TriLink AirProjector KJ-200 User manual
Date Published September 2004 © Komatsu TriLink Ltd. 2004
KJ-200
IEEE802.11b/g Standard Wireless Projector Server
User’s Manual
Thank you for purchasing AirProjector KJ-200.
This document contains basic operating instructions for KJ-200.
Please read the contents of this User’s Manual carefully before using your KJ-200,
as well as the reference during the use of the unit, and become thoroughly familiar
with the feature of KJ-200.
2
Safety Instructions
This manual contains Safety Symbols to ensure the safe use of this product.
Please have this manual handy for quick references whenever you need it.
Safety symbols
The safety symbols appear below and also displayed on the unit to ensure
your safety during the use of this product, and prevent possible dangers to
you and damages to other properties. Following safety alert symbols and
their explanations deserve your careful attention and understanding. Please
become familiar with the contents of this section before proceeding to the
main sections.
DANGER
Failure to obey this safety warning may result in
serious or fatal personal injury to yourself or to
others.
CAUTION
Failure to obey this safety warning may result in
costly property damage or personal injury to
yourself or to others.
DANGER and CAUTION labels
DANGER or CAUTION labels are affixed on the unit with Black letters on
Yellow background. Always follow the instruction on the label.
If you see any DANGER or CAUTION labels, other than those described in
this manual, always follow the safety.

3
DANGER
Do not attempt to disassemble, modify, or repair the product.
Do not attempt to open, disassemble, modify, or repair this product or the AC adapter.
Failure to comply with this warning may cause fire or electric shock.
Keep liquid and objects out of the unit.
Do not introduce any liquid or objects into the product or AC adapter.
Failure to comply with this warning may cause fire or electric shock, and affects the operation of the product.
If you spill liquid or if any objects fall into the unit, immediately disconnect the AC adapter, and contact the place of
purchase or Support Center.
Do not operate the product outside the specified voltage.
The AC adapter supplied with the product operates at 100 to 120 VAC (@ 50/60 Hz).
Operating the product outside of the specified voltage rating may cause fire, smoke, or electric shock, and malfunction of the unit.
Refer to “<13> General Specifications”.
Always use the AC adapter that is supplied with the product.
Failure to comply with this warning may cause fire or electric shock.
Furthermore, do not use the supplied power adapter with any other products.
Do not handle the product or AC adapter with wet hands.
Failure to comply with this warning may cause electric shock.
Avoid damages to the power cable.
Do not damage, break, or modify the power cable.
Failure to comply with this warning may cause fire or electric shock.
Furthermore, maintain following safety precautions.
•Do not place any objects on the power cable.
•Do not forcefully pull, twist, or bend the power cord.
•Do not place the power cord near the sources of heat.
•Do not suspend the AC adapter using the power cable.
•Do not keep the power cord stretched out.
Handle AC adapter with care
Failure to comply with this warning may cause fire or electric shock.
Furthermore, maintain following safety precautions.
•Remove any dust or particles from AC adapter before plugging into the power source.
•Be sure that AC adapter is firmly plugged into the power source.
•Be sure to unplug the AC adapter by holding the adapter.
•Do not have any metals to contact the AC adapter.
Avoid connecting to a surge protector with too many devices.
Exceeding the specified voltage rating by connecting too many devices to a surge protector may cause fire or electric shock.
Do not operate the unit when it is not working properly.
Operating the unit when the unit is emitting excessive heat, fumes, or strange odor may cause fire or electric shock.
Disconnect the power from the unit immediately and contact the place of purchase or Network Support center.
Do not operate this product near the medical devices (such as pacemaker, etc.).
Before operating this product, make sure that no electromagnetic interference is produced.
Operation of any radio equipment may interfere the functionality of some medical devices (such as pacemaker).
Do not operate this product near flammable materials (flammable gas) or chemical.
Failure to comply with this warning may cause fire.
Furthermore, do not operate the unit near open flame.
Pacemake
r
Supplied
adaptor
only

4
CAUTION
When moving the unit, always disconnect the AC adapter from the outlet.
Damaging the power cord by attempting to move the unit while the power cord is plugged into an electrical outlet may cause
fire and electrical shock.
Always disconnect AC adapter from the electrical outlet, before connecting or
disconnecting power plug from the unit.
Connecting or disconnecting the power plug from the back of the unit, while the AC adapter is connected to the power
source, may result in electric shock.
Do not cover the AC adapter with a cloth or blanket while the power is being
supplied.
Failure to comply with warning may cause fire.
Do not operate cellular phones too close to this unit (within 20 cm).
Doing so may cause this product to malfunction.
Make sure that nothing rests on top of the unit or AC adapter.
Failure to comply with warning may damage the casing, and cause fire or electric shock.
Do not block air vents of this product.
Heat may become trapped inside the unit, causing fire.
If the product is not operated for an extended period of time, such as holidays,
disconnect the AC adapter from electrical outlet.
Handle the unit with extreme caution with the forecast of and during the electrical storm.
Disconnect the power adapter from the electrical outlet, if an electrical storm is forecasted. However, if an electrical storm is
already in progress, do not touch the KJ-200 unit and power adapter.
Failure to comply with this warning may cause electrical shock.
Use the electrical outlet which is located away from the devices that have voltage
variation or emit electrical noise.
Do not drop the unit or subject it to other mechanical shocks.
Clean the unit with care.
When cleaning the unit and AC adapter, always disconnect AC adapter from power source first, and use soft dry cloth.
Do not use any solutions containing chemicals, such as paint thinner, benzene, or alcohol to clean the product.
Operating and storing your KJ-200 unit.
For the details on typical operating environment for KJ-200 unit, refer to “<13> General Specifications”.
Do not operate or store this product in the following locations.
Failure to comply with this warning may result in malfunction of the unit, as well as causing fire, electric shock, and personal injury to you and to others.
•Humid or dusty area, or near salty water.
•Area where the use of wireless devices is prohibited, or where the use is prohibited by law
•Inside aircrafts and airports.
•Fueling stations.
•Vicinity of other wireless devices, which may cause interference or cause potential hazards.
•Use in non-wireless LAN environment.
•Near a high-frequency microwave oven.
•Within the reach of children.
•Unstable surface. (e.g., surface with heavy vibration, inclined surface, etc.)
•Area susceptible to static electricity.
Use of paint
thinner prohibited.
Humidit
y
Temperature
Dust
Inside aircraft
Fueling
Stations

5
Be sure to read this before using the supplied software
Be sure to read the following agreement before using the software supplied with the KJ-200, and use
the software only if you agree with the agreement. If you do not agree, return the product to the
distributor where you purchased the product.
Software License Agreement
The customer (hereinafter referred to as “the User”) and Komatsu TriLink Ltd. (hereinafter referred to
as “Komatsu TriLink”) agree with the following concerning the use of the software Komatsu TriLink
supplies to the User (hereinafter referred to as “Software”).
Article 1 Software subject to this agreement
The Software described in this agreement is the program disk supplied with the product
and the accompanying manuals.
Article 2 Range of use
1. Komatsu TriLink grants the User nonexclusive rights to use the Software provided that
the User uses the Software in compliance with this agreement.
2. The Software can be used in one or more units of hardware on the LAN to which
Komatsu TriLink’s projector server is connected.
Article 3 Duplication of Software
The User is prohibited from duplicating all or part of the Software, except for backup
purposes.
Article 4 Modification of Software
The User must not modify or reverse-engineer the Software for any reason.
Article 5 Property rights and copyright
The copyright and all other property rights of the Software and its copies belong to
Komatsu TriLink or the parties described in the Software in all cases.
Article 6 Assignment
The User must not transfer the Software or its copies to any third party, transfer the license
to, or re-license the Software without written permission from Komatsu TriLink.
Article 7 Term
The term of this agreement commences from the day the User starts using the Software
and lasts until the User finishes using the Software. If the User violates any article of this
agreement, Komatsu TriLink may prohibit the User from using the Software and terminate
the agreement.
Article 8 Termination
Upon any termination the User must immediately destroy the Software and all
accompanying written materials and all copies thereof.
Article 9 Liability of Komatsu TriLink
In no event, Komatsu TriLink takes no responsibility for any damage resulting directly or
indirectly from the User’s use of the Software, including but not limited to damage to data
programs and other property of the User, or loss of operating profits or expected profits of
the User.

Contents
6
Contents
Safety Instructions..................................................2
Be sure to read this before using the supplied
software..................................................................5
Contents .................................................................6
Compliances...........................................................7
How to Read This Manual ......................................8
Checking Package Contents ..................................8
<1> Overview of AirProjector··································9
System Requirements ······································ 9
Features ························································· 10
<2> Setting up AirProjector and Projector ············ 11
Setting up KJ-200 and Projector ·····················11
<3> Installing AirProjector Client (Windows)·········12
System Requirements for AirProjector
Client ······························································ 12
Installing AirProjector Client ··························· 12
<4> Installing AirProjector Client (for
Macintosh) ··················································13
System Requirements for AirProjector
Client ······························································ 13
Installing AirProjector Client ··························· 13
<5> Getting Started (Windows XP)·······················14
Procedure ······················································· 14
<6> Getting Started (Windows 98 SE, Me,
2000) ··························································17
Wireless Settings for Your PC ························ 17
TCP/IP Settings for Your PC ·························· 17
<7> Using AirProjector (with Mac OS X 10.3.4
or later) ·······················································22
Procedure ······················································· 22
<8>Projecting Image ············································23
AdHoc Mode··················································· 23
Infrastructure Mode ········································ 23
Projecting Image in Infrastructure Mode ········ 23
<9> Using AirProjector Client ·······························26
Starting AirProjector Client ····························· 26
Main Screen of AirProjector Client ················· 27
Transmitting Moving Images (Real Time
Capture)·························································· 28
Transmitting Still Images (One-Shot
Capture)·························································· 28
Stopping Image Transmission ························ 29
Transmitting Images to Multiple AirProjector
Units ······························································· 29
To join the moderated session ······················· 29
Checking the Destination of Selected
AirProjector····················································· 29
Changing Quality of Image····························· 30
Setting as Default Network Adapter ··············· 30
Connecting to AirProjector in Different
Network Segment··········································· 31
Assigning Nickname······································· 31
Using Remote Control Function ····················· 31
Display of Icon (For Windows only)················ 32
Displaying Version Information······················· 32
Viewing Help ·················································· 33
Activating Main Screen ·································· 33
Exiting Moderated Session ···························· 34
Exiting AirProjector Client······························· 34
<10> Advanced Settings ······································ 35
Launching Configuration Screen···················· 35
Configuration Screen Format ························· 36
Information Page············································ 37
Quick Setup Page ·········································· 38
TCP/IP Settings Page ···································· 39
Wireless Settings Page ·································· 40
Display Settings Page ···································· 42
Admin Password Settings Page····················· 43
User Password Settings Page ······················· 43
Miscellaneous Page ······································· 44
Restart Page ·················································· 45
Firmware Update Page ·································· 45
Serial Command Settings Page ····················· 45
Viewing Komatsu TriLink Home Page············ 45
Viewing Technical Support Site ······················ 45
Viewing Download Site··································· 45
<11> Standby Screen··········································· 46
Standby Screen Format·································· 46
<12> Restore to Factory Default Settings ············ 47
Procedure for Restoring to Factory Default
Settings ·························································· 47
Factory Default Settings································· 47
<13> Setting IP Address Using arp + ping
Commands(Windows) ································ 48
Setting Procedure Using arp + ping
Commands ····················································· 48
<14> Setting 802.1x [LEAP] ······························ 49
<15> Troubleshooting ·········································· 51
<16> General Specifications ································ 53

7
Compliances
DECLARATION OF CONFORMITY
Applicable Product: AirProjector KJ-200
This device complies with Part 15 of the FCC Rules. Operation is subject to the following two conditions:
(1) This device may not cause harmful interference.
(2) This device must accept any interference received, including interference that may cause undesired
operation.
This equipment has been tested and found to comply with the limits for a Class B digital device, pursuant to
Part 15 of the FCC Rules. These limits are designed to provide reasonable protection against harmful
interference in a residential installation. This equipment generates, uses and can radiate radio frequency
energy and, if not installed and used in accordance with the instructions, may cause harmful interference to
radio communications. However, there is no guarantee that interference will not occur in a particular
installation. If this equipment dose cause harmful interference to radio or television reception, which can be
determined by turning the equipment off and on, the user is encouraged to try to correct the interference by
one or more of the following measures:
−Reorient or relocate the receiving antenna.
−Increase the separation between the equipment and receiver.
−Connect the equipment into an outlet on a circuit different from that to which the receiver is connected.
−Consult the dealer or an experienced radio/TV technician for help.
FCC WARNING
Changes or modifications not expressly approved by the party responsible for compliance could void the
user’s authority to operate the equipment.
Exposure to radio frequency
“IMPORTANT NOTE”: To comply with FCC RF exposure compliance requirements, the antenna used for this
transmitter must be installed to provide a separation distance of at least 20 cm from all persons and must not
be co-located or operating in conjunction with any other antenna or transmitter.
Komatsu TriLink USA Ltd.
25300 NW Evergreen, Hillsboro, OR 97124
Telephone 503-844-3330
This Class B digital apparatus complies with Canadian ICES-003.
Cet apparei numérique de la class B est conforme à la norme NMB-003 du Canada.
L'utilisation de ce dispositif est autorisée seulement aux conditions suivantes :
(1) il ne doit pas produire de brouillage et (2) l'utilisateur du dispositif doit être prêt à accepter tout brouillage
radioélectrique reçu, même si ce brouillage est susceptible de compromettre le fonctionnement du dispositif.
FCC Compliance Statement
For United States Users
For Canadian Users

8
How to Read This Manual
Before using the KJ-200, the equipment must be connected and your PC must be configured properly.
The procedure for setting up your PC differs depending on the version of Windows operating system on your PC and on the
type of wireless mode to be used. Check the operating system and wireless mode of your PC, and follow the steps below.
Checking Package Contents
The package of the KJ-200 contains the following items. When unpacking the package,
please be sure that all items in the following list are included. If any part is missing,
consult the distributor where you purchased the product.
Main unit
AC adapter
CD-ROM
Quick Installation Guide
Ceiling Mount Bracket
Caution
•Do not use any AC adapter other than the one
included with the product.
•An RGB cable and serial cable are not included with
the product; these cables must be obtained
separately.
9
<1> Overview of AirProjector
This chapter provides an overview of the AirProjector KJ-200.
System Requirements
Supported OS
Microsoft Windows 98 SE/Me
Microsoft Windows 2000 Professional
Microsoft Windows XP Home Edition/Professional
Apple Mac OS X (v10.3.4 or later)
Protocol environment Operable in a TCP/IP environment.
Network standard
For AdHoc mode:
IEEE802.11b/g
For infrastructure mode:
One of the following must be supported:
•IEEE802.11b/g •100BASE-TX •10BASE-T
Recommended CPU
For Windows OS, Equivalent to Pentium4 2GHz or higher
For Macintosh, PowerPC G4 1 GHz or faster
Recommended Memory 256 MB or higher
Display settings for PC
Must support one or more of the following resolutions: VGA (640 x 480), SVGA
(800 x 600), XGA (1024 x 768), SXGA (1280 x 1024), and also support a 16-bit
(65,536 colors) or 24/32-bit (16,770,000 colors) color setting.
Analog RGB settings
of projector Display resolution
Horizontal scanning
frequency
(Hz)
Vertical scanning
Frequency
[Hz] (Refresh rate)
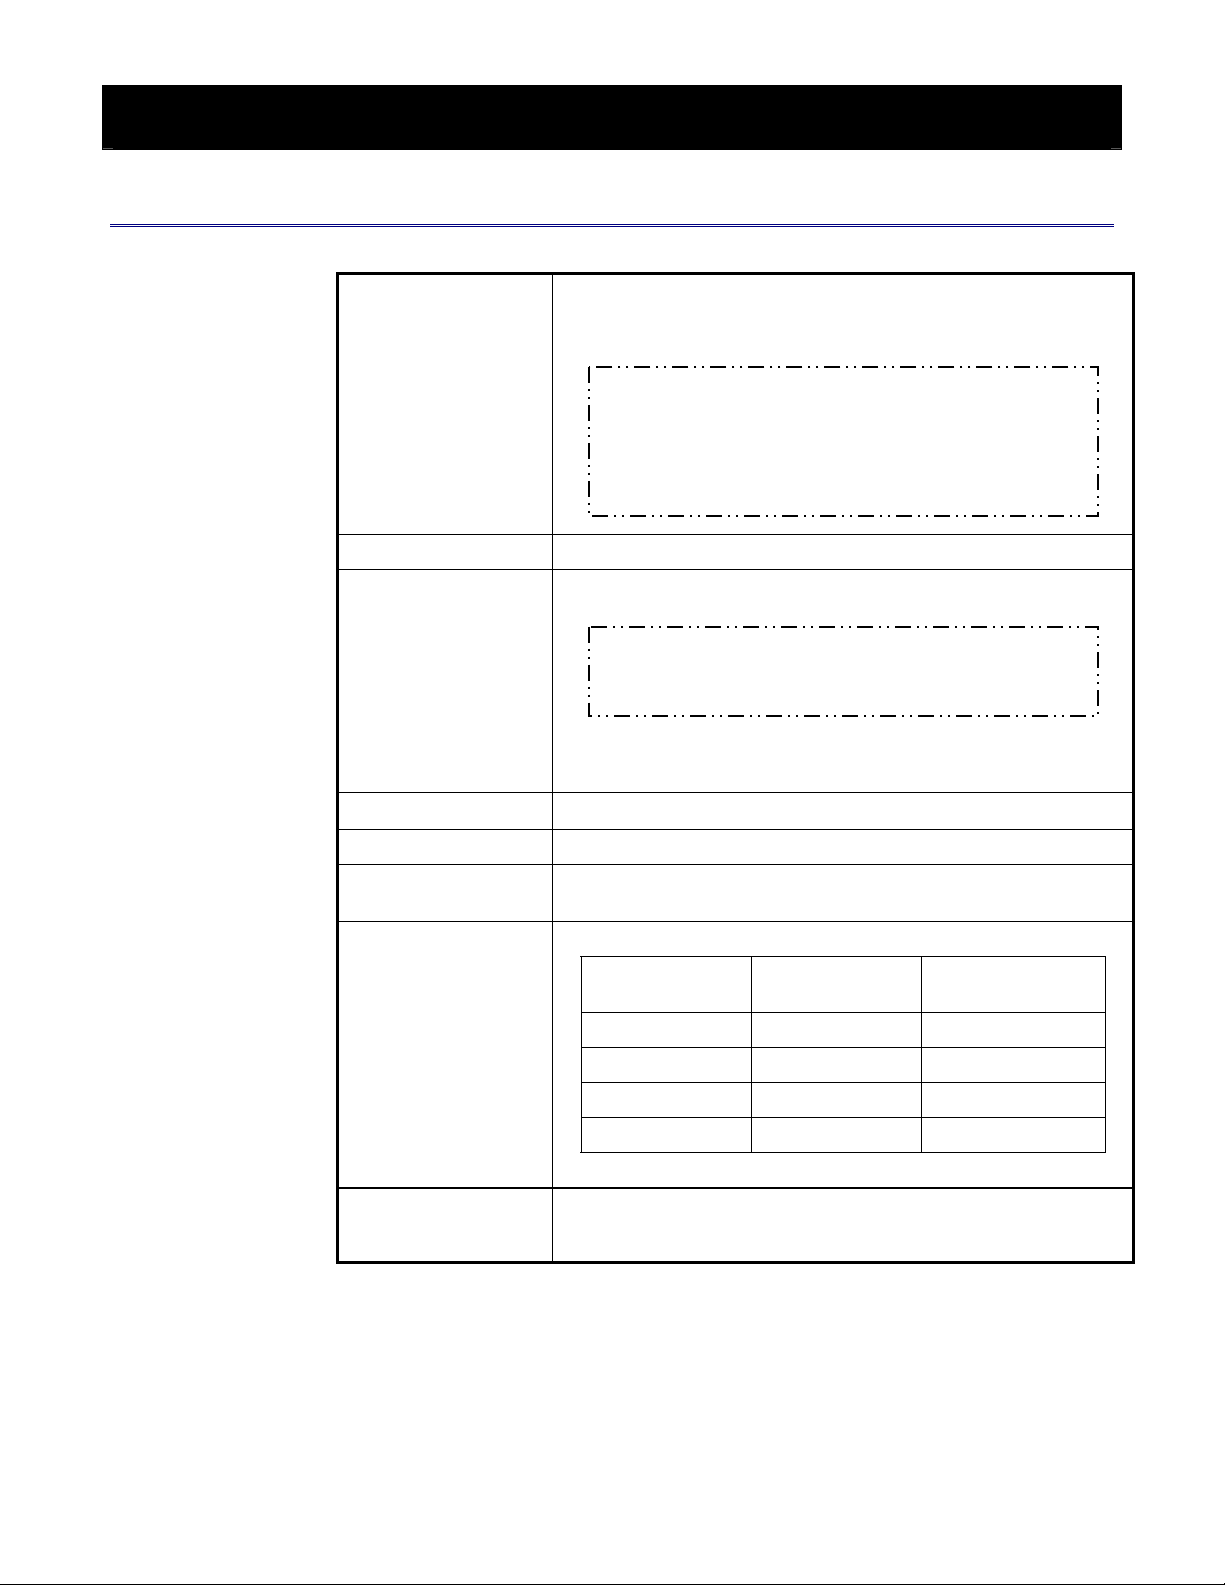
VGA (640 x 480) 31.469 59.940
SVGA (800 x 600) 37.879 60.317
XGA (1024 x 768) 48.363 60.004
SXGA (1280 x 1024) 63.981 60.020
Unsupported Applications
For Windows OS, Applications using Direct X, and motion picture
reproduction such as MS-Office Assistant, and DVD are not
supported.
* Minimum system requirements For Windows OS, CPU : Pentium III 600MHz Memory : 128MB
For Macintosh, CPU: PowerPC G4 800 MHz Memory: 128 MB
Caution
•In order to use Quick Setup feature with Windows XP, please
make sure that you have Service Pack 1 installed.
Service Pack 2 is currently not supported
•Quick Setup button may not work for some wireless LAN card.
Caution
•Some wireless LAN cards may not be able to communicate in
AdHoc mode via IEEE 802.11g

Overview of AirProjector
10
Features
At Power ON Normal Operation Error
POWER LED (green) On On Off
STATUS LED (orange) On →Off
Flashes while receiving
packets (only when KJ-200
receiving packets).
Off
ERROR LED (red) On →Off Off On
How to verify settings
When the TEST switch is pressed, the current device settings are displayed
(projected) by the projector for approximately 60 seconds (the display will
automatically disappear after 60 seconds). If the TEST switch is pressed during
setting display, the display will immediately disappear.
All LEDs light up for several seconds after power is on.
POWER LED: Lights up green when power is on.
STATUS LED: Lights up orange when a packet is received.
ERROR LED: Lights up red when an error occurs.
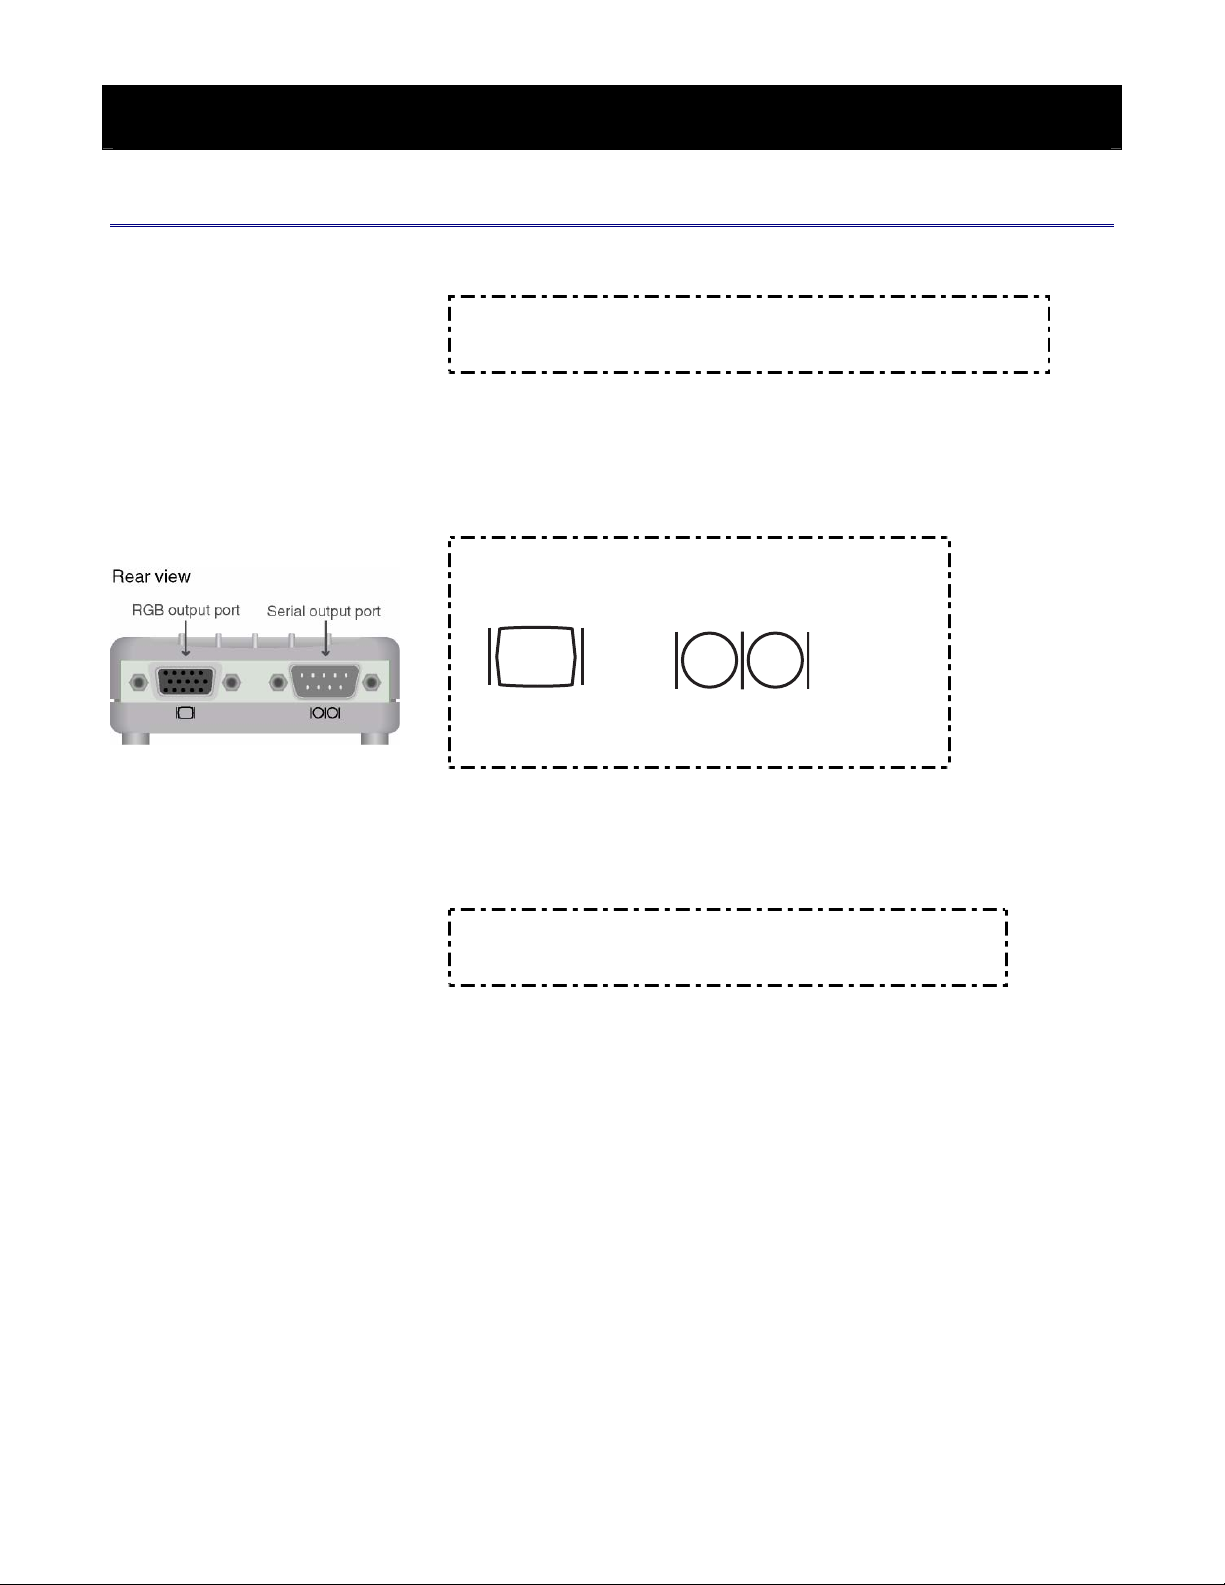
RGB output port: Used to connect an RGB cable.
Serial output port: Used to connect a serial cable.
DC connector: Used to connect the DC plug of the AC adapter.
TEST switch: Press to reset the AirProjector to the factory default settings
and to view the current settings.
Refer to “<10> Restore to Factory Default Settings”.
Example of projected setting display
The screen shown on the left is an example of the projected settings. You can view up
to 14 parameters.
Refer to “<8> Advanced Settings” and “<10> Restore to Factory Default Settings” for
details of each item.
11
<2> Setting up AirProjector and Projector
This chapter describes the procedure for setting up the AirProjector KJ-200 and projector.
Setting up KJ-200 and Projector
Caution
•An RGB cable and serial cable are not included with the KJ-200; these cables
must be obtained separately.
1. Connect AirProjector and the projector with an RGB cable.
Using a standard RGB cable, connect one end of the cable to the RGB port
(Female Mini D-sub 15-pin) on AirProjector, and connect the other end to the RGB
port of the projector.
Point
•The following marks are printed on the back of the KJ-200.
RGB output port Serial output port
2. Turn on the power to your projector.
3. Set the Input mode of the projector to [Analog RGB].
Point
•Refer to the owner’s manual of the projector for how to set the Input
source.
4. Connect the DC plug of the AC adapter to the connector on AirProjector, then
connect the power plug of the AC adapter to a wall outlet.
5. The projector will display a “Ready for use” message. This completes setup of
AirProjector and the projector.

12
<3> Installing AirProjector Client (Windows)
This chapter describes the procedure for installing AirProjector Client.
AirProjector Client is utility software exclusively used for configuring and operating AirProjector.
AirProjector Client can be operated using the following two methods:
•Installing AirProjector Client in a PC.
•Directly starting AirProjector Client from the supplied CD-ROM.
System Requirements for AirProjector Client
The system requirements for AirProjector Client are as follows:
Supported OS: Microsoft Windows 98 SE, Me, 2000 Professional, XP Home
Edition/Professional
Supported machine: PC/AT or compatibles (DOS/V)
Installing AirProjector Client
Install AirProjector Client as described below.
When AirProjector Client is operated directly from the supplied CD-ROM, it is not
necessary to install AirProjector Client in your PC.
When not installing AirProjector Client, proceed to “<4> Getting Started (Windows XP)” or
“<5> Getting Started (Windows 98 SE, Me, 2000)”.
1. Insert the CD-ROM supplied with AirProjector into the CD-ROM drive of your PC.
2. The AirProjector Client installation program in the CD-ROM will start up
automatically, displaying the “Software License” screen.
Read the contents on the screen. If you agree with the contents, check the
“Agreed” radio button and click “OK”.
3. When the main screen appears, click “KJ-200 Client”. The “Install AirProjector
Client” icon will appear. Click the icon to start installation.
4. The AirProjector Client installation wizard will start. Click “Next”.
5. Click “Yes” if you agree with the contents on the license agreement.
6. Specify the AirProjector Client installation destination.
Confirm the specified installation destination, and then click “Next” if it is OK.
7. Create the shortcut. Change the setting of the shortcut if necessary, and click
“Next”. Files will be copied from the CD-ROM.
8. Click “Finish” to complete AirProjector Client installation.
Read the subsequent Readme file if necessary.
This completes AirProjector Client installation.
Remove the CD-ROM from the CD drive and store it in a safe location.
Point
If the “Software License”
screen does not appear
automatically, open the
CD-ROM drive from [My
Computer] on your PC and
run “AutoRun.exe” to display
the “Software License” screen
manually.

13
<4> Installing AirProjector Client
(for Macintosh)
This chapter describes how to install AirProjector Client software.
AirProjector Client is an application used to operate and configure AirProjector KJ200.
There are two ways to operate AirProjector using AirProjector Client.
- Install the application in a Macintosh computer
- Launch AirProjector Client directly from CD-ROM
System Requirements for AirProjector Client
AirProjector Client has following system requirements
Supported OS: Apple Mac OS X 10.3.4 or later
Supported Macintosh model: PowerBook G4, iBook.
Installing AirProjector Client
This section describes AirProjector Client installation procedure.
If you choose to launch AirProjector Client directly from a CD-ROM that was supplied with
the product, you do not need to install AirProjector Client in Macintosh computer. If you
choose to do so, proceed to “Operating Procedure”.
1. Place the CD-ROM in Macintosh computer’s CD-ROM drive.
2. Double-click the CD-ROM drive icon. Then, double-click [AirProjector Client.pkg].
3. The Installer window will appear, and subsequently the window describing the
system requirements for AirProjector Client will appear. If you agree with the
statement, click on [Continue].
4. If only you are agreeing with the terms in Software End-User License Agreement,
click [Continue] and then click [Agree].
5. Specify the hard disk to which the application will be installed.
Click [Select] to specify the location in your hard disk where you would like to
install the application, and click [Continue].
6. Click [Install] to begin installation of AirProjector Client.
If the application is already installed, the button will indicate [Upgrade].
7. When [The software was installed properly] message appears, click [Close] and
complete the installation.
8. When completing installation, [Komatsu TriLink] folder will be created.
Launch AirProjector Client by opening [Komatsu TriLink] folder => [AirProjector
Cleint] folder] and click [AirProjector Client] file.
Point
If the “Software License”
screen does not appear
automatically, open the
CD-ROM drive from [My
Computer] on your PC and
run “AutoRun.exe” to display
the “Software License” screen
manually.

14
<5> Getting Started (Windows XP)
This chapter describes how to connect to AirProjector with the factory default settings, using a PC running
on Windows XP.
When the OS is Windows XP, AirProjector Client automatically makes the settings of the PC necessary for
connection.
Caution
•In order to use Quick Setup feature with Windows XP, please make sure that you have Service Pack 1 installed.
Service Pack 2 is currently not supported
•Quick Setup button may not work for some wireless LAN card.
Procedure
1. Log on using a user account with “Administrator” privileges.
2. Start AirProjector Client.
Launch AirProjector Client by clicking Windows [Start] button -> [Programs] ->
[AirProjector Client] -> [AirProjector Client].
If you are launching AirProjector Client from the CD-ROM, click [KJ-200 Client]
from Main Menu, and click [Launch AirProjector Client] icon.
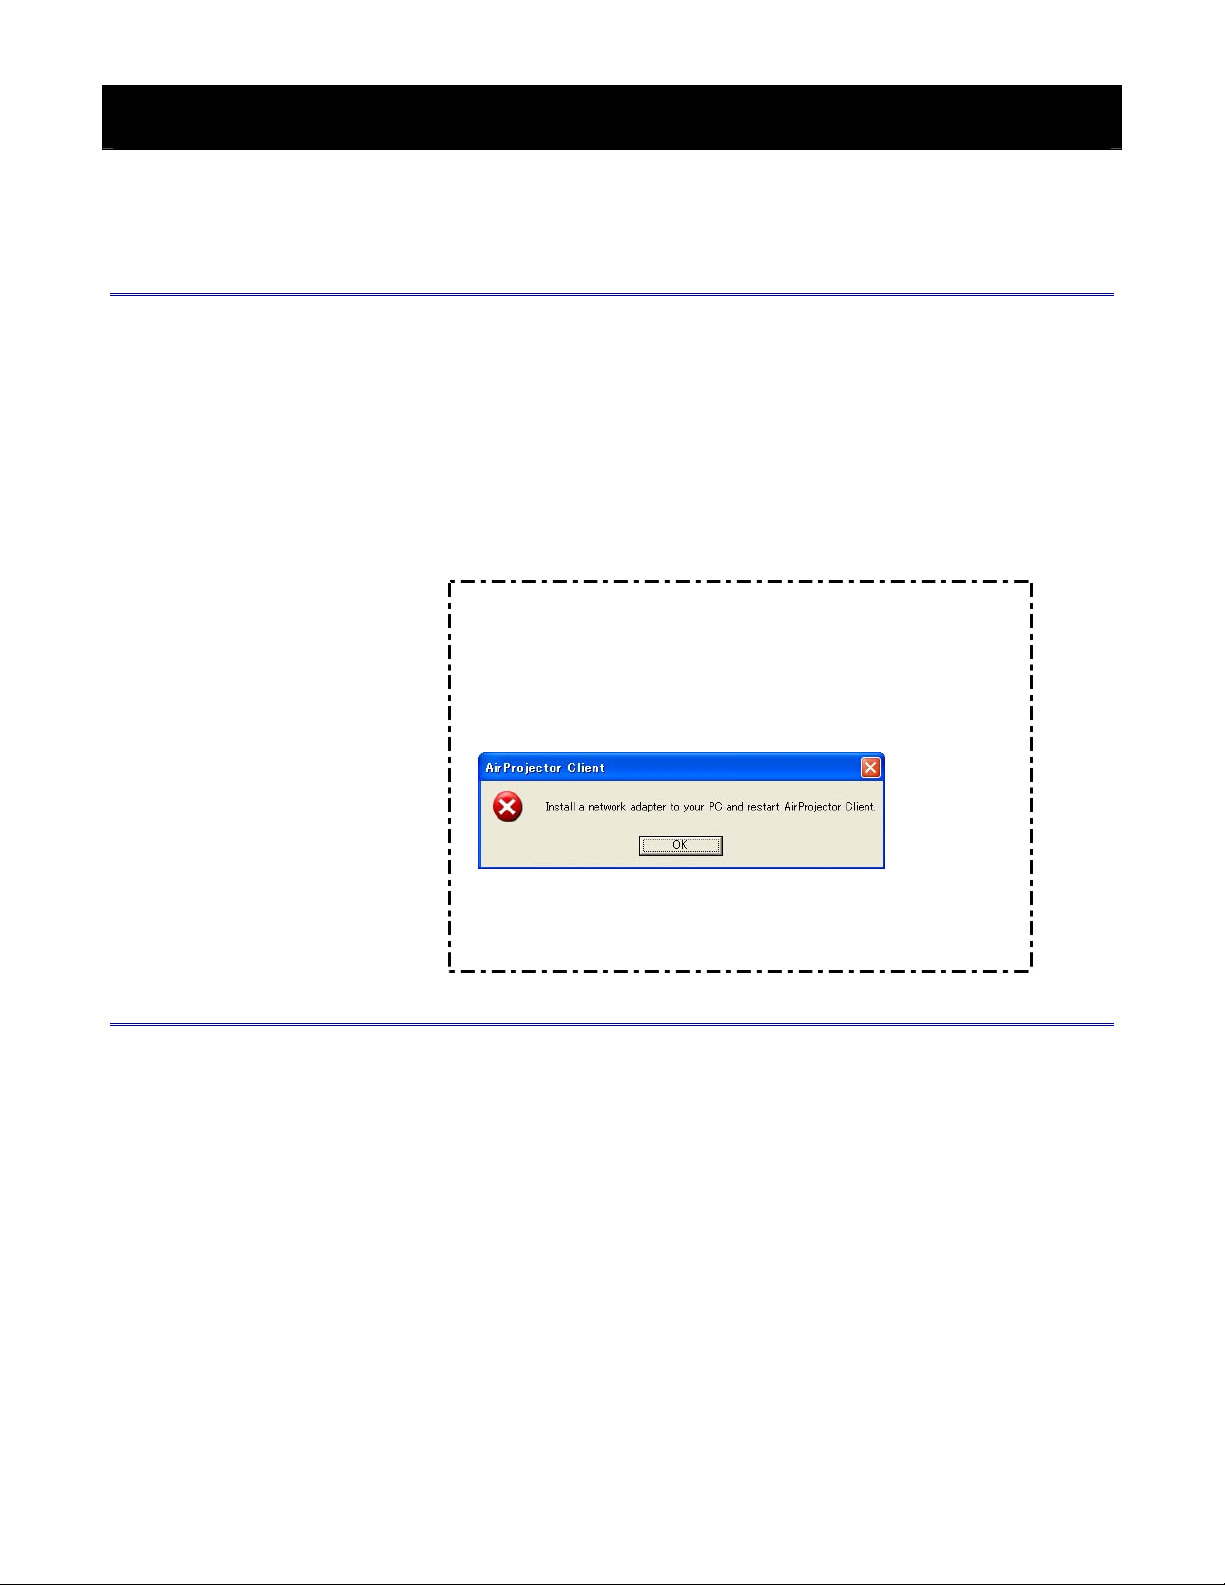
Point
•An IEEE802.11b/g wireless LAN adapter is required as the network adapter.
•The following error message appears if the network adapter is not installed
properly or not at all. (This message does not appear if the network
adapter is operating normally). Click “OK” to exit AirProjector Client.
•The status of the network adapter that is installed in the PC can be checked
with the device manager. If the adapter is not working properly, the icon
for the network adapter will have “×” or “!” mark.
3. The network adapter selection screen will appear.
Select a wireless network adapter from the pull-down menu, and click “OK” to start
IP address verification.
Point
•This screen appears only when there are two or more network adapters.
Caution
•If “Set as Default Network Adapter” is checked, the selected network
adapter is regarded as the default network adapter.
In this event, this screen will not appear next time AirProjector Client is
started.
This function can also be set on the “ADVANCED SETTINGS” screen.
Refer to “<7> Using AirProjector
Client”.

Getting Started (Windows XP)
15
4. A progress indicator will appear while the application verifies the IP address
assigned to the wireless network adapter.
5. When the IP address is verified, the main screen and AirProjector search screen
will be displayed. Operation on the main screen is disabled until the AirProjector
search screen disappears.
6. If AirProjector cannot be found, the message will appear as shown on the left.
Click “OK” to close the message and display the main screen.
7. Click “Quick Setup” on the main screen.
8. A confirmation message appears, prompting whether to change the wireless LAN
settings of the PC to match the factory default settings of AirProjector.
Click “OK” to start searching AirProjectors with the default settings.

Getting Started (Windows XP)
16
9. A progress indicator will appear while the application changes the wireless LAN
settings and the TCP/IP settings.
10.The main screen and the AirProjector search screen will appear.
11. When AirProjector searching is complete, the available AirProjectors will be listed
on the main screen.
Select the desired AirProjector from the list, and click the “Real Time Capture”
button.
The initial configuration of AirProjector is completed when the screen image of your
PC is displayed on the projector.
Caution
•AirProjector Client may not be able to detect KJ-200 if the firewall feature in some PC virus detection programs is running.
To use AirProjector Client, disable the firewall feature temporarily.
17
<6> Getting Started (Windows 98 SE, Me, 2000)
This chapter describes how to connect to AirProjector with the factory default settings, using a PC running
on Windows 98 SE/Me/2000.
When the OS is Windows 98 SE/Me/2000, the settings of the PC necessary for connection (wireless
settings and TCP/IP settings) must be performed manually.
Wireless Settings for Your PC
Configure Network Type, SSID, and WEP (encryption) as follows using the utility for the
wireless adapter.
•Network Type: AdHoc mode
•SSID: WIRELESS (all uppercase)
•WEP (encryption): Disable
Be sure to use the utility for the wireless adapter for setting these parameters.
Refer to the manual of the utility for how to use the utility.
Point
•An IEEE802.11b/g wireless LAN adapter is required as the network adapter.
•The following error message appears if the network adapter is not installed
properly or not at all. (This message does not appear if the network
adapter is operating normally). Click “OK” to exit AirProjector Client.
•The status of the network adapter that is installed in the PC can be checked
with the device manager. If the adapter is not working properly, the icon for
the network adapter will have “×” or “!” mark.
TCP/IP Settings for Your PC
TCP/IP settings are necessary only when the PC runs on Windows 98 SE, Me or 2000
and you are using DHCP to obtain an IP address automatically.
You may skip this section if you are using static IP address.
The procedure of manual TCP/IP setting is described below.
Note that the procedure differs depending on whether the PC runs on Windows 2000 or
Windows 98 SE/Me.

Getting Started (Windows 98 SE, Me, 2000)
18
For Windows 2000
1. Click “Start” on the Windows task bar and select “Settings” →“Network and Dial-up
Connections”.
2. Perform either of the following to display the Local Area Connection Properties
window:
•Right-click the “Local Area Connections” icon to display the pull-down menu,
and select “Properties”.
•Double-click the “Local Area Connections” icon to display the Local Area
Connection Status window, and click “Properties”.
3. Click to select “Internet Protocol (TCP/IP)” from the Local Area Connection
Properties window. Then click “Properties” to display the Internet Protocol
(TCP/IP) Properties window.
4. On the Internet Protocol (TCP/IP) Properties window, make the following settings,
and then click “OK”.
•Click to select “Use the following IP address”.
•Set the IP address and Subnet mask as follows:
IP Address 169.254.100.1
Subnet Mask 255.255.0.0

Getting Started (Windows 98 SE, Me, 2000)
19
5. The Local Area Connection Properties window appears again.
Click “OK”.
6. Start AirProjector Client.
Launch AirProjector Client by clicking Windows [Start] button -> [Programs] ->
[AirProjector Client] -> [AirProjector Client].
If you are launching AirProjector Client from the CD-ROM, click [KJ-200 Client]
from Main Menu, and click [Launch AirProjector Client] icon.
7.When AirProjector searching is complete, the available AirProjectors will be listed on
the main screen.
Select the desired AirProjector from the list, and click the “Real Time Capture” button.
The initial configuration of AirProjector is completed when the screen image of your
PC is displayed on the projector.
Caution
•AirProjector Client may not be able to detect KJ-200 if the firewall feature in some PC virus detection programs is
running. To use AirProjector Client, disable the firewall feature temporarily.

Getting Started (Windows 98 SE, Me, 2000)
20
For Windows 98 SE/Me
1. Click “Start” on the Windows task bar and select “Settings” →“Control Panel”.
2. From the Control Panel window, double-click the “Network” icon to display the
Network window.
3. On the Network window, click to select the TCP/IP for your wireless LAN adapter,
and then click “Properties” to display the TCP/IP Properties window.
4. On the TCP/IP Properties window, make the following settings, and then click
“OK”.
•Click to select “Specify an IP address”.
•Set the IP address and Subnet mask as follows:
IP Address 169.254.100.1
Subnet Mask 255.255.0.0
Table of contents
Popular Server manuals by other brands

Oracle
Oracle SUN X4-8 Service manual

Digi
Digi ConnectPort TS 8 MEI quick start guide

Gigabyte
Gigabyte R183-Z94-AAD1 user manual

Intel
Intel SR1530CLR - Server System - 0 MB RAM Technical specification, installation and operation manual

Axis
Axis 241Q Blade Specifications

Dell
Dell PowerEdge R210 II Getting started


