Triton Blue Q-BEAM200 User manual

Q-BEAM200
CABEzA Movil BEAM lED 200W
Moving head BeaM Led 200W
MANUAl DE USUARio / USER MANUAl
Este manual contiene información importante: léalo antes de poner el dispositivo en funcionamiento.
Q-BEAM200

2.
español
Manual de usuario Q-BEAM200 deTriton Blue | Junio 2023 | www.triton-blue.com
INTRODUCCIÓN
ESPAÑOL
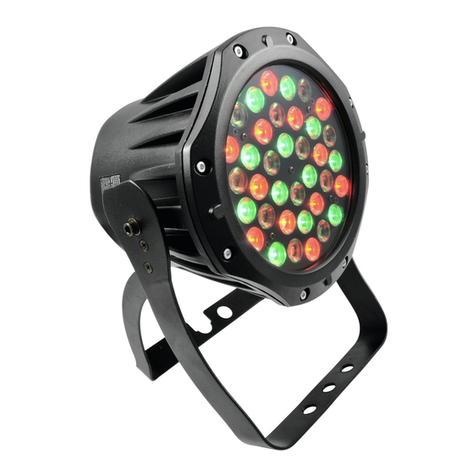
El Q-Beam200 es una cabeza móvil de haz potente y profesional. Con LED Blanco de 200W y LED. Ring, el
Q-Beam200 puede producir un haz de 2º muy nítido y generar un haz de luz increíblemente nítido, lo que lo
hace perfecto para efectos en el aire.
PAQUETE
En la caja vienen incluidos:
1 x Cabeza móvil Q-WASH740Z
1 x Cable de alimentación Powercon/Schucko
1 x Omega para montaje de garras o abrazaderas
1 x Manual de usuario
Desenvuelva cuidadosamente el paquete, compruebe el contenido para asegurarse de están presentes todos
los elementos y que se han recibido en buenas condiciones. Si falta alguna pieza o está dañada, póngase en
contacto con su proveedor inmediatamente y retenga el material de embalaje para su inspección.
INSTRUCCIONES DE SEGURIDAD
Este dispositivo ha salido de nuestras instalaciones en perfecto estado. Para mantener esta condición y garantizar una
operación segura, es absolutamente necesario que el usuario siga las instrucciones de seguridad y las notas de advertencia
escritas en este manual.
El fabricante no se hace responsable de los daños causados por no seguir lo descrito en este manual o por cualquier
modicación no autorizada del aparato, por tanto no están cubiertos por la garantía.
• Este producto está diseñado solo para uso en interiores.
• Duranteelfuncionamiento,la carcasasecalienta. Dejequeelaparatose enfríe unos20 minutos antes
de manipularlo.
• Asegúrese de que el voltaje disponible no es superior al indicado en el aparato. ¡ADVERTENCIA! Esta
unidadnocontieneuninterruptorON/OFF.Desconectesiempreelcabledeentradadelaalimentación
para cortar la corriente del aparato cuando no esté en uso o antes de limpiar y/o reparar el aparato.
• Asegúrese que el cable de alimentación no esté doblado y/o dañado. Por su seguridad, compruebe el
equipo y el cable de alimentación cada cierto tiempo.
• Desconecte siempre el aparato de la red eléctrica cuando no lo utilice o antes de limpiarlo. Manipule
el cable de alimentación sólo por el enchufe. No tire nunca del enchufe. Nunca tire del cable de
alimentación para desenchufarlo.
¡PRECAUCIÓN! Mantenga este dispositivo alejado de la lluvia y la humedad.
Desconecte el cable de alimentación antes de abrir la carcasa.

3.
Manual de usuario Q-BEAM200 deTriton Blue | Exclusivo uso Profesional
español
• Este aparato pertenece a la clase de protección I. Por lo tanto, es imprescindible conectar el conductor
amarillo/verde a tierra.
• La conexión eléctrica, las reparaciones y el mantenimiento deben ser realizados por personal
cualicado. No conecte este aparato a un dimmer (regulador de intensidad).
• No encienda y apague el aparato en intervalos cortos ya que esto reduciría la vida útil de la lámpara.
• Durante la puesta en marcha inicial puede salir algo de humo u olor. Se trata de un proceso normal y
no signica necesariamente que el aparato esté defectuoso.
• No toque la carcasa del aparto con las manos desnudas durante su funcionamiento (la carcasa se
calienta). Para posibles sustituciones utilice únicamente lámparas y fusibles del mismo tipo y
potencia.
• Apague, desenchufe y deje que el aparato se enfríe antes de dar un nuevo servicio.
• Asegúrese de que el cableado del equipo esté debidamente conectado a tierra.
• Guarde este Manual para futuras consultas.
• Paraevitar el riesgodeincendioodescargaeléctrica,noexpongaelequipoalalluvia ni a lahumedad.
• Asegúrese de que el cable de alimentación nunca esté doblado o dañado.
• Desconecte la alimentación de la unidad cuando no se utilice durante largos períodos de tiempo.
• Nunca opere el equipo sin la cubierta.
¡PRECAUCIÓN! ¡DAÑO VISUAL! Evite mirar directamente a la fuente de luz (con especial
cuidado para afectados por epilepsia).
ESPECIFICACIONES
• Fuente de luz: Anillo LED + 1 LED blanco de 200W
• Temperatura de color: 9.500K
• Ángulo de haz: 2°
CARACTERÍSTICAS
• Colores: 13 colores + blanco
• Gobos: 11 gobos jos + abiertos
• Prism1: Rotación bidireccional circular de 8 caras
• Prism2: Rotación bidireccional circular de 8+16 caras
• Superposición de prismas: Sí
• Filtro antiescarcha para efecto wash
• Rueda discroica de 7 colores
• Entrada de energía: CA 100-240V
• Dimensiones: 306 x 183 x 433 mm
• Peso: 11,6 kg
• Foco electrónico
• Dimmer lineal: 0,100 % Hz
• Strobo: 0,25 fps
• PAN/TILT: 540°/270° + corrección automática
• Control: DMX. Auto. Sonido. Maestro-esclavo
• Canal DMX: 19 / 24 canales. seleccionable
• Display: I CD con 4 botones
INFORMACIÓN TÉCNICA

4.
español
Manual de usuario Q-BEAM200 deTriton Blue | Junio 2023 | www.triton-blue.com
MEDIDAS
DIAGRAMA FOTOMÉTRICO
Distancia (m)
Ancho de haz 2º 5 m
0,2 m
Lux 129.000 Lux
Q-BEAM200
183306
92
393
433
2º
10 m
0,4 m
34.850 Lux

5.
Manual de usuario Q-BEAM200 deTriton Blue | Exclusivo uso Profesional
español
CONFIGURACION
1.- Montaje
1) La cabeza móvil es totalmente operativa en cualquier posición de montaje, colgando boca abajo, montada
lateralmente, colocada sobre una supercie plana, etc.
IMPORTANTE: Siempre se deben usar cables de seguridad cuando la unidad está montada en techo o viga. El cable de
seguridad debe ser capaz de soportar 10 veces el peso del dispositivo.
2.- Alimentación AC
1) El accesorio está diseñado para funcionar con AC 90-240V 50/60Hz. Todas las unidades deben ser alimentadas
directamente desde un circuito conmutado. Esta unidad no puede funcionar con un dimmer o un circuito de
atenuación, incluso si se usa únicamente para una conmutación de 0% a 100%.
ADVERTENCIA:Todos los accesorios deben estar conectados a circuitos con una conexión a tierra adecuada.
CONFIGURACION
Mapa menu Congure la dirección DMX y
seleccione el modo de canal DMX
Seleccione el modo de ejecución
Conguración de pantalla
Edición de escenas
Conguración avanzada

6.
español
Manual de usuario Q-BEAM200 deTriton Blue | Junio 2023 | www.triton-blue.com
19 Ch 24 Ch Valor DMX Funciones
1 1 000-255 Pan 0-540º
2 000-255 Pan Fino
2 3 000-255 Tilt 0-540º
4 000-255 Tilt no
3 5 000-255 Pan /Tilt velocidad de rápido a lento
4 6 000-255 Dimmer 0-100% (Spot)
5 7
Strobo
000-003 Strobo abierto
004-099 Desvanecimiento Strobo de lento a rápido
100-149 Pulso Strobo de lento a rápido
150-199 Fade In Strobo de lento a rápido
200-249 Rand strobo de lenta a rápido
250-255 Strobo abierto
6 8
Color
000-004 Blanco
005-009 Blanco + Color 1
010-014 Color 1
015-019 Color 1 + Color 2
020-024 Color 2
025-029 Color 2 + Color 3
030-034 Color 3
035-039 Color 3 + Color 4
040-044 Color 4
045-049 Color 4 + Color 5
050-054 Color 5
055-059 Color 5 + Color 6
060-064 Color 6
065-069 Color 6 + Color 7
070-074 Color 7
075-079 Color 7 + Color 8
080-084 Color 8
085-089 Color 8 + Color 9
090-094 Color 9
095-099 Color 9 + Color 10
100-104 Color 10
105-109 Color 10 + Color 11
110-114 Color 11
Canales DMX

7.
Manual de usuario Q-BEAM200 deTriton Blue | Exclusivo uso Profesional
español
6 8
115 - 119 Color 11 + Color 12
120-124 Color 12
125-129 Color 12 + Color 13
130-134 Color 13
135-139 Color 13 + Blanca
140-197 Rotación en sentido horario rápido a lento
198-255 Rotación en sentido antihorario lento a rápido
7 9
Gobo
000-004 Abierto
005-009 Gobo 1
010-014 Gobo 2
015-019 Gobo 3
020-024 Gobo 4
025-029 Gobo 5
030-034 Gobo 6
035-039 Gobo 7
040-044 Gobo 8
045-049 Gobo 9
050-054 Gobo 10
055-059 Gobo 11
060-064 Gobo 12
065-069 Gobo 13
070-074 Gobo 14
075-128 Rotación en sentido horario rápido a lento
120-131 Stop
132-185 Rotación en sentido antihorario lento a rápido
186-190 Gobo 1 temblando de lento a rápido
191-195 Gobo 2 temblando de lento a rápido
196-200 Gobo 3 temblando de lento a rápido
201-205 Gobo 4 temblando de lento a rápido
206-210 Gobo 5 temblando de lento a rápido
211-215 Gobo 6 temblando de lento a rápido
216-220 Gobo 7 temblando de lento a rápido
221-225 Gobo 8 temblando de lento a rápido
226-230 Gobo 9 temblando de lento a rápido
231-235 Gobo 10 temblando de lento a rápido
236-240 Gobo 11 temblando de lento a rápido
241-245 Gobo 12 temblando de lento a rápido
246-250 Gobo 13 temblando de lento a rápido
251-255 Gobo 14 temblando de lento a rápido

8.
español
Manual de usuario Q-BEAM200 deTriton Blue | Junio 2023 | www.triton-blue.com
8 10 000-255 Enfoque de cerca a lejos
9 11
Prisma 1
000-127 Prisma 1 O
128-255 Primas 1 On
10 12
Prisma 1 rotativo
000-005 Prisma 1 rotativo Stop
006-125 Prisma 1 rotativo en el sentido de las agujas del reloj girando de lento a rápido
126-255 Prisma 1 rotativo girando en sentido antihorario lenta a rápida
11 13
Prisma 2
000-127 Prisma 2 O
128-255 Primas 2 On
12 14
Prisma 2 rotativo
000-005 Prisma 2 rotativo Stop
006-125 Prisma 2 rotativo en el sentido de las agujas del reloj girando de lento a rápido
126-255 Prisma 2 rotativo girando en sentido antihorario lenta a rápida
13 15
Frost y rueda 7 colores
000-005 Sin función
006-125 Rueda 7 colores
126-255 Frost
14 16 000-255 Dimmer 0-100% (LED Ring/Anillo)
17 000-255 Anillo LED strobo de lento a rápido
18 000-255 Anillo LED Intensidad Rojo 0-100%
19 000-255 Anillo LED Intensidad Verde 0-100%
15 20 000-255 Anillo LED Intensidad Azul 0-100%
16 21 000-255 Macro anillo LED
17 22 000-255 Anillo LEDVelocidad macro de lento a rápido
18 23 000-255 Programas automáticos incorporados
19 24 Reset
19 24 Sin función
000-159 5s para reset los motores Pan/Tilt
160-189 5s para reset los motores de efectos
190-249 5s para reset total de la cabeza móvil

9.
Manual de usuario Q-BEAM200 deTriton Blue | Exclusivo uso Profesional
español
RUEDA COLOR RUEDA GOBOS
14 1
2
3
4
5
6
7
8
9
10
11
12
13
Abierto
1
2
3
4
5
6
7
8
9
10
11
12
13
Blanco
RUEDA DE GOBOS Y COLORES

10.
español
Manual de usuario Q-BEAM200 deTriton Blue | Junio 2023 | www.triton-blue.com
MANTENIMIENTO Y LIMPIEZA
• Los servicios de garantía sólo será válidos bajo situaciones de uso general.
• Todos los daños causados por un uso inadecuado, por ejemplo una mala conexión de alimentación,
la utilización de un accesorio no contemplado en usos generales, el uso no siguiendo la normativa
y precauciones de este manual, el daño causado por el transporte u otro accidente, la reparación
o cambio en la estructura no aprobada por la empresa, el uso erróneo o el daño causado por la
negligencia, la instalación inadecuada, etc., no están incluidos en esta garantía.
• Nuestros servicios de garantía no abarcan los costes de accesorios, piezas consumibles, dispositivos
auxiliares, transporte y servicios a domicilio de técnicos.
• Si tiene problemas que no pueden resolverse o dudas, póngase en contacto con su distribuidor.
GARANTÍA
Es absolutamente esencial que el equipo se mantenga limpio y que no se acumule polvo, suciedad ni residuos sobre la
luminaria ni en su interior. De lo contrario, la potencia luminosa del equipo se reducirá considerablemente.
Una limpieza regular no sólo garantizará la máxima potencia luminosa, sino que también permitirá que la luminaria
funcionede forma able durantetodasu vidaútil.Se recomiendautilizarun paño suave, queno suelte pelusa,humedecido
con un líquido limpiacristales especíco; en ningún caso deben utilizarse alcohol ni disolventes.
1) La lente del objetivo frontal requiere una limpieza semanal. Los ventiladores de refrigeración deben limpiarse
mensualmente.
2) El interior de la luminaria debe limpiarse al menos una vez al año con un aspirador o un chorro de aire. Elimine el
polvo y la suciedad de los ventiladores y las rejillas de refrigeración con un cepillo suave y un aspirador.
3) ¡Importante! ¡Compruebe periódicamente los ltros de aire y límpielos antes de que se obstruyan!
4) Limpie dos ltros de aire colocados en las tapas de la luminaria y dos en la base de la luminaria. Utilice una
aspiradora, aire comprimido o puede lavarlos y volver a secarlos.
5) Después de sustituir los ltros de aire, ponga a cero el contador de tiempo transcurrido en el menú“Información”
(información- -->Filtros de aire- -->Tiempo transcurrido).
6) Sustitución del fusible. Antes de sustituir el fusible, desenchufe el cable de alimentación.
a) Retire el portafusibles situado en el panel posterior de la base con un destornillador adecuado (en
sentido contrario a las agujas del reloj).
b) Retire el fusible antiguo del portafusibles.
c) Instale el nuevo fusible en el portafusibles (sólo del mismo tipo y capacidad).
d) Vuelva a colocar el portafusibles en la carcasa y fíjelo.

11.
Manual de usuario Q-BEAM200 deTriton Blue | Exclusivo uso Profesional
español

12.
english
User Manual | Q-BEAM200 byTriton Blue | June 2023 | www.triton-blue.com
INTRODUCTION
ENGLISH
The Q-Beam200 is a powerful and professional beam moving head. With 200W White LED and LED. Ring, the
Q-Beam200 can produce a razor sharp 2º beam and generate an incredibly sharp beam of light, making it
perfect for mid-air eects.
UNPACKING
1 x Moving head Q-Beam200
1 x Power cable
2 x Omega brackets
1 x User manual
Carefully unwrap the package, check the contents to ensure that all items are present and received in good
condition. If any parts are missing or damaged, contact your supplier immediately and retain the packaging
material for inspection.
SAFETY INSTRUCTIONS
CAUTION! Keep this device away from rain and moisture! Unplug mains lead
before opening the housing!
This device has left our premises in absolutely perfect condition. In order to maintain this condition and to ensure a safe
operation, it is absolutely necessary for the user to follow the safety instructions and warning notes written in this manual.
IMPORTANT
• The manufacturer will not accept liability for any resulting damages caused by the non-observance
of this manual or any unauthorized modication to the device.
• Please consider that damages caused by manual modications to the device are not subject to
warranty.
• During the operation the housing becomes hot). Allow the xture to cool approximately 20 minutes
prior to manipulate with it.
• Make sure that the available voltage is not higher than stated on the rear panel.
• WARNING! This unit does not contain an ON/OFF switch. Always disconnect power input cable to
completely remove power from unit when not in use or before cleaning or servicing the xture.
• Make sure that the power-cord is never crimped or damaged by sharp edges. Check the device and
the power-cord from time to time.
• Always disconnect from the mains, when the device is not in use or before cleaning it. Only handle
the power-cord by the plug. Never pull out the plug by tugging the power cord.
• This device falls under protection class I. Therefore, it is essential to connect the yellow /green
conductor to earth.

13.
User Manual | Q-BEAM200 byTriton Blue | For Professinal use only, not for residential use
english
• The electric connection, repairs and servicing must be carried out by a qualied employee. Do not
connect this device to a dimmer pack.
• Do not switch the xture on and o in short intervals as this would reduce the lamp’s life.
• During the initial start-up some smoke or smell may arise. This is a normal process and does not
necessarily mean that the device is defective.
• Do not touch the device’s housing bare hands during its operation (housing becomes hot)! For
replacement use lamps and fuses of same type and rating only.
CAUTION! EYE DAMAGES!
Avoid looking directly into the light source! (Mean especially for epileptics)!
TECHNICAL INFORMATION
SPECIFICATIONS
• Source: 200 white LED + RGB LED Ring
• Color temperature: 9,500K
• Beam angle: 2°
• Power consumption: 250W Max.
FEATURES
• 1 color wheel: 13 colors + white
• Gobo wheel: 11 static gobos + open, shaking
• Prism 1: 8-fact circular, bi-direction rotating
• Prism 2: 8+16-fact circular, bi-direction rotating
• Prism overlapping eect
• Electronic focus
• 0-100% linear dimmer
• Power supply: 100~240V, 50-60Hz
• Fuse: F5A/250V
• Dimensions: 306 x 183 x 433 mm
• Weight: 11.6 kg
• 1-25 fps strobe
• 4 working modes: DMX, Auto, Sound, Master/
Slave
• DMX modes: 19/24 channels
• LCD display with 5 buttons
• Pan : 540°Tilt: 270°

14.
english
User Manual | Q-BEAM200 byTriton Blue | June 2023 | www.triton-blue.com
MEASURES
PHOTOMETRIC DIAGRAM
Q-BEAM200
183306
92
393
433
Distance (m)
Beam width 2º 5 m
0,2 m
Lux 129.000 Lux
2º
10 m
0,4 m
34.850 Lux

15.
User Manual | Q-BEAM200 byTriton Blue | For Professinal use only, not for residential use
english
SETTING
1.- Mounting
The Moving Head is fully operational in any mounting position, hanging upside-down, side mounted, or set on a
at llevel surface, etc.
IMPORTANT: Safety cables must always be used when unit is celling or truss mounted.The safety cable must be capable of
holding 10 times the weight of the xture.
2.- AC Power
1) The xture is designed to work on AC 90-240V 50-60Hz. All units must be powered directly from a switched
circuit.This unit cannot be run on a rheostat or dimmer circuit even if used solely for a 0% to 100% switching.
WARNING: All xtures must be connected to circuits with a suitable Earth Ground.
Mapa menu Set DMX address and select DMX
channel mode
Select running mode
Display setting
Scene editing
Advanced setting

16.
english
User Manual | Q-BEAM200 byTriton Blue | June 2023 | www.triton-blue.com
DMX Channel
19 Ch 24 Ch DMX Value Functions
1 1 000-255 Pan 0-540º
2 000-255 Pan Fine
2 3 000-255 Tilt 0-540º
4 000-255 Tilt ne
3 5 000-255 Pan/Tilt speed from fast to slow
4 6 000-255 Dimmer 0-100% (Spot)
5 7
Strobo
000-003 Strobe open
004-099 Fade strobe slow to fast
100-149 Pluse strobe slow to fast
150-199 Fade In strobe slow to fast
200-249 Rand strobe slow to fast
250-255 Strobo open
6 8
Color
000-004 Blanco
005-009 Blanco + Color 1
010-014 Color 1
015-019 Color 1 + Color 2
020-024 Color 2
025-029 Color 2 + Color 3
030-034 Color 3
035-039 Color 3 + Color 4
040-044 Color 4
045-049 Color 4 + Color 5
050-054 Color 5
055-059 Color 5 + Color 6
060-064 Color 6
065-069 Color 6 + Color 7
070-074 Color 7
075-079 Color 7 + Color 8
080-084 Color 8
085-089 Color 8 + Color 9
090-094 Color 9
095-099 Color 9 + Color 10
100-104 Color 10
105-109 Color 10 + Color 11
110-114 Color 11

17.
User Manual | Q-BEAM200 byTriton Blue | For Professinal use only, not for residential use
english
6 8
115 - 119 Color 11 + Color 12
120-124 Color 12
125-129 Color 12 + Color 13
130-134 Color 13
135-139 Color 13 +White
140-197 Clockwise rotation fast to slow
198-255 Counter-clockwise rotation slow to fast
7 9
Gobo
000-004 Open
005-009 Gobo 1
010-014 Gobo 2
015-019 Gobo 3
020-024 Gobo 4
025-029 Gobo 5
030-034 Gobo 6
035-039 Gobo 7
040-044 Gobo 8
045-049 Gobo 9
050-054 Gobo 10
055-059 Gobo 11
060-064 Gobo 12
065-069 Gobo 13
070-074 Gobo 14
075-128 Clockwise rotation fast to slow
120-131 Stop
132-185 Counter-clockwise rotation slow to fast
186-190 Gobo 1 shaking slow to fast
191-195 Gobo 2 shaking slow to fast
196-200 Gobo 3 shaking slow to fast
201-205 Gobo 4 shaking slow to fast
206-210 Gobo 5 shaking slow to fast
211-215 Gobo 6 shaking slow to fast
216-220 Gobo 7 shaking slow to fast
221-225 Gobo 8 shaking slow to fast
226-230 Gobo 9 shaking slow to fast
231-235 Gobo 10 shaking slow to fast
236-240 Gobo 11 shaking slow to fast
241-245 Gobo 12 shaking slow to fast
246-250 Gobo 13 shaking slow to fast
251-255 Gobo 14 shaking slow to fast

18.
english
User Manual | Q-BEAM200 byTriton Blue | June 2023 | www.triton-blue.com
8 10 000-255 Focus near to far
9 11
Prism 1
000-127 Prism 1 O
128-255 Prim 1 On
10 12
Prism 1 rotating
000-005 Prism 1 rotating Stop
006-125 Prism1 clockwise rotating slow to fast
126-255 Prism1 counter-clockwise rotating slow to fast
11 13
Prism 2
000-127 Prism 2 O
128-255 Prism 2 On
12 14
Prism 2 rotating
000-005 Prism2 rotating stop
006-125 Prism2 clockwise rotating slow to fast
126-255 Prism2 counter-clockwise rotating slow to fast
13 15
Frost & 7color dish
000-005 No function
006-125 7color dish
126-255 Frost
14 16 000-255 Dimmer 0-100% (LED Ring)
17 000-255 LED Ring strobe from slow to fast
18 000-255 LED Ring Red intensity 0-100%
19 000-255 LED Ring Green intensity 0-100%
15 20 000-255 LED Ring Blue intensity 0-100%
16 21 000-255 LED Ring Macro
17 22 000-255 LED Ring Macro speed from slow to fast
18 23 000-255 Built-in auto programs
19 24 Reset
19 24 No function
000-159 5s to reset Pan/Tilt motors
160-189 5s to reset Eect motors
190-249 5s to reset the xture

19.
User Manual | Q-BEAM200 byTriton Blue | For Professinal use only, not for residential use
english
WHEEL GOBOS AND COLORS
COLOR WHEEL GOBO WHEEL
14 1
2
3
4
5
6
7
8
9
10
11
12
13
Open
1
2
3
4
5
6
7
8
9
10
11
12
13
White

20.
english
User Manual | Q-BEAM200 byTriton Blue | June 2023 | www.triton-blue.com
WARRANTY
• Warranty service is only valid under normal use.
• All man-made damage, such as inadequate access to power, the use of
inappropriate accessories, non manual use, damage for transport and other
accidents, non- approved repair or modication, misuse or damage caused by
negligence, improper installation, are not in warranty.
• This warranty does not cover accessories, vulnerable parts, assistive devices,
transportation and maintenance personnel on- site service fee.
• When you can not solve the problem or have questions, please contact us.
MAINTENANCE AND CLEANING
It is absolutely essential that the xture is kept clean and that dust, dirt and smoke-uid residues must not build up on or
within the xture. Otherwise, the xture‘s light-output will be signicantly reduced. Regular cleaning will not only ensure
the maximum light-output, but will also allow the xture to function reliably throughout its life. A soft lint-free cloth
moistened with any good glass cleaning uid is recommended, under no circumstances should alcohol or solvents be used!
1) The front objective lens will require weekly cleaning as smoke-uid tends to building up residues, reducing the
light-output very quickly.The cooling-fans should be cleaned monthly.
2) The interior of the xture should be cleaned at least annually using a vacuum-cleaner or an air-jet. Remove dust
and dirt from the fans and cooling vents using a soft brush and vacuum-cleaner.
3) Important! Check the air lters periodically and clean before they become clogged!
4) Clean two air lters placed in the xture‘s covers and two in the xture base. Use a vacuum cleaner, compressed
air or you can wash them and put back dry.
5) After replacing the air lters, reset the elapsed time counter in the menu “Information” (information- -->Air
Filters- -->Elapsed Time).
6) Replacing the fuse. Before replacing the fuse, unplug mains lead.
a) Remove the fuse holder on the rear panel of the base with a tting screwdriver from the housing
(anti- clockwise).
b) Remove the old fuse from the fuse holder.
c) Install the new fuse in the fuse holder (only the same type and rating).
d) Replace the fuse holder in the housing and x it.
Other manuals for Q-BEAM200
1
Table of contents
Languages:
Other Triton Blue Light Fixture manuals
Popular Light Fixture manuals by other brands

Lightolier
Lightolier Lytespan 9120 specification

Triarch
Triarch Lighting Fixture 32093 installation instructions

Chauvet
Chauvet Q-Spot 200 user manual

Signtex
Signtex Moonlite MAEBB Series Installation instructions and owner's manual

Regent
Regent ICE SPLASH LED Mounting guide

Philips
Philips LVL Series Specifications