Truen NCAM-531BIR User manual

H.26
4 HD VIDEO SERVER
User Manual
ver.1.0
NCAM-531BIR
1.3 Megapixel IP Camera

NCAM-531BIR User Manual
1.3 Megapixel IP Camera Manual
2/44
Safety Precaution
Make sure to turn off the power before installing NCAM-531BIR.
o not install under the direct sunlight or in dusty areas.
Make sure to use the product within the temperature and humidity specified in the specification.
o not operate the product in presence of vibrations or strong magnetic fields.
o not put electrically conducting materials in the ventilation hole.
o not open the top cover of the product. It may cause a failure or electric shock on the
components.
To prevent from overheating, make sure to keep the distance at least 10cm from the ventilation
hole.
Make sure proper voltage (220V/100V) before connecting the power.
We appreciate your purchasing NCAM-531BIR.
Before insta ing the product, p ease read the fo owing with care.

NCAM-531BIR User Manual
1.3 Megapixel IP Camera Manual
3/44
Tab e of Content
Table of Content .............................................................................................................................. 3
1. Introduction ................................................................................................................................. 4
About This Manual .................................................................................................................... 4
Features ................................................................................................................................... 4
Product and Accessories .......................................................................................................... 5
Part Names and Functions ....................................................................................................... 6
3. System Connections ............................................................................................................. 8
2. Installation ................................................................................................................................. 11
Check if it works ..................................................................................................................... 12
3. System Operation .................................................................................................................. 13
Remote Video Monitoring ....................................................................................................... 13
Initialization of IP address ....................................................................................................... 15
4. Remote Configuration ............................................................................................................... 16
Using Web Brower .................................................................................................................. 16
System Configuration ............................................................................................................. 17
Video Configuration ................................................................................................................ 21
Audio Configuration ................................................................................................................ 26
Network Configuration ............................................................................................................ 27
Serial Configuration ................................................................................................................ 32
Event Configuration ................................................................................................................ 34
Preset Configuration ............................................................................................................... 37
Record Configuration .............................................................................................................. 38
User Configuration .................................................................................................................. 39
Camera Configuration ............................................................................................................ 41

NCAM-531BIR User Manual
1.3 Megapixel IP Camera Manual
4/44
1. Introduction
About This Manua
This user manual provides information on operating and managing the premium network camera, NCAM-
531BIR. The manual includes instructions of installation, operation and configuration of NCAM-531BIR as
well as how to make troubleshooting.
Features
NCAM-531BIR is a 1.3 Megapixel network-based camera with remote live monitoring, audio monitoring and
control via an IP network such as LAN, A SL/V SL, and Wireless LAN.
Video
Highly efficient compression algorithm, H.264 & MJPEG support
18 kinds of compression and resolutions: CIF (352x240) - QVGA(1280 x 960)
Wide range of transmission rates: 32kbps ~ 8Mbps
Various transmission modes: CBR, VBR
Motion detection
Audio
Multi-transmission mode: Simplex (NCAM-531BIR Client PC or ecoder, Client PC or ecoder
NCAM-531BIR), Full uplex
Network
Fixed IP & ynamic IP ( HCP) support
1:1, 1:N support
Multicasting
Automatic transmit rate control according to network conditions
Sensor and A arm
Support direct connections of external sensor and alarm devices
Event Alarm
User Interface
iagnose and upgrade through dedicated program called True Manager
System configuration using Internet Explorer

NCAM-531BIR User Manual
1.3 Megapixel IP Camera Manual
5/44
High Re iabi ity
Reliable embedded system
Product and Accessories
NCAM-531BIR Quick Manua SW and User Manua CD
NCAM-531BIR User Manual
1.3 Megapixel IP Camera Manual
6/44
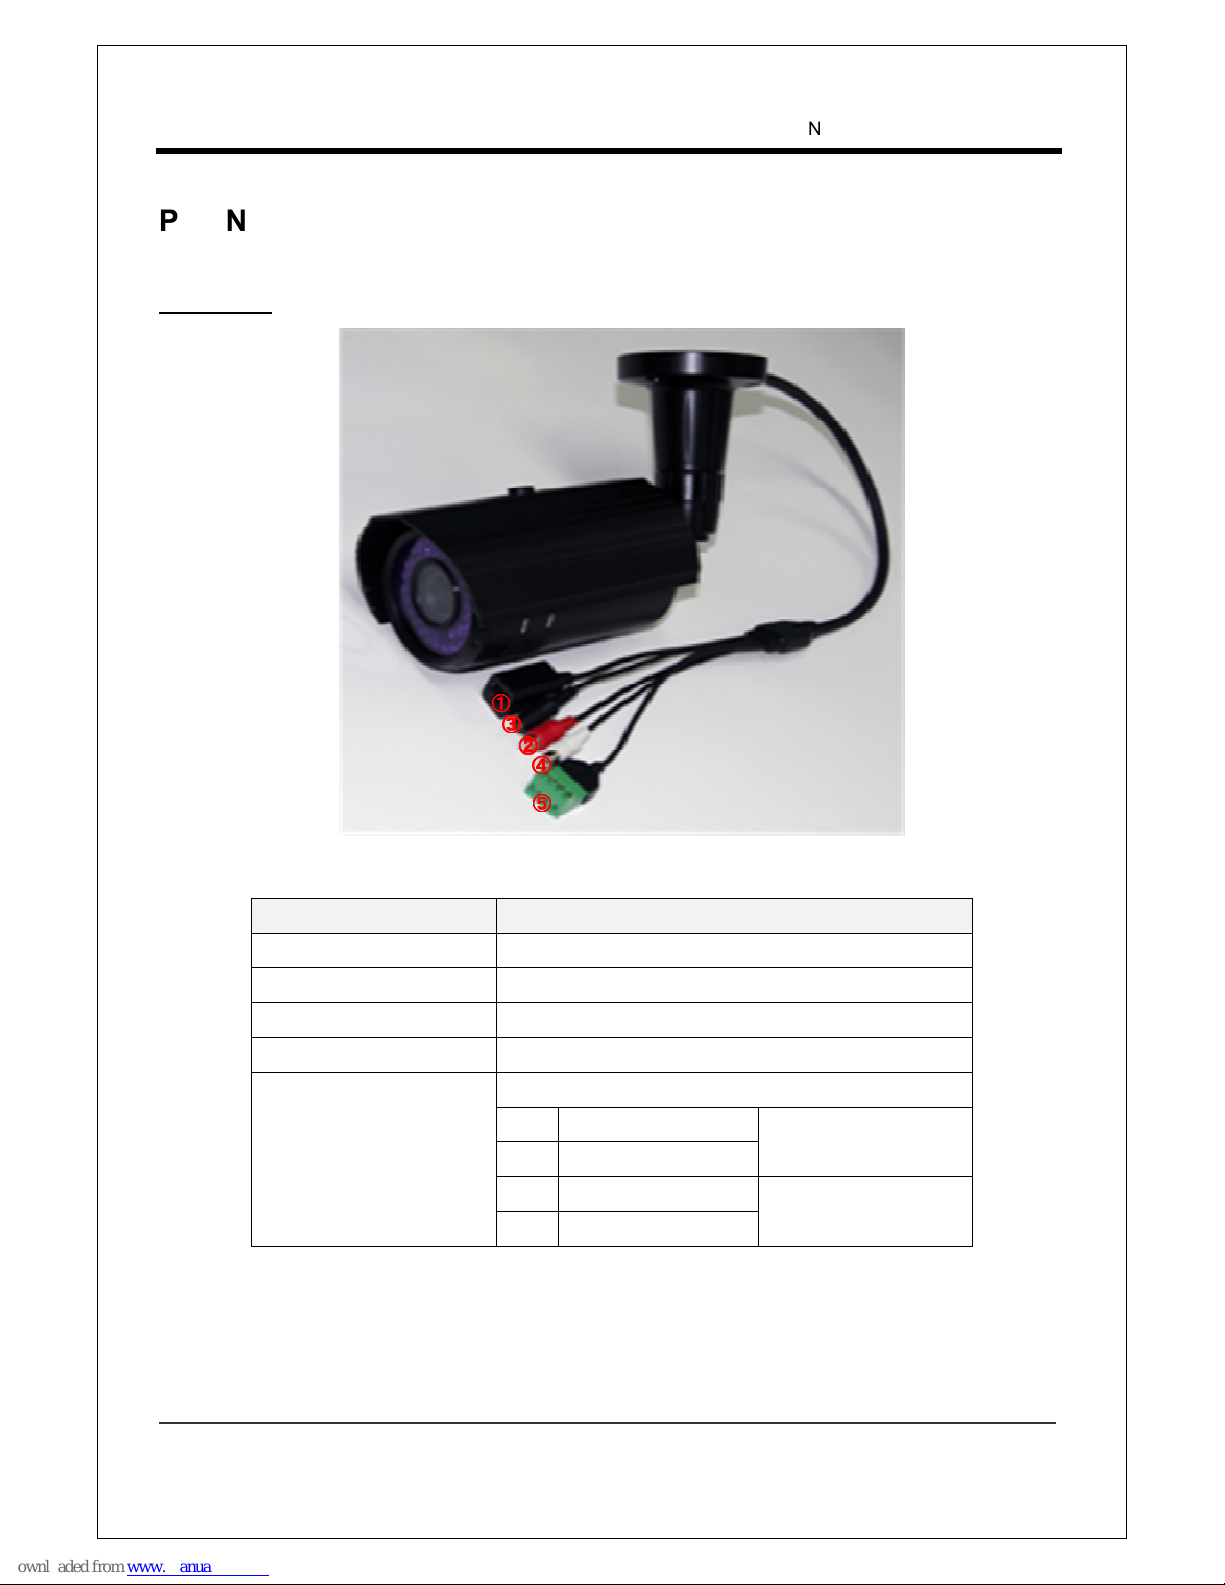
Part Names and Functions
Connector
Connector Function
1. NETWORK Ethernet (RJ45)
2. POWER INPUT C 12V
3. AU IO OUT(RE ) Connect jack from speaker
4. AU IO IN (WHITE) Connect jack from line level audio source
5. ALARM & SENSOR
T/Block – 4pin
A SENSOR IN Normal Open
B GN
C ALARM OUT Normal Open
Relay, Max 30Vdc, 1A
ALARM COMMON
④
④④
④
③
③③
③
⑤
⑤⑤
⑤
①
①①
①
②
②②
②
NCAM-531BIR User Manual
1.3 Megapixel IP Camera Manual
7/44
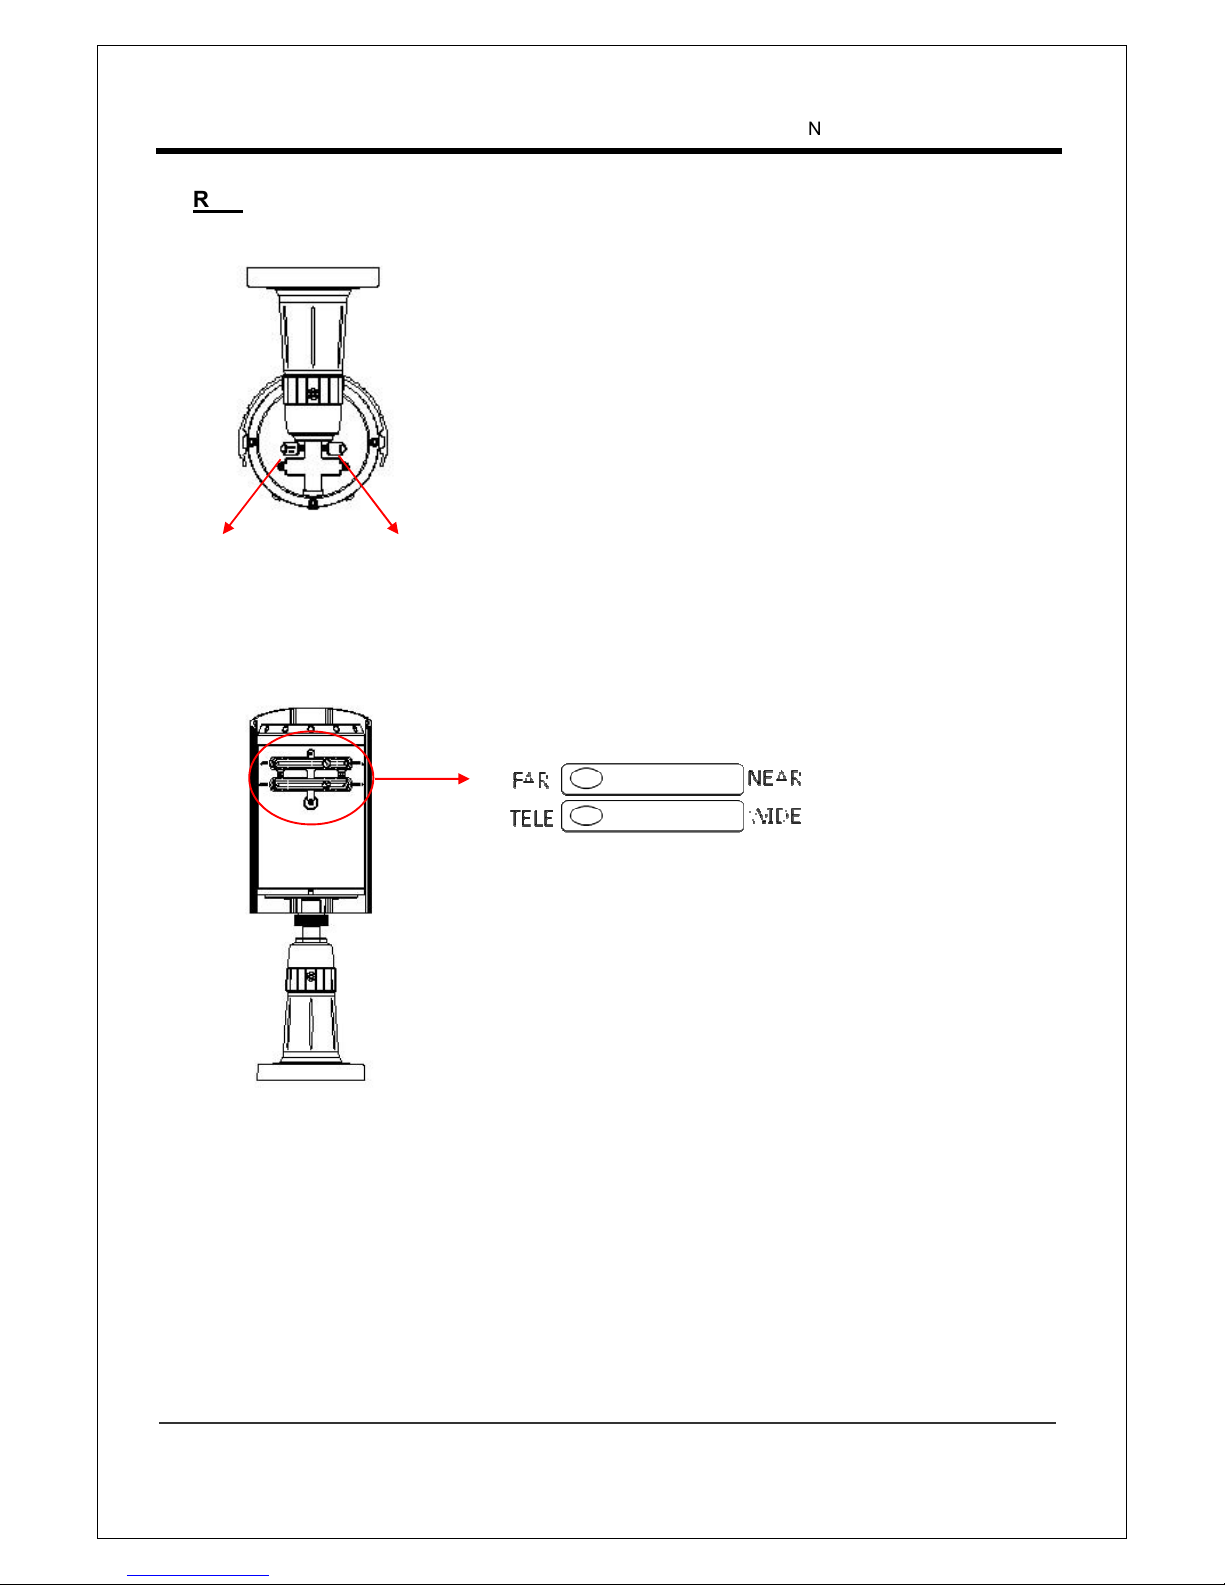
Rear
Reset Button: Push the reset switch for more than 5seconds to
reset the camera.
Video Output: Composite video output (1 Vpp 75ohm, pitch
2mm connector)
Reset Button Video Output
NCAM-531BIR User Manual
1.3 Megapixel IP Camera Manual
8/44
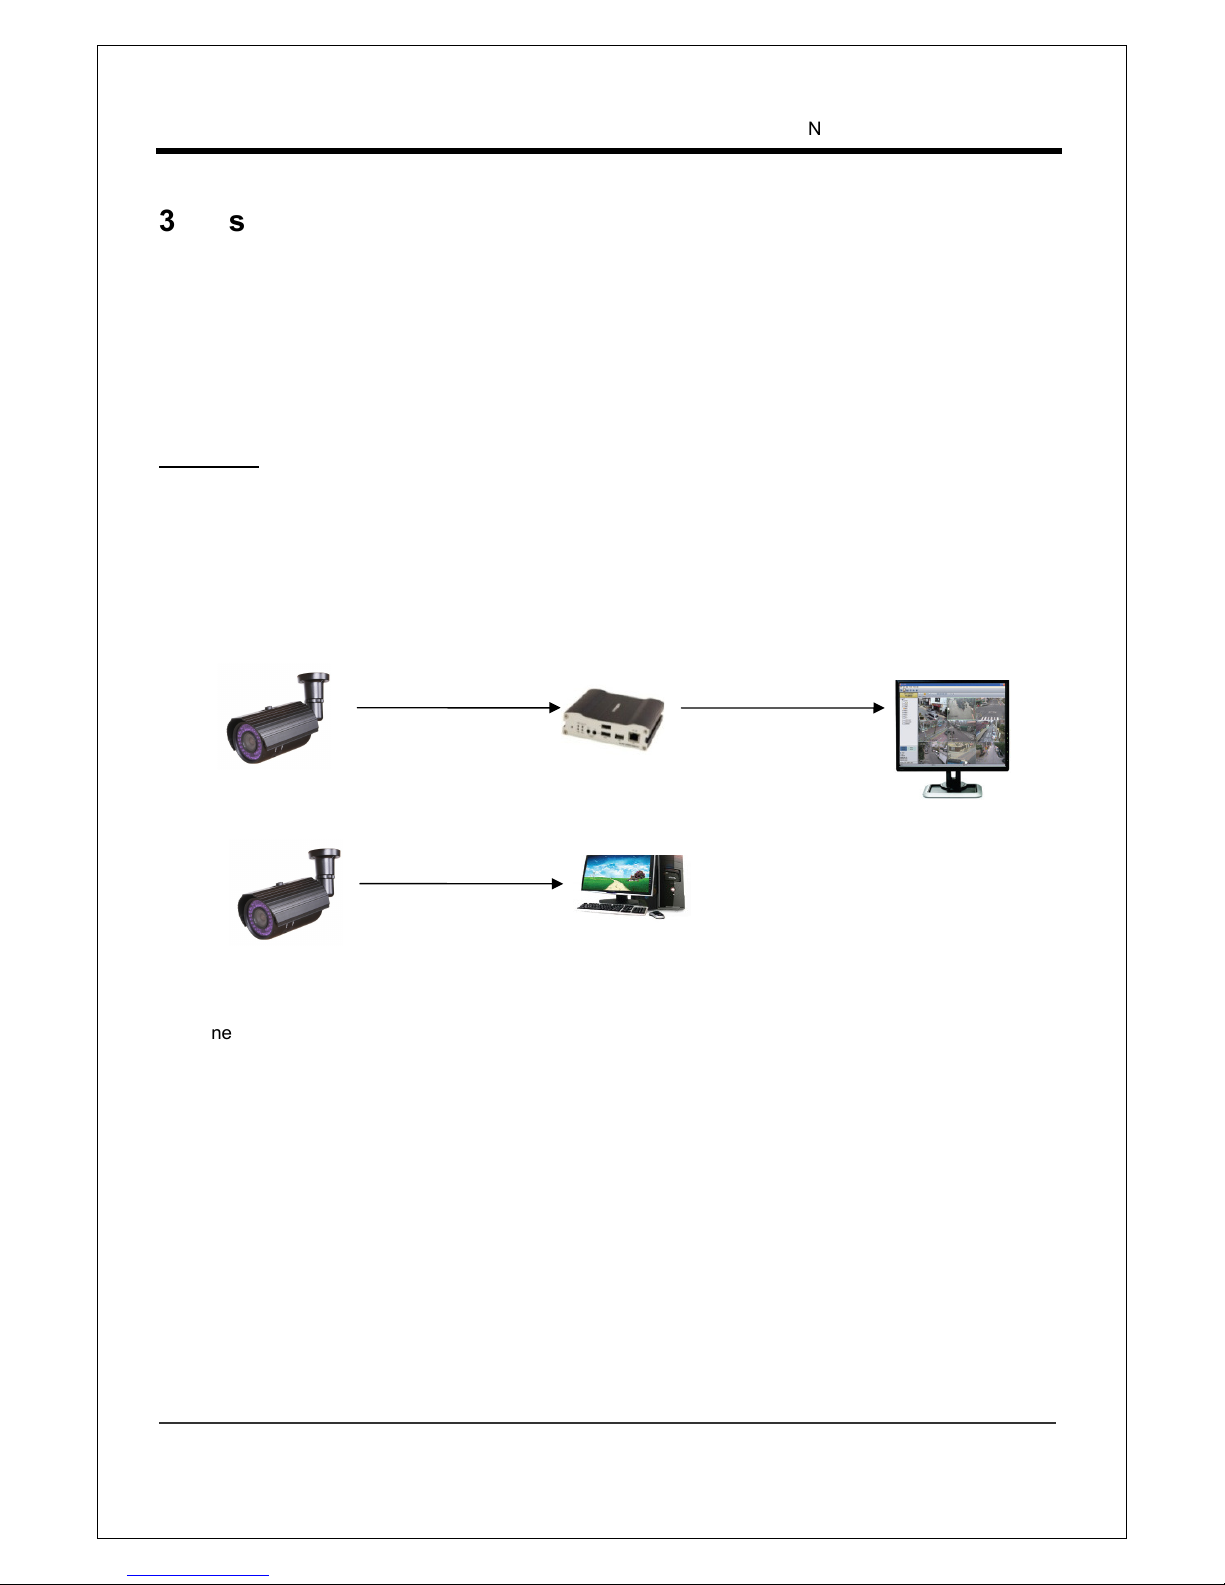
3. System Connections
NCAM-531BIR IP Cameras can be connected in either 1 to 1 connection where one NCAM-531BIR is
connected one PC client or a decoder system or 1 to many connections where one NCAM-531BIR can be
connected several PCs and decoder systems.
Topo ogy
Generally, NCAM-531BIR and PC or a decoder is connected in 1-to-1 mode or 1-to many configuration.
1:1 Connection .
One NCAM-531BIR is installed at a site where video images are transmitted. A PC or a decoder is
installed at a central location to receive and view the video images on an analog monitor. Audio and
serial data are transferred in either direction.
Site
Remote Center ( ecoder) Remote Center
Site
Remote Center (PC SW)

NCAM-531BIR User Manual
1.3 Megapixel IP Camera Manual
9/44
or
or
or
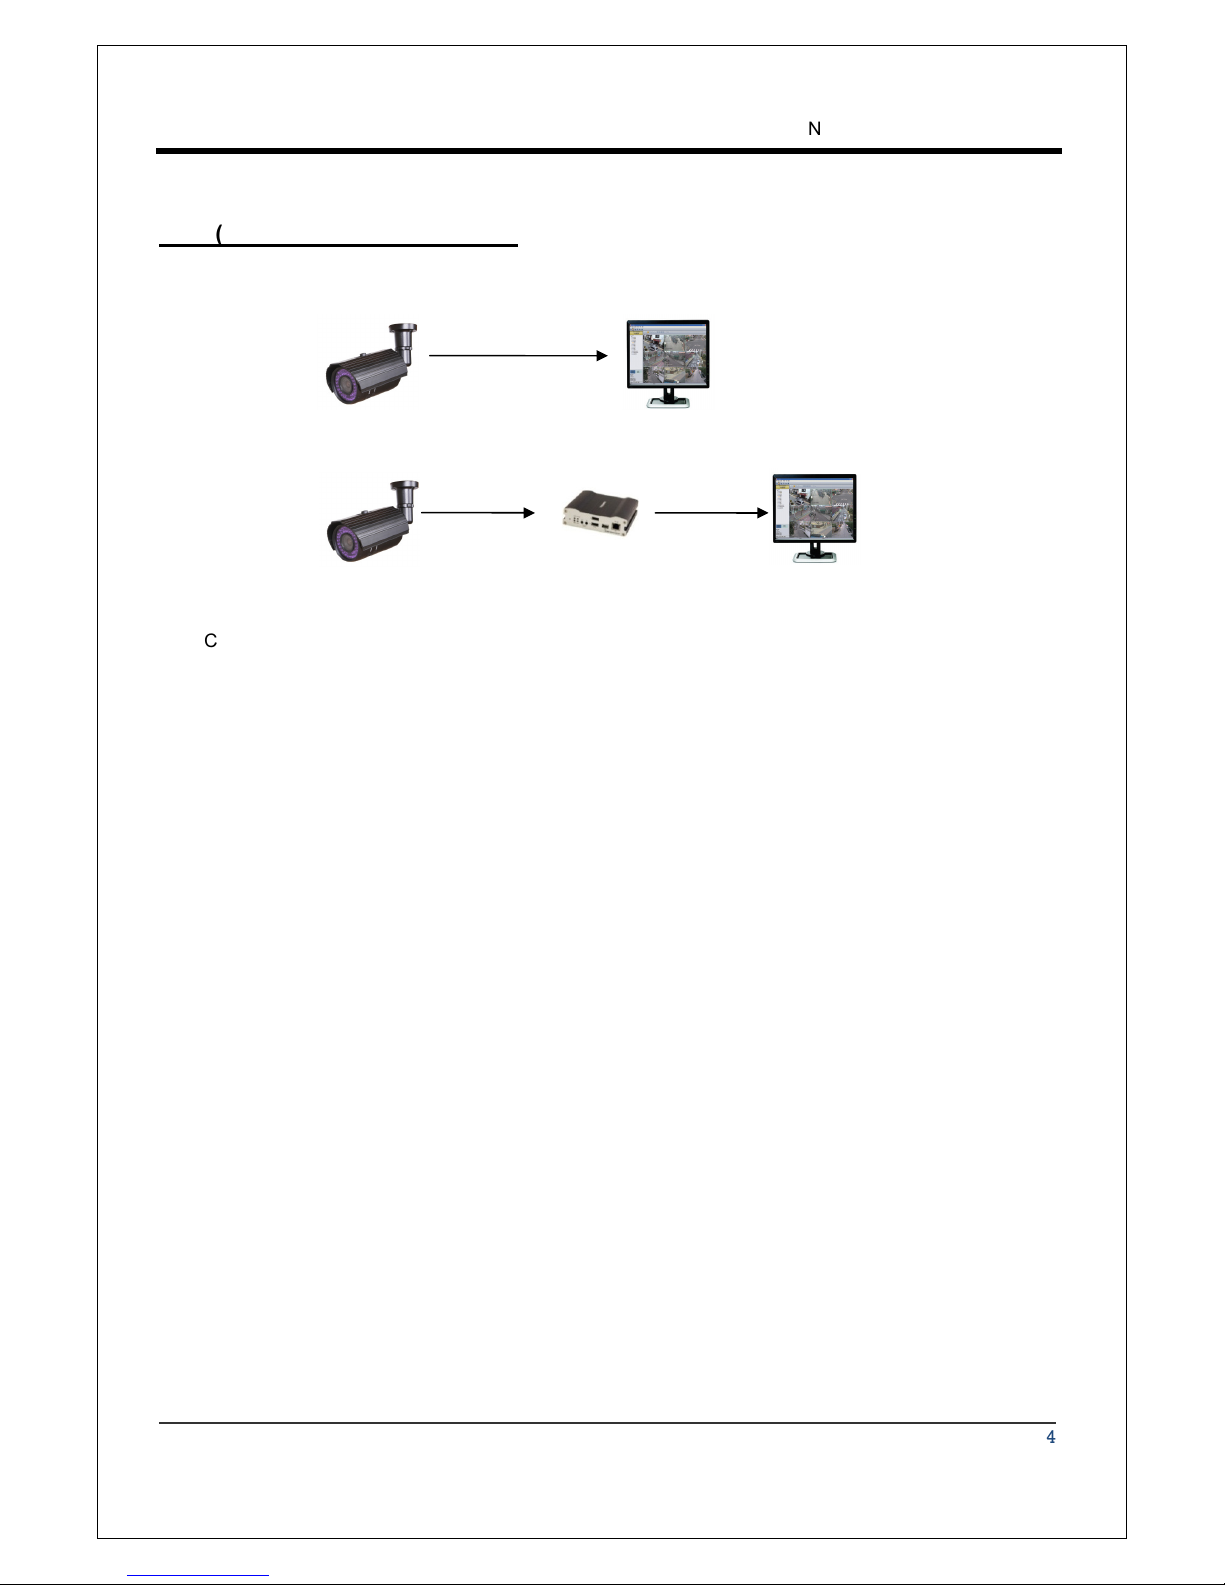
1:N Connection .
In this configuration, a site can be monitored from many remote central locations. Although up to 64 PCs
or decoders can be connected to one NCAM-531BIR, in the real network environment, network
bandwidth can limit the maximum connections. Functionally, the central monitoring system (CMS)
software provided can replace the decoder.
Mu ticast Mode
If the network supports multicasting, a large number of decoders can be used to receive video effectively
from a NCAM-531BIR using a single streaming of video and audio. However, multicast mode is possible
only when network environment supports multicast.
Re ay
Video and audio data can be retransmitted from a center to another center. The arrangement is useful
when the network bandwidth to the site is limited while there are more than one center want to monitor
the site.
Site
Remote Center
Site
Center 1( ecoder) Center 2 ( ecoder)
NCAM-531BIR User Manual
1.3 Megapixel IP Camera Manual
10/44
CMS (Centra Monitoring System)
CMS (Central Monitoring System) is a Window-based remote monitoring program in order to monitor or
control video, audio, and events in real time from several IP cameras or video servers. Please refer to
the CMS User Manual for more in detail..
Site
Remote Center
Site
Remote Center ( ecoder)
CMS

NCAM-531BIR User Manual
1.3 Megapixel IP Camera Manual
11/44
2. Insta ation
Connecting Power
1. Carefully check the voltage and current capacity of the rated power.
2. After confirming the power source, connect power adaptor and connect the 12V C connector to
the system
Connecting Network
1. Plug network cable to Ethernet port (RJ-45 network port).
Connecting Video
1. To display video through the composite video output, connect to a monitor using BNC coaxial
cable
2. Set Enab e Preview option “ON” on the Video tab of web page.
(Please refer to the Video Configuration part)
In case that video transmission distance is long, video data may not be transmitted due to a
reduction in the video signal. In order to prevent it, install a repeater in the middle.
Connecting Audio
Audio is full-duplex. It is possible to set the mode as Tx-only, Rx-only or Tx-Rx.
1. Connect audio input and output ports to audio devices accordingly.
2. The Audio signal required is line level, so an audio equipment with an amp, mixer or other amplifier
should be used.
Connecting Sensor and A arm
Connect sensor and alarm devices to corresponding terminals accordingly.

NCAM-531BIR User Manual
1.3 Megapixel IP Camera Manual
12/44
Check if it works
Once the power is supplied to the camera, it will start booting. The system will boot up to an operating mode
after approximately 40-60 seconds.
The software provided in the C called True Manager allows you to check the IP address and other network
details of the camera. Please refer to the True Manager manual for instructions on how to find the IP address
of the camera and change it if required.

NCAM-531BIR User Manual
1.3 Megapixel IP Camera Manual
13/44
3. System Operation
Remote Video Monitoring
There are two ways to monitor video when the decoder system and NCAM-531BIR is connected. In order for
a proper operation, an IP address must be set accordingly. Please refer to True Manager in Chapter 3 or
Remote Setting in Chapter 4 for further details.
Defau t ID : admin Defau t Password : 1234
Video Monitoring using Internet Exp orer
Open Internet Explorer and enter NCAM-531BIR’s IP address. The system will ask for confirmation to install
Active-X control. Once authorized, the Internet Explorer will start to display video images from NCAM-
531BIR as shown below.
Defau t IP Address : http://192.168.10.100

NCAM-531BIR User Manual
1.3 Megapixel IP Camera Manual
14/44
Video Se ection
Select the Video stream to be viewed: Primary or Secondary
NCAM-531BIR is capable of dual streaming; primary streaming and secondary streaming.
Video will be displayed according to the resolution set on video configuration. If dual streaming (“Use
Dua Encode” Menu in Video page) is not activated, secondary video is not available
Screen Size
Screen size is initially adjusted according to the compression resolution. If you click x1/2 icon, the whole
screen size will be reduced in half.
Digita Zoom
Control the igital zoom on the screen
The more the camera zooms in, the smaller the square of control panel is.
Position of the image can be changed by moving position of the square. Max
x5 igital Zoom is available. If you press x1, the screen will return to the
normal size.
PTZ Contro Pane : In case of this product, this function is not avai ab e.
PTZ Control Panel is used for controlling external PTZ devices when the external PTZ devices are
connected through serial port.
Focus Near, Focus Far, Auto Focus
Adjust the focus
Menu On, Enter, ESC: In case of this product, this function is not avai ab e.
isplay and control OS (On Screen isplay) menu if OS menu is supported.
- Menu On: isplay OS menu list
- Enter: Select or operate menu items
- ESC: Cancel or go back to the previous menu
Sensor Input
NCAM-531BIR supports one sensor input. Status of the sensor is displayed in real time. When the
sensor connected to NCAM-531BIR is working, the light turns red.
A arm Output
NCAM-531BIR supports one Alarm output. A number icon indicates status of the alarm device. To
operate the alarm device, press the number icon.

NCAM-531BIR User Manual
1.3 Megapixel IP Camera Manual
15/44
Screen Capture
Capture pictures and store them as BMP or JPEG files.
Audio Transfer
Transfer audio from a PC that displays video image currently to NCAM-531BIR.
Video Monitoring with Decoder System
Once NCAM-531BIR’s IP address is set in the remote IP address section of the decoder, the decoder system
will connect to NCAM-531BIR and start receiving the video images. Normally, a monitor connected to the
decoder will display video images
Initia ization of IP address
If a system IP address is lost, the system can be reset to the system default IP address using the reset
button in the back side of the system.
1. While system is in operation, press the reset button for more than 5 seconds.
2. The system will reboot automatically
3. Once the system reboots, IP address will be set to the system default as below.
•
••
• IP mode Fixed IP •
••
• IP address 192.168.10.100
•
••
• Subnet mask
255.255.255.0 •
••
• Gateway 192.168.10.1
•
••
• Base port 2222 •
••
• HTTP port 80

NCAM-531BIR User Manual
1.3 Megapixel IP Camera Manual
16/44
4. Remote Configuration
Using Web Brower
Remote setting is available by using web browser. Enter IP address of NCAM-531BIR and then a live view
screen appears as below. Press Setup button located in the upper right area of the monitoring screen to go
to the server setup. For Remote Setting, user should be authorized higher than manager level.
The configurations are grouped into 10 categories: System, Video, Audio, Network, Seria , Event,
Preset, Record, Camera and User. Any configuration changes are not applied until App y button is
pressed. Leaving the page without pressing App y button, any changes in the page will be discarded.
Enter IP Address
Press Setup button

NCAM-531BIR User Manual
1.3 Megapixel IP Camera Manual
17/44
System Configuration

NCAM-531BIR User Manual
1.3 Megapixel IP Camera Manual
18/44
Genera
System ID
Enter System I that is used as a camera title
The set System I is displayed with video image on Web browser. The System I is also transferred to
remote software, such as CMS, and displayed on it.
Language
Select the language to be used for web-based configuration
Firmware
Firmware version
isplay the current firmware version
Board ID
isplay the Network board I of NCAM-531BIR recognized by system
Upgrade
Upgrade firmware
1. Press Browse button to select a firmware file from PC.
2. Press Firmware Upgrade button to start to upgrade.
3. Messages for showing status (downloading / upgrading) will be displayed.
4. The camera will reboot automatically after completing upgrade. Do not turn the camera off during
upgrading

NCAM-531BIR User Manual
1.3 Megapixel IP Camera Manual
19/44
Time
Start Time
Latest the camera’s booting date and time
Current Time
Current date & time
Enter a new date and time and press Set Current Time button to update date & time
Time Format
Change the time format. Selectable time formats are as below
- YYYY/ MM/ DD hh:mm:ss (Ex. 2010- 4- 11 18:18:42)
- DD/ MM/ YYYY hh:mm:ss (Ex.11- 4- 2010 18:18:42)
- MM/ DD/ YYYY hh:mm:ss (Ex. 4- 11- 2010 18:18:42)
Time Zone
Select time zone of where the camera is installed.
epending on the time zone, “Automatically adjust clock for aylight Saving Time” can be selected.
.
Automatica y synchronize with NTP server
Synchronize the camera time with an NTP server using NTP (network time protocol).
Name of the NTP server should be registered on NTP server Name.
Reboot
Reboot the camera.
o not press the Reboot button unless the server needs a reboot.
A time zone is a region of the earth that has uniform standard time, usually referred to as the oca
time. By convention, time zones compute their local time as an offset from UTC (Coordinated
Universal Time). In casual use, GMT (Greenwich Mean Time) can be considered equivalent to UTC.
Local time is UTC plus the current time zone offset for the considered location
The Network Time Protoco (NTP) is a protocol for synchronizing the clocks of computer systems
over packet-switched, variable-latency data networks. It is designed particularly to resist the effects
of variable latency by using a jitter buffer.

NCAM-531BIR User Manual
1.3 Megapixel IP Camera Manual
20/44
Factory Reset
Current IP Address of NCAM-531BIR is changed to default IP Address, 192.168.10.100.
System log and user registrations are also cleared. The other setting value will be remained.
Note that Password will not be changed by the factory reset for the security purpose. Please contact the
manufacturer when you forget your password.
Table of contents


