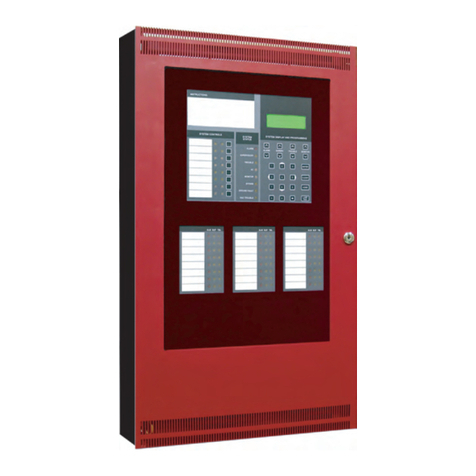
TSL TallyMan TMCP 16 User manual

TMCP 16/32/48
Installation Manual
Issue 1

2 of 26
Version History
Issue
Date
Change Details
1
06/11/17
First Issue

3 of 26
Contents
Introduction ....................................................................................................................................................5
Setup...............................................................................................................................................................6
Adding a TMCP in the TallyMan controller.................................................................................................6
First time startup ........................................................................................................................................9
Engineering menu.....................................................................................................................................10
Panel lock..................................................................................................................................................12
PSU............................................................................................................................................................12
Comms ......................................................................................................................................................13
Panel comms settings ...........................................................................................................................13
Panel controller comms settings ..........................................................................................................13
Main/backup modes.............................................................................................................................14
Testing comms......................................................................................................................................14
Operation......................................................................................................................................................15
Startup ......................................................................................................................................................15
Main/backup comms ................................................................................................................................15
PSU failure.................................................................................................................................................15
Panel lock..................................................................................................................................................15
Connections ..................................................................................................................................................16
Default IP settings.....................................................................................................................................16
Pin out details ...........................................................................................................................................17
Ethernet ................................................................................................................................................17
Serial RS422 ..........................................................................................................................................18
GPI 1-16.................................................................................................................................................19
GPI output 1-4.......................................................................................................................................20
Weight and dimensions ................................................................................................................................22
TMCP-16 ...................................................................................................................................................22
TMCP-32 ...................................................................................................................................................23
TMCP-48 ...................................................................................................................................................24
Safety ..............................................................................................................................................................1
Installation ..................................................................................................................................................1
Earthing/grounding.................................................................................................................................1
Mounting ................................................................................................................................................1
Power......................................................................................................................................................1
Ventilation ..............................................................................................................................................1

4 of 26
Warranty, maintenance and repair ................................................................................................................2
Failure during warranty ..............................................................................................................................2
Technical support information ...................................................................................................................2
TSL returns procedure ................................................................................................................................2
Fault report details required...................................................................................................................2
Packing....................................................................................................................................................2

5 of 26
Introduction
This manual provides installation and operation information for the 16, 32 and 48 button TallyMan
Control Panels hereafter referred to as TMCP-16, TMCP-32 and TMCP-48 respectively and TMCP
collectively.
All operational set-up such as routing assignments, mnemonics and tally management are programmed
via a TallyMan controller, currently this includes the models TM1,TM2, TM2+ and TMC-1 (as of June
2013).
The TMCP is compatible with TallyMan controller software versions 1.83 onwards.
Instructions regarding operational setup can be found in the Control Panel section of the TallyMan
Manual.

6 of 26
Setup
Adding a TMCP in the TallyMan controller
To add a TMCP in the TallyMan controller click Add New Component on the System properties pane and
select “Control Panel” from the list of devices.
Figure 1
On the control panel properties pane under UCP type, select “TSL Control Panel”

7 of 26
Figure 2
Set the address, size (number of buttons) and the number of pages you wish to be able to display and
click Apply.
Click Edit Comms parameters and set the comms settings.
Figure 3

8 of 26
The TallyMan controller connects to the TMCP either serially or via TCP/IP. When connected via TCP/IP
the units act as server and client, the TallyMan Controller acting as a server and the TMCP acting as a
client.
The IP in the “Control Panel: Setup Communication” window must be left blank at 0.0.0.0 or match the IP
of the TallyMan Controller NOT the TMCP.
Figure 4

9 of 26
First time startup
On first time startup the TMCP will attempt to connect to a system controller with the default IP settings.
The default settings are available in the “Default IP Settings” section of this manual under “Connections”.
If the TMCP fails to establish comms with a system controller the “No Comms” menu will be presented.
Figure 5
To change the TMCP settings enter the “Engineering Menu” (next page).

10 of 26
Engineering menu
To access the engineering menu press the “Select Menu” button in the “No Comms” menu or push and
hold the rotary encoder knob for 5 seconds until the menu is presented.
The engineering menu is divided into 3 sections.
PSU status:
Figure 6
These buttons indicate the status of the PSUs, only PSUs enabled in the “Setup PSU” menu are displayed
here.
Comms Status:
Figure 7
These buttons indicate the comms status. The left button is illuminated green when the TallyMan
controller has responded correctly to poll requests. The orange buttons display the details of the
TallyMan controller that the panel is connected to. The right button is illuminated blue and when pressed
toggles the current comms between main and backup settings if backup comms are enabled. The Target
will switch to “Target Backup” and the new settings will be displayed if backup comms are selected.

11 of 26
Active buttons:
Figure 8
These buttons are covered individually in the following sections.

12 of 26
Panel lock
Pushing the “setup lock” button in the engineering menu presents the user with 3 options:
Off The panel lock is disabled
Manual The panel lock can be enabled by holding the encoder for 3 seconds until a padlock icon
appears in the right hand side of the of the rightmost button.
Timed If no buttons are pressed for the specified time the Panel Lock will be activated. The
timeout may be adjusted in 30 second increments using the rotary encoder knob, up to
a maximum of 30 minutes.
The currently selected mode is illuminated green.
Panel lock mode is indicated by the presence of a padlock icon in the right hand edge of the rightmost
button.
Figure 9
Panel lock may be deactivated by pressing and holding the rotary encoder knob until the padlock icon on
the rightmost edge disappears.
PSU
Pushing the “setup PSU” button in the engineering menu presents the user with four options
•PSU A Fitted
•PSU A Not Fitted
•PSU B Fitted
•PSU B Not Fitted
When a PSU is set as fitted the current status will be displayed on the engineering menu and transmitted
via the current comms settings.

13 of 26
Comms
Pushing the “setup comms” button in the engineering menu presents the user with the following options.
•Ping Main
•Ping Backup
•Panel IP
•Panel Subnet
•Panel Gateway
•Target IP
•Target Port
•Comms Mode
Panel comms settings
To set the Panel IP, Panel Subnet and Panel Gateway press the corresponding button to access the below
menu.
Figure 10
To change a value, press the octet to be changed, it will be highlighted in green. The value may now be
adjusted by turning the rotary encoder knob.
Panel controller comms settings
To set the TallyMan controller IP address press the “Target IP” button to access the below menu.
Figure 11
Target IP allows the user to set the IP of the TallyMan controller. If the backup comms are set to IP, the
option to set the backup address will be available here.
To change a value, press the octet to be changed, it will be highlighted in green. The value may now be
adjusted by turning the rotary encoder knob.

14 of 26
Main/backup modes
“Comms Mode” allows the user to set:
•Main comms
oTCP/IP
oSerial RS422
•Backup Comms
oTCP/IP
oSerial RS422
o“No Backup”.
The currently selected option is shown in green.
Testing comms
“Ping Main” and “Ping Backup” buttons are available in the comms menu, pressing these buttons will
initiate a ping to the target IP address.
The result of the latest poll is shown in the engineering menu. This is a poll to the TallyMan controller
using the TMCP protocol as opposed to a simple ping.

15 of 26
Operation
Startup
On startup the TMCP will attempt to connect to the TallyMan controller with the main comms settings.
Should this fail the TMCP will present the “No Comms” screen (Fig.8)
Main/backup comms
In the event that the main communications should fail, the user will be presented with the “No Comms”
menu.
Figure 12
Here the user may opt to attempt to re-establish the main comms or switch to backup comms (if enabled
in the comms menu).
Comms may be switched to backup via an external GPI or manually via the engineering menu for testing
and maintenance or to force failover to a backup system in emergencies that do not meet the automatic
failover criteria, i.e non response of the main controller to successive polls.
PSU failure
Should a PSU that is set as fitted in the setup PSU menu fail, a PSU failure notification will be reported via
the TMCP protocol to the TallyMan system controller.
Panel lock
Panel lock mode is indicated by the presence of a padlock icon in the right hand edge of the rightmost
button.
Figure 13
Panel lock functionality is determined via the Setup lock menu.

16 of 26
Panel lock may be deactivated by pressing and holding the rotary encoder knob until the padlock
disappears.
Connections
Signal
Connector on
rear panel
Description
-Ethernet TCP/IP
RJ45 Socket
Network comms with TallyMan controller, TallyMan set as
Network TCP/IP server
-USB
USB Socket
Future use
-Serial RS422
DB9 Female
Serial Comms with TallyMan controller
-GPI Input 1-16
DB25 Female
Configurable as inputs or outputs. Configured viaTallyMan
controller
-GPI Output 1-4
DB9 Female
4 Isolated relay outputs
Default IP settings
The default settings of the TMCP are:
Network TCP/IP Client
IP Address: 192.168.205.123
Subnet Mask: 255.255.255.0
Default Gateway: 192.168.205.254
The default Tallyman Controller settings that the TMCP will attempt to connect to are:
Network TCP/IP Server
IP Address: 192.168.205.121
Port: 8100
Panel ID: 1

17 of 26
Pin out details
Ethernet
Signal Name
RJ-45 Pin
TX +
1
TX -
2
RX +
3
EPWR + Power
4
EPWR + Power
5
RX -
6
EPWR - Power
7
EPWR - Power
8
Figure 14

18 of 26
Serial RS422
(D9 Female connector on rear panel)
Port settings:
•Baud Rate: 38,400
•Parity: None
•Data Bits: 8
•Stop Bits: 1
Pin Numbers
Signal
Pin Numbers
Signal
1
0v/Chassis
6
0v
2
TX-
7
TX+
3
RX+
8
RX-
4
0v
9
0v
5
-
To connect serially to a TallyMan controller a crossover cable will be required
RS422 crossover cable:
Signal
TMCP
TallyMan
Signal
0v/Chassis
1
1
0v
TX-
2
8
RX-
RX+
3
7
TX+
0v
4
4
0v
-
5
-
-
0v
6
6
0v
TX+
7
3
RX+
RX-
8
2
TX-
0v
9
9
0v

19 of 26
GPI 1-16
(D25 Female connector on rear panel)
Pin
Function
Pin
Function
1
GPI 1
14
GPI 9
2
GPI 2
15
GPI 10
3
GPI 3
16
GPI 11
4
GPI 4
17
GPI 12
5
GPI 5
18
GPI 13
6
GPI 6
19
GPI 14
7
GPI 7
20
GPI 15
8
GPI 8
21
GPI 16
9
-
22
-
10
-
23
-
11
Backup force-over
24
Ext Voltage ref
12
+5v
25
0v
13
0v
To activate a GPI input the pin must be pulled to ground.
These GPI may be configured as inputs or outputs by the TallyMan controller. GPI inputs will occupy the
lowest numbered pins on the connector.
GPI outputs are open collector driver circuits (10K pull-up to +5V). Common (ground) appears on Pins 13
and 25. The circuit is capable of sinking approx. 150mA to ground to activate relays etc.
An example of the open collector circuit used with GPI configured as outputs on the D25 connector is
shown below.

20 of 26
Figure 15
GPI output 1-4
(D9 Female connector on rear panel)
Pin Numbers
Signal
Pin Numbers
Signal
1
Relay 1
6
Relay 3
2
Relay 1
7
Relay 4
3
Relay 2
8
Relay 4
4
Relay 2
9
0v
5
Relay 3
These GPI outputs consist of isolated relay contact pairs. Current loading is rated at 0.5A at 125 VAC, 1A
at 24 VDC, non-inductive. Common (ground) appears on Pin 9.
The example below demonstrates the circuit required for GPI 1 on the GPI output 1-4 connector. Output
2 uses pins 3+4, output 3 uses pins 5+6 and output 4 uses pins 7+8.
This manual suits for next models
2
Table of contents
