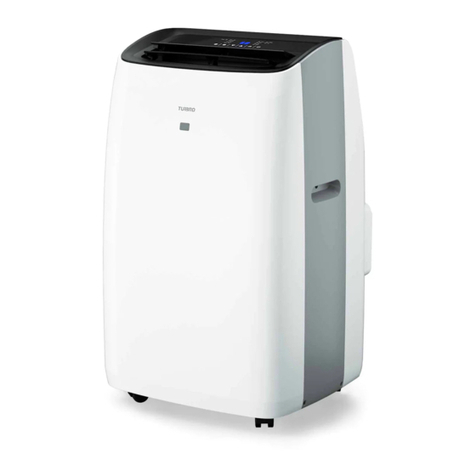
TURBRO GL9K115 User manual

USER
MANUAL
SPLIT AIR
CONDITIONER
Before using or installing your
TURBRO Split Air Conditioner,
please read this manual carefully
Model:
GL9K115 GL9K230
GL12K115 GL12K230
GL18K230
and retain it for future reference.

support@turbro.com www.turbro.com
Tips for First-Time Use
1. Allow the unit to sit upright for at least 3-4 hours before powering on. Shipping carriers may set the unit on
its side, which causes the refrigerant to pool in certain areas. Standing the unit upright for 3-4 hours allows
the refrigerant to move freely within the coils.
2. Some parts with sharp edges may cause injury, so gloves are highly recommended for unpacking and
installing.
3. If you have any difficulties during installation, please contact our Customer Support Team via
support@turbro.com for help.
4. If you have any problems with your product, please send us an email before submitting a return request, as
there might be a simple solution for your issue.
Please read this user manual carefully before installing and operating the unit.
Caution: Risk of fire
Before using the appliance, read the owner's manual first.
Before installing the appliance, read the installation manual first.
Before repairing the appliance, read the service manual first.
The figures in this manual may be different from the material objects, please refer to the material objects for
reference.
1. Do not use means to accelerate the defrosting process or to clean, other than those recommended by the
manufacturer. Should repair be necessary contact the TURBRO Customer Service Team.
2. Any repairs carried out by unqualified personnel may be dangerous.
3. Do not pierce or burn refrigerant lines or any other components.
4. Read the user manual in its entirety before beginning installation or operation.
Caution, risk of fire

support@turbro.com www.turbro.com
CONTENTS
SAFETY INFORMATION
PARTS DESCRIPTION
OPERATING INSTRUCTIONS
Operating from the Remote Control
Operating from the App
INSTALLATION INSTRUCTIONS
Indoor Unit Installation
Outdoor Unit Installation
Inspection before Use
CLEANING
Warning
Cleaning the Outer Case
Cleaning the Filter
Maintenance Checklists
TROUBLESHOOTING
MALFUNCTION CODES
WARRANTY & CUSTOMER SUPPORT
Warranty Information
Customer Support
···········································································································01
··············································································································03
··································································································06
···························································································06
·············································································································13
······························································································13
··············································································································13
···········································································································19
···············································································································26
·································································································································27
···································································································································27
············································································································27
·····················································································································27
·············································································································28
················································································································29
···········································································································30
····················································································31
·················································································································31
·····················································································································31

support@turbro.com www.turbro.com
SAFETY INFORMATION
01
Please read all instructions before use and save this user manual for future reference. A digital version can be
obtained from Customer Support.
Your safety and the safety of others are very important to us. We have provided many important safety
messages throughout this manual and on the appliance itself. Always read and follow all posted safety messages.
To reduce the risk of fire, electric shock, injury, or death to persons using or near this appliance, please follow
some basic safety precautions. These precautions include, but are not limited to, the following:
Installation and Setup
●This appliance is not intended for use by any persons (including children) with reduced or restricted physical,
mental, or sensory capabilities, or lack of experience and knowledge, unless under the direct supervision
of a person responsible for their safety.
●Please keep plastic bags and sheets out of the reach of children as they might be mistakenly used for play.
Packaging materials can become airtight chambers and may pose a risk of suffocation if not disposed of
properly.
●When installing or moving the appliance, be careful not to pinch, crush, or damage the power cord.
●Never attempt to operate this appliance if it visibly damaged, malfunctioning, disassembled or has missing
or broken parts. This includes exposed wiring on a damaged cord or electrical plugin. All repairs and
servicing must be performed by qualified service personnel. Use only authorized TURBRO factory OEM
parts.
●Keep the product away from fire. Do not store or use flammable gases or materials near the appliance.
●Do not use heating equipment near the appliance.
●In the event of a gas leak (propane gas, LP gas, etc.) do not operate this or any other appliance. Open a
window or door to ventilate the area immediately.
●The indoor unit should be installed close to the wall.
Electrical Safety Warning
●Protect the indoor unit with a fuse of suitable capacity for the maximum input current or with another
overload protection device.
●Push the power plug all the way into the wall outlet so that it will not loosen.
●Never plug or unplug the appliance with wet hands.
●Always grip the plug firmly and pull it straight out from the outlet when taking it out.
●This product should be plugged directly into a power outlet. Power outlets should be properly rated,
protected, and sized in order to avoid electrical overload.
●Do not use a multiple-outlet power strip or extension cord. Failure to do so may result in short-circuit or
electrical shock.
●Do not cut or remove the third (ground) prong from the power cord.
●Your air conditioner must be used in a properly grounded wall receptacle. If the wall receptacle you
intend to use is not adequately grounded or not protected by a time-delay fuse or circuit breaker, have a
qualified electrician install the proper wall power receptacle before using this appliance.

support@turbro.com www.turbro.com
02
●During the installation or moving of the appliance, be careful not to pinch, crush, or damage the power
cord. Always unplug the unit from the outlet before cleaning or maintenance operations.
●The batteries in the remote controller must be recycled or disposed of properly. For disposal of scrap
batteries, please discard the batteries as sorted municipal waste at the accessible collection point.
●Do not obstruct the air inlet or outlet of the indoor or outdoor unit. The obstructions cause a reduction
in the operative efficiency of the conditioner with possible consequent failures or damages.
●Do not climb onto or place any objects on the outdoor unit.
FCC Caution
This device complies with part 15 of the FCC Rules. Operation is subject to the following two conditions:
(1) This device may not cause harmful interference, and (2) this device must accept any interference received,
including interference that may cause undesired operation.
Any Changes or modifications not expressly approved by the party responsible for compliance could void
the user's authority to operate the equipment.
Note: This equipment has been tested and found to comply with the limits for a Class B digital device,
pursuant to part 15 of the FCC Rules. These limits are designed to provide reasonable protection against
harmful interference in a residential installation. This equipment generates uses and can radiate radio
frequency energy and, if not installed and used in accordance with the instructions, may cause harmful
interference to radio communications. However, there is no guarantee that interference will not occur in a
particular installation. If this equipment does cause harmful interference to radio or television reception,
which can be determined by turning the equipment off and on, the user is encouraged to try to correct the
interference by one or more of the following measures:
●Reorient or relocate the receiving antenna.
●Increase the separation between the equipment and receiver.
●Connect the equipment into an outlet on a circuit different from that to which the receiver is connected.
●Consult the dealer or an experienced radio/TV technician for help.
The distance between user and device should be no less than 20cm.

support@turbro.com www.turbro.com
03
Indoor Unit
NOTE: When the remote controller fails, press the Manual Button with insulation material.
PARTS DESCRIPTION
01
02
03
01
04
07
06 07
Air Filter
Electric Control Box
Deflector
02
05
Air Inlet
Manual Button
03
06
Front Panel
Air Outlet
04
05
Current status RespondOperation
Standby Press the manual button once It beeps briefly once and enters cool mode.
Standby Press the manual button twice
in 3 seconds It beeps briefly twice and enters heat mode.
Running Press the manual button once It keeps beeping for a while and turn off.

support@turbro.com www.turbro.com
04
Display
01
02
Indicator for Timer, Temperature, and Error codes.
Indicator for Timer Function.
Indicator for Sleep Mode.
01
02
03
03
Outdoor Unit
01
01
02
03
04
Air Outlet
Air Inlet
Wiring Box
Valve Box
02
03
04

PARTS PARTS NAME QUANTITY
Mounting plate
Wall anchors 1 set
Screws 1 set
Screws for remote control holder 1 set
Remote control 1
AAA battery 2
Remote control holder 1
Drain joint 1
Wall sleeve 1 set
Refrigerant pipe (5m) 2
Signal cable (with 4 colored wires) 1
1
support@turbro.com www.turbro.com
05

support@turbro.com www.turbro.com
06
PARTS PARTS NAME QUANTITY
Power cable
Drain hose 1
Sealing gum 1
Insulation tape 1
Rubber feetfor outdoor unit 4
1
OPERATING INSTRUCTIONS
Operating from the Remote Control
Guide plate 1

support@turbro.com www.turbro.com
07
The functions are explained in the “Function Description” section of the user manual.
Turn the air conditioner on/off.
Increase the set temperature; lengthen the time in TIMER setting.
Decrease the setting temperature; reduce the time in TIMER setting.
Select the operation mode.
Switch the TURBO mode on/off.
Long press to switch the unit of temperature.
Switch the TIMER function on/off.
Adjust the fan speed.
Switch the ECO function on/off.
Switch the MUTE function on/off.
Stop/start horizontal deflector movement or set the desired up/down airflow direction.
Stop/start vertical deflector movement or set the desired left/right airflow direction.
Switch the SLEEP mode on/off.
Switch the LED display on/off.
Switch the I FEEL function on/off.
To save the set temperature, setting mode and set fan speed as you need.
MODE
TURBO
TIMER
FAN
ECO
MUTE
SWING
SWING
SLEEP
DISPLAY
I FEEL
I SET
FUNCTIONBUTTONS

support@turbro.com www.turbro.com
08
▷AUTO MODE
The unit will automatically switch between Cool/Heat or Fan Mode depending on the ambient room
temperature.
●Press the “MODE” button until the symbol appears on the remote screen.
●Pressing the "FAN" button will adjust the fan speed.
▷COOL MODE
Ideal for hot muggy weather when you need to cool and dehumidify the room.
●Press the “MODE” button until the symbol appears on the remote screen.
●Press the or button to select your desired temperature 61°F-88°F (16°C-31°C).
●Pressing the "FAN" button will adjust the fan speed.
Function Description
MODE Button
Pressing the “Mode” button will cycle through the following modes, as shown below:
SIGNAL
AUTO MODE
COOL MODE
DRY MODE
FAN MODE
HEAT MODE
BATTERY
TEMPERATURE
UP-DOWN AUTO SWING
LEFT-RIGHT AUTO SWING
FAN SPEED
MUTE FUNCTION
TURBO
CHILD LOCK
SLEEP MODE
I FEEL FUNCTION
ECO MODE
FREEZE GUARD HEATING FUNCTION
TIMER
LIGHT
MEANINGSYMBOLS MEANINGSYMBOLS
AUTO COOL DRY FA N HEAT

support@turbro.com www.turbro.com
09
▷DRY MODE
Ideal to reduce room humidity (spring and autumn, rainy periods or damp rooms, etc).
●Press the “MODE” button until the symbol appears on the remote screen.
●In this mode, the fan speed cannot be adjusted.
▷FAN MODE
The unit only blows air, not heating or cooling the room.
●Press the “MODE” button until the symbol appears on the remote screen.
●Pressing the “Fan” button will adjust the fan speed.
▷HEAT MODE
Ideal for cold weather when you need to heat the room.
●Press the “MODE” button until the symbol appears on the remote screen.
●Press the or button to select your desired temperature 61°F-88°F (16°C-31°C).
●Press the "FAN" button can adjust the fan speed.
NOTE:
●In heating mode, the appliance will automatically activate a defrost cycle when needed. This procedure
usually lasts for 2-10 minutes. During defrosting, the indoor unit fan stops running. After defrosting, it will
resume heat mode automatically.
●If necessary, you can press the “ECO” button 10 times within 8 seconds while using the heating mode to
start forced defrosting.
FAN Button
●Press the “FAN” button to adjust the desired fan speed.
●It can be set to AUTO / MUTE / LOW / LOW-MID / MID / MID-HIGH / HIGH / TURBO speed circularly.
NOTE: The fan speed can only be changed under AUTO / COOL / FAN / HEAT mode.
SWING Button
This function is useful for adjusting the up/down or left/right swing of air circulation.
●Press the “SWING ” button to activate the deflector to swing from up to down. The icon will appear
on the remote display. Press the button again to stop the swing movement at the current angle.
●Press the “SWING ” button to activate the deflectors to swing from left to right. The icon will appear
on the remote display. Press the button again to stop the swing movement at the current angle.
NOTE: Never put fingers, sticks, or other objects into the air inlet or outlet vents. Such accidental contact
with live parts might cause damage or injury.
In heating mode, press the “SWING ” button will activate the deflector to swing up/down after
3 minutes to make sure blowing warm wind to you.
(Flash)

support@turbro.com www.turbro.com
10
SLEEP Button
This function is useful at night as it maintains the room at optimum temperature silently without excessive
fluctuations in either temperature or humidity.
●Press the “SLEEP” button to set sleep mode. The icon will appear on the remote and indoor unit display.
●Press this button again to cancel sleep mode and the icon will disappear.
NOTE:
●When in COOL MODE, the selected temperature will increase automatically during the 2nd-5th hours.
Then the temperature will automatically decrease for the next 5 hours back to the selected temperature
at the 10th hour and quit sleep mode automatically after that.
●Sleep function is available only on COOL / HEAT modes. In this mode, the fan speed is always low.
MUTE Button
●Press the “MUTE” button to activate this function, and will appear on the remote display. In this mode,
the indoor and outdoor unit will operate at the lowest fan speed to be quiet.
●When pressing the “FAN” or “TURBO” button, the mute function will be canceled.
NOTE: Mute function is available only on COOL / FAN / HEAT / AUTO mode.
TURBO Button
This function is ideal for cooling the room in the shortest time. When this function is active, the unit will
automatically be set to high fan speed.
●To activate the turbo function, press the “TURBO” button and the will appear on the remote display.
●In COOL / HEAT mode, when you select the TURBO feature, the unit will operate the fast cooling/heating
with the highest fan speed.
●To cancel this function, press the “TURBO” button again.
●Press the “TURBO” button for 3 seconds to switch the temperature scale between Fahrenheit and Celsius.
TIMER Button
This timer can be used to delay the unit start-up or shutdown. This avoids wasting electricity by optimizing
operating periods.
▷Programming start-up
●When the unit is off, press the “Timer” button, and set time will appear on the remote screen and flash.
Press or button to set desired delayed start-up time. The timer setting increases/decreases by half
an hour between 0 and 10 hours and by one hour between 10 and 24 hours. Press the “TIMER” button
again to confirm.
●When the timer is active, and set time will appear on the indoor unit display.
●After the timer setting, you can continue to set your desired mode and temperature.
●If you press the timer button again the timer will be canceled and the display will disappear.
▷Programming shut down
●When the unit is on, press the “Timer” button. Press or button to set desired delayed shut-down
time. The timer setting increases/decreases by half an hour between 0 and 10 hours and by one hour
between 10 and 24 hours. Press the “TIMER” button again to confirm.
●When the timer is active, will appear on the indoor unit screen.

support@turbro.com www.turbro.com
11
●Press the timer button again, the timer will be canceled and the will disappear.
ECO Button
In this mode the appliance automatically uses less compressor power to save energy without reducing the
cooling effect.
●Press the “ECO” button to activate ECO mode and the appears on the display.
●Press the button again to cancel it.
NOTE: The ECO function is available on COOL / HEAT modes.
I FEEL Button
This function enables the remote control to measure the temperature at its current location and send this
signal to the air conditioner to optimize the temperature around you to ensure comfort.
Normally, the ambient temperature will be based on a sensor located inside the indoor unit. In I FEEL mode,
the ambient temperature is based on a sensor in the remote control. If the remote control is unable to send
a signal back to the indoor unit, this function will automatically be turned off and will operate normally.
●Press the “I FEEL” button to activate the function, and the will appear on the remote display.
●Press the button again to cancel it.
NOTE: This function will automatically deactivate after 2 hours.
I SET Button
Remember your favorite setting and run it again by pressing one button.
▷Remember the favorite setting
●On COOL / FAN / DRY / HEAT mode, long press the "I SET” button for over 3 seconds to remember the
current setting.
●When “AU” flashing appears on the remote display, it means the remote controller remembers the setting.
NOTE: Press any button to quit remembering the procedure and you can reset it by repeating the steps.
▷Run the I SET setting
●On COOL / FAN / DRY / HEAT mode, only press the “I SET” button to activate the function.
●The appliance will run on your previous saved setting, and you will see “AU” flashing on the remote screen.
●Press the “I SET” button again or any other button to cancel this function.
DISPLAY Button
Switch the LED display ON/OFF on the indoor unit panel.
●Press the “DISPLAY” button to switch off the LED display on the panel and the will disappear on the
remote screen. Press again to switch on the LED display.
Other Functions
Child Lock Function
Long press the “MODE” and “TIMER” buttons simultaneously to switch on/off this function. When in this
mode, the remote screen will display and will not send any signal to the air conditioner.

support@turbro.com www.turbro.com
12
Freeze Guard Heating Function
This mode is useful if you are going to be away from the home for an extended period of time and want to
prevent your unit and/or water pipes in your home from freezing.
●Long press the “ECO” button over 3 seconds to switch on this function. When the function is activated,
8°C (46°F) will appear on the remote display.
●This function will automatically start heat mode when the room temperature is lower than 8° C (46°F). If
the room temperature is higher than 18°C (64°F), the appliance will cancel this function automatically.
●Long press the “ECO” button for 3 seconds to switch off this function. The unit will also be turned off.
Using the Remote
●Point the remote control toward the air conditioner.
●Check that there are no objects between the remote control and the signal receptor in the indoor unit.
●Never leave the remote control exposed to the sun.
●Keep the remote control at a distance of at least 1m from the television or other electrical appliances.
Inserting or Replacing the Batteries
●Remove the cover on the rear of the remote control.
●Insert two "AAA" 1.5V batteries in the correct position (see instructions
inside the battery compartment).
NOTE:
●If the remote control unit is replaced or disposed of, the batteries must be removed and discarded in
accordance with current legislation as they are harmful to the environment.
●Do not mix old and new batteries. Do not mix alkaline, standard (carbon-zinc) or rechargeable
(nickel-cadmium) batteries.
●Do not dispose of batteries in fire. Batteries may explode or leak.
●Remove the batteries if the remote control won’t be used for a long time.
Self-Clean Function
This function helps carry away the accumulated dirt, bacteria, etc from the indoor evaporator.
To activate this function, turn off the indoor unit first, then press the “SWING ”and “SWING ” buttons
simultaneously until hearing a beep. The “AC” will appear on the remote and the indoor unit display. This
function will run for about 30 minutes, and it will return to the previous mode when complete.
You can press the button to cancel this function during the process and will hear 2 beeps when it's
finished or canceled.
NOTE:
●It's normal if there is some noise during the process.
●We suggest operating this function at the following ambient conditions to avoid certain safety protection
features. It's suggested to utilize this function every 3 months.
Indoor unit
Outdoor unit
Temp < 86°F (30°C)
41°F (5°C) < Temp < 86°F (30°C)

support@turbro.com www.turbro.com
13
Operating from the App
This model is equipped with the Wi-Fi function. Using the AIRIA APP
you can control the air conditioner via an iPhone or Android smartphone
anywhere, even outside of your home. Please scan the QR code below or
search “AIRIA” on App Store or Google Play and download the app.
●Supported wireless routers must work with a 2.4G Hz operating frequency. 5GHz frequency is not
supported at this time.
●Standard: IEEE 802.11b/g/n
●Supported smartphone system: Android 5.0 or later iOS 9.0 or later
●Before connecting to the unit, please make sure the indoor unit is plugged in and in standby mode
(not powered on).
●Then you can connect this device with the AIRIA app. Please refer to the Quick Guide for the AIRIA app
connection guide.
●Please connect the WiFi within 3 minutes after powering on the air conditioner. If you miss the time or
have difficulty connecting to the WiFi, you can remove the power plug to reset the WiFi signal. Then
you will need to power on the air conditioner and connect by EZ mode again. The display will appear
“CF”.
NOTE:
●The APP is only compatible with smartphones and is not available for laptops or tablets.
●APP may not support the latest version of Android or iOS system because of the test of stability. Also may
not be compatible with tampered Android or iOS system.
●Due to different network situations, request time-out could happen, and it is necessary to do
network configuration again.
●Due to different network situations, the control process may return time-out (30S-60S) sometimes.
●All the illustrations in the manual are for explanation purpose only. The latest APP may be slightly different.
●The APP will continue to be updated with design and content improvements. Check for updates at the
Google Play Store or the APP Store.
Before installing the indoor unit, you need to check the label on the product box and make sure that the
model number of the indoor unit matches the model number of the outdoor unit.
Step 1: Select the Installation Location
Make sure the installation complies with the following diagrams.
Indoor Unit Installation
INSTALLATION INSTRUCTIONS

support@turbro.com www.turbro.com
14
Check the location meets the following requirements:
●Air inlet and outlet must be clear of obstructions, ensuring proper airflow throughout the room.
●Condensate can be easily and safely drained.
●All connections can be easily made to the outdoor unit.
●A mounting wall strong enough to withstand four times the full weight and vibration of the unit.
●Filter can be easily accessed for cleaning.
●Leave enough free space to allow access for routine maintenance.
●Install at least 10 ft. (3 m) away from the antenna of a TV set or radio. Operation of the air conditioner
may interfere with radio or TV reception in areas where reception is weak.
●Do not install in a laundry room or by a swimming pool due to the corrosive environment.
Step 2: Install Mounting Plate
●Take the mounting plate from the back of the indoor unit.
●Ensure you can meet the minimum installation dimension requirements as step 1. According to the size of
the mounting plate, determine the position and stick the mounting plate close to the wall.
●Adjust the mounting plate to a horizontal state with a bubble level, then mark out the screw hole positions
on the wall.
●Set the mounting plate down and drill holes in the marked positions with a drill.
●Insert included wall anchors into the holes, then hang the mounting plate and fix it with screws.
NOTE: Make sure the mounting plate is firm enough and flat against the wall after installation. You can
use the guide plate to help positioning.
Bubble level
Ceiling
Floor

Step 3: Drill Wall Hole
●Determine the location of the wall hole base on the position of the mounting plate.
●The hole should have a 70mm diameter at least and a small oblique angle to facilitate drainage to the
outdoors.
●Drill the wall hole with a 70mm core drill and with a small oblique angle lower than the indoor end about
5-10mm.
●Place the wall sleeve in the hole to protect the connection parts.
Caution: When drilling the wall hole, make sure to avoid wires, plumbing, and other sensitive components
already in your home.
70mm
Wall sleeve
Indoor
5-10mm
support@turbro.com www.turbro.com
15
Step 4: Connecting Refrigerant Pipe
●According to the wall hole position, select the appropriate piping mode. There are 3 optional piping modes
for indoor units as shown in the figure below:
●In Piping Mode 1 or Piping Mode 3, a notch should be made by using scissors to cut the plastic sheet of
piping outlet on the corresponding side of the indoor unit.
NOTE: When cutting off the plastic sheet at the outlet, the cut should be trimmed to smooth.
●Take off the plastic cover in the pipe ports and take off the protective cover on the end of the piping
connectors.
●Check whether there is any debris on the port of the refrigerant pipe and make ensure the port is clean.
●Bend the refrigerant pipes with the port facing up as shown in the figure below.
3
2
1
NO
YES

●There is asmall amount of refrigerant inthe pipe for testing before it leavesthe factory. When
unscrewing the screw capof the refrigerant pipe, there will beasound toindicate the refrigerant has not
leakedduring transportation. Ifthere is nosound,the pipe may bebroken, please check for leaks or
contact the customer support team.
●After aligning the refrigerant pipes, rotate the nut of the refrigerant pipe and tighten it as tightly as
possible by hand. Please pay attention that over-tightening may damage connections and cause leaks.
●Use a proper torque wrench to tighten it according to the Torque Table below.
●Wrap the joint with the insulation pipe.
support@turbro.com www.turbro.com
Newton meter
18 - 20
30 - 35
45 - 50
60 - 65
Inch (mm)
1/4 (6.35)
3/8 (9.52)
1/2 (12.00)
5/8 (15.88)
Pound-force foot
24.4 - 27.1
40.6 - 47.4
61.0 - 67.7
81.3 - 88.1
Kilogram-force meter
2.4 - 2.7
4.1 - 4.8
6.2 - 6.9
8.2 - 8.9
TIGHTENING TORQUEPIPE SIZE
16
Step 5: Connect Drainage Hose
●In some models, both sides of the indoor unit are provided with drainage ports so you can choose one of
them to attach the drainage hose. Plug the unused drain port with the rubber attached to one of the ports.
●Connect the drainage hose to the drainage port, and ensure the jointis firm and fully sealed. Wrap the
joint firmly with insulation tape to avoid any leaks.

support@turbro.com www.turbro.com
17
the position of the control box from the back
●Open the front panel of the indoor unit. Use a screwdriver to open the electric control box cover and
reveal the terminal block.
●Unscrew the cable clamp. Choose the signal cable with 4 colored wires, and insert one end of the cable into
of the right end of the indoor unit.
NOTE: Make sure there are no twists or dents, and the pipes should be placed obliquely downward to avoid
blockage.
Step 6: Connect Signal Cable
●Choose the correct cable size determined by the maximum operating current on the rating label and
table below.
16
9
17
11
13
GL9K115
GL9K230
GL12K115
GL12K230
GL18K230
2.5
1.0
2.5
1.5
1.5
AWG 14+
AWG 18+
AWG 14+
AWG 16+
AWG 16+
Minimum Wire
Cross-sectional Area (mm )
2Recommended Wire GaugeModel Min. Circuit Ampacity (A)
This manual suits for next models
4
Table of contents
Other TURBRO Air Conditioner manuals
Popular Air Conditioner manuals by other brands

Ingersoll-Rand
Ingersoll-Rand EBC180-300 Installation, operation and maintenance

LG
LG Multi V PRHR041 installation manual

LG
LG LAN090HSV Service manual

Mitsubishi Electric
Mitsubishi Electric MSZ-GL25VGD operating instructions

Fujitsu
Fujitsu Inverter 9316796003-01 operating manual

Sabiana
Sabiana JANUS 05 Installation and maintenance manual

Friedrich
Friedrich Vert-I-Pak A-Series Installation & operation manual

Mitsubishi Electric
Mitsubishi Electric PAC-KE250TB-F installation manual

CLIVET
CLIVET Box-SM 2 650x650 Installation and operating manual

Klarstein
Klarstein 10029808 user manual

Daikin
Daikin FVXS09NVJU Operation manual

Haier
Haier HW-18HI03 Operation manual