Turku Bioscience Zeiss LSM780 User manual

Contents
1. Information .....................................................................................................1
2. Before Imaging ................................................................................................2
2.1 Check your sample with an ordinary fluorescence microscope............................. 2
2.2 Clean your slides................................................................................................. 2
2.3 Check the environment....................................................................................... 2
2.4 Start the heating earlier if possible...................................................................... 2
2.5 Cancellation ....................................................................................................... 2
2.6 Unsure?.............................................................................................................. 2
3. Working with immersion objectives.................................................................3
4. Starting up and shutting down the instrument.................................................4
4.1 Start up.............................................................................................................. 4
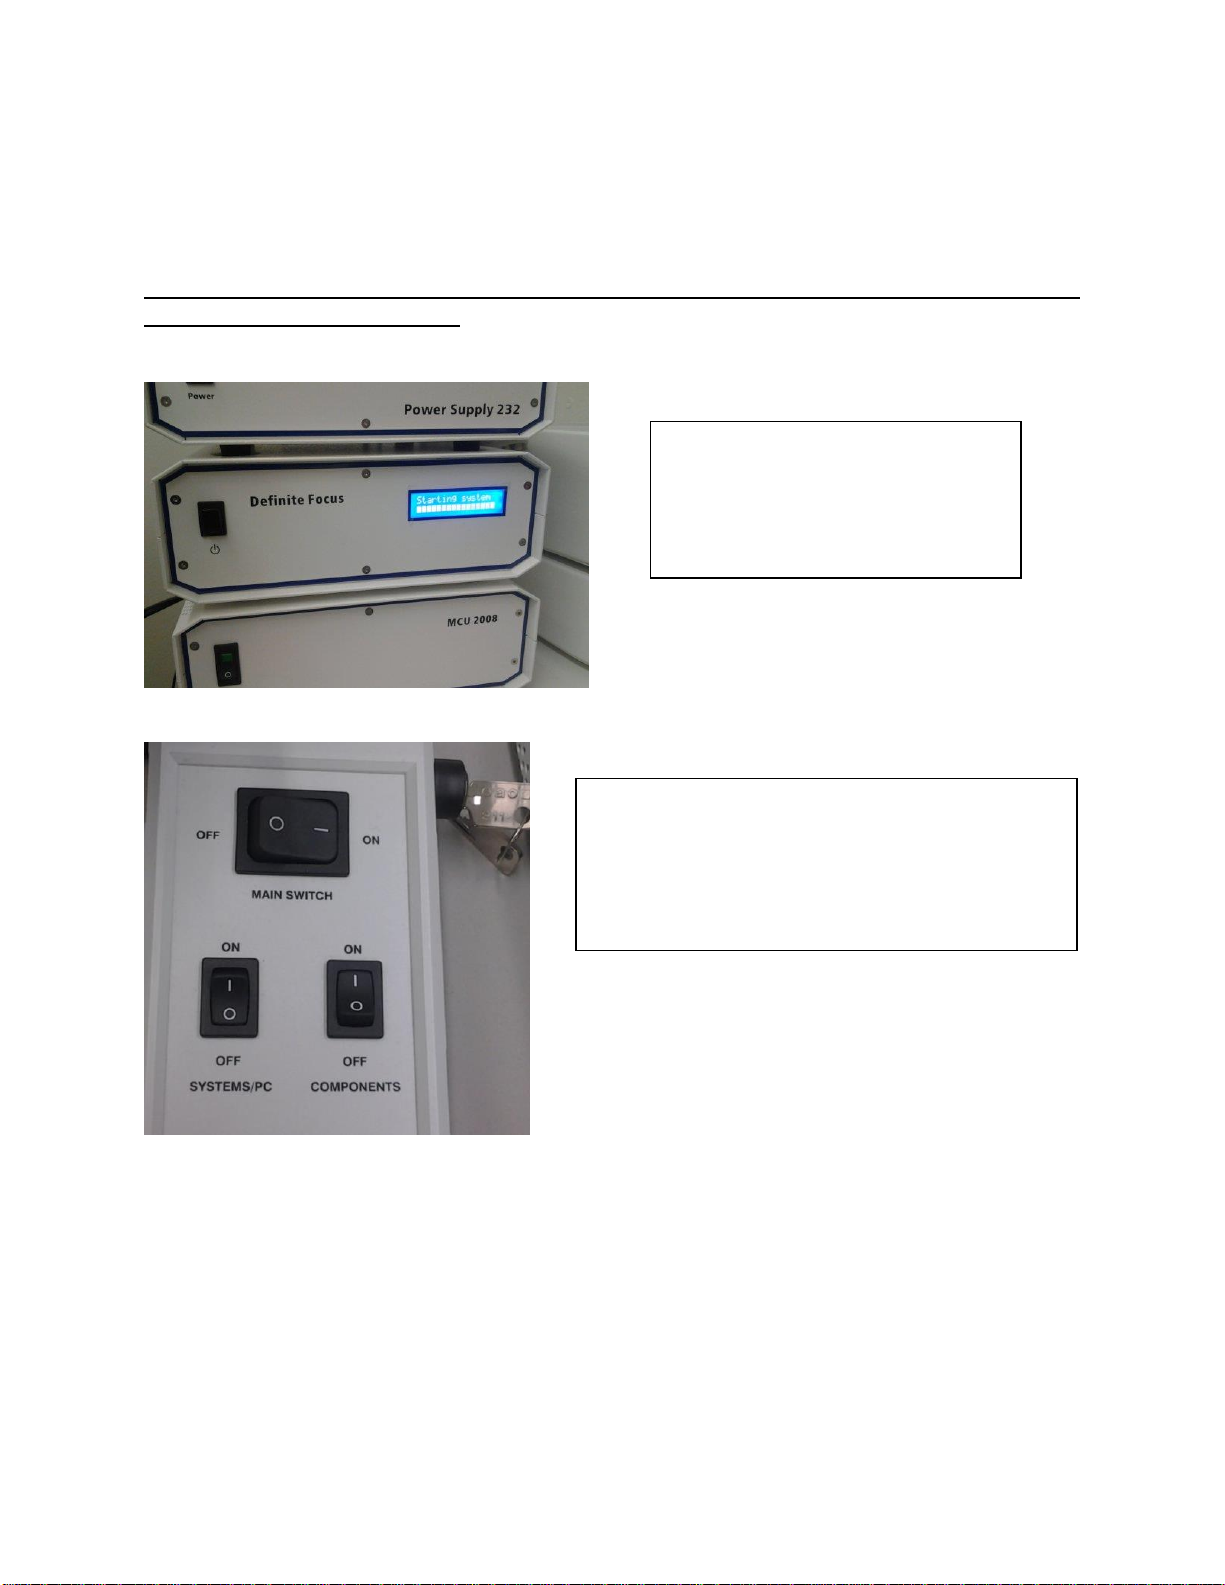
4.1.1 Definite focus........................................................................................................4
4.1.2 Main switches.......................................................................................................4
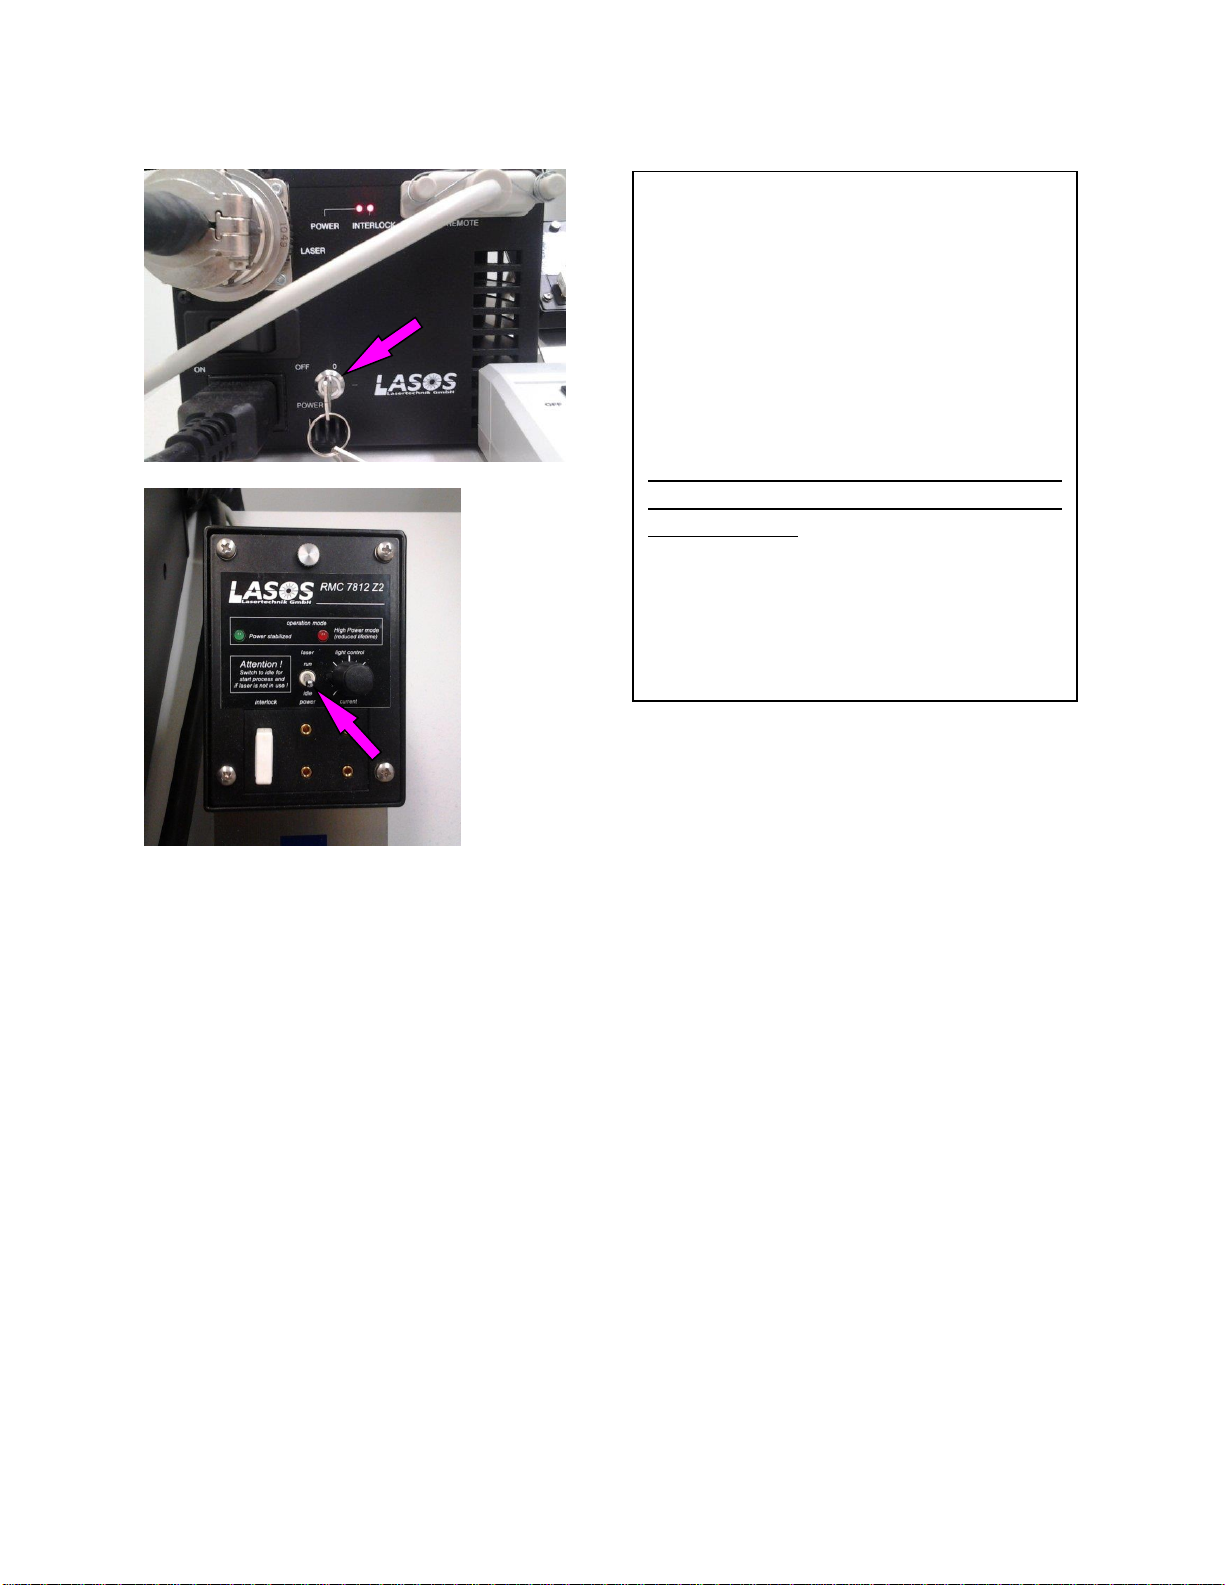
4.1.3 Argon laser............................................................................................................5
4.2 Shut down.......................................................................................................... 5
5. Starting the Zen software ................................................................................6
5.1 Start the ZEN software........................................................................................ 6
6. Using the fluorescence microscope ..................................................................7
6.1 Visualizing the sample in ocular mode................................................................. 7
6.2 Using the confocal microscope settings ............................................................... 8
6.2.1 Reusing settings from previous experiments .......................................................8
6.2.2 Setting up new experiment ..................................................................................8
6.2.3 Using Smart Setup ................................................................................................8
6.2.4 Manually create light paths..................................................................................9
6.2.5 Visualise sample on screen...................................................................................9
6.2.6 Adjust the Channels............................................................................................10
6.2.7 Acquire images ...................................................................................................10
6.3 Experiments ..................................................................................................... 11
6.4 Z-stacks............................................................................................................ 11
7. Live Cell experiments.....................................................................................12
7.1 Live imaging equipment set up.......................................................................... 12
7.2 Setting up time-lapse........................................................................................ 13
8. Troubleshooting ............................................................................................14
8.1 Do not see fluorescence in the Locate mode...................................................... 14
8.2 Weak signal with the Argon laser...................................................................... 14
8.3 Argon does not start......................................................................................... 14

1
1. Information
The Cell Imaging and Cytometry Core is responsible for maintenance of this microscope.
Each user must follow the CIC user policy.
More information: https://bioscience.fi/services/cell-imaging
Only authorized users may use the CIC instruments.
Users must report any malfunction or problem to the CIC
personnel.
The user is responsible for removing their data from the hard
drive and should do so immediately.
Files older than 30 days are automatically wiped from the
system without prior notice

2
2. Before Imaging
2.1 Check your sample with an ordinary fluorescence microscope
It is a good practice to check the quality of your sample before making use of a
more expensive instrument.
2.2 Clean your slides
Clean the remaining salt and mounting medium off the coverslip. Dirty coverslip
compromises the image quality. You can use ethanol to aid the cleaning. Do not
use the microscope lens tissue. Clean your slides beforehand in your own lab, as
it is impractical to use microscopy time for cleaning.
2.3 Check the environment
Switch on the lights and check if the microscope environment is tidy.
If there are oil spills or other issues, please inform CIC personnel.
2.4 Start the heating earlier if possible
Whendoing live cell imaging, it is good to switch on the heating at least two hours
in advance. If someone is using the instrument, ask whether it is possible to
switch it on. If no one is using the instrument, start the instrument and switch on
the heating.
2.5 Cancellation
Cancellation must be done 24 hours before the reservation starts. However, if
you suddenly cannot use your time, inform the next user and cancel your
reservation.
If you are the last user of the day and cannot come, you are responsible for the
instrument shutdown.
2.6 Unsure?
If you feel that you need support, please contact CIC personnel.

3
3. Working with immersion objectives
The immersion medium should match the objective.
The 40x and 63x objectives need water or oil with a refraction index of 1.334. For
fixed samples and short time experiments, MilliQ water is appropriate
For long experiments water immersion oil is more suitable. The water immersion
bottle is marked with a W; the water-oil is very fluid and must be applied very
carefully.
The 100x objective needs oil with a refraction index of 1.518. This oil is more
viscous than the water immersion oil.
The image will be suboptimal when incorrect oil is applied. Do not mix immersion
oils.
A small drop of oil is enough, as too much will make a mess, damaging the
instrument.
Start imaging with the objective in the lowest position. Then, focus the objective
upwards until the oil touches the coverslip. Next, focus the sample visually through
the eyepieces.
After imaging, wipe the oil off from the objective softly with a dry lens tissue. Then,
finish the cleaning by wiping softly with a new lens tissue moistened with
isopropanol. Only lens tissue may touch the objective lens.
When changing the sample with the immersion objective, the objective must be
lowered (inverted microscope) in between.
Press Load position in the remote unit, in the software (Focus window) or on the
top of the right focusing knob (closest, front most button). Objective moves down.
Remove the sample and add oil if needed
Place the new sample. If you are changing the objective in between, wipe the
objective clean with a drylens tissue. Otherwise, oil might spill into themicroscope.
Press Work position in the remote unit, software or on the top of theright focusing
knob (second button). The objective will move up into the position before Load was
pressed. It should be very close to the correct focus position.

4
4. Starting up and shutting down the instrument
4.1 Start up
Note: Switch lights on and check that the environment is clean. If you see some issues,
report them to CIC personnel.
4.1.1 Definite focus
4.1.2 Main switches
1
3
2
1. Main on.
2. Systems/PC on. The computer starts.
3. Components on.
If needed, plug in and switch on
definite Focus.
If definite focus remains off Zen
will give an error on start up.

5
4.1.3 Argon laser
4.2 Shut down
If you are NOT the last user of the day
Clean the immersion objectives you used.
Leave the Argon laser to standby mode.
Remove your data.
If you ARE the last user of the day, additionally:
Switch off all lasers through the software (incl. Argon).
Bring objective down.
Close the ZEN software.
Shut down the computer.
Switch off Systems/PC and Components.
Be sure that Argon cooling has finished (you will hear fan switch off).
Switch off Main.
Turn the key on the Lasos control unit
from 0 to 1.
Switch the Argon stand-by switch from
Idle to Run.
The warm-up process will take several
minutes. The green LED will lit when
the laser is ready to use.
Note: the Argon laser will emit light also
when in Idle but the light intensity is
much weaker.
Do not touch the light control knob (the
laser current selector). However, if the
red LED is on, turn the knob counter-
clockwise until the red light goes off.

6
5. Starting the Zen software
5.1 Start the ZEN software
Click the Start System button
Choose Acquisition
Switch on the lasers
Start-up will take a few minutes; a
loading bar will be visible.
If there are any errors, contact CIC
personnel
Switch on the lasers you need.
The Diode 405 is always on.

7
6. Using the fluorescence microscope
6.1 Visualizing the sample in ocular mode
! NOTE: the first user must manually open the RL shutter on the Zeiss touchpad!
1Choose the Locate tab to view
sample using the oculars.
2Transmitted light turn on bulb
and open the shutter.
3Objective lenses:
10x/0.45 dry
20x/0.80 dry
40x/1.2 Water
63x/1.2 Water
100x1.4 Oil
4 RL Reflected light shutter
(fluorescence)
5 Fluorescence filters:
• DAPI
•GFP
• RFP
•Analyser filter
(Polarization imaging)
•NoneLSM
(Confocal imaging)
1
2
3
4
5

8
6.2 Using the confocal microscope settings
6.2.1 Reusing settings from previous experiments
6.2.2 Setting up new experiment
6.2.3 Using Smart Setup
If you have earlier acquired
images with desired light paths,
open the image and use the
Reuse button.
To create new light paths, you
can
Use the Smart Setup or create
them manually.
You can save a new imaging
configuration you created or
open an existing configuration
The Smart Setup function
allows you to insert your
fluorophores and the software
will provide light path
suggestions.
Choose your fluorophore from
the dropdown box
Fastest scans your labels with a
single scan. This gives the most
spectral cross talk/ bleed-
through and should be avoided.
Best signal scans the light
paths separately and is the most
suitable option for everyday use.
Smartest (Line) reduces the
number of scans and groups
together light paths, which
would produce least cross talk.

9
6.2.4 Manually create light paths
6.2.5 Visualise sample on screen
1
2
3
5
1Click + or trash button to add or delete track.
2 Ch1 is a standard photomultiplier tube
(PMT).
ChS1 is a very sensitive detector, for very
weak/sensitive samples.
Ch2 is a cooled PMT, which is more (red-)
sensitive than Ch1.
Once you select your fluorophore, an emission
spectrum appears. You can adjust the slider,
which will change the range of the emission
filter.
3 Visible light includes Argon and both HeNe
lasers.
Invisible light contains the 405nm diode.
4 You must select the correct mirror to reflect
the laser line toward the sample (arrow)
5 T-PMT is used for collected transmitted light
from lasers to create a wide field image.
The buttons mentioned here are used to
visualise your sampleon screen. One you have
selected 1 track (like in the adjust channels
image) you can start optimizing the
visualization of your sample.
AF Find Focus and Set Exposure are
automatic methods. They take extra time and
are not necessarily optimal compared to
manually doing so.
Live continuously scans the sample in a fast
(maximum) speed.
Continuous scans continuously like Live, but
with a final (Snap) image quality.
Snap takes a snapshot.

10
6.2.6 Adjust the Channels
6.2.7 Acquire images
1 Expand all shows all available tracks.
2Laser power and activated lasers can be
adjusted.
Adjust pinhole to equalize the optical
Section thicknesses in each channel.
Do not equalize the Airy units.
Gain (Master) defines the PMT gain
(brightness). Too much gain produces noise in
the image.
Digital Offset adjusts the background intensity
level. When using the range indicator, zero
pixels are blue. Increasing the Digital Offset
brings up the background and blue pixels
disappear.
Digital Gain increases the PMT gain but canalso
create more noise.
1 Objective can be chosen both here and in
the Locate window.
2 Click Optimal for the maximum resolution for
current objective and zoom level.
Increasing the Line Step value increases
scanning speed as fewer lines are scanned.
Decreasing the Speed and increasing the
Averaging increases signal-to-noise ratio with
the cost of increased photo bleaching and
acquisition time.
Unidirectional scanning has more accuracy
but a slower scan speed than bidirectional.
Scan Area defines the zoom level and angle.
1
2
3

11
6.3 Experiments
6.4 Z-stacks
Experiments are for a protocol
more advanced than a single z
slice.
They are activated by ticking
desired boxes through the
corresponding window.
Once parameters are selected
they will open and new window,
such as for z-stack.
Execute experiments through
Start Experiment button
During Live scan, mark the lowest and
highest desired focus levels with Set
First and Set Last.
Selecting Optimal will calculate the best
interval between slices based on
objective and lasers selected.
Alternatively, interval between Z-slices
or number of Z-slices can be manually
adjusted.
NOTE! Keeping interval spacing will
alter the Z-range. Keeping slices will
keep Z-range and alter intervals
between Z-slices.
Execute the procedure with the Start
Experiment button

12
7. Live Cell experiments
7.1 Live imaging equipment set up
Check that there is distilled
water in the humidifier bottle.
Place the heating insert onto the stage. Place your sample into the insert.
Place the CO2incubator lid onto the heating insert. Make sure the air holes on the lid
are facing the sample.
Switch on/off the incubator and CO2through
the software. Typically, 37°C and 5% CO2are
used for normal cell imaging.

13
7.2 Setting up time-lapse
Setting up a time-lapse mean you can allow the software to run the experiment without
the need to be at the microscope. You optimized your imaging set up and then you tell
the software how often to capture and how long to wait between captures.
Time Series is activated in the
Experiments (page 11)
Tick Show all to reveal more options
Cycles specifies thenumber of times you
want to run your image capture set up
Interval specifies the gap of time
between each captured image
The combination of cycles and interval
will determine how long the experiment
runs.

14
8. Troubleshooting
8.1 Do not see fluorescence in the Locate mode
Check that that the HBO 100 lamp unit is on and manually open the FL shutter in the
touch-screen control unit.
8.2 Weak signal with the Argon laser
Check that the switch is in Run mode, not Idle.
8.3 Argon does not start
The LASOS cooling unit is perhaps switched off.
Table of contents