twisted electrons TherapSID User manual

TherapSID
USER MANUAL
Note: All functions apply to MKII and MKIII
May 2nd 2023
of 231

Thanks! Overview
Thank you for adopting TherapSID, the ultimate SID synth!
About the SID chip:
The MOS Technology 6581/8580 SID (Sound
Interface Device) is the built-in Programmable
Sound Generator chip of Commodore's CBM-II,
Commodore 64, Commodore 128 and Commodore
MAX Machine home computers. It was one of the
first sound chips of its kind to be included in a
home computer prior to the digital sound
revolution.
Read more: http://en.wikipedia.org/wiki/
MOS_Technology_SID
I want to express my gratitude to several people who have
made TherapSID what it is. First and foremost, a special
thanks goes out to Windfisch for completely overhauling the
code and providing invaluable guidance and mentorship
throughout the process.
I would also like to thank Sequence7 and Oemsysadm for
their valuable feedback, I also want to extend my thanks to
ThomasJ for his exciting contributions to the project.
Thanks to Themis for all the testing and concept contributions
over the years and on going.
The TherapSID code is now open-source and available on
GitHub so please feel free to join the party!
https://github.com/twistedelectrons/TherapSID
Please use GitHub if possible to submit feature requests and bug reports!
Enjoy!
of 232

Connectivity & Power (rear view)
TherapSID features from right to left
-Power input: TherapSID requires a centre positive DC voltage source of 15v
at least 200mA
-1/4” audio inputs and outputs for both chips (mono TS)
-MIDI input & output
-CV pitch input, Gate input (1/8” TS mono)
(only active when in monophonic mode)
-3 LFO override CV inputs (1/8” TS mono)
The Audio ins enables you to run any audio signal through the SID filter path.
of 233

Presets
TherapSID comes preloaded with a total of 99
assorted presets get you started. It is important to
note that these presets are fully customisable and
can be modified to suit individual preferences.
It is worth mentioning that the presets were
developed specifically using the 6581 variant of the SID chip. Consequently,
there is a possibility that the presets may sound slightly different when used
with other SID variations.
Load
To change the preset, press the up/down buttons. Additionally, holding down
either button will result in accelerated scrolling in the corresponding direction.
The preset number will be displayed on the device's screen.
Save
It is possible to save the current sound to any preset slot by following these
steps:
-Activate the save mode by simultaneously pressing both preset up and down
buttons. The destination slot number will flash on the display.
-Choose the desired destination slot by pressing the preset up or down button.
-Save the current sound to the selected slot by pressing both preset up and
down buttons.
To cancel the save operation, press the reset button.
Preset Reset
Press reset to quickly load preset 1 - a useful preset to use as a starting point.
Preset Randomiser
To randomise the preset, simply hold down the reset button for a duration of 2
seconds.
of 234

Voice Section
TherapSID’s 3 voices are laid out across the top half of the control panel. The
3 voice strips are identical in functionality, explained from left to right:
Waveforms
Each voice each consists of 4 waveforms:
Square,Triangle,Sawtooth and Noise.
Press the corresponding button to enable or disable a waveform (indicated by
LED).
Note: Multiple waveforms can be active at the same time.
Pulsewidth
The pw knob adjusts the duty cycle of the square waveform.
Note: this has no effect on the other waveforms, only square.
Tune
The tune knob transposes the voice in semitone increments. The tune ranges
from -12 to +12 semitones (2 octaves), indicated by the 7 segment LED
display.
Twelve ‘o clock knob position is zero.
Fine
The fine knob fine tunes the voice (+/-1 semitone range)
Twelve ‘o clock knob position is centre.
Master Volume
Hold filter mode and adjust the scrub knob to set the master volume. Lowering
the volume can reduce distortion when playing all voices at once.
of 235

Paraphonic Mode
TherapSID has two voicing modes: unison and paraphonic. In unison mode, you can
play a single note at a time. This will trigger the 3 voices at once. Paraphonic mode
allows you to play up to three different notes simultaneously by splitting the 3 voices
into separate notes.
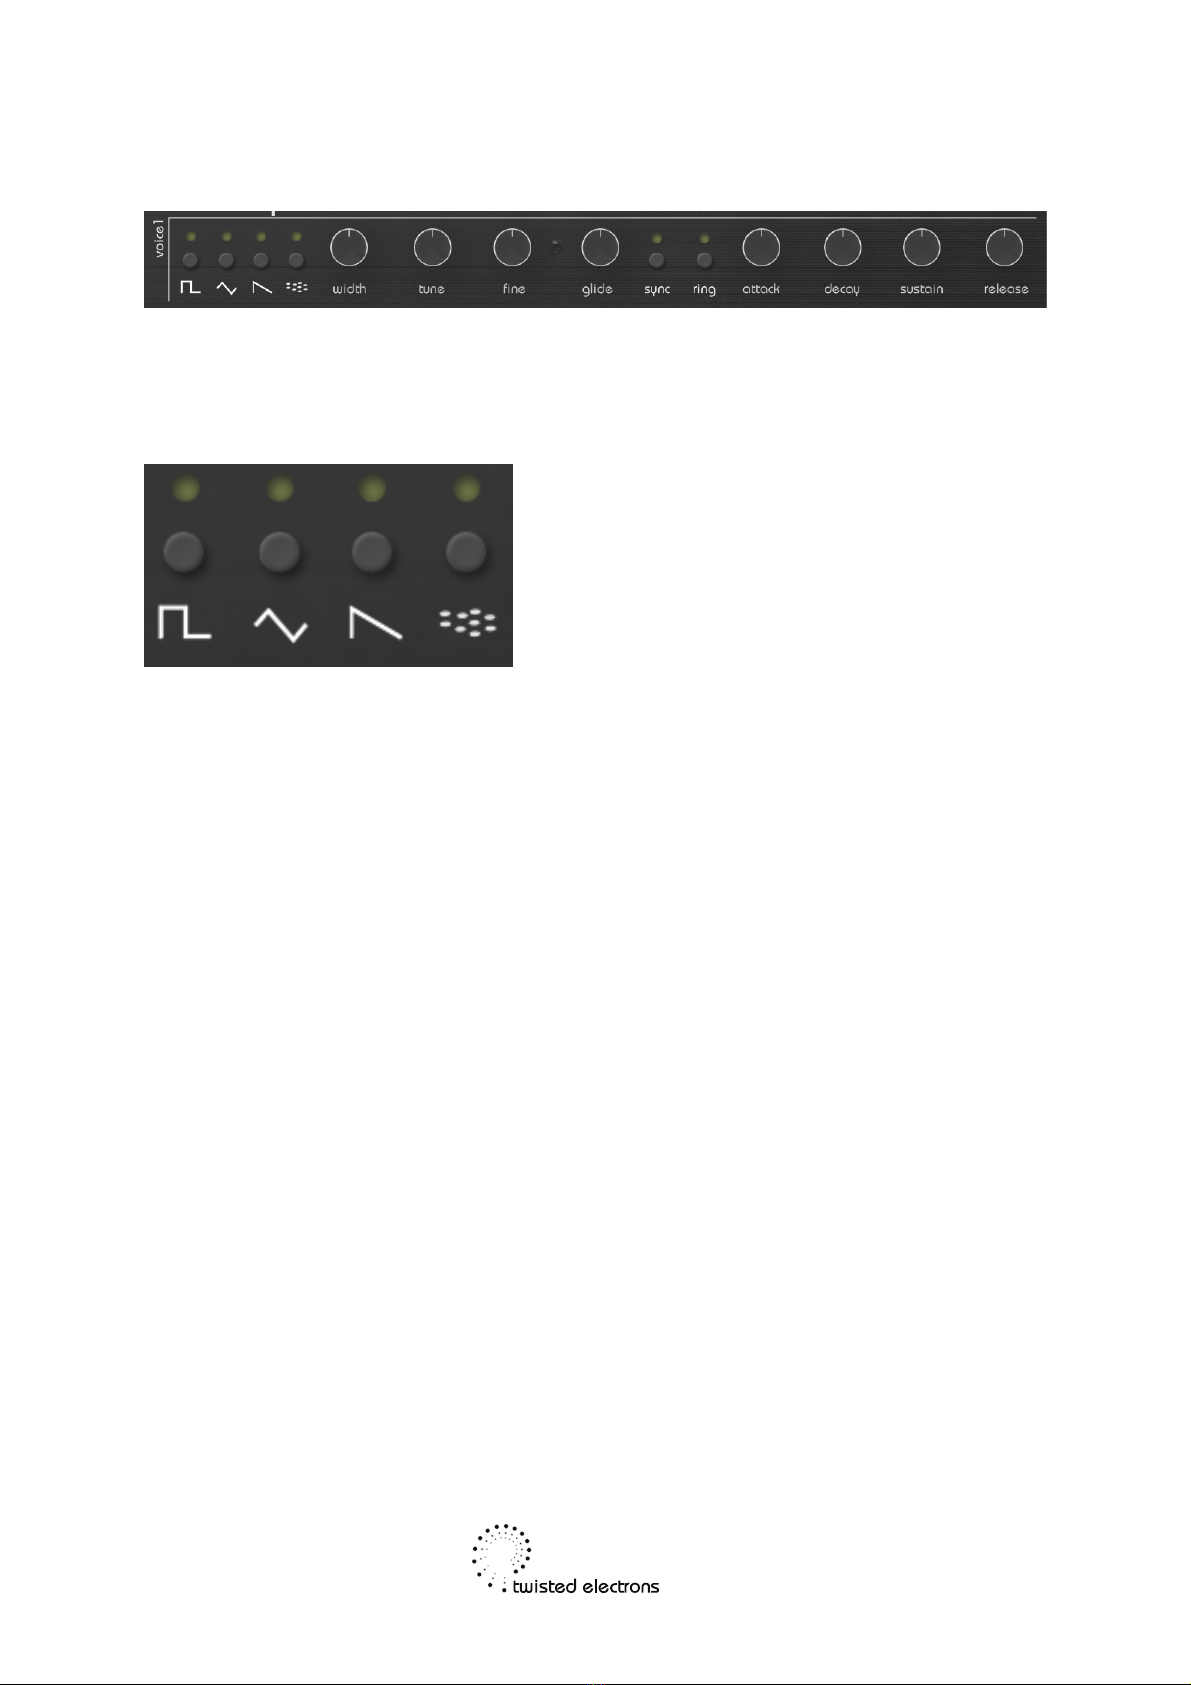
To activate paraphonic mode, hold a waveform button on voice 1 for two
seconds. The LED display will show "PA" to indicate that paraphonic mode is
active. Voices 2 and 3 will now mirror the parameters of voice 1. To switch
back to monophonic mode, hold a waveform button on voice 1 again for two
seconds. The LED display will show "OF" to indicate that monophonic mode is
active.
Fat Modes
TherapSID also supports a second SID chip, and there are several "Fat
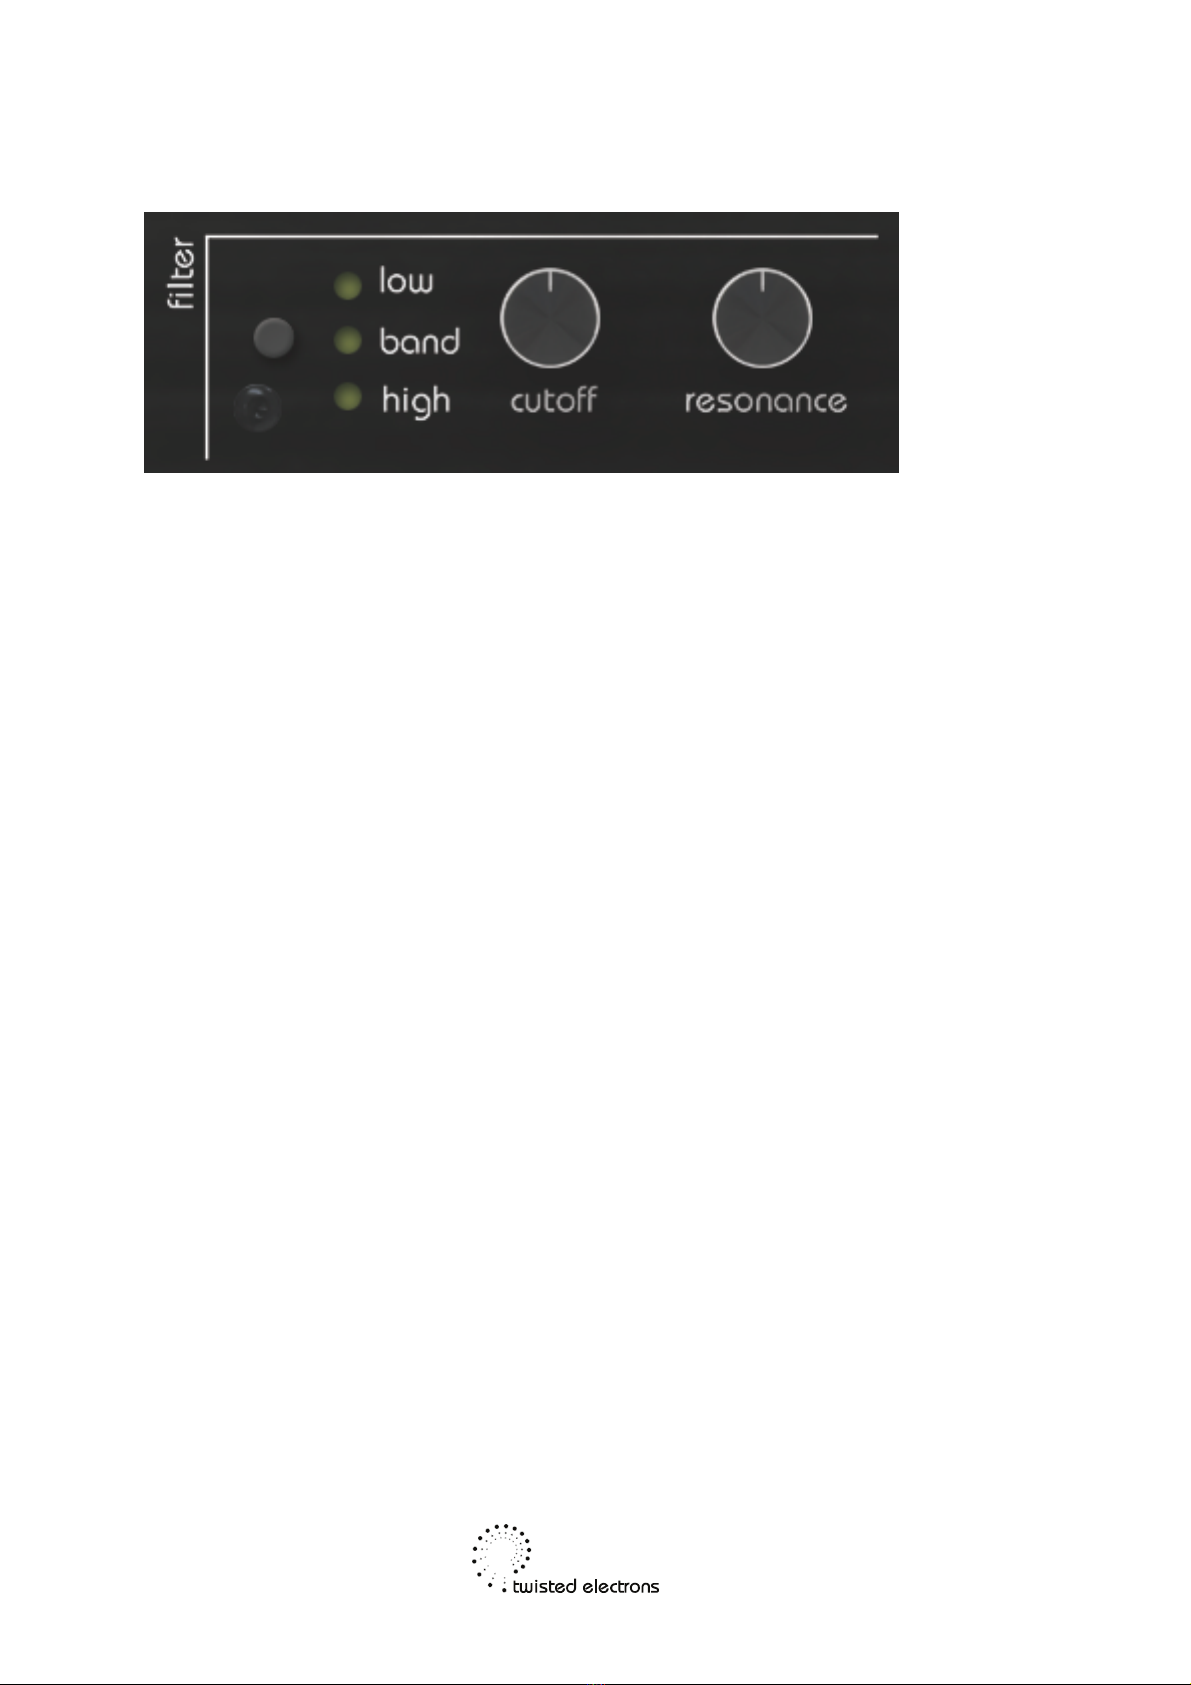
Modes" available that allow you to take advantage of both chips. To switch
between the different Fat Modes, hold down the filter button and press the arp
mode button. The corresponding Fat Mode number will be displayed on the
screen. Note that some Fat Modes may exhibit different behaviours depending
on whether or not paraphonic mode is active.
Here are the available Fat Modes:
Mirror Mode (F1): Both chips have the exact same data transmitted.
Octave Mode (F2): Chip #1 is one octave above Chip #2.
Slightly Detuned Mode (F3): The two chips are slightly out of phase, creating
nice panorama effects.
Heavily Detuned Mode (aka Super Fat Mode) (F4): Six saw oscillators create
an incredibly thick and fat sound.
Polyphonic Modes (F5): When paraphonic mode is active, you can play up to
six notes at once, spread across both chips. When paraphonic mode is
deactivated, you can play two notes at once, each consisting of three voices in
unison.
Two-Voice/Three-Note Mode (F6, only available in paraphonic mode): This
mode enables you to play up to three notes at once, each consisting of two
voices (1 and 2). In this mode, you have access to the parameters of both
voice 1 and voice 2 to craft your sound.
of 236

Auto Chord
To use the auto chord feature on the TherapSID, please follow these
instructions:
1- Hold down a chord on your MIDI keyboard.
2 - While still holding the chord, press and hold the arp mode and press the
retrig button to engage the auto chord feature.
To free up your hands for pressing buttons, we recommend using the sustain
pedal.
If you wish to disengage auto chord, simply repeat the same button presses
as before.
Note that if you activate auto chord without holding down any keys, the
TherapSID will select a chord from its built-in selection.
Glide
Adds glide aka portamento to the synth’s pitch.
More glide=longer portamentos/slides.
Sync
When set on voice1, Synchronizes the fundamental frequency of Oscillator 1
with the fundamental frequency of Oscillator 3, producing “Hard Sync” effects.
Varying the frequency of Oscillator 1 with respect to Oscillator 3 produces a
wide range of complex harmonic structures from Voice 1 at the frequency of
Oscillator 3. In order for sync to occur Oscillator 3 must be set to some
frequency other than zero but preferably lower than the frequency of Oscillator
No other parameters of Voice 3 have any effect on sync.
of 237

Ring Mod
When set to voice 1 or 3, replaces the Triangle waveform output of that voice
with a “Ring Modulated” combination of Oscillators 1 and 3.
When set to voice 2, replaces triangle waveform output of voice2 with a “Ring
Modulated” combination of Oscillators 2 and 1.
Varying the frequency of Oscillator 1 with respect to Oscillator 3 produces a
wide range of non-harmonic overtone structures for creating bell or gong
sounds and for special effects. In order for ring modulation to be audible, the
Triangle waveform of Oscillator 1 must be selected and Oscillator 3 must be
set to some frequency other than zero. No other parameters of Voice 3 have
any effect on ring modulation.
Volume Envelopes - ADSR
The "attack" and "decay" of a sound have a great effect on the
instrument's sonic character. ADSR envelope is specified using four
parameters:
• Attack time is the time taken for initial run-up of level from nil to
peak, beginning when the key is first pressed.
• Decay time is the time taken for the subsequent run down from the
attack level to the designated sustain level.
• Sustain level is the level during the main sequence of the sound's
duration, until the key is released.
• Release time is the time taken for the level to decay from the
sustain level to zero after the key is released.
of 238

Filter
The SID chips are equipped with a multimode resonant filter.
The filter is the analog section of the circuit and its warm/dirty sound
contributes to the authentic SID character.
Filter Modes
Press the filter button to toggle through the 4 filter states:
Off, Low Pass, Band Pass, High Pass, Low Pass+ High Pass (notch)
Cutoff
The cut knob adjusts the filter cutoff frequency
Resonance
The res knob adjusts the filter’s resonance
Note: The resonance is more or less pronounced depending on the type of
SID chip.
Filter Routing
One can connect or disconnect any of the three voices to and from the filter.
To do so, hold down the filter mode button, which will display the voices that
are currently connected to the filter. When a voice is connected, the waveform
LEDs will light up. To connect or disconnect a voice from the filter, press any
of its waveform buttons.
of 239

Modulation (LFO)
TherapSID has 3 LFOs to bring your synth to life!
Note: the LFO values can also be transmitted as midi CCs to modulate other
MIDI capable instruments.
LFO Waveforms
There are 5 LFO types to choose from:
Square, Triangle, Saw, Noise and Env3 (ADSR envelope of voice 3).
-Move either of the 3 LFO’s depth or rate knobs to select that LFO.
-Press the lfo shape buttons to change the selected LFO’s shape.
You can also assign no shape at all by pressing a readily lit shape.
In this case the LFO’s depth knob becomes a manual controller.
Assigning LFOs to knobs
You can link any of the three available LFOs to the following knobs:
Filter Cutoff, Filter Resonance, Tune1, Tune2, Tune3, Fine1, Fine2, Fine3,
Width1, Width2, Width3, LFO Depth1, LFO Depth2, LFO Depth3, LFO Rate1,
LFO Rate2, LFO Rate3, Arpeggiator Scrub, Arpeggiator Range, Arpeggiator
Rate
Simply manipulate the desired knob and then press the chain button
of the LFO you wish to link to it. The chain LED will light up,
indicating that the LFO is now linked to the selected knob.
Should you need to unlink the LFO, simply press the link button
again, and the chain LED will deactivate. It's important to note that
you can link a single LFO to multiple knobs!
of 2310

Re-trigger & Loop
the LFOs can be used as "one-shot" envelopes by
deactivating the looping feature using the loop button. This
is useful for achieving pitch decay on percussive sounds
and other effects. Additionally, the LFOs can be re-
triggered on every key press by toggling the retrig button.
CV Override
Each of the three LFOs can be overridden using the corresponding CV input
jack. By plugging a 1/8" mono jack into the desired CV input, you can take
control of the LFO with an external source. The expected CV range is 0-5v
DC.
Arpeggiator
TherapSID MKII has a brand new arpeggiator that is easy to use but can
become wild when modulated by LFO!
When active, the arpeggiator re-triggers LFOs
The arpeggiated notes are also transmitted via MIDI
of 2311

Arp Modes
The arpeggiator has 7 modes that you can access by pressing the mode
button. The currently selected mode is displayed on the LED display.
Here's a description of each mode:
Up: The arpeggiator will play all held notes in a loop, starting from the lowest
note and moving up. If the range knob is set to a value above zero, the
sequence will add an octave to each loop.
Down (d0): This mode is similar to Up mode, but the arpeggiator plays the
held notes in a loop starting from the highest note and moving down the scale.
Up Down (Ud): This mode combines the Up and Down modes. The
arpeggiator plays the held notes in a loop, starting from the lowest note and
moving up the scale, then reverses direction and moves down the scale.
Random (rd): In this mode, the arpeggiator selects notes from the held keys at
random.
Octave (OC): The arpeggiator repeats each note at all available octaves
before advancing to the next note. The number of octaves played can be
adjusted using the range knob.
Trill Plus 1 semitone (P1): The arpeggiator plays each note from the lowest to
the highest, followed by the note one semitone above it.
Trill Plus 2 semitones (P2): This mode is similar to P1, but the arpeggiator
plays each note followed by the note two semitones above it.
Scrub
You can use the scrub knob to jog through the arpeggiator notes. This is
particularly powerful when linked to an LFO.
Note: The arpeggiator has to be in OFF mode for Scrubbing to work.
Rate & Range
Use the rate knob to adjust the speed of the arpeggiator and the range knob
to set the octave span (1-4).
Note: the arpeggiator can sync to MIDI clock.
of 2312

MIDI
TherapSID can transmit and receive MIDI. A little dot at the right of the first
LED digit indicates incoming MIDI, a dot at the right of the second LED digit
indicates outgoing MIDI
MIDI Channel Selection
TherapSID can receive and send MIDI on the channel of your choice.
You can individually change the input and output channels at any time by
following these steps:
-To select MIDI input channel: Hold Arp Mode and press Preset Up
Now the input channel is displayed on the led display.
Change the MIDI input channel (1-16) with the Preset Up/Down buttons
When done, confirm with a final press of the Arp Mode button. Display goes
blank and the channel is saved to EEPROM
-To select MIDI output channel: Hold Arp Mode and press Preset Down
Now the output channel is displayed on the led display.
Change the MIDI output channel (1-16) with the Preset Up/Down buttons
When done, confirm with a final press of the Arp Mode button. Display goes
blank and the channel is saved to EEPROM
Triggering Voices Separately
If MIDI channel input is set to 1 you can trigger voices 1 2 and 3 individually on MIDI
channels 2, 3 and 4 respectively. When the input is set to another channel
TherapSID on responds to that channel.!
!
!
!
!
!
!
!
!
!
!
!
of 2313

MIDI Preset Management
You can transfer all presets to and from a computer via MIDI System
Exclusive (SYSEX) transfers. This is handy to back up or share your presets
with fellow TherapSID owners.
To transmit (dump) SYSEX:
Hold Preset Down during startup. The SYSEX is automatically sent out of the
MIDI port.
To receive SYSEX:
Hold Preset Up during startup. TherapSID will enter SYSEX receive mode,
indicated Re on the LED display panel.
You can now send the SYSEX you previously dumped to TherapSID.
At the end of the transfer, the Eeprom will be updated. This takes around 13
seconds. The progress % is indicated 0-99 on the LED Display.
of 2314

MIDI Controller Implementation
Note: the knobs and buttons (AND LFOs!) send their corresponding MIDI CCs
out too, so you can double TherapSID as a powerful MIDI controller for other
synths!
MIDI Message
Range
Result
Direction
Note On/Off CH1
1-127
Trigger Voices Unison
receive/send
Note On/Off CH2
1-127
Trigger Voice1 only
receive/send
Note On/Off CH3
1-127
Trigger Voice2 only
receive/send
Note On/Off CH4
1-127
Trigger Voice3 only
receive/send
Control CC#6
1-127
Voice1 Attack
receive/send
Control CC#7
1-127
Voice1 Decay
receive/send
Control CC#8
1-127
Voice1 Sustain
receive/send
Control CC#9
1-127
Voice1 Release
receive/send
Control CC#14
1-127
Voice2 Attack
receive/send
Control CC#15
1-127
Voice2 Decay
receive/send
Control CC#16
1-127
Voice2 Sustain
receive/send
Control CC#17
1-127
Voice2 Release
receive/send
Control CC#22
1-127
Voice3 Attack
receive/send
Control CC#23
1-127
Voice3 Decay
receive/send
Control CC#24
0-127
Voice3 Sustain
receive/send
Control CC#25
0-127
Voice3 Release
receive/send
Control CC#32+59
0-127
Filter Cutoff
receive/send
Control CC#33
0-127
Filter Resonance
receive/send
Control CC#3
0-127
Voice1 Tune
receive/send
Control CC#11
0-127
Voice2 Tune
receive/send
Control CC#19
0-127
Voice3 Tune
receive/send
Control CC#2
1-127
Voice1 Pulse Width
receive/send
of 2315

Control CC#10
1-127
Voice2 Pulse Width
receive/send
Control CC#18
1-127
Voice3 Pulse Width
receive/send
Control CC#4
1-127
Voice1 Fine
receive/send
Control CC#12
1-127
Voice2 Fine
receive/send
Control CC#20
1-127
Voice3 Fine
receive/send
Control CC#5
1-127
Voice1 Glide
receive/send
Control CC#13
1-127
Voice2 Glide
receive/send
Control CC#21
1-127
Voice3 Glide
receive/send
Control CC#34
1-127
Arp Scrub
receive/send
Control CC#35
1-127
Arp Rate
receive/send
Control CC#36
1-127
Arp Range
receive/send
Control CC#26
1-127
Lfo1 Rate
receive/send
Control CC#27
& Mod Wheel
0-127
Lfo1 Depth
receive/send
Control CC#28
0-127
Lfo2 Rate
receive/send
Control CC#29
0-127
Lfo2 Depth
receive/send
Control CC#30
0-127
Lfo3 Rate
receive/send
Control CC#31
0-127
Lfo3 Depth
receive/send
Control CC#49
0=off 1=on
Voice1 Sync
receive/send
Control CC#50
0=off 1=on
Voice1 Ring
receive/send
Control CC#51
0=off 1=on
Voice2 Sync
receive/send
Control CC#52
0=off 1=on
Voice2 Ring
receive/send
Control CC#53
0=off 1=on
Voice3 Sync
receive/send
Control CC#54
0=off 1=on
Voice3 Ring
receive/send
Control CC#37
0=off 1=on
Voice1 Rect
receive/send
Control CC#38
0=off 1=on
Voice1 Triangle
receive/send
MIDI Message
Range
Result
Direction
of 2316

Control CC#39
0=off 1=on
Voice1 Saw
receive/send
Control CC#40
0=off 1=on
Voice1 Noise
receive/send
Control CC#41
0=off 1=on
Voice2 Rect
receive/send
Control CC#42
0=off 1=on
Voice2 Triangle
receive/send
Control CC#43
0=off 1=on
Voice2 Saw
receive/send
Control CC#44
0=off 1=on
Voice2 Noise
receive/send
Control CC#45
0=off 1=on
Voice3 Rect
receive/send
Control CC#46
0=off 1=on
Voice3 Triangle
receive/send
Control CC#47
0=off 1=on
Voice3 Saw
receive/send
Control CC#48
0=off 1=on
Voice3 Noise
receive/send
Control CC#55
0-25=LP 26-50=BP
51-75=HP
76-100=LP+HP(not
ch) 101-127=OFF
Filter Mode
receive/send
56
0-127
lfo1
send
57
0-127
lfo2
send
58
0-127
lfo3
send
MIDI Message
Range
Result
Direction
of 2317

Settings Tool
The online tool provides a convenient way to set TherapSIDs parameters within one
screen. You can easily adjust the parameters to your liking using the tool's interface.
To use the online tool, your web browser must have MIDI support enabled (like
Chrome).
No downloads or drivers are necessary, as the tool runs directly in your browser.
The tool is available at the following web address:
https://www.twistedelectrons.com/tool
It is recommended to hard refresh your browser before using the tool to ensure that
you are using the latest version. This can be done by pressing Ctrl + F5 (Windows)
or Command + Shift + R (Mac).
1. Select MIDI input and output ports:
To use the online tool, you need to select the MIDI input and output ports that are
connected to your TherapSID. You can do this by using the drop-down menus
located at the top of the screen.
2. Download current settings:
After selecting the MIDI input and output ports, press the "Read" button to download
the current settings from your TherapSID device. This will allow you to view the
current settings and make changes if necessary.
3. Change parameters:
Once you have downloaded the settings, you can change any parameters that you
want. The tool provides an intuitive interface for adjusting the settings.
of 2318

4. Update the device settings:
After making any desired changes, press the "Write" button to update the device with
the new settings. This will ensure that the TherapSID is configured with your desired
settings.
Firmware updates
TherapSID can receive firmware updates through MIDI system exclusive messages
(sysex). You can check the latest firmware version on the TherapSID page online:
http://twisted-electrons.com/therapsid/.
The current firmware version is displayed on the 7-segment LED display for 1
second during startup.
To enter the update mode (also known as boot-loader mode):
-Unplug the power cord from the unit (or use the power button on MKIII).
-Press and hold down the filter type button (located at the bottom left of the control
panel).
-Power the unit back on
When you enter the boot-loader mode, all the LEDs on the control panel will light up.
This indicates that the TherapSID is ready to receive the sysex data from your
computer.
of 2319

Windows
If you're using a Windows PC, we recommend using MIDI-OX to update your
TherapSID's firmware. MIDI-OX is a free and highly useful app.!
!
Here are the steps to follow:
1. Launch MIDI-OX on your computer.
2. In the Sysex window, click on Command and select Window > Load File.
Navigate to the location where you have stored the firmware update file.
3. Click on Command again and select Window > Send Sysex.
4. This will send the firmware update to your TherapSID. Please make sure the
Therapsid is in boot-loader mode and connected to your computer via MIDI
before sending the sysex file.
Mac
If you're using a Mac, we recommend using SysEx Librarian to update your
TherapSID's firmware. SysEx Librarian is a free and user-friendly app.
1. Launch SysEx Librarian on your Mac.
2. In the top drop-down menu, select your MIDI interface (if it's not already
selected).
3. Drag the MIDI SysEx file from the Finder into the frame of SysEx Librarian
4. Select the file by clicking on it with your mouse.
5. Click the Play button to send the firmware update to your Therapsid.
Please ensure that the TherapSID is in boot-loader mode and connected to your
Mac via MIDI before sending the sysex file.
of 2320
Table of contents
Other twisted electrons Music Equipment manuals