300-C Series 1/16/17
www.ultra-tec.com800-851-2961 | 775-885-1443
5. At opposite end post with tensioning terminal, detach
the body from the Hanger Bolt to allow cable slack so
you can perform the next step.
6. Back at post with swageless terminal, push the
cable into the hole in the tting as far as it will go
(approximately 1-1/16”). Twist the cable in a clockwise
direction as you push it into the tting.
4. Pull the cable tightly along the side of the tting and
mark the cable 1-3/16” from the end of the tting
opposite the post. Mark and cut the cable on your mark.
D. Feed/Crimp Cable through Corner Posts
As composite sleeves can be somewhat fragile, it is
recommended to stop and start at corners.
Do not allow a cable to exit a post on an angle; it can
damage the sleeve.
E. Install Swageless Terminal
7. Return to the post with tensioning terminal and
hand turn the body back onto the Hanger Bolt as
far as possible.
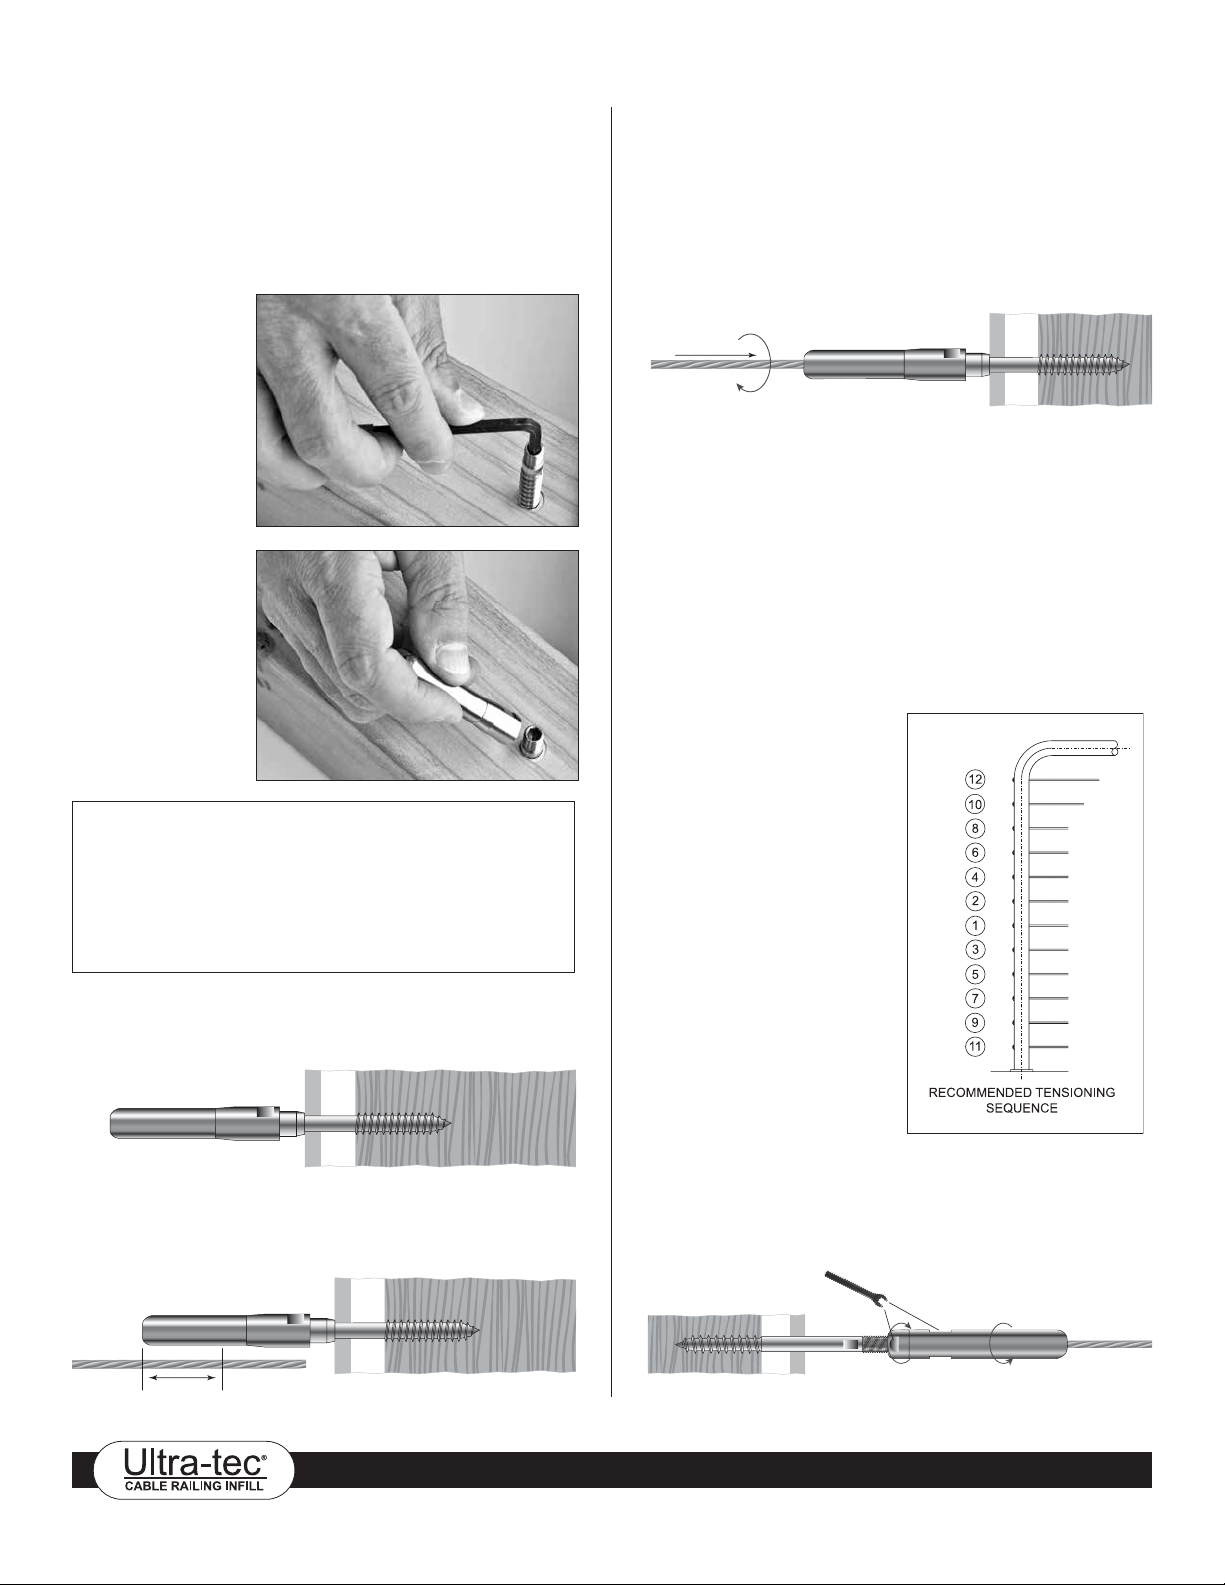
F. Tension Cables
1. Tension the cable by holding it to prevent the cable
from turning while you turn the Adjust-A-Body®with a
7/16” open-end wrench. Be careful to protect the cable
from damage while tensioning the Adjust-A-Body®.
2. Tension all cables to
desired amount in
sequence, beginning
with the center
cables, moving up
and down toward
the top and bottom.
As you tension each
cable, give it a sharp
pull downward
mid-span to help
set the wedges,
then re-tension as
necessary in the
same sequence.
3. While holding the body still with a 7/16” open-end
wrench, turn the lock nut against the body and tighten
with a wrench.
3. Depending on the depth of the composite sleeve,
the Push-Lock® coupler may not be able to sit ush to
the post.
Note: If you have trouble inserting the cable into the tting, it may be
because the locking wedges have become stuck. This is not a defect! Here’s
what you can do to “free the wedges” —
For Pull-Lock®or Push-Lock® ttings for 1/8” cable, using either a PL-KEY or
1/4” diameter bolt, insert the PL-KEY or bolt into the hole and press until
the wedges move freely. Perform the same operation for a 3/16” Pull-Lock®
or Push-Lock®, except use a 16d nail or another tool with 1/8” or smaller
diameter. Anything larger than what is recommended can actually get stuck
inside the tting – NOT what you want!
1. Use a 3/16”
hex wrench
to drive the
lag section
of the tting
into your
pre-drilled
pilot hole.
2. Thread the
Push-Lock®
coupler onto
the lag and
tighten with
7/16” wrench.
1-3/16”
Push


