ULTRAPALACE MIDINOME User manual

MIDINOME
A Tap-Tempo Metronome, Master Midi Clock, and CV Clock
Manual v3.0

Thank you for purchasing the Midinome!
This project started in August 2017, as a utility pedal for
loopers and samplers. We wanted a way to synchronize via midi
while simultaneously sending an analog audio “metronome” to the
performer. This allowed us to enable perfectly aligned layers of
sounds, expanding our creative potential and fostering collaboration
amongst humans and machines.
Introduction
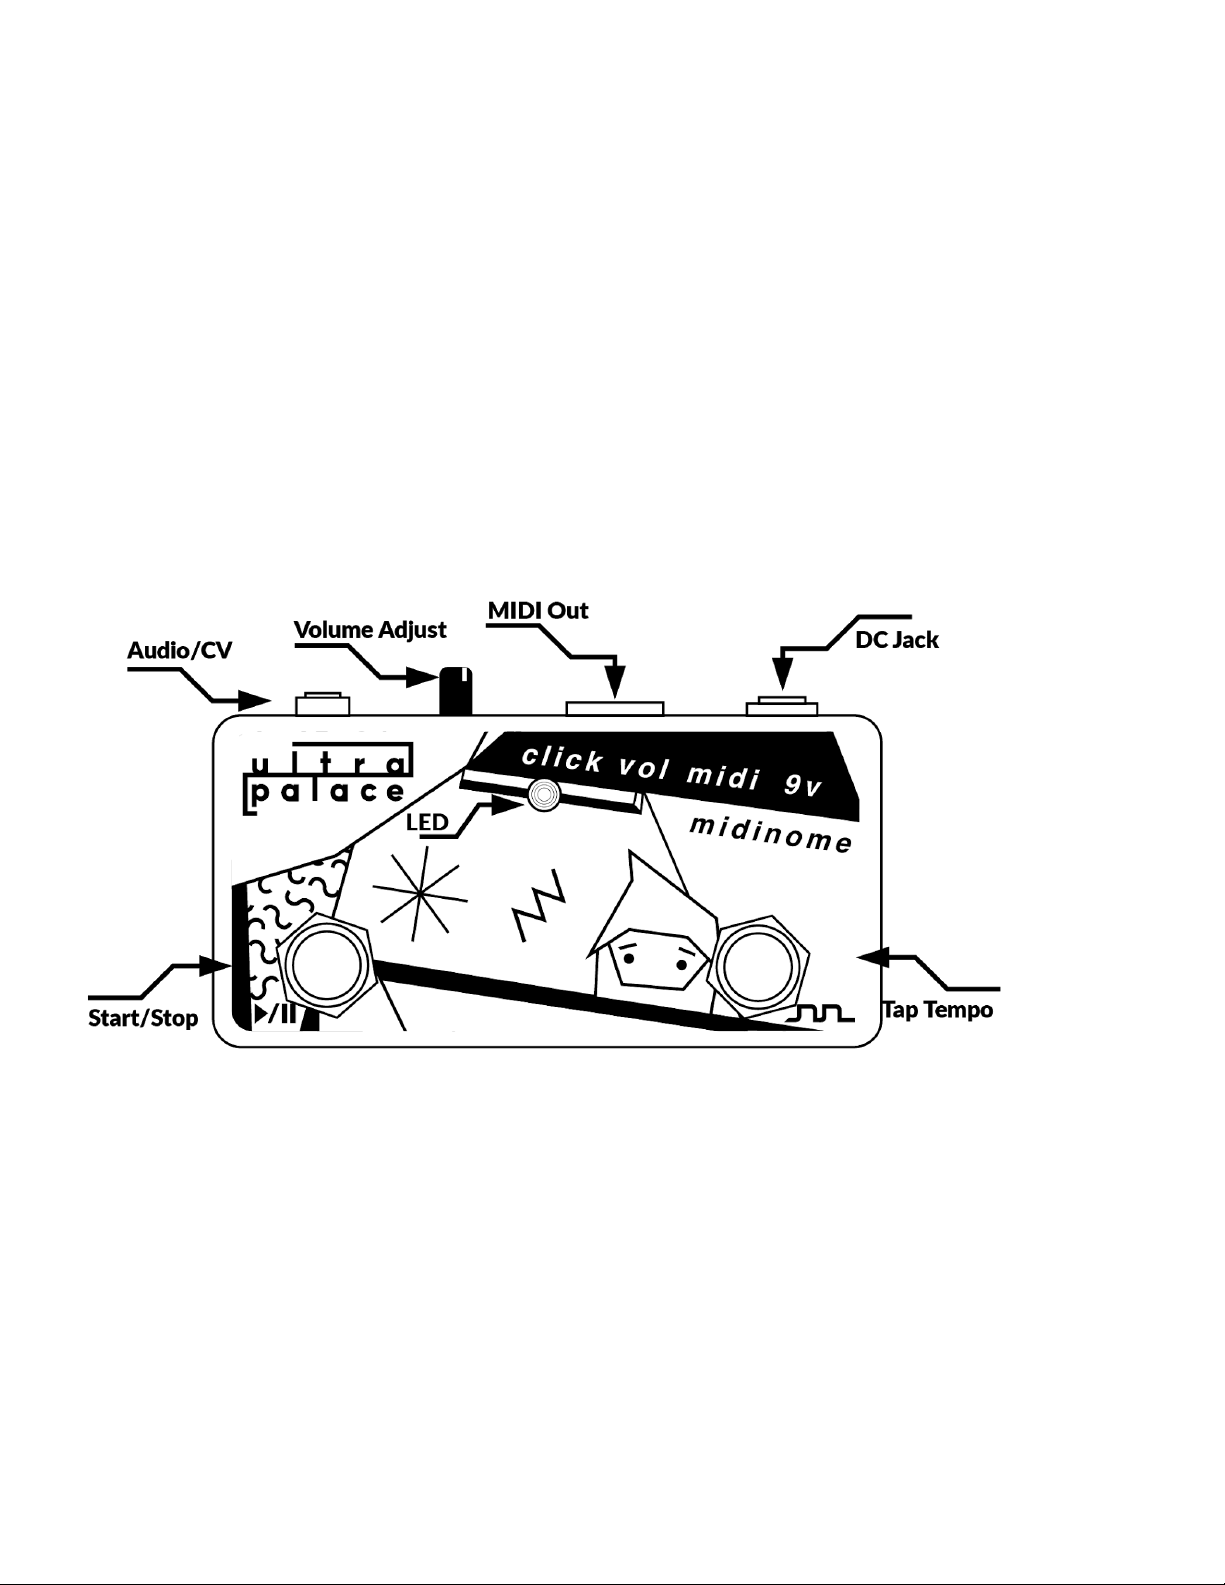
MIDINOME keeps you and your devices synchronized by
generating both a MIDI signal, and an audio click, while keeping
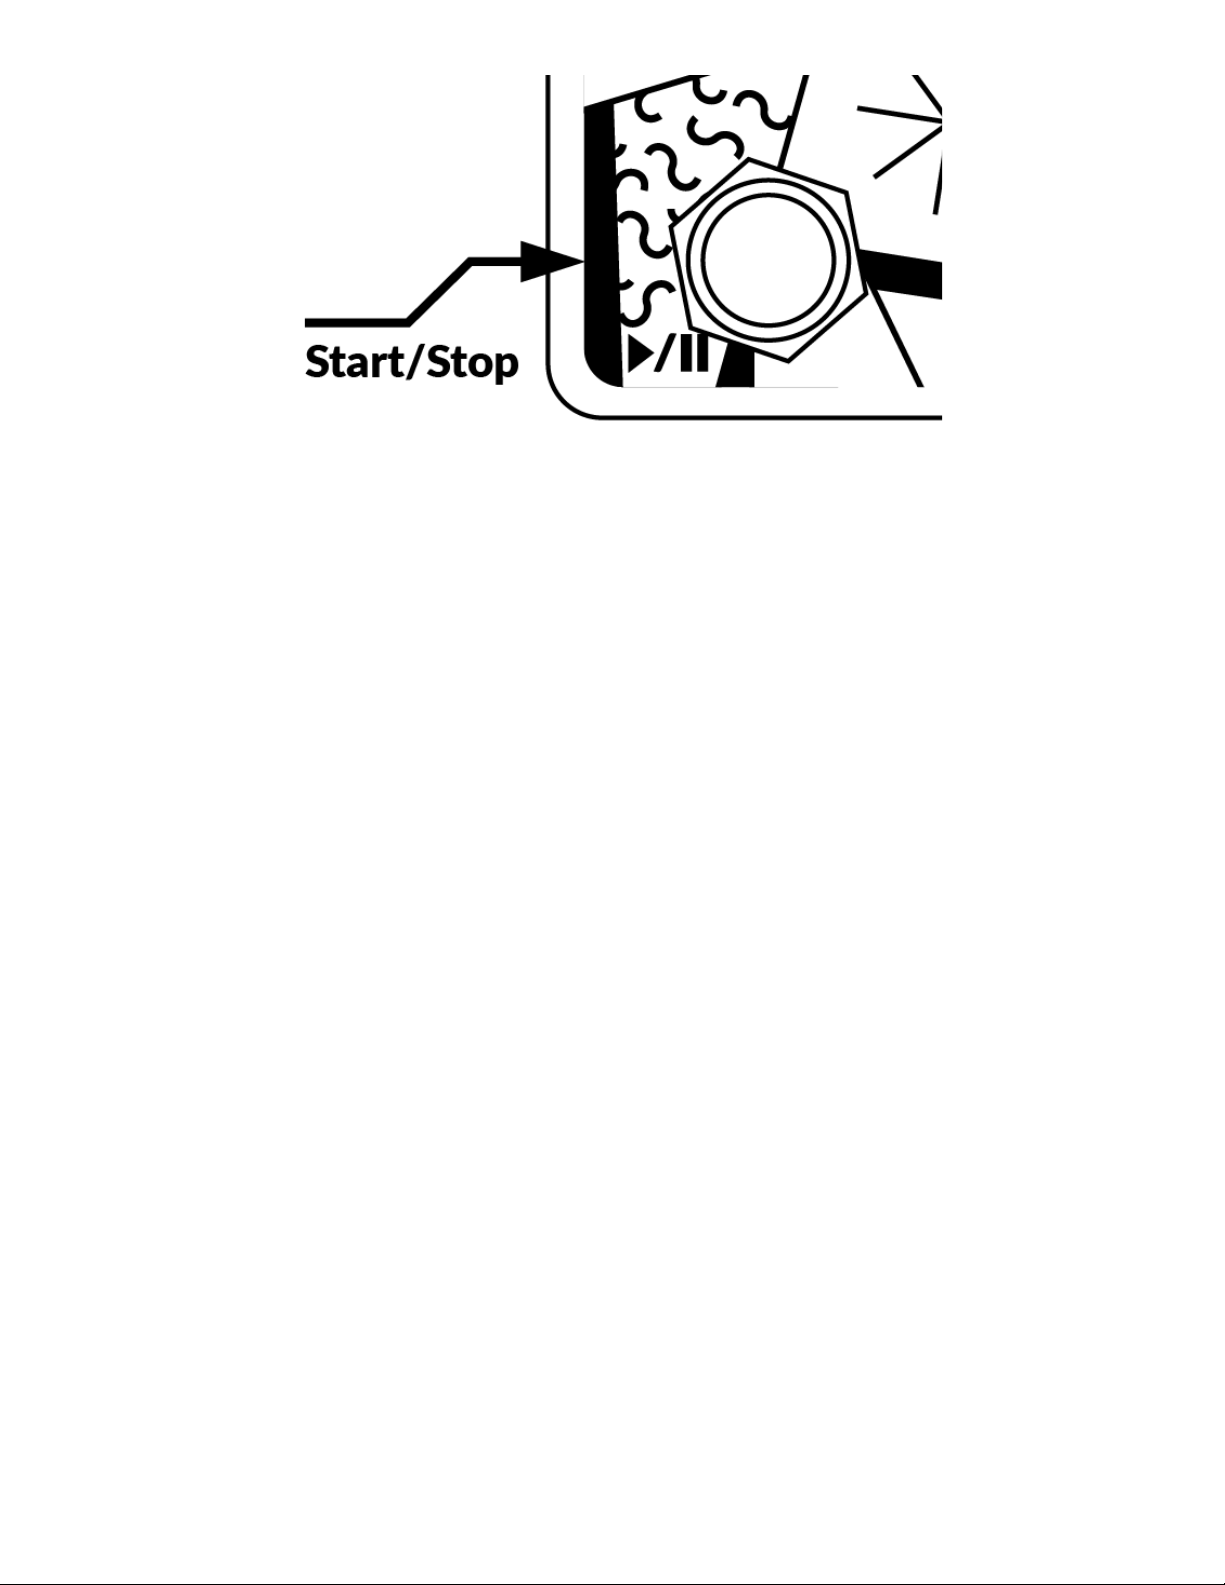
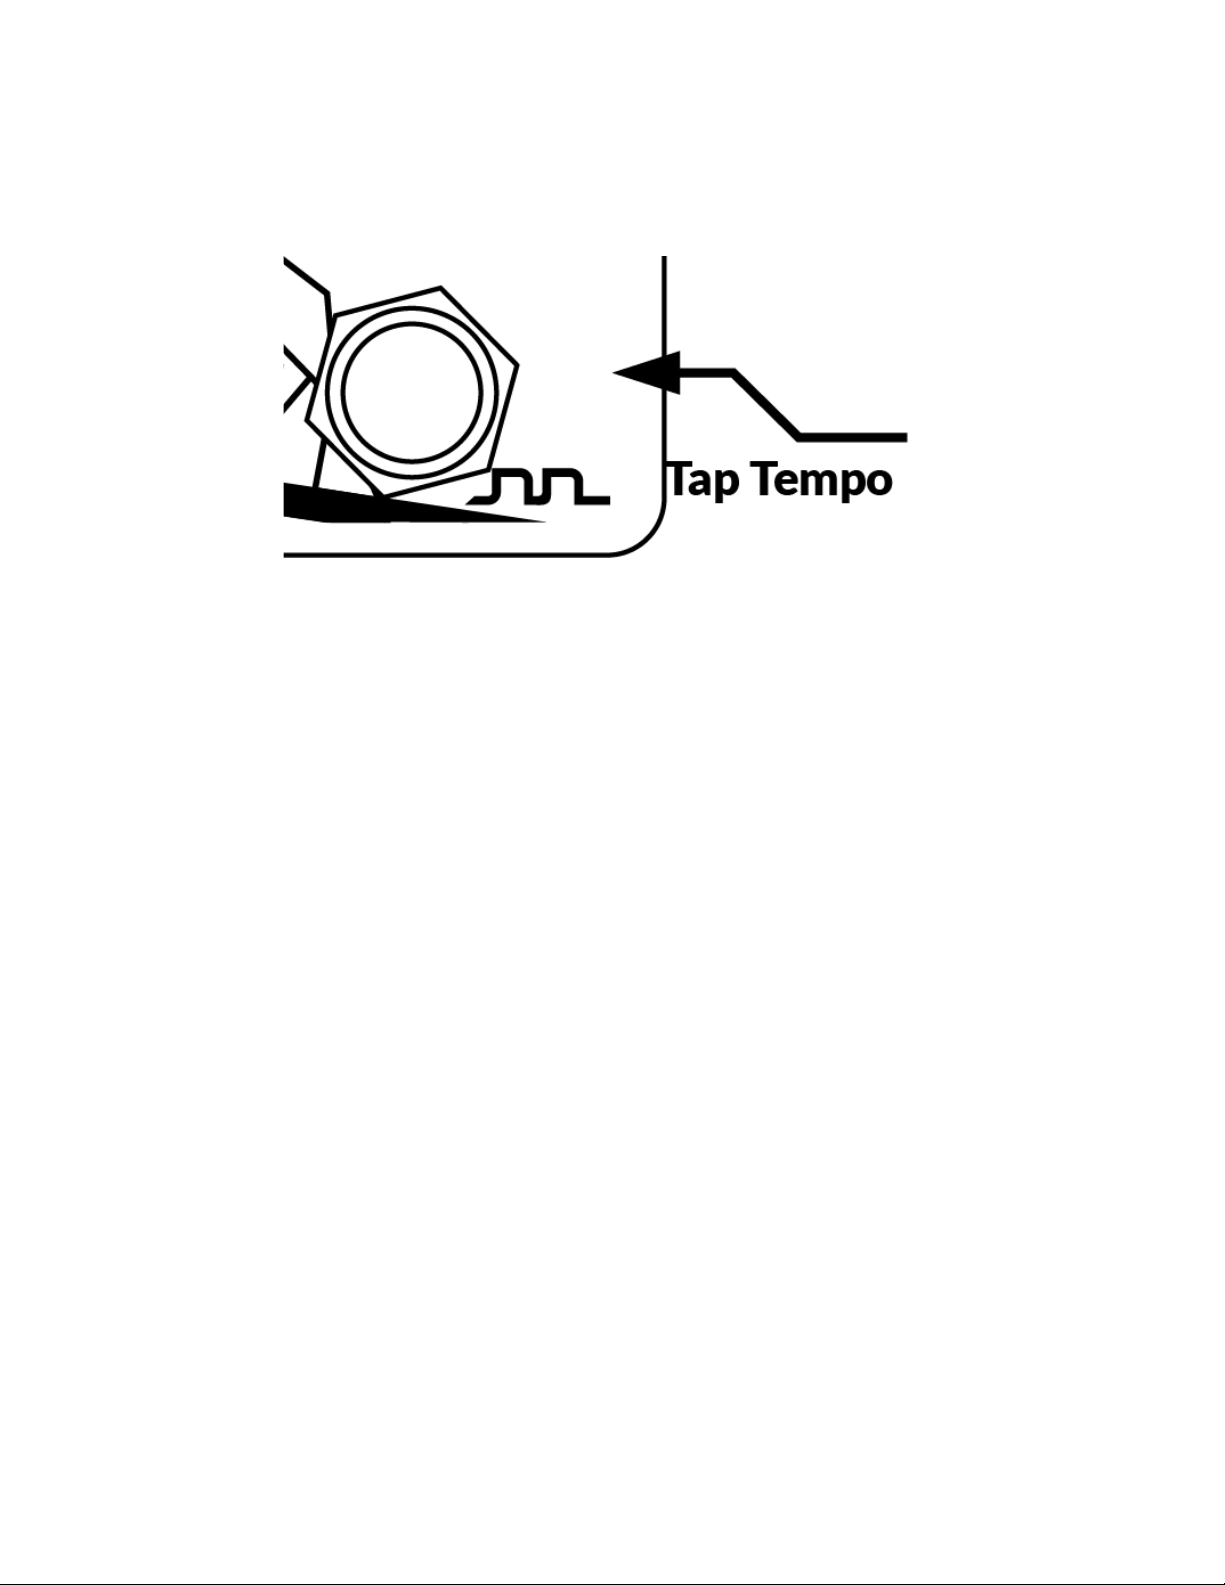
both signals perfectly in sync. Midinome can start or stop a MIDI
sequence as well as change the tempo by tapping, all while
occupying the least amount of real-estate in your pedalboard and
keeping functions simple.
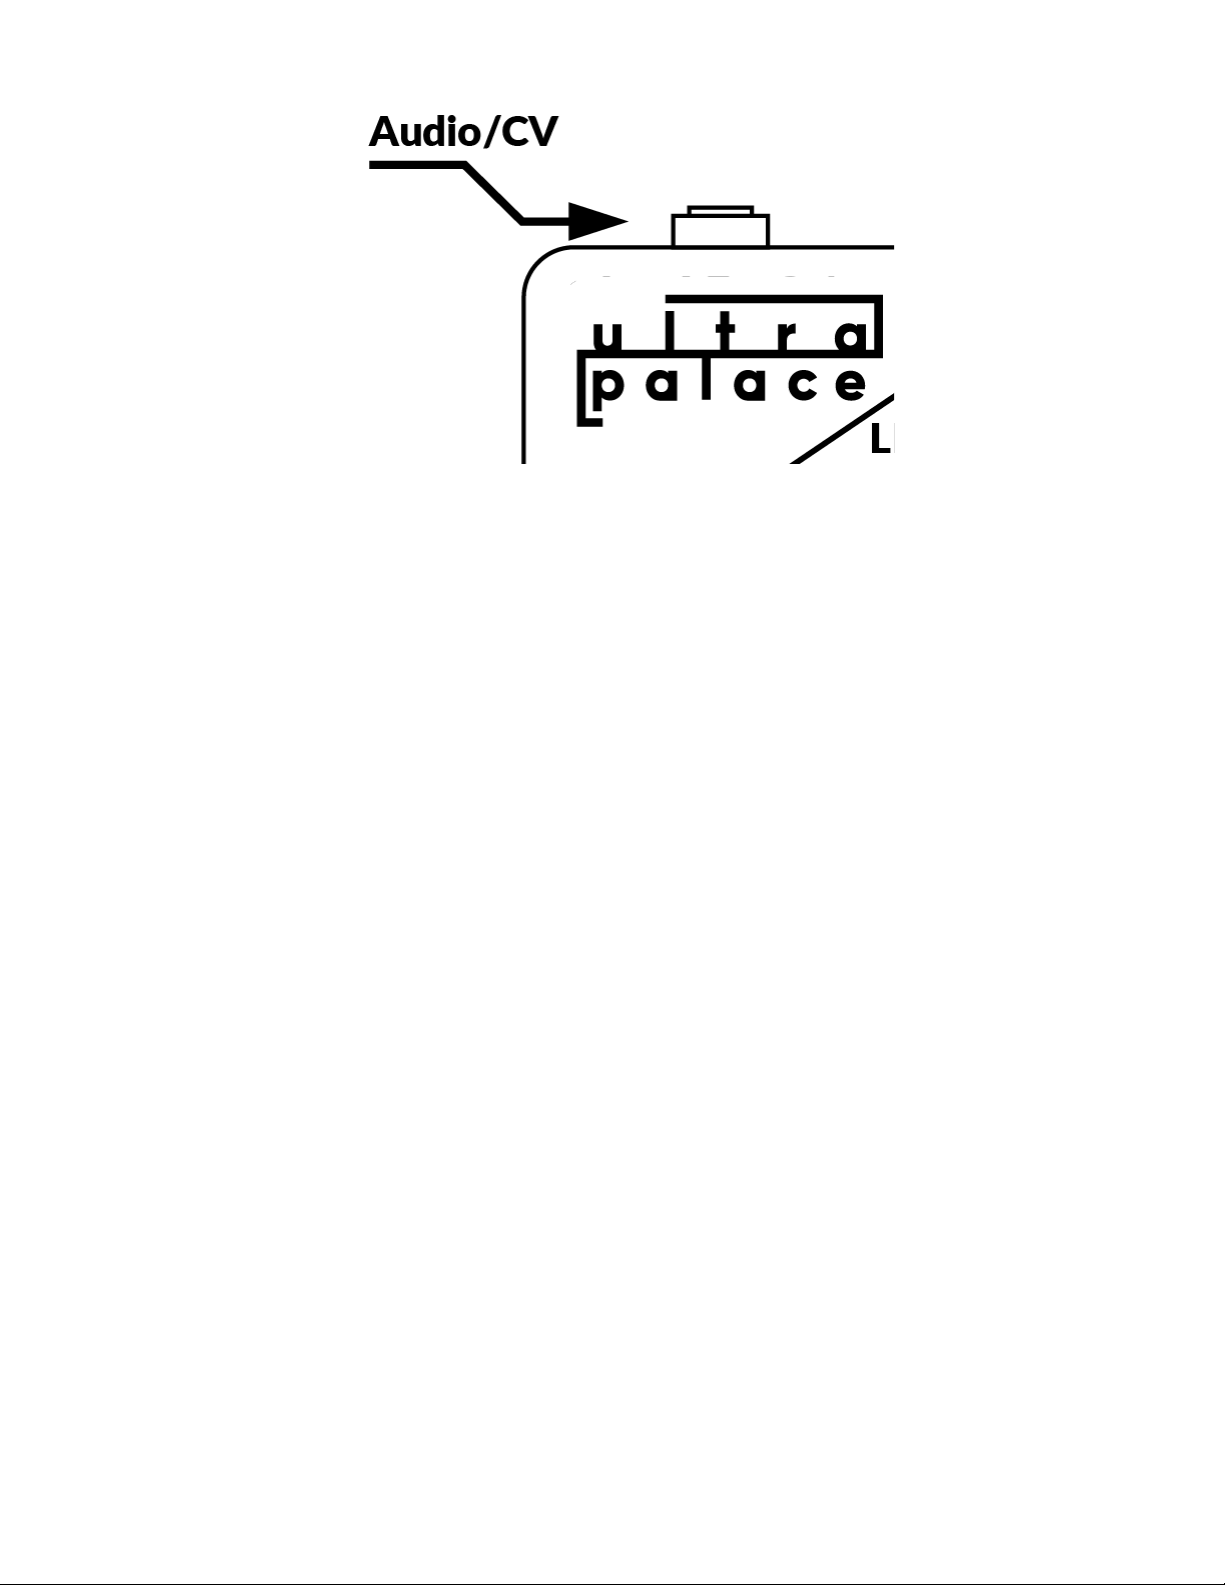
Midinome is universal and works with any device with a MIDI
Input or CV Input.
Updated Features of Version 3.0 (April 2020)
● Added a hidden menu which allows changing of CV
divider, click tone, and default tempo.
● Added a multi-colour LED to represent different functions
Midinome is performing.
1

● Custom tempo can now be saved by pressing and holding
the tap tempo button for 5 seconds during operation.
● Re-designed clock circuit which now provides 0.07%
stability - eliminating drift in long sessions.
● Firmware upgradable/customizable with Arduino
Inputs, Outputs, & Controls
Start/Stop
The Midinome is always either Active(Green) or Halted(Red),
the Start/Stop
footswitch alternates between these two modes.
2

The Start/Stop
button starts and stops both the MIDI signal,
and Audio Click or CV Clock.
When the MIDI clock is started it begins operation at 120 BPM
or at the user defined BPM preset.
When the MIDI Clock is stopped, the Audio Click or CV Clock
is halted immediately and a red light will come on.
When the Midi Clock is started or stopped it sends a standard
MIDI Start Command (0xFA) or Stop Command (0xFC).
If MIDINOME is Halted (Red), and the Start/Stop
button is
pressed, it will start both the MIDI Clock and the Audio Click. If the
MIDINOME is Active (Green), and the Start/Stop
button is
pressed, the MIDINOME will immediately stop both the MIDI Clock
and the Audio Click or CV Clock.
3

Tap Tempo
Tapping the Tap Tempo button will adjust the tempo. The
flashing of the LED will change, and you will hear the difference in
the tempo. Tap faster for allegro
and tap slower for largo
.
The limits for tempo are extremely broad and limited only by
how fast or how slow you can physically tap the tempo.
Saving a custom tempo
You can save a custom preset by holding the tap tempo button
for 5 seconds. The light will turn from Green to white, indicating you
have saved the current tempo. This will now be the current default
tempo, and will be active when power is removed and reapplied.
Wait a few seconds after you last pressed the Tap Tempo
button, or Midinome might think you mean to tap a tempo in.
4

LED
The LED will flash while the MIDINOME is Active, it will flash
in sync with the MIDI signal and the audio click or CV clock.
When power is first applied to the MIDINOME the LED will light
to indicate it is ready.
LED indicators
● Red LED(Blinking): Midinome is going through it’s boot
sequence, please stand by while it completes (3 Seconds)
● Red LED(Steady): Midinome is Halted and waiting
● Green LED(Blinking): The Midinome has now started and it is
displaying the tempo
Audio Click/CV Output
5

This 3.5 mm stereo or mono output carries the Audio Click or
CV Clock, perfect for headphones or Eurorack patch cables. This
output is powerful enough to drive headphones, and the volume
control can be used to adjust for line level, suitable for mixers,
audio interfaces, or other line level equipment.
The Audio Click is a synthesized and filtered square wave
providing a classic metronome “click
” sound. Pitched at roughly B4.
The CV Signal swings from 0 to 5 volts and is compatible with
most modular and vintage synthesizers or drum machines. For
equipment that requires a higher trigger voltage a gate booster
might need to be used. For Moog and some Arp equipment, a V-
trig to S- trig adapter will be required.
The Midinome has now 9 click tone presets that can be selected
from the menu.
6

Volume Knob
Adjust the volume of the Audio Click. Rotate clockwise for
louder and counter-clockwise for quieter or silent.
When the MIDINOME is in CV Mode, the volume knob has no
function.
MIDI OUT
7

This is the MIDI OUT, to be connected to the MIDI IN on
another device. This will send MIDI clock and MIDI commands.
MIDI THRU and MIDI OUT can be used on the other device to
daisy chain this signal. MIDI splitters and converters can also be
used.
DC POWER
Midinome takes a standard 2.1 mm power jack, 9VDC. As is
common with guitar pedals, it is centre negative to fit easily on
your pedalboard. Midinome is reverse polarity protected, so no
worries if the wrong type of adapter gets plugged in.
How to operate the MIDINOME
8

Connect your headphones and MIDI cable. The MIDI cable
should run from the Midinome, to the MIDI IN of the device
receiving MIDI signal.
Next, connect the power. The LED will flash red for about 3-5
seconds after that the LED will stay lit indicating that the Midinome
is ready to go.
Press the Start/Stop
footswitch, you should see the LED light
flashing, indicating that there is both a MIDI Clock and an Audio
Click or CV Clock being sent. The default metronome tempo is 120
BPM, and will reset to this tempo when the Midinome is powered
down (unless you have saved a different tempo in the menu or
during operation). Adjust the metronome volume to desired amount.
You’re all set!
Adjusting the tempo is as easy as tapping the beat you’re
thinking of, Midinome will adjust immediately. (Takes two presses
minimum). Press Start/Stop to immediately issue a MIDI ‘Stop’
command, and stop both the MIDI Clock, and the Audio Click or CV
Clock.
Press Start/Stop again to resume.
That is all you need to know about basic operation of
Midinome!
9

CV Mode
Midinome has a small built in switch that will toggle the device
between Audio Click Mode, and CV Clock Mode. The Audio
Click Mode is intended to be a metronome, and CV Clock Mode is
intended to trigger a synthesiser or drum machine, or to
synchronize other electronic devices which accept this standard. To
toggle between modes, first power off the MIDINOME and remove
all cables, turn the MIDINOME on it’s back and remove the 4
screws. The switch is located in the middle of the board, and can
be toggled by hand.
Settings Menu
To enter the settings menu, unplug the power to the Midinome,
press & hold both the Start/Stop & Tap Tempo buttons and plug in
DC power again.
Midinome will flash purple, indicating you are in the programmable
Menu.
There are 3 options you can change (in order)
CV Divider - Purple LED
Click Tone - Yellow LED
Default Tempo - Blue LED
10

Press the Tap Tempo to rotate between the menu options. Press
the Start Stop to change the current option.
And once you are happy with the current changes, press and hold
Tap Tempo and press and hold Start/Stop to Save changes and go
into regular Midinome operation.
CV Divider (Purple LED)
You can change the clock division that gets sent out via CV, The
purple light will flash accordingly to the subdivision, options are:
1:4, 1:2 , 1:1, and 2:1. 1:1 is the default
Click Tone (Yellow LED
There are 9 presets. Press Start/Stop to rotate between options,
the first 4 are clicks, and the remaining 5 presets are tones which
are great for cutting through a mix or a very loud environment.
Default Tempo (Blue LED)
There are 5 options to choose from. 80 Bpm, 100 Bpm, 120 Bpm,
140 Bpm and Custom tempo Preset (white LED). The custom
tempo is set during operation by holding the Tap Tempo button. It is
saved in one slot in the Default Tempo
menu, and can be recalled
later.
11

Tips and Tricks
It is recommended to press STOP *then* TAP a new tempo
*then* press START, each time you want to change the tempo.
This might intuitively be the first thing to do for most people since
it’s a lot easier to count in your head when you aren’t hearing a
different beat.
Some receiving devices only count the first two clock pulses
and will get confused, or simply ignore a new tempo, when the
tempo is changed mid-operation, without first stopping and starting
the device (ie. Boomerang Rang Phrase Sampler III). Other devices
will speed up or slow down the loops as you change the tempo (ie.
Boss RC50).
Using an extension cord for your headphones is a great idea!
If you want to send the Audio Click to more people and
synchronize your loops live, we recommend using a splitter,
headphone amp, or mixer.
Firmware Updates
Firmware updates will be announced on the Ultra Palace
facebook page, or ultrapalace.com.
12

Compatibility
This is a list of devices which we’ve tested with the MIDINOME
for MIDI or CV. Normally MIDI is universal and you shouldn’t have
any problems with any device, as long as it’s configured to receive
a MIDI Clock.
Confirmed compatible MIDI devices:
Boomerang Rang Phrase Sampler III
Boss RC50
Arturia Minibrute
Arturia Keystep
Arturia Beatstep Pro
Dave Smith Poly Evolver
Dave Smith OB-6
Korg Volca Series
Alesis SR16 & 18
Confirmed compatible CV devices:
Mutable Instruments Modules (Trigger Inputs)
Ornament and Crime
Temps Utile
4MS Spectral Multiband Filter
Arturia Keystep (Clock input)
Korg Volca Series (Sync In)
13

Technical Specifications
Default BPM: 120
Maximum BPM: 300 BPM
Minimum BPM: 20 BPM
CV Output voltage: 0 ~ 5 Volts
Audio Output: 9 Vp-p
Output Impedance [Audio]: 68 Ω
Output Impedance [CV]: 1 kΩ
Current Consumption: 20mA Max
Power Supply type: 2.1 mm DC barrel jack centre negative
Maximum Power supply voltage: 22 VDC
Minimum Power supply voltage: 6.7 VDC
Recommended Power supply voltage: 9-12 VDC
SAFETY GUIDELINES
This pedal can be used with a 9v DC power
adaptor dedicated for use with guitar effects (Boss style). It uses
a centre negative polarity 2.1mm socket, standard to 9v guitar pedals.
If any problems occur, stop using the pedal and
contact us for advice on how to proceed.
We love feedback, and would be happy to hear from you! We
are also open to suggestions for upcoming versions or firmware
revisions.
Contact
14

This manual printed on residue waste from sugar cane processing.
© ULTRAPALACE 2020
15
Table of contents
Popular Music Pedal manuals by other brands

TC Electronic
TC Electronic SENTRY quick start guide

Behringer
Behringer SUPER FUZZ SF300 user manual

Black Mass
Black Mass The First Herald quick start guide

GFI System
GFI System ORCA DELAY user manual

TC Electronic
TC Electronic Gravy TRI CHORUS & VIBRATO user manual

Mod
Mod THE SUSPENDED CHIME Troubleshooting supplement

Electro-Harmonix
Electro-Harmonix Lizard Queen operating instructions

Gig-fx
Gig-fx PRO-CHOP operating manual

GOD CITY INSTRUMENTS
GOD CITY INSTRUMENTS Stockwell V1.1 Build guide

Marshall Amplification
Marshall Amplification GV-2 Guv’nor Plus owner's manual

Wampler
Wampler Germanium Tumnus Quick reference guide

Zoom
Zoom 503 AMP SIMULATOR Operation manual