Chapter1 Introduction
Overview of the DSL/Cable Gateway
The DSL/Cable Gateway is a small desktop gateway that sits between your local Ethernet network
and a remote network (e.g., the Internet). The DSL/Cable Gateway contains an Ethernet EWAN
port connecting to an external ADSL/Cable modem, and a four-port 10/100Mbps Ethernet switch
for connecting to PCs on your local network. Data comes into the gateway from the local LAN
and then is "routed" to the remote network, and vice versa. This Gateway provides many
cost-effective functions and management benefits that provides ease of configuration and can be
up and running in few minutes.
DSL/Cable Gateway Applications
Main functions of the DSL/Cable Gateway:
-Share IP Address, provides Internet access to users with one ISP account
-To allow access to the servers from the public network,
-Eliminate the needs of installing software to connect to ISP
-Built in switch provides connectivity to 10/100 Mbps for LAN devices
-Host different services for remote users to access various services at their site using constant IP
-Allow Internal network to be fully exposed to the Internet for special applications (DMZ Host)
-Provides security features that prevents hacking from Internet
Accessing the Internet
The most common use for the DSL/Cable Gateway is to provide Internet access, so that everyone
on your LAN can surf the web and send/receive email or files. The DSL/Cable Gateway
automatically acquires the necessary IP address when the connection to the Internet is
established. You don't need to apply for and assign an IP address to each PC or workstation on
your network.
Accessing Servers from the Public Network
If you want special servers to be accessible by remote users across the Internet (e.g. an e-mail
server, an FTP server, or a web server), you can configure the DSL/Cable Gateway to proxy the
service from its own address. This means that the remote user can address the Gateway as if it
were the special server and the Gateway will redirect this connection to the appropriate computer
on the network.
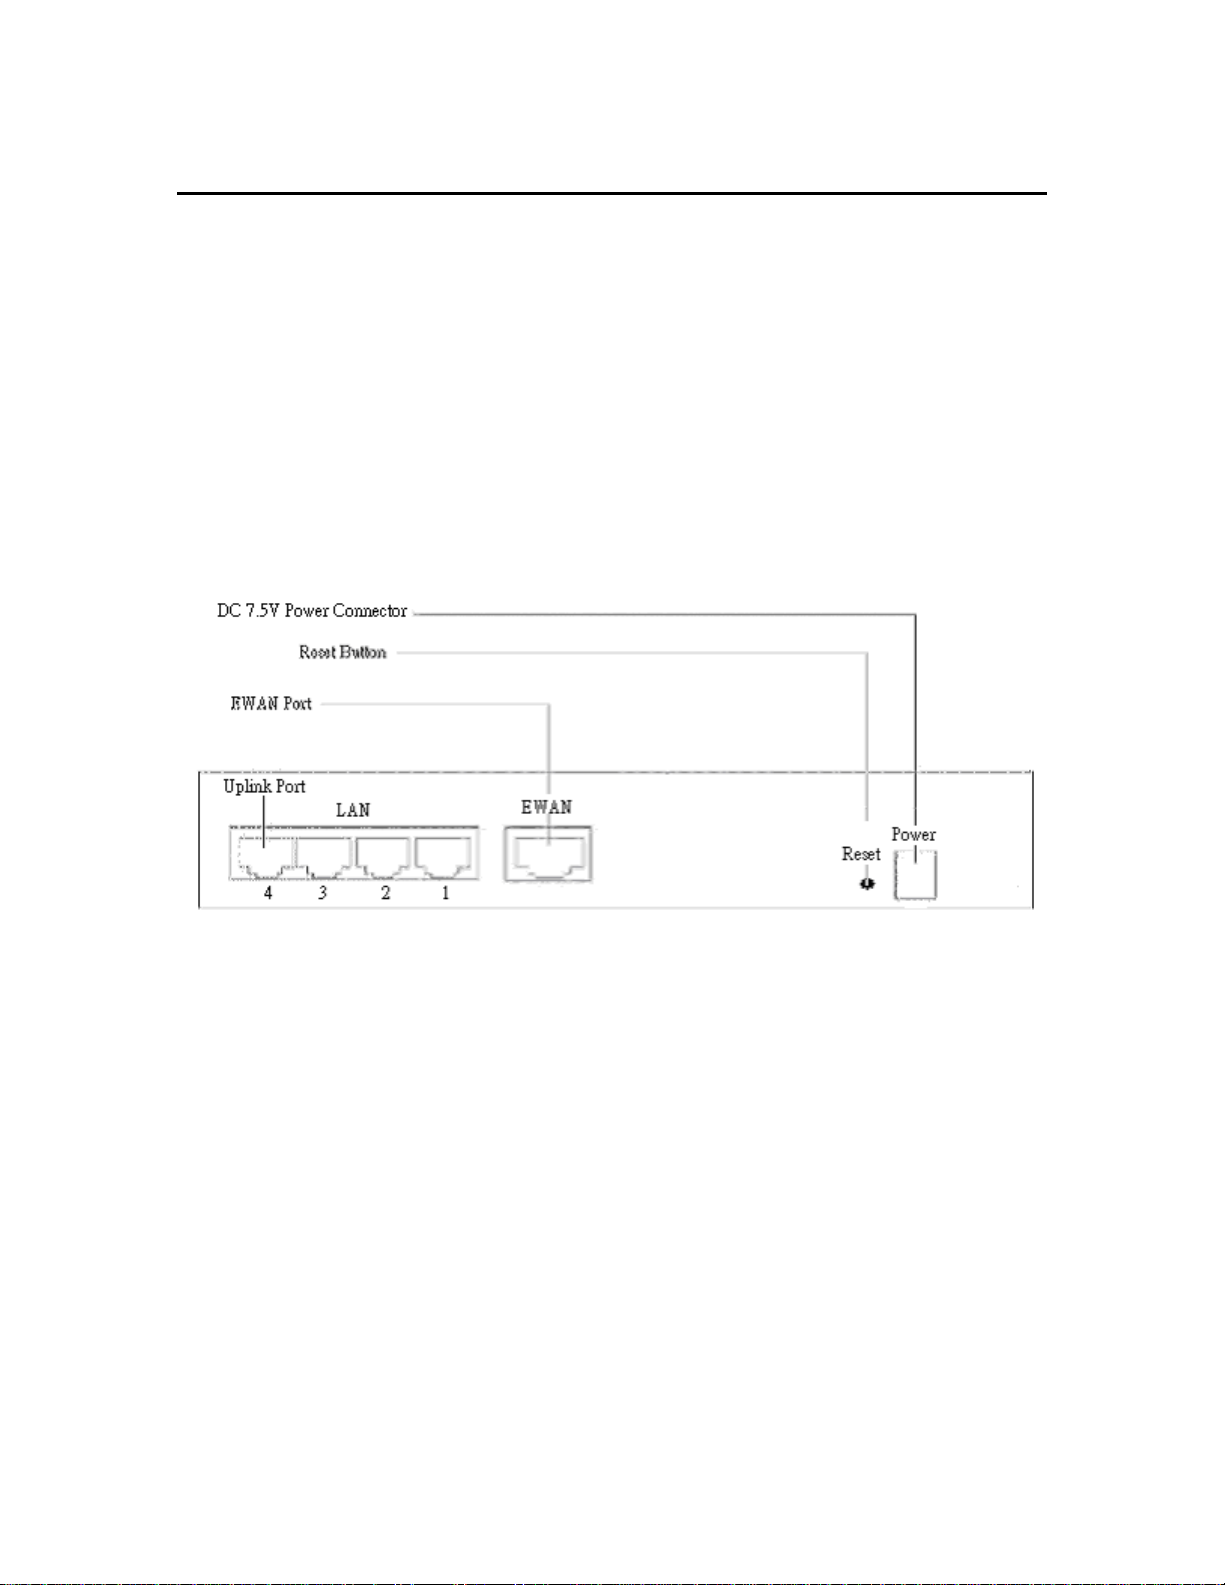
A Physical Look at the DSL/Cable Gateway
The following illustration shows the rear panel of DSL/Cable Gateway:
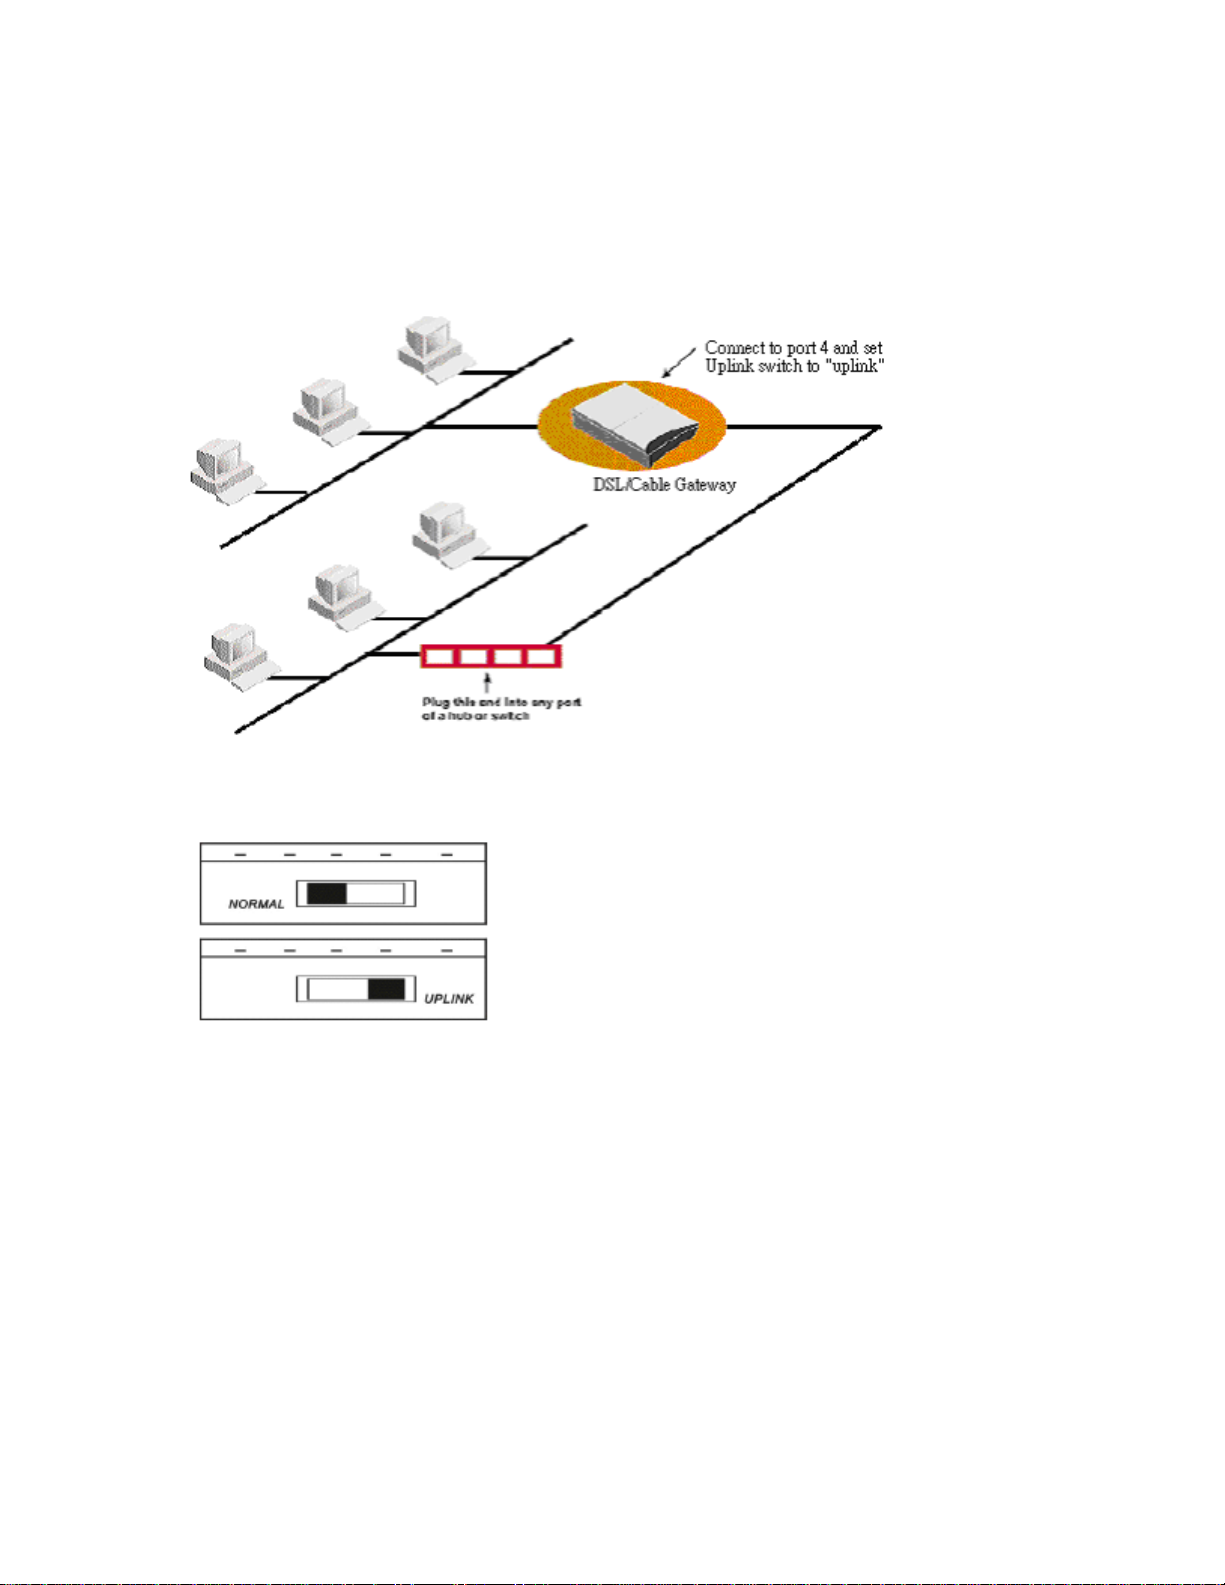
(1) 4 RJ-45 10/100 Switch connectors for connecting to PCs and workstations or connecting
external Ethernet hub, or switch with uplink switch on port 4
(2) 1 RJ-45 EWAN connector for connecting to Internet via ADSL/Cable modem
(3) 1 DC power connector for connecting through an AC power adapter (included as part of the
product) to the wall power outlet
(4) Reset button to reset to factory configuration
1