Instructions d’emploi Instructions d’emploi
FF
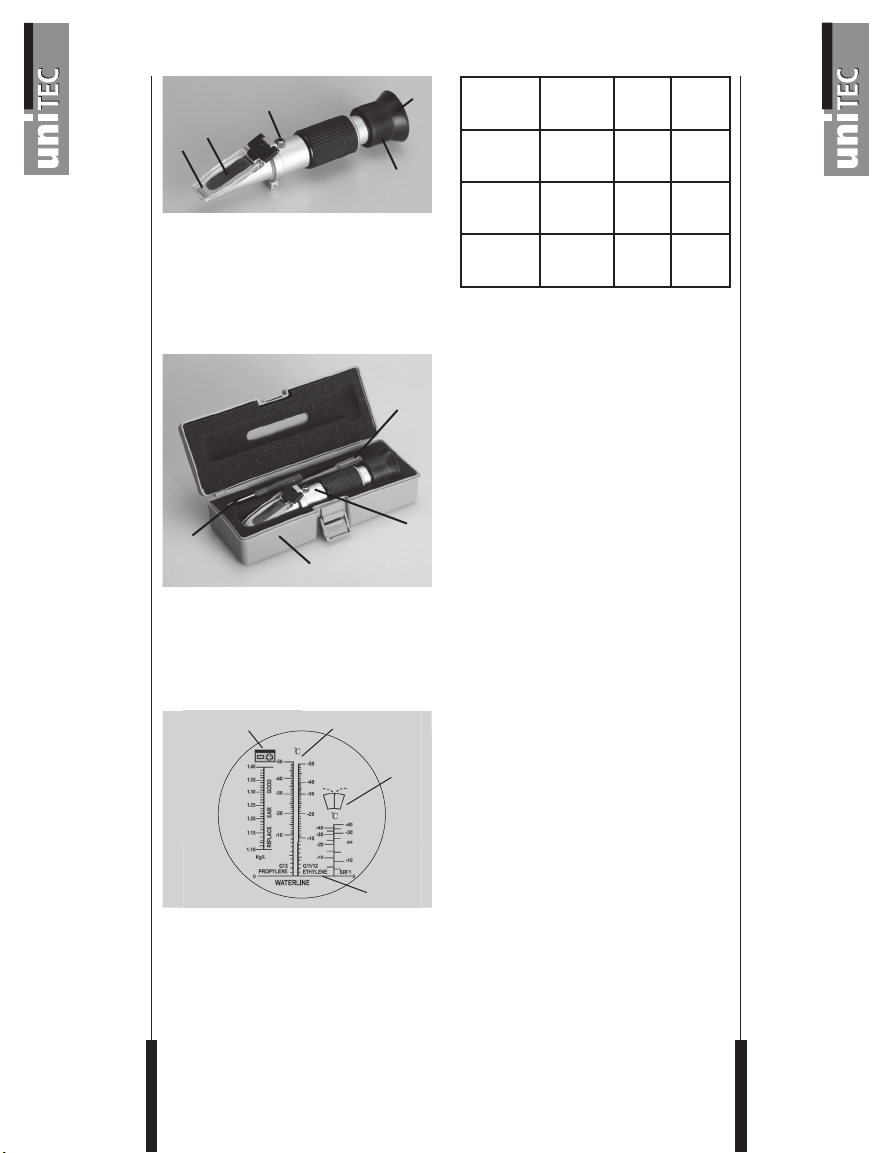
Utili-
sation
A B C
Plage de
mesure
1,10-
1,40 kg/l
-50°C
-0°C
-
40°C
-0°C
Précision
0,01
kg/l
5°C 5°C
Gradu-
ation
+/-0,01
kg/l
+/-1°C +/-5°C
Attention !
Danger de brûlure à l’acide lors du
test de l’électrolyte. Veuillez porter
des vêtements de protection, des
gants de protection et des lunettes
de protection lorsque vous
manipulez de l’électrolyte.
• Evitez le contact de l’acide avec la
peau, les yeux ou les vêtements,
rincez abondamment la peau
brûlée à l‘acide avec de l‘eau.
Consultez ensuite immédiatement
un médecin/ophtalmologiste.
• En cas de brûlure des yeux à
l’acide, rincez les yeux durant au
minimum 15 minutes paupières
ouvertes avec de l’eau courante
tiède de l’intérieur vers l’extérieur.
• Nettoyez le réfractomètre en pro-
fondeur après chaque utilisation.
• Le réfractomètre ne peut être
soumis à aucune température
extrême, à des sollicitations
mécaniques élevées, à un rayonne-
ment solaire direct ou à une
humidité importante.
• Le réfractomètre n’est pas un jouet,
maintenez-le à l’écart des enfants.
• Durant l’utilisation du réfracto-
mètre, veillez à ne pas recevoir de
coups ou autres chocs car cela
peut causer de dangereuses
lésions oculaires.
• Touchez la lentille du réfractomètre
le moins possible avec les doigts !
Techni-
sche
Daten
Consignes de
sécurité
Avant la
première
utili-
sation
Utilisation /
mesure
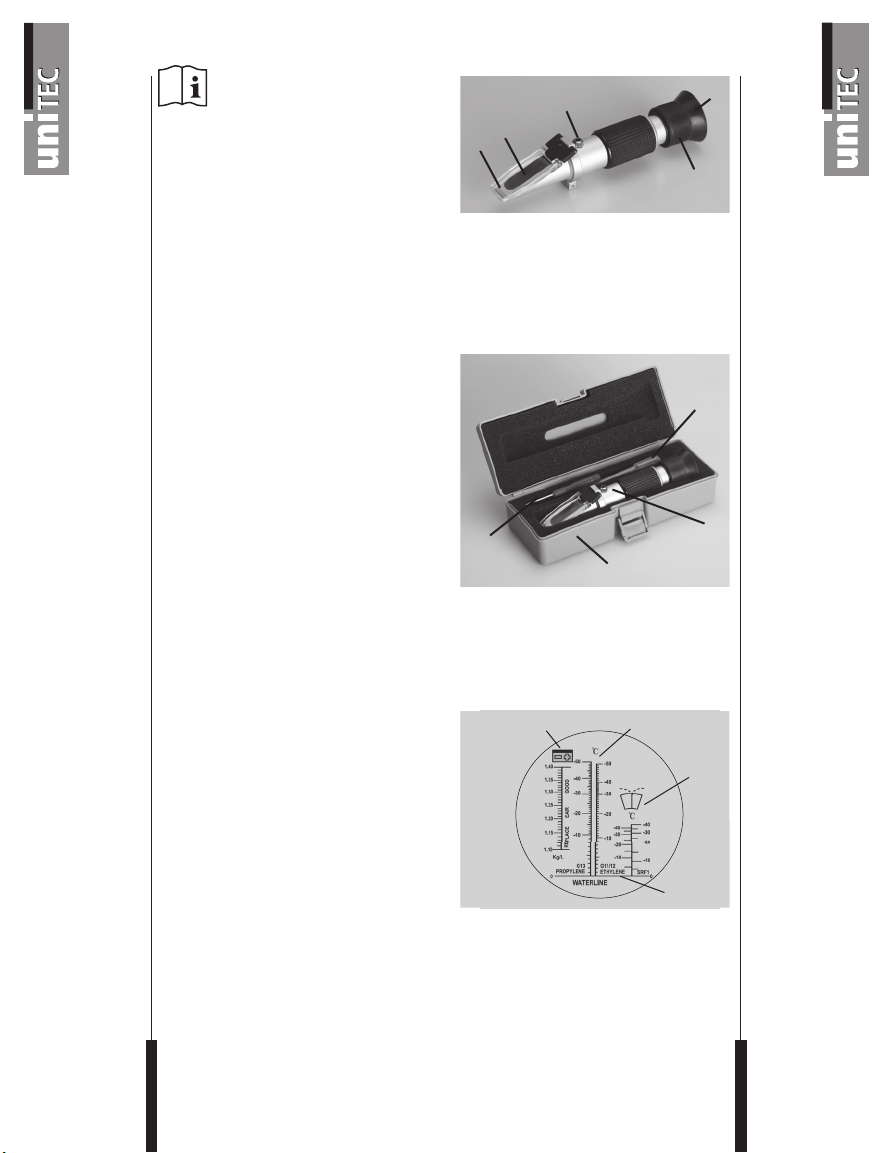
• Vérifiez le bon positionnement de
l’œilleton.
• Le réfractomètre permet de déter-
miner rapidement et de façon
précise la teneur en produit antigel
dans votre circuit de refroidisse-
ment ainsi que la teneur en produit
antigel dans le système lave-glace
de votre véhicule. Il vous offre en
outre la possibilité de déterminé
la densité d’acide de l’électrolyte
de votre batterie de véhicule.
L’instrument de mesure doit être
ajusté pour une mesure correcte
.
Ajustage du point zéro
1. Rabattez le couvercle prismatique
[1] vers le haut,
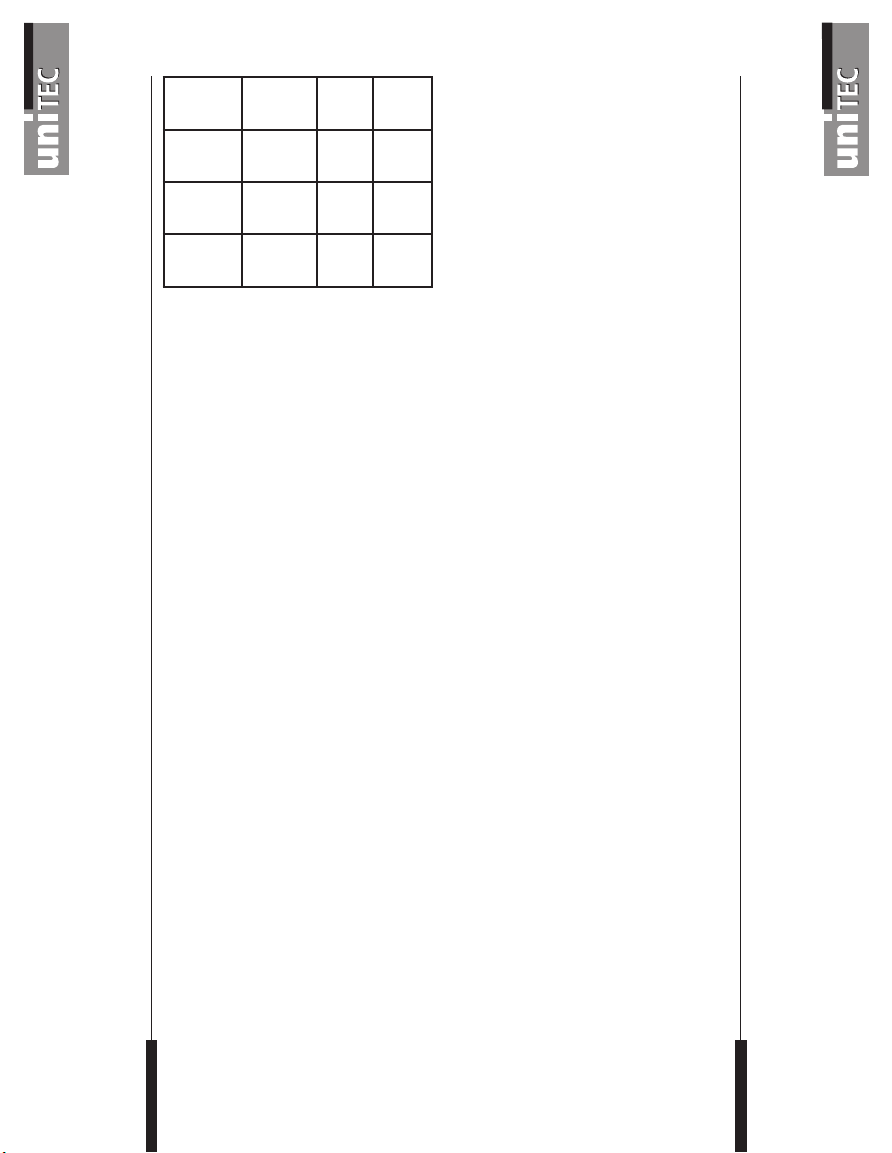
2. Déposez quelques gouttes d’eau
distillée sur la surface prismatique
[2] à l’aide de la pipette fournie [8],
3. Refermez le couvercle prisma-
tique [1]. Mesurez la quantité de
liquide de sorte que la surface
prismatique soit intégralement
recouverte après la fermeture du
couvercle prismatique [1].
4. Placez votre œil sur l’oculaire
[4] et dirigez le réfractomètre en
plaçant sa surface prismatique
[2] contre une source de lumière
aussi claire que possible (pas
directement dans le soleil).
5. Pour la mise au point, tournez
la rondelle de réglage [5] sur
l’oculaire [4].
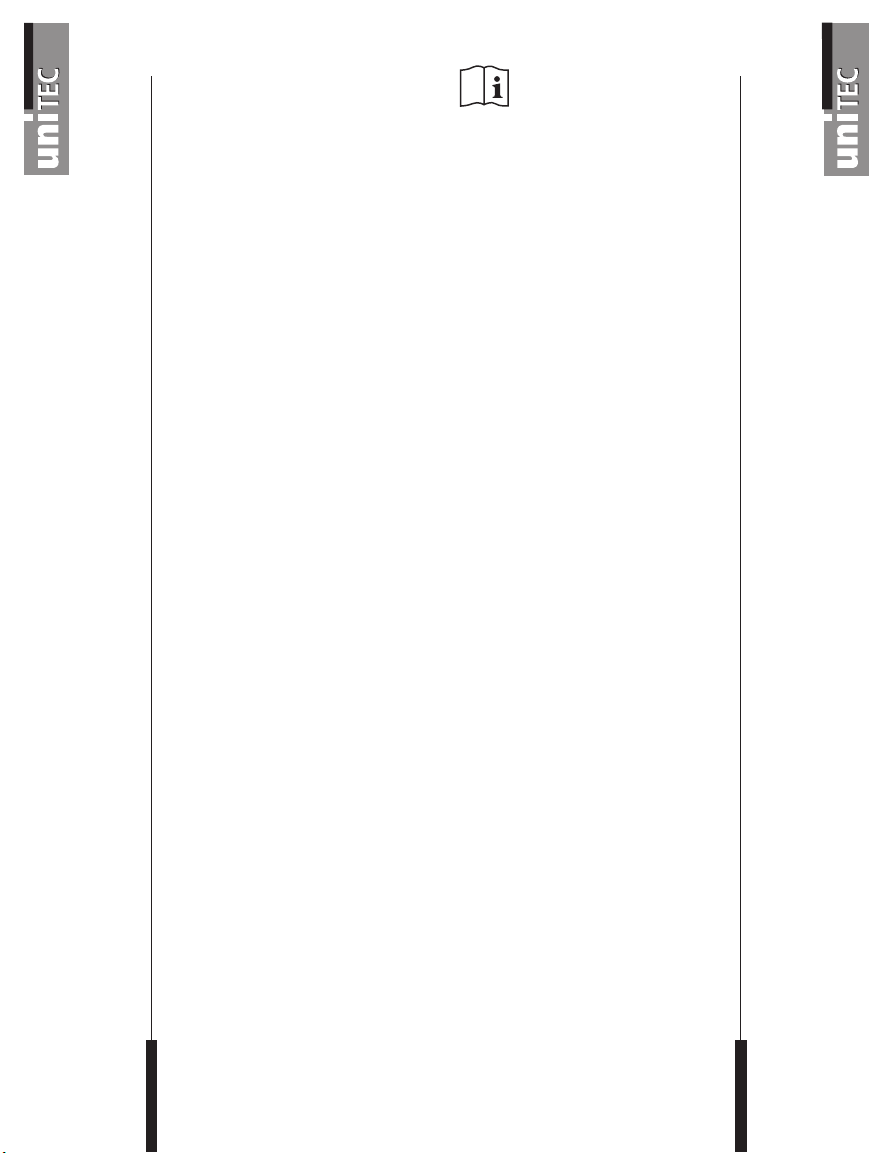
6.
Dans l’oculaire [4], vous voyez un
champ blanc et un bleu. La limite
des deux champs doit se trouver
sur le point zéro (waterline) [D].
Si la limite des deux champs ne se
trouve pas exactement sur le point
zéro, enlevez le capuchon de re-
couvrement de la vis d’ajustage [3]
et tournez à l’aide de l’outil d’ajus-
tage [6] la limite des deux champs
au point zéro. L’ajustage doit se
faire à température ambiante.
75565_BA_120622.indd 18-19 05.07.12 10:22