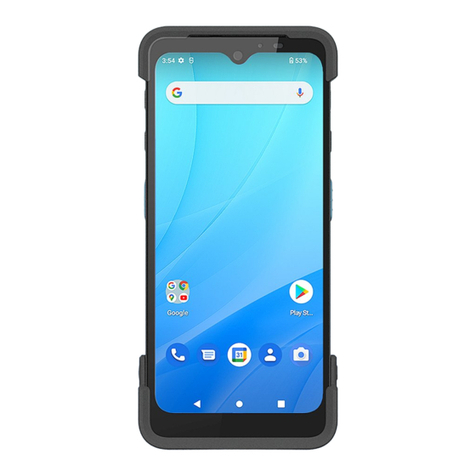
Unitech EA520 User manual

EA520
Operating Instruction
Safety information
Safety specifications and usage instructions of mobile phone battery
Recommended usage items
·Before you use the battery, please read the instruction manual and the surface label of the battery carefully.
·Please use the battery in places away from the heat source and high voltage and do not allow children to play with
the battery. Do not beat the battery. Please remember that this battery can only be charged with the original
charger.
·Do not allow short circuit of the positive and negative poles of the battery and do not install or disassemble the
battery by yourself; do not let the battery get wet so as to avoid danger.
·If this battery is not used for a long time, please store it well and ensure that the battery is at half charge, neither
full nor running out.
Warning against danger
·Do not disassemble or install the battery
The protection mechanism and protection circuit inside the battery can help avoid danger. If it is not well
disassembled or installed, the production functions will be damaged, which may lead to the heating, smoking,
deformation or burning of the battery.
·Do not short-circuit the battery
Do not connect the positive and negative poles of the battery with metal and do not store or move the battery
together with metal. If the battery is short-circuited, a large current will flow through the battery, which will
damage the battery and lead to heating, smoking, deformation or burning of the battery.
·Avoid using the battery near power sources
Do not use the battery near fire or ovens as overheating will cause short circuit inside the battery and lead to
heating, smoking, deformation or burning of the battery.
·Use a special charger to charge the battery correctly
If you charge the battery with a non-dedicated charger, the battery may be dangerous. Charging under abnormal
conditions may result in loss of internal protection circuit functions of the battery and abnormal chemical reactions,
because of which, the battery may have the problems of heating, smoking, deformation or burning.
·Do not destroy battery
Do not use metal to damage the battery by chiseling into it, beating or throwing it or by any other means because
they may lead to heating, smoking, deformation or burning of the battery and cause danger.
·Do not use the battery in other devices
Improper operating conditions may reduce the battery performance and its service life and may even lead to
heating, smoking, deformation or burning of the battery
Warning
·Do not put the battery on the charger for long periods

Please stop charging the battery if the charger is still charging the battery after the normal charging time as
abnormal charging may lead to the heating, smoking, deformation or burning of the battery.
·Do not place the battery in microwave oven or other pressure vessels.
Transient heating or structural damage can lead to the heating, smoking, deformation or burning of the
battery.
·Battery with liquid leakage should not be placed near the fire
If the battery leaks (or smells), please keep it away from the fire source, otherwise, the leaking electrolyte
may catch fire or even cause other hazards.
·The headset should not give out too loud sounds
Please use the headset with caution because excessive sound may lead to hearing loss.
Matters needing attention
·When you use the battery in strong sunlight
Please do not use the battery in strong sunlight so as to avoid heating, smoking, deformation or burning,
which may lead to the degradation of battery performance and the reduction of its lifetime.
·Anti-static
The protective circuit inside the battery can help prevent all kinds of accidents. Please do not use the battery
in high-voltage electrostatic field because static electricity may damage the protection panel, which may lead to the
heating, smoking, deformation or burning of the battery.
·Instruction manual
Before you use the battery, please read the manual carefully and read it when necessary.
·Charging mode
Please use the recommended charging method to charge the battery in recommended ambient conditions with
a special charger.
·Working temperature of the equipment
-10 ℃to 55 ℃.
Use and maintenance of the mobile phone
Please use the mobile phone designed by excellent technology, with care. Please take the following
suggestions so that you can better use and maintain the mobile phone.
·Keep the mobile phone and all its parts out of reach of children.
·Do not place the mobile phone in a place with high temperature because high temperatures can shorten the life of
electronics, damage batteries, and even distort or melt some plastic parts.
·When the phone is moved from a place with low temperature to a place with normal temperature, please do not
put the phone in a low temperature place as moisture may occur inside which may damage the circuit board.
·Do not dismantle the mobile phone as improper handling by non-professionals may damage the device.
·Do not use irritant chemicals, cleaning solvents or corrosive cleaners to clean the phone. When you need to clean
your mobile phone, please gently wipe it with a cloth dampened with mild soapy water.
·Please use the accessories recommended by the manufacturer. Unauthorized accessories may damage the mobile
phone.
·If you carelessly make the mobile phone wet, please ensure that the mobile phone has dry before you use it again.
·Do not contact metal parts (except for specially configured charger port and data cable port) with the charger port
of the mobile phone so as to avoid short circuit.
Important Tips
Please observe the following precautions when using your mobile phone so as to avoid possible disasters or

legal penalties.
Pay attention to aviation safety
Do not use your mobile phone on the plane. As the navigation system on the plane may be interfered with by
mobile phones, many countries ban mobile phones from being used on planes.
Pay attention to the safety of the surrounding environments
Do not use mobile phones at gas stations and do not use them near oil storage plants, chemical plants and
places near flammable or explosive objects.
Pay attention to traffic safety
Please be careful enough when you drive cars and do not drive your car while making phones.
Be aware of radiation interference
When you use the mobile phone, please keep away from objects or devices which are easily disturbed. You
are recommended to keep the antenna at least 2.5cm away from your body when using your mobile phone.
Be aware of the interference to medical facilities
The usage of a mobile phone may cause interference to some medical devices. Most hospitals will prohibit
you from using your mobile phone.
Pay attention to the storage environment
Please keep the mobile phone away from magnetic devices, such as magnetic cards and floppy disks.
Radiation from the mobile phone will erase the information stored on the magnetic devices.
Warning
There is no self-repair content in the mobile phone. If the mobile phone is suspected to be damaged, please
send it to the designated service and maintenance center as soon as possible so that qualified technicians can repair
them. Do not disassemble the mobile phone by yourself; otherwise, it may suffer electric shock or other injuries.
Do not let young children access the mobile phone or its accessories. Improper operations of children may
damage the mobile phone or its accessories and may hurt the children or others. Meanwhile, detachable parts of
mobile phones, such as SIM cards and memory cards, may be swallowed by children, which is dangerous for
children.
When you use a mobile phone, please keep it away from high temperature and exposure of the sun. Keep it
in a dry and cool place.
Waterproofing precautions:
1. Before you do the waterproof test, all notches of the battery cover should be closed tightly, otherwise, it will not
be waterproof.
2. USB socket, headphone socket and charger seat of this machine are waterproof devices themselves. After the
waterproof test, the machine should be dried and placed for a period of time until the water in the headphone
socket, USB socket and charger seat dries up.
1.Introduction to the Mobile Phone
1.1 Insert and remove the SIM card
Close the mobile phone and uncover the upper right side cover of the mobile phone; insert the thimble into
the round hole inside the card slot and then take out the card holder. Place the SIM card flat on the groove of the
holder according to the shape of the holder and ensure that the flat area of the metal faces downward and that the

corner positions are the same with those of the card slot. Then, insert the card holder into the card slot. If you need
to take out SIM card, please close the machine first and then remove other external powers. Insert the thimble into
the round hole in the card slot and take out the card holder to remove the SIM card.
Tip: If mobile phone SIM does not support hot swap, you should not take out the SIM when the phone is on
standby state, otherwise, SIM card may be damaged.
1.2 Insert and take out the memory card
Close the mobile phone and uncover the upper right cover of the mobile phone. Insert the thimble into the
round hole inside the card slot and take out the card holder. Place the memory card flat on the card holder and
ensure that the flat area of the metal faces downward and that the corner positions are the same with those of the
card slot. Then, insert the card slot into the mobile phone.
Please close the phone before you take out the memory card and then take out the card holder according to the
above steps.
1.3 Remove and install the battery
The phone has a built-in battery.
Tip: The phone does not support manual disassembly of the battery.
1.3.1 Charge the battery
If the new battery is not fully charged, you need to install the battery and use up the electric quantity of the
battery before you use the mobile phone. Then, charge the battery according to the following method.
1. Insert the charger connector into the charger jack of the mobile phone.
2. Connect the charger with the power supply and the battery symbol will display dynamically, indicating
that the battery is being charged.
When the charging is completed, the symbol of full battery will be displayed, indicating the completion of
charging.
After the battery is fully charged, please remove the charger from the power supply and then pull the
charging head out of the mobile phone.
Tip: You can connect the USB data connection line with the computer to charger your mobile phone, copy
data and do other operations. USB version 2.0 is used. If the battery of your mobile phone has used up, you may
not be able to charge your mobile phone through a USB line. At that time, you need to charge your mobile phone
with a charger.
2. Basic Operations
2.1 Turn on/off mobile phone
Please long press the power button to turn on or off the mobile phone.
Tip: It takes the mobile phone some time to initialize the mobile phone, so please wait patiently.
If the mobile phone is started first, but the SIM card is not inserted, some functions of the mobile phone will
not be used normally. After the SIM card is inserted, the mobile phone will automatically check whether the
SIM card can be used.
2.2 Lock and unlock the screen
After the mobile phone is not used for a long time, its screen will go black and enter the locking state so as to save
some battery power.
Lock the screen/mobile phone:press the power button
Unlock the screen/mobile phone:press the power button to light the screen which shows the screen locking state.

Click Unlock and slide up to unlock the screen.
If you have set the locking pattern or the password, the screen will give you a hint to ask you draw the picture or
input the password.
Main menu→Setting→Security→Screen locking mode
Screen locking mode →Pattern locking
1. Screen locking→Pattern
2. Pay attention to the screen prompt and pattern examples and select next step twice.
3. Connect at least 4 points manually.
4. Select “Continue”
5. Draw the pattern and confirm it.
6. Select “Confirm”
After setting the unlocking pattern, the mobile phone will ask you to swipe upward to unlock the screen
each time you turn on the phone. Then, you should enter the unlocking pattern. If you want to set the mobile
phone to make it no longer require an unlocking pattern, please enter Settings → Security to change the
screen locking mode. After entering the unlocking pattern, please click “No”.
Set screen locking mode→password
1. Set screen locking mode→password
2. Input at least four character password
3. Select “Continue”
4. Input character password again and confirm it.
5. Select “Confirm”
After setting the password, the mobile phone will ask you to swipe upward to unlock the screen each
time you turn on the phone. Then, you should enter the password as required. If you want to set the mobile
phone to make it on longer require an unlocking password, please enter Settings → Security to change the
screen locking mode. After entering the password, please click “No”.
Tip: Please use the above steps to set the screen locking mode as PIN code.
Set screen unlocking mode→fingerprint
1. Set screen unlocking mode→fingerprint
2. Type in fingerprint and input at least 4-character password before you enter the fingerprint
3. Input fingerprint and finish the operation
After you set your fingerprint, you can unlock the screen using your fingerprint. You can also unlock
the screen by entering the password or pattern. If you want to delete the fingerprint, please go to Settings →
Security to delete the fingerprint locking setting.
2.3 Touch methods
You can use the following methods to operate your mobile phone accordingly. (Please click the corresponding
function key with your finger pulps.)
2.3.1 Click:
You can select an icon or option in the display screen by using the click function. For example, in the main
menu, you can click the information to enter and browse all SMS/MMS information.
2.3.2 Point:
You can check more menu options by holding on an item for several seconds. For example, when you click
and hold on a number in the contact details interface for several seconds, a pop-up menu will open, and you can

perform certain options on the menu.
2.3.3 Scroll:
Click in the scrollbar and drag up and down. For example, when browsing the contact list, a scrollbar will pop
up on the right side. You can drag the scrollbar to make it easier to find contacts.
2.3.4 Drag:
Click in a project with your finger and move it by dragging your finger.
2.3.5 Double click:
When scrolling through photos or webpages, you can quickly click twice with your finger to zoom in or out.
2.3.6 Fast swipe
Use the scrollbar to select contacts in the list, you can quickly swipe the touch screen.
When quickly swiping a long list of contacts, you can click screen to stop the swipe.
Friendly tips: In order to avoid scratching the touch screen, please do not use a sharp tool.
Do not access to other electronic equipment with the touch screen. Electrostatic discharge can cause the touch
screen failure.
In order to make better use of the touch screen, please remove the touch screen protective film before using
your mobile phone.
2.4 Check IMEI
1. Main menu→ Settings→ About mobile phone→ Status information
You can check your IMEI in the status information.
2. Enter “*#06#” on the dial pad to check the IMEI.
2.5 Main buttons

Button
Function
Home key
Return to the standby screen.
Task manager key
Enter the task manage.
Back key
Return to the previous screen.
Power on/off
Switch power on or off; Sleep/Wake; Long press for 10 seconds to
restart.
Volume keys
Adjust the phone volume and press the volume key on the camera
interface to take picture (No wake-up function).
2.6 Sleep and wake up the screen
1. You can put the screen to sleep to save battery, prevent accidental operation of mobile phone and clean
the screen by pressing the power button. And then pressing it again to wake up the screen.
2. If you need to adjust the time of mobile phone to automatically enter sleep state, please select
Settings→ Display→ Sleep/Wake.
2.7 Home screen
You can add shortcuts, widgets and other applications to customize the home screen according to your
requirements.
2.7.1 Add items to the home screen
You can customize the home screen by adding applications, widgets, folders and applications, and shortcut
keys for projects.

2.7.2 Move items on the home screen
1. Click the item you want to move.
2. Drag the item to the desired position after being selected.
2.7.3 Remove items from the home screen
1. Click the item you want to remove.
The item is selected and a delete icon appears in the upper area of the screen.
2. Drag the item to the delete.
2.8 WLAN
Main menu→ Settings→ WLAN
·WLAN: Turn on or off WLAN.
·Network notification: Set the mobile phone to notify the user when an open network is available nearby.
·WLAN networks: Find wireless networks around you:
1. Select Settings→ WLAN
2. Select WLAN and turn it on. The mobile phone will scan for available WLAN networks, and then list
the network names found in the WLAN network list.
3. Click a network to connect.
4. If it is a protected network, the system will prompt you to enter your password. For specific details,
please consult the service provider or administrator of the network.
2.8.1 Delete WLAN networks
You can make the mobile phone not save the memorized WLAN network details.
1. Turn on the WLAN.
2. Click and hold the connected network name on the WLAN Settings screen.
3. In the opened WLAN dialog, click cancel the save.
2.9 Operating status of mobile phone
The network signal strength is
4G.
Download
The network signal strength is
3G.
The USB is connected.
GSM network is in use.
The battery is full.
The battery is being charged.
Silent mode
The signal strength of WLAN
Turn on portable WLAN hotspots.
The headset is plugged in.
Airplane mode
New messages
Alarm is set.

On the line
Missed calls
2.10 Notifications
There will be icons in the banners at the top of the home screen to notify new messages or E-mails, calendar
events, alarms, and ongoing events (such as current call status).
3. Dial
3.1 Dial pad:
Main menu→ Dial or Click dial button
3.1.1 Click the button to enter the phone number on the dial pad.
If you enter wrong number, click and you can delete numbers one by one. You can delete all number,
please long press .
If you make an international long-distance call, press and hold the 0 key and enter the international connection
code “+”.
3.1.2 Click the dial button below the dial pad, you can dial the number you enter.
3.2 End the call
Click or click end call button.
3.3 Answer the call and refuse the call
When you have an incoming call, the relevant information of the call will be displayed on the screen. If you have
missed calls, you will receive a notification.
In the incoming call interface, drag icon to the right icon, you can answer the call.
(When the screen is locked, drag the lock screen control to the right to answer).
Notice: You can press the headset button to answer the call after you plug the headphones into your phone.
In the incoming call interface, drag to the left , you can reject a call.
3.4 Refuse the call with messages
In the incoming call interface, drag and slide up to ,you can reject the call and send a
message to inform the reason for rejection.
3.5 Hold the call
In the process of the call, click the waiting icon .
3.6 Silence the call
In the process of the call, click the silent icon .

3.7 Switch between current calls
After connecting two calls, you can click the call interface to switch.
3.8 Call options
You can perform the following operations during a call:
1. Click HFP (Hands-free profile) and you can use mobile phone loudspeaker.
2. Click Bluetooth and you can use Bluetooth device.
Notice: Please make sure that your phone has been bound and established a connection with the Bluetooth
audio device before using this function.
3. Click dial pad and enter phone numbers.
4. Click the call adding and you can add a new call.
5. Click the call recording and you can record the call.
3.9 Call history
The call history contains all your outgoing calls, received calls or missed calls, etc.
Main menu→ Dial → Call history
1. Click the item you want and click “Call back” below to make a call.
2. Click the item you want and click “Details” below to view the detailed history about this number and
perform more operations.
3. Click the item you want and click “IP dial” to manually enter the number prefix and select any number to
directly dial by IP.
4. Click menu→ Clear call history and you can clear the list of call history.
3.10 Emergency call
Notice: Your network service provider has set up one or more emergency numbers. Different countries have
different emergency call numbers, so the emergency call number of your mobile phone will not be valid in all
regions. Sometimes due to the influence of the network, environment or interference events, emergency calls may
not be able to be dialed.
Main menu→ Dial(If your mobile phone is locked, you can click emergency call.)
1. Enter emergency call numbers.
2. Click the icon of dial and make an emergency call.
4. Address book
Create and manage a list of personal or company contacts stored in the mobile phone or on the SIM card. You
can perform some operations such as creating, deleting contacts and so on.
4.1 Create New Contacts
Main menu→ Address book. Click the icon in the lower right corner to create a new contact, and the new
contact pop box will pop up. You can select a phone or SIM card to create a contact.
After entering the names of contacts and editing the related information, please click finish.
4.2 Backup contacts
Main menu→ Address book→ Press the option menu in the upper right corner→ Import and Export→ Pop
up the import/export contact box, and you can select to export to storage device/SIM card and click export.
Notice: Backup contacts needs to install an expansion memory card in your mobile phone.
4.3 Edit and delete contacts
Main menu→ Address book

Click and enter the contact you want and press edit button to modify, please click the ok symbol in the upper
left corner after editing.
Press the option menu in the upper right corner→ Delete. Select the contact you want to delete and click ok
symbol to delete this person.
4.4 Add contacts to favorites
You can add the most frequently contacted contacts to your favorites.
1. Open your address book.
2. Click and enter the contact details interface.
3. Click the five-pointed star icon to add to favorites.
4.5 Delete favorite contacts
Main menu→ Address book→ Favorites
After opening the favorites, you can enter the contact details interface, then click the five-pointed star icon
to delete the contact in the favorites.
4.6 Use contacts groups
Contacts groups involve the groups you create and you can add members to these groups.
4.6.1 View groups
1. In the main menu interface, click address book to enter the list of contacts.
2. You can click the option menu in the upper right of the screen, select a group, and enter the contact group
interface to view or manage your group.
4.6.2 Create groups
1. Open the contacts group interface.
2. Click the group icon in the upper right corner to create groups.
3. Enter the name of group and click OK.
4.6.3 Add members to the group
1. Open the contacts group interface.
2. Click the upper right icon and select modify, add members and enter directly or enter address book to
choose to add contacts.
3. Select the contact you want to add from the list and click ok symbol.
4.6.4 Delete groups
1. Open the contacts group interface.
2. Click the name of a group to enter, click the icon in the upper right corner, and select delete (this menu
only appears after the user customizes the group).
4.6.5 Edit groups
1. Open the contacts group interface.
2. In the group details interface, click menu→ Modify. You can modify and edit the name of the group.
3. Re-enter the group name and click ok symbol.
4.6.6 Search for contacts
1. Open the contacts list.
2. Click the icon of search and select to search.
3. Enter the name of the contact you want to search for.
4. Click the matched contacts in the list to view their details.
5. Message
You can send and receive SMS (Short Messaging Service) or MMS (Multimedia Messaging Service)

containing multimedia files.
5.1 SMS
Main menu→ SMS
5.1.1 Send SMS
1. Open the message function and view the conversation list.
2. Click the icon of the new message in the upper right corner of the screen to edit new messages.
3. Enter the recipient’s number in the recipient field. You can also click the icon on the right to select
recipients from contacts.
4. Click the send message and enter text message.
5. Click the send icon to send message.
5.2 MMS
5.2.1 Create and send MMS
1. Open the message function and view the conversation list.
2. Click the icon of the new message in the upper right corner of the screen to edit new messages.
3. Enter the recipient’s e-mail address in the recipient field. You can also click the icon on the right to
select recipients from contacts.
4. Enter the recipient’s number in the recipient field. You can also click the icon on the right to select
recipients from contacts.
5. Click menu→ Add subject, and you can add the subject of message.
Notice:
SMS will be automatically converted into MMS after topics and attachments are added. Similarly, MMS
will be automatically converted into SMS after subjects, attachments and other contents are deleted.
6. Press icon and select the attachment you need.
7. After editing, please click send.
5.2.2 Read and reply messages
1. Click a message and you can open and view the conversation.
2. If you need to reply to a message, just open the message and enter the reply content in the text box
below.
5.3 View message details
1. Open the message function and view the conversation list.
2. Click the message to be viewed and open the conversation directly.
3. Long press the message that you want to check the details.
4. Click menu in the pop-up message option bar→ Message details
5.4 Forward message
1. Open the message function and view the conversation list.
2. Click message to be forwarded and open the conversation directly.
3. Long press the message to be forwarded and click menu in the pop-up message option bar→ Message
details
5.5 Delete message
5.5.1 Delete the entire conversation with a contact
1. Open the message function and view the conversation list.
2. Long press this conversation.
3. Click the delete button.

Tip: There is another way:
Open the conversation list, click the option icon in the upper right corner and select “Delete all
conversations”.
5.5.2 Delete a message
1. Open the message function and view the conversation list.
2. Click the message to be deleted and open the conversation directly.
3. Long press message to be deleted.
4. Select “Delete” in the pop-up message option bar.
5. Click “OK” in the pop-up dialog box.
5.5.3 Change message settings
1. Open the message function and view the conversation list.
2. Click the icon in the upper right corner→Settings, and you can make various settings to the messages.
6. E-mail
You can easily read and send E-mails via mobile phone. “E-mail” carries a conduct that allows you to easily
configure the e-mail service.
6.1 Set up an E-mail account
When you first use the E-mail function, you need to set up an E-mail account.
6.1.2 In the main menu interface, click E-mail and open the E-mail function to set up your account.
6.1.3 Enter the E-mail address and password, and click next step. The system will automatically connect to
the server and check the server settings, or you can click manual settings.
6.1.4 Set the E-mail check frequency, default account, E-mail reminder and other information, and click
next step.
6.1.5 Create a name for your mail account and set the name to be displayed when you send out E-mails and
click next step.
6.1.6 The system will synchronize with the mail server you set up. And then, your E-mail will be displayed
on your mobile phone.
6.2 Read E-mails
6.2.1 Please click E-mail to enter inbox after setting up your E-mail account.
6.2.2 Click the E-mail you want to read and the screen will display the corresponding E-mail, including the
sender, subject and related information, followed by contents of E-mail.
Notice: When receiving new E-mails, you will get a corresponding notification in the status bar. You can
open the notification panel and click new E-mails to read.
6.3 Write and send E-mails
6.3.1 From the main menu, you can enter the inbox by clicking E-mail.
6.3.2 Click the writing icon in the lower right corner.
6.3.3 Enter the recipient, and you can also click the collapse symbol on the rightmost of the recipient
column to add the E-mail addresses of the CC and BCC recipients.
6.3.4 Click subject and enter the subject of the E-mail.
6.3.5 Click the E-mail content and enter your content.
6.3.6 Click the attachment icon in the menu→ Add attachments, including stored photos, videos, audios and
other files.
6.3.7 Click the send icon in the upper right corner of the screen.
6.4 Add a signature to the E-mail
6.4.1 From the main menu, you can enter the inbox by clicking E-mail.

6.4.2 Click the icon in the upper left corner→ Settings
6.4.3 Click the account you have set up.
6.4.4 Click the signature.
6.4.5 Enter the signature you want and click ok.
6.5 Add an E-mail account
6.5.1 From the main menu, you can enter the inbox by clicking E-mail.
6.5.2 Click the icon in the upper left corner→Settings→Add account
6.5.3 You can add new accounts and please view setting up an E-mail account for details.
6.6 Edit the E-mail account
6.6.1 From the main menu, you can enter the inbox by clicking E-mail.
6.6.2 Click the icon in the upper left corner→Settings
6.6.3 Click the account you have set up to edit and edit it for general settings, notification settings and
server settings.
7. Chrome Browser
You can use the browser function to view webpages or search for information on the Internet.
Notice:
1. Use the browser to enable your mobile phone to access the web and web-based applications. If it
necessary, please consult your network service provider how to connect.
2. It may cost you related data traffic charges by using this function. For specific tariff details, please
contact your network service provider.
Main menu→Chrome browser
1. When you first enter the Chrome browser, it will present an interface to welcome to Chrome. Using
this application means that you agree to Chrome’s terms of service and privacy notice. You can view
the service and privacy notice, check the option that help make Chrome better by sending usage
statistics and crash reports to Google and select “Accept & Continue” to enter and continue using.
2. Enter “settings of Chrome” to add your account in order to get the recent tabs, saved bookmarks,
history and other settings in your device. If you have not applied for a Google account, you can also
directly click ‘No, thanks’.

3. If you want to display your favorite bookmarks on the main pages, please click to view
saved bookmarks and mobile bookmarks. You can also click to view the recent tabs, history
and information of other devices. Please notice that other devices need logging in Chrome.
4. Click in the right of the search bar and open the option bar,
you will see three icons at the
top of option bar , they are respectively open the webpage you
just closed and exited, add new bookmarks and refresh the current page. There are many operations in
the list of the option bar, including open new tabs, open new incognito tabs, saved bookmarks, recent
tabs, history, share, print, find on page, add to home screen, request desktop site, settings, help and
feedback, etc.
8. Music
Enjoy music stored in your mobile phone or SD card through the Music Player.
8.1 Copy audio files to your mobile phone
1.Connect your mobile phone to your computer via a USB cable
2.The USB setting interface pops up on the mobile phone. Then select to mount the SD card
3.Copy audio files to SD card through your computer.
8.2 Open the music library
8.2. 1 Open music and view the music library
Click music in the Main Menu and the system will automatically scan the audio files on your mobile phone.
The scanned audio files will be displayed in the list. When the music application opens, you will see four tabs:
Music singer, albums, songs, and playlist.
Click any viewing mode in the music interface, and you can open the music list in different modes.
8.2. 2 Delete tracks from SD card
1. Open the music application and view the list of audio files.

2. Press a certain track for a long time
3. Select Delete from the pop-up window
4. Click OK in the dialog box that opens
8.3 Open music file
8.3. 1 Play music
1. Open the music application and view the list of audio files
2. Click the Music singer/Albums/Songs/Playlist tab to find the music file you want.
3. Click the music file to start playing
8.3. 2 Set the track to a ringtone
Long press a track in the music library list. Click “as the mobile phone ringtone” in the Menu that opens.
(only for songs in a playlist) or Click Menu-> use it as a mobile phone ringtone when a song is playing.
8.4 Usage of playlist
You can create a playlist and organize music files into tracks so that you can play tracks in your order or a
random order
8.4. 1 Create a playlist
1.Open the music application and view the list of audio files
2.Select the music file to add to the playlist and press long until the shortcut Menu pops up
3.Click and add it to playlist
4.Click to create a new playlist
5.Enter the name of the new playlist
6.Click to save, at which time the playlist has been created successfully and the music file you selected has
been added to the playlist
8.4. 2 Add tracks to playlist
1. Open music and select the song tab.
2. Select the music file to add to the playlist and press long until the shortcut Menu pops up
3. Click and add to it playlist
4. Select the playlist to add
8.4. 3 Remove tracks from a playlist
1. Open music and select the playlist tab
2. Click a playlist to view the tracks in it
3. Long press the track you want to remove from the playlist until the shortcut Menu pops up
4. Click to delete it from the playlist
8.5 Play music
Open the music library and select the music you want. Press Menu → play all while viewing the tracklist.
8.6 Music player control buttons
Function
Description
Play/pause
Click
The previous/next song
Click

Fast forward/backward
Long press and hold
View playlist
Click
Random play
Click
Repeated playback
Click
Sound effect
Click
Volume
Press the side volume key up or down
8.7 Hide, activate, and turn off the music player
Press the home key to hide the music player. And your music will be continued while other applications
operate. displayed in the status bar indicates that a song is playing. Swipe down the status bar to see
details, and click the song name to return to the Music player interface. Press to pause music and press
the home key to return to the Home Screen.
9.Video
When video files exist on your mobile phone, you can open them to enjoy
9.1 View video
Click Video to enter the video library from the Main Menu
Video displays the video from your SD card or mobile phone, including video you shot with your camera
and video you downloaded from the network or other settings
9.2 Play video
Click Video to view the video list
Click a video to play it
9.3 Share video
Click Video to view the video list
Long-press a video file select Share the video in the pop-up dialog box
10. Camera
Your mobile phone camera comes with 8 megapixels to take photos. You can take your favorite photos with
your camera and set them up as wallpaper or share them via messaging, Bluetooth, email, and other means. The
mobile phone stores the photos taken in the mobile phone's external SD card and memory.
Tip: Please wipe the camera lens before taking pictures for the best shooting effect. Please respect the rights
of others and abide by local laws, regulations, and customs when taking photos.

10.1 Take photos
1. Click on the Home Screen to enter the app, then click and click back button to
enter the camera viewfinder interface: The top icon can be used to select various camera modes, and
the lower right corner can be used to select the flash mode and switch between front and rear camera
modes. Touch the preview area to adjust the focus. As shown in the figure:
2. Camera mode is set to camera mode by default. You can switch to camera mode from via
3. Aim the lens at the position/object.
4. Click to take pictures.
The thumbnail of the photo you just took is displayed in the lower-left corner of the screen.
· Click thumbnails to view photos.
· Click Menu and then select Delete to delete the photo.
· Click Menu and then select Play Slide to slide the photo
· Click Menu, select Edit to edit photos
· Click Menu and select Rotate Left/Right to correct the photo by rotating it.
· Click Menu, select Cut, you can cut photos.
· Click Menu, select "Set As" for photos, which can be set as wallpaper and contact photos.
· Click Menu, select Details to view the details of the picture.
· Click Menu, select Print to save photos in PDF format
10.2 Record video
1. Switch the camera to the camera mode

2. Aim the lens at a position/object
Press to start recording video, press to stop, and save it automatically.
3. Press the home button to turn off the camera and return to the Home Screen.
The video thumbnail you just recorded is displayed on the left side of the screen. Click the thumbnail, and
you can do the following:
· Select Share to share videos via messaging, Bluetooth, e-mail, and so on.
· Click Menu, select Delete to delete the video.
· Click Menu, select Cut to cut the video.
· Click Menu, select Silence, the video will be saved to the camera and will play silently.
· Click Menu, select Detail to view video details.
10.3 Camera mode settings
Click to enter the camera setting mode, and sets the camera as needed, such as exposure, effect, etc.
As shown in the figure:
10.4 Camera mode settings
Click to enter the camera setting mode, and set the camera as needed as shown in the figure:

11. Gallery
You can open the Gallery to view the Photo Album
11.1 View albums
Click Gallery to open Gallery and view Photo Album from Main Menu
The Gallery displays images from your SD card or mobile phone, including images you took with your
camera and downloaded from the network or other locations.
11.2 Processing pictures
11.2.1 View & browse pictures
1. Click the Gallery to open the Gallery and view the Photo Album
2. Click an album in the list and the pictures in the album are displayed as thumbnails
3. Click a thumbnail to browse a larger image
11.2.2 Delete picture
Click the Menu-> Delete to delete the picture
11.2.3 Slide show
1. Open a Photo Album, in which the pictures will be displayed as thumbnails
2. Click the Photo Album thumbnail icon to view the picture
3. Click Menu → Play slides to show all the pictures in the album as slides
11. 2.4 Editing
Click Menu-> Edit to edit the picture
11. 2.5 Rotate photos
Click Menu-> Rotate Left and the picture can be rotated to the left
Click Menu-> Rotate Right and the picture can be rotated to the right
11. 2.6 Cut photos
Click Menu-> Cut to cut the picture
11. 2.7 Set photos as wallpaper or contact photos
Other manuals for EA520
7
Other Unitech Desktop manuals
Popular Desktop manuals by other brands

Sony
Sony VGX-XL2 User Guide (Computer Component) user guide
ECS
ECS MD200 Quick installation guide
Dell
Dell OptiPlex GX150 Information guide

Vecow
Vecow EAC-5000 user manual
Sony
Sony VAIO VGN-FW Series Operating instructions - hardware guide
Moxa Technologies
Moxa Technologies DA-682 Series Brochure & specs
