UNITRAY Safe Tray System User manual

DESIGN & INSTALLATION GUIDE

UNITRAY Safe Tray System IDesign & Installation Guide V2 NZ IOctober 2017
2
www.unitray.co.nz
TABLE OF CONTENTS
1 PURPOSE OF DOCUMENT 2
1.1 General 2
1.2 Supporting information 2
2. GENERAL 2
2.1 UNITRAY Safe Tray System explained 2
2.2 UNITRAY Safe Tray System scope of use 3
2.3 Designer & Installer skill level 3
2.4 Health & Safety 3
2.5 Handling & storage 4
3. SPECIFICATION 5
4. INSTALLATION 5
4.1. Assembling the UNITRAY Safe Tray System 5
4.1.1. Inserting the elevating posts into the UNITRAY
Safe Tray System 5
4.1.2 Assembling the T-Connector 5
4.1.3 Assembling the Tundish 7
4.2. Locating the UNITRAY Safe Tray System &
connecting with the HWC 7
5. FINISHING 8
6. QUALITY ASSURANCE 8
7. ADDITIONAL RESOURCES 8
1. PURPOSE OF DOCUMENT
1.1. GENERAL
This document is intended for designers and
installers to ensure that the UNITRAY Safe Tray
System is specied and installed correctly.
1.2. SUPPORTING INFORMATION
This document must be read in conjunction
with the following documents:
•UNITRAY Safe Tray System pass™
(product assurance supplier statement)
•UNITRAY Safe Tray System Care and
Maintenance
•UNITRAY Safe Tray System Warranty
•UNITRAY Installation Sheet
2. GENERAL
2.1. UNITRAY SAFE TRAY SYSTEM
EXPLAINED
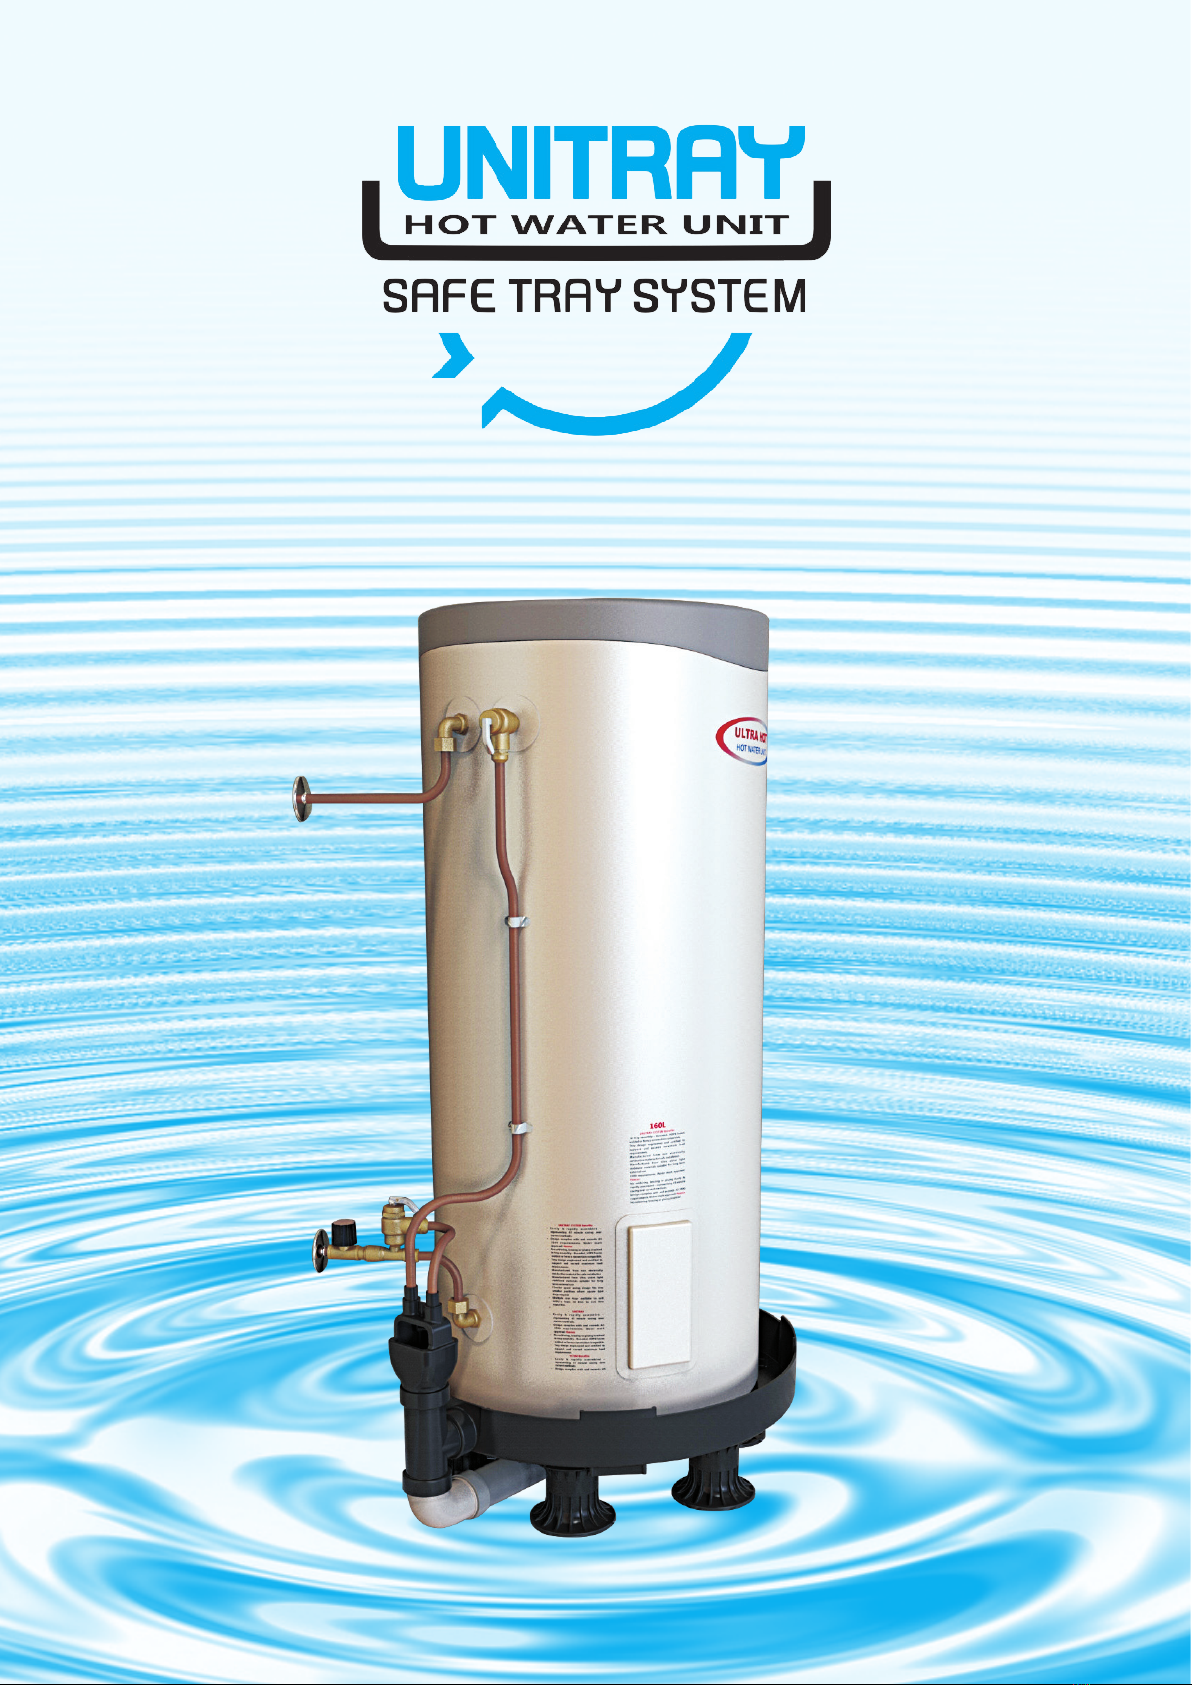
The UNITRAY Safe Tray System comprises
•UNITRAY Safe Tray
•Tundish components
•T-Connector
•Elevating posts (optional)
The UNITRAY Safe Tray System is designed
specically for use with hot water cylinders
(HWC) that utilise a controlled heat source. It
is designed to collect and drain any accidental
overow, thereby protecting the building and/
or neighbouring properties from damage or loss
of amenity.
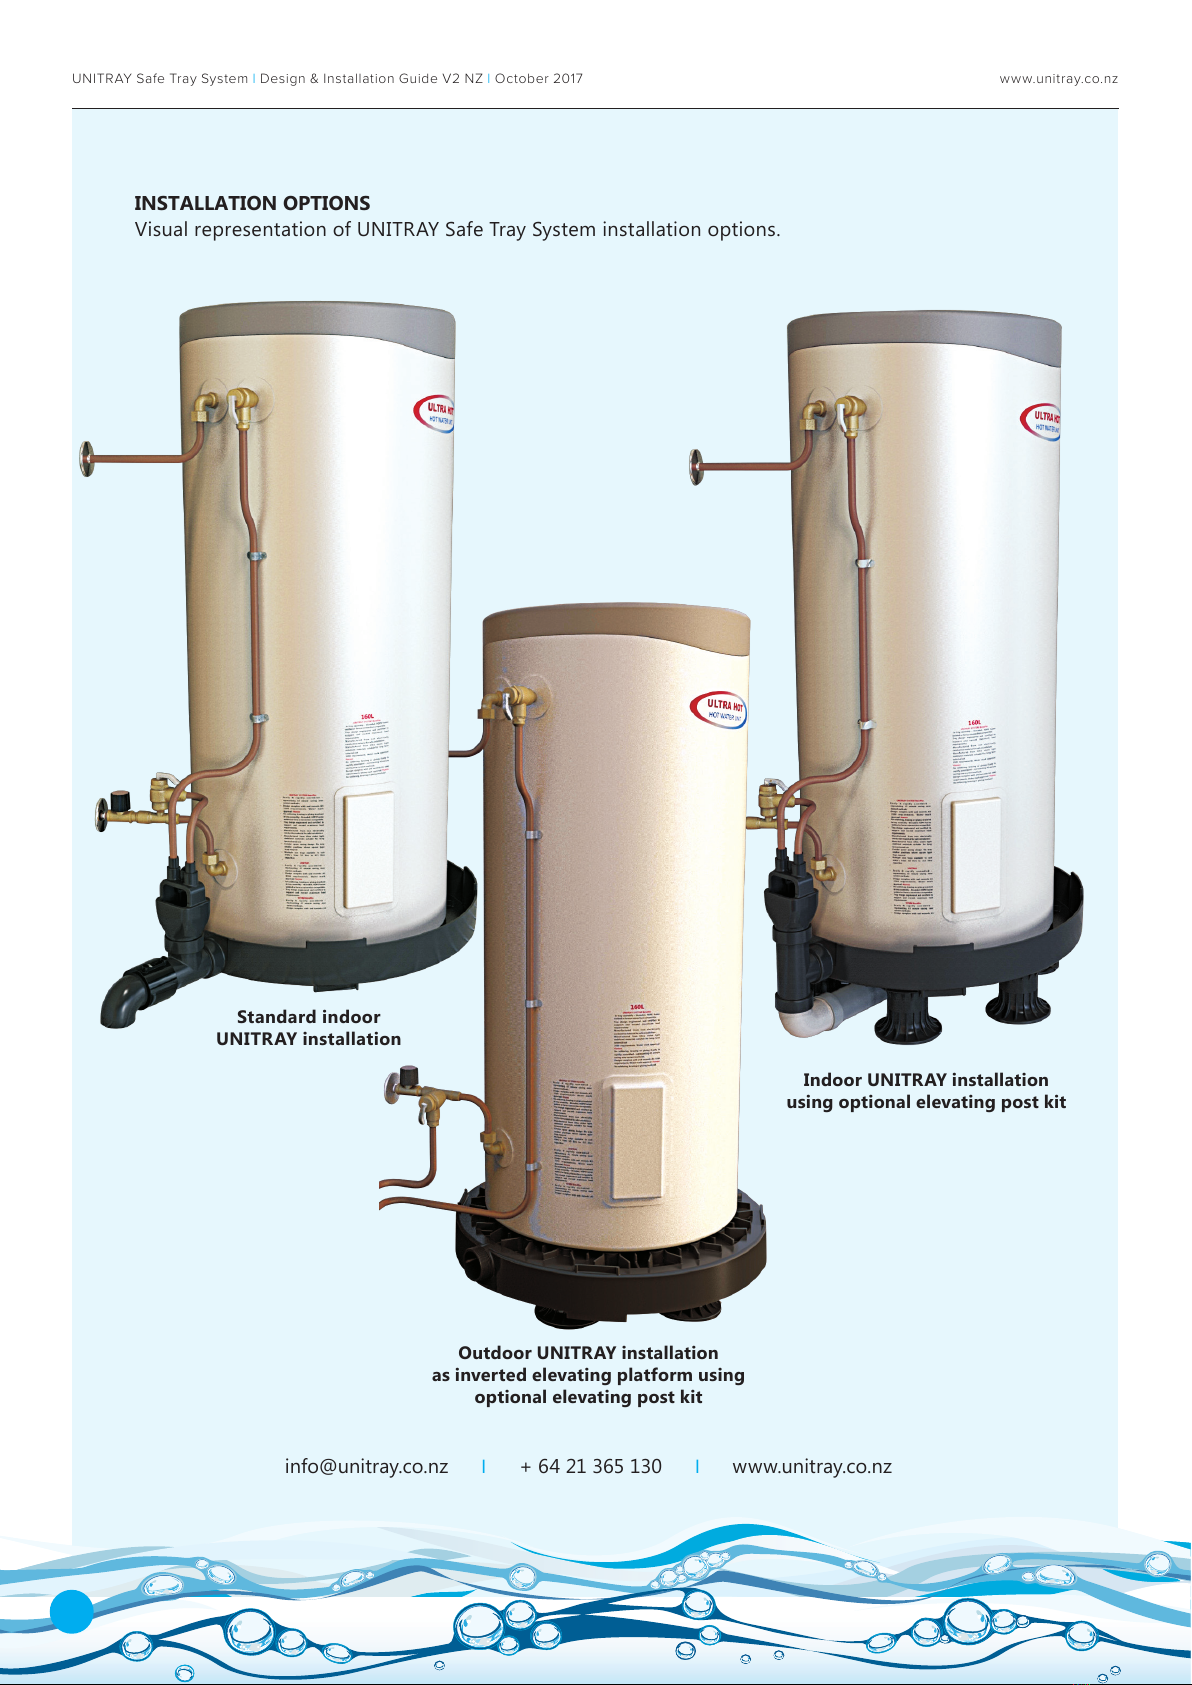
It may be installed internally or externally
depending on the position of the HWC.
The UNITRAY Safe Tray System is made
from light weight, high density polyethylene
Qenos (HDPE 0390) complying with BS EN
1778: 2000. It is available in 3 sizes:
•482 mm diameter (internal) Small
•590 mm diameter (internal) Medium
•695 mm diameter (internal) Large
The Tundish is supplied in 3 easily assembled
parts plus adaptors to suit the relief drain
diameter (15 mm or 20 mm). The Tundish
assembly ensures the relief drain discharges
with a regulated air gap.
For more information on Unitray NZ Pty Ltd
please contact:
+ 64 21 365 130
www.unitray.co.nz
Uncontrolled in printed format

UNITRAY Safe Tray System IDesign & Installation Guide V2 NZ IOctober 2017
3
www.unitray.co.nz
The UNITRAY Safe Tray System may be
supported on 6 x 100 mm high elevating posts
(to suit the location of the drainage waste
and associated plumbing). Alternatively, the
UNITRAY Safe Tray System may be placed
directly on a stable, at surface.
2.2. UNITRAY SAFE TRAY SYSTEM SCOPE
OF USE
The UNITRAY Safe Tray System is intended for
use in all buildings where:
• The oor has been designed to support all
applied loads
•The water supply system has been installed
to comply with the NZ Building Code
•A drainage system has been installed to
comply with the NZ Building Code
2.3. DESIGNER AND INSTALLER SKILL LEVEL
Where the UNITRAY Safe Tray System
is specied, the designer shall have the
appropriate skills, knowledge of the product
and access to all UNITRAY Safe Tray System
technical information (refer www.unitray.co.nz).
The UNITRAY Safe Tray System must be installed
by a registered plumber/gas tter in accordance
with this design and installation guide.
2.4. HEALTH & SAFETY
When installing the UNITRAY Safe Tray System :
• Appropriate close t clothing should be warn
at all times
•Wear eye and ear protection and appropriate
footwear where necessary
•The right equipment should be selected for
working at height (where necessary)
•The work area should be kept clear and
unobstructed
• With an existing HWC, ensure the HWC is
drained and isolated from the power supply
Refer to-
•Worksafe New Zealand Quick Guide
•The Absolutely Essential Health & Safety
Toolkit
Ø internal 695mm Large
Ø internal 590mm Medium
Ø internal 482mm Small
720mm Large
619mm Medium
520mm Small
100mm
Minimum
Footprint
Sizes
160mm
50mm
50mm
85mm
28mm
50mm
UNITRAY cross section
116mm
110mm
Optional elevating
post kit dimensions
(set of 6)

UNITRAY Safe Tray System IDesign & Installation Guide V2 NZ IOctober 2017
4
www.unitray.co.nz
2.5. HANDLING & STORAGE
When unpacking, ensure all parts have been supplied. The
UNITRAY Safe Tray System comes with the following parts:
Adaptors - select the tapered adaptors for standard
15mm and 20mm NZ copper relief drain diameters.
NB the adaptors pre-attached to Tundish cap must
only be used for smaller diameter pipe such as
KemPress™ or imported copper pipe.
UNITRAY - polymer safe tray with
integrated outlet and elevating ribs to
allow water and airow as per AS/NZS
3500.4 section 5.4.5 (b).
Tundish cap - aligns relief drains with
regulated “air gap” (AS/NZS 3500.4
section 5.12.3(h)).
Tundish - easy connect with 50 mm regulated
universal drain outlet as per AS/NZS 3500.4
section 5.4.4.1(b).
T-Connector - Screw-
on 50 mm BSP female
T-Connector. Also suitable
for fusion welding and
Fernco connections.
1
2
3
4
5
Elevating post kit* - sturdy 100 mm polymer post set.
*Optional - supplied separately.
6

UNITRAY Safe Tray System IDesign & Installation Guide V2 NZ IOctober 2017
5
www.unitray.co.nz
3. SPECIFICATION
Specication of the correct UNITRAY Safe Tray System size may only be
made once the HWC to be installed has been selected. Ensure:
•the full weight of the HWC does not exceed 400kg.
• that when installed there will be sufcient space between the full
circumference of the HWC and the wall of the UNITRAY Safe Tray System.
4. INSTALLATION
4.1. ASSEMBLING THE UNITRAY SAFE TRAY SYSTEM
4.1.1. INSERTING THE ELEVATING POSTS INTO THE UNITRAY SAFE TRAY
Assemble the elevating posts by pushing the male half of the post fully into the
corresponding female half. Insert the elevating posts into the locating holes and
slots at even spacings. Ensure the elevating posts are rmly pushed as far as they
can go. Use a soft-headed mallet if necessary to ensure that the elevating posts
are tted securely.
It is crucial that the elevating posts are evenly spaced to ensure that the HWC is
evenly supported.
The UNITRAY may be used as an elevating platform, such as for outdoor
installations. Installation of the elevating posts is unchanged but in this instance
the UNITRAY is inverted.
ALLOWABLE ELEVATING POST LOCATION PATTERNS
The UNITRAY safe tray system is designed and engineer-certied to safely support the load of a full
HWC when put together in accordance with the below elevating post locations.
1
2
Correct distribution of posts Incorrect distribution of posts
MEDIUM TO LARGE UNITRAY TRAY
Uneven spacing Insufcient number
of posts
Correct distribution of posts Incorrect distribution of posts
Uneven spacing
SMALL UNITRAY TRAY
Insufcient number
of posts
5

UNITRAY Safe Tray System IDesign & Installation Guide V2 NZ IOctober 2017
6
www.unitray.co.nz
4.1.2 ASSEMBLING THE T -CONNECTOR
Screw the T-Connector securely onto the threaded UNITRAY Safe Tray outlet using
thread tape on all male components to ensure a water-tight connection.
Ensure that the T-Connector is orientated correctly for the drain location. There
are three options for attaching the T-Connector. Select the option to suit the
conguration and dimensions of the installation space.
OR OR
1Apply Teon thread tape to
all male components. Screw
T-Connector to UNITRAY.
2Choose one of the above 3 T-Connector conguration options for
an indoor installation. Connect T-Connector to plumbing pipework
using threaded connection or alternate fusion coupling method.
If necessary the T-Connector may be modied to suit fusion
coupling. Cut threaded ange from long end of T-Connector
then make connection in accordance with coupling instructions.
3
4.1.3 ASSEMBLING THE TUNDISH
Push the Tundish Cap rmly into the Tundish and then screw the assembled Tundish into
the upper threaded outlet of the T-Connector. Use Teon thread tape to ensure a water-
tight connection. See g. A and g. B.
B
AC
Insert relief drain adaptors into corresponding holes in the top of the Tundish cap to
accept both 15 mm or 20 mm copper relief drains. Select the tapered adaptors for
standard 15 mm and 20 mm NZ copper relief drain diameters. If necessary use a soft-
headed mallet to ensure that the adaptors are inserted correctly.
NB the adaptors pre-attached to Tundish cap must only be used for smaller diameter
pipe such as KemPress™ or imported copper pipe.

UNITRAY Safe Tray System IDesign & Installation Guide V2 NZ IOctober 2017
7
www.unitray.co.nz
4.2. LOCATING THE UNITRAY SAFE TRAY SYSTEM &
CONNECTING WITH THE HWC
Ensure the oor surface is level and stable, and the area is free
of any loose items such as construction debris.
Place the fully assembled UNITRAY Safe Tray System in the
correct location for where the HWC is to be installed. Ensure
the system is stable and level before tting the HWC.
Connect the lower outlet of the T-Connector to a drain in
accordance with Building Code plumbing requirements.
Place the HWC centrally on the UNITRAY Safe Tray System to
ensure even weight distribution and spacing between HWC and
safe tray wall.
Insert fabricated PRV drain pipes into adaptors in the Tundish
cap. See g D for example.
4.3. CONNECTING TO DRAIN
Connection to drains must be in compliance with NZ Building
Code. Examples of Acceptable Solutions include G13/AS3 and
G13/AS1, which require that drain materials and products shall
comply with the following table:
D
5. FINISHING
Install the HWC in accordance with the supplier instructions
including, but not limited to, ensuring the installation of
seismic restraints.
Test the HWC in accordance with the supplier requirements.
Ensure that the UNITRAY Safe Tray System is balanced and any
debris is cleared from the tray and surrounds.
6. QUALITY ASSURANCE
UNITRAY NZ Pty Ltd recommends that installers record the
installation of the HWC with the UNITRAY Safe Tray System.
This may include:
• Written notes, and
• Meaningful photos
USEFUL LINKS
Information to help with the design
and specication of UNITRAY Safe Tray
System refer to:
•UNITRAY Design & Installation Guide
Information to help with care and
maintenance of UNITRAY refer to:
•UNITRAY Care and Maintenance
document
Information on the UNITRAY pass™
(product assurance supplier statement)
refer to:
•UNITRAY pass™ document
Information on the warranty of
UNITRAY refer to:
•UNITRAY Warranty document
7
MATERIAL STANDARD
Pipes & Fittings
Air admittance values
Copper pipe
Copper ttings
PVC pipe and ttings
Plastic ttings
PE pipe and ttings
Elastomeric rings
ASSE 1050 or ASSE 1051, EN 12380, AS/NZS 4936
NZS 3501
AS 1589
AS/NZS 1260
AS 2887
AS/NZS 4401
AS/NZS 4130 or AS 1646
Traps
Plastic
Copper
AS 2887
AS 1589

UNITRAY Safe Tray System IDesign & Installation Guide V2 NZ IOctober 2017
8
www.unitray.co.nz
INSTALLATION OPTIONS
Visual representation of UNITRAY Safe Tray System installation options.
info@unitray.co.nz I+ 64 21 365 130 Iwww.unitray.co.nz
Standard indoor
UNITRAY installation
Indoor UNITRAY installation
using optional elevating post kit
Outdoor UNITRAY installation
as inverted elevating platform using
optional elevating post kit
8
Table of contents
Popular Plumbing Product manuals by other brands

scandia
scandia TREND manual

Hewi
Hewi 815.06.110 Series Mounting instructions

Hans Grohe
Hans Grohe Crometta 85 1jet 28606000 Assembly instructions

JACLO
JACLO 6980 installation instructions

Spectrum Brands
Spectrum Brands Pfister Aliante LF-042-AT Quick installation guide

JADO
JADO IQ 823 303 Series installation instructions