Universal Space DUCKY SPLASH User manual

Operation Manual
www.universal-space.com
Be Sure
to Read this
Manual
Before Use

1
CONTENT
Important Safety Instructions .................................................................... 2
1. SPECIFICATIONS....................................................................................... 4
2. PACKAGE CONTENTS ............................................................................... 5
3. PART NAMES ............................................................................................ 6
4. SET UP & INSTALLATION .......................................................................... 7
5. HOW TO PLAY.......................................................................................... 11
6. GAME OPTIONS ...................................................................................... 12
7. MAINTENANCE, INSPECTION.................................................................. 19
8. OVERALL CONSTRUCTION...................................................................... 23

2
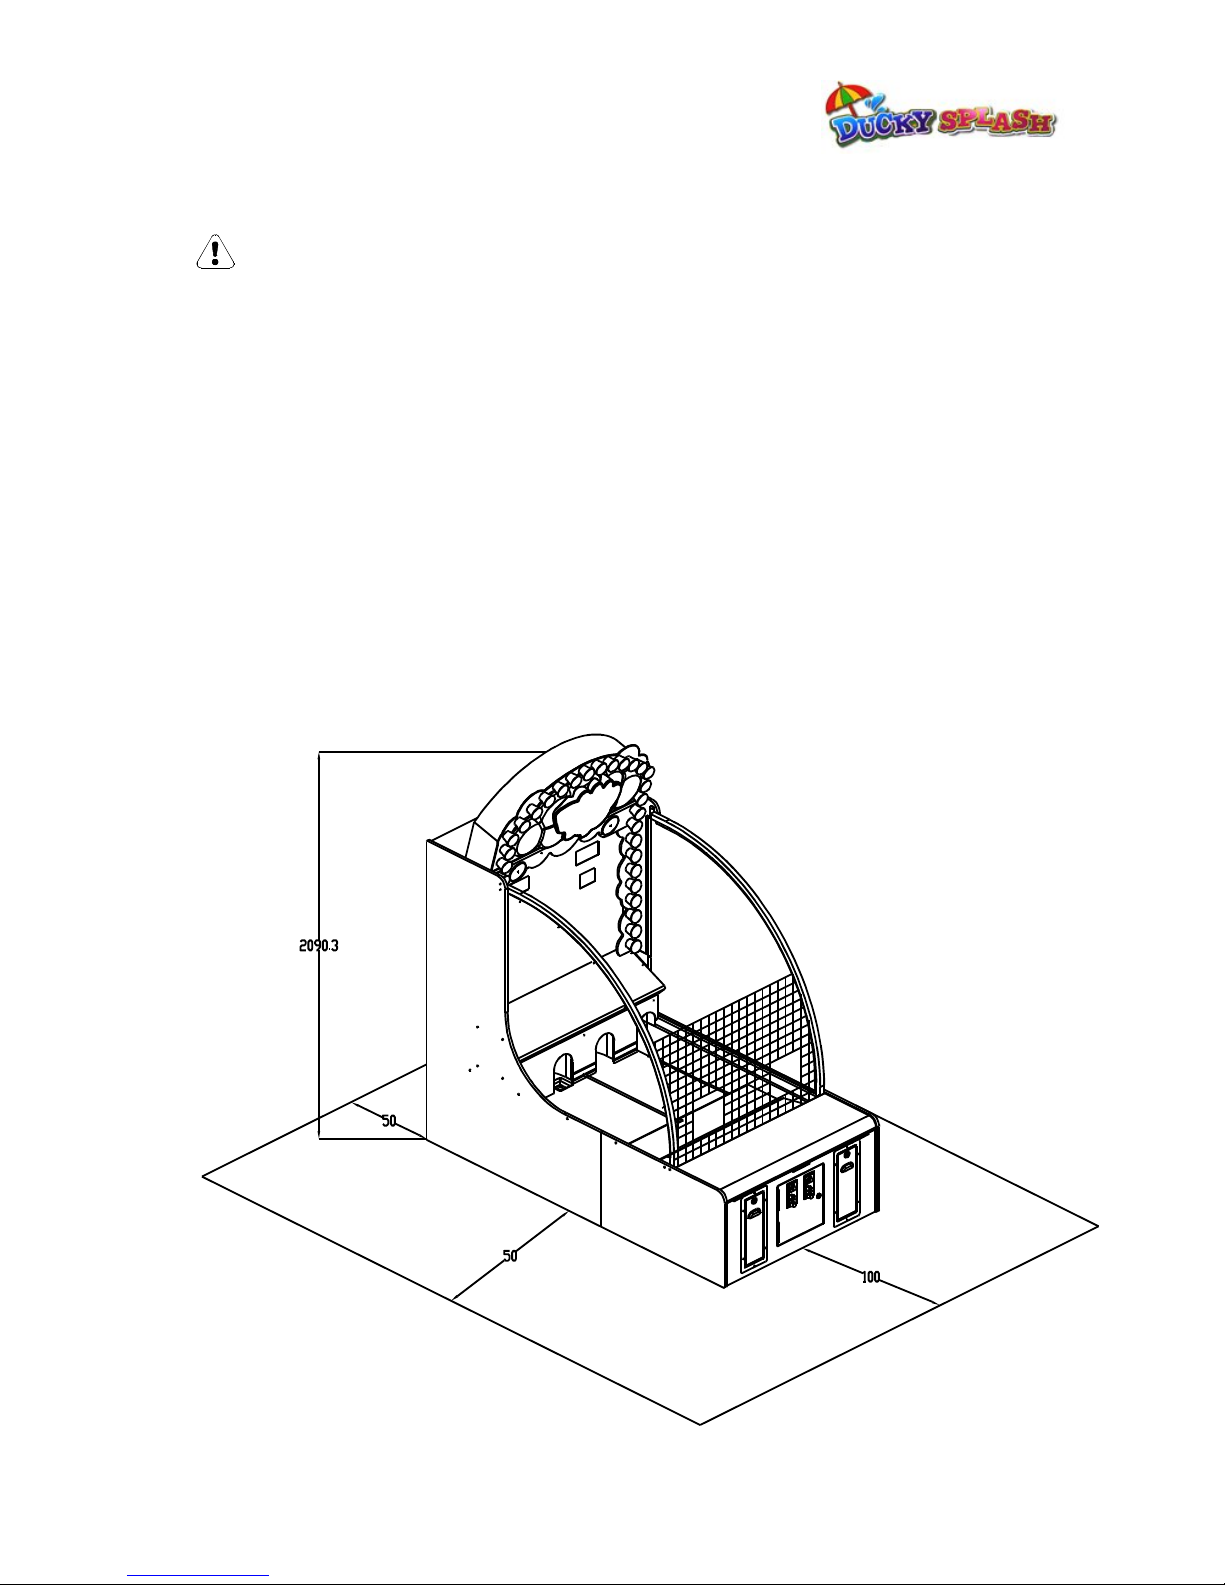
Thank you for purchasing DUCKY SPLASH from UNIVERSAL SPACE. We hope
you enjoy the product.
This manual contains valuable information about how to operate and maintain your game
machine properly and safely. It is intended for the owner and/or personnel in charge of
product operation. Carefully read and understand the instructions.
If you need any help during installation and setup please utilize this manual and
troubleshooting guide. If the product fails to function properly, non-technical personnel
should under no circumstance attempt to service the machine. Contact your distributor or
manufacturer for help.
Before use, please read IMPORTANT SAFETY INSTRUCTIONS.
IMPORTANT SAFETY INSTRUCTIONS
To ensure the safe usage of this product, carefully read and
understand these instructions before operating your game.
Save these instructions for future reference.
Use this product only as described in this manual. Other uses not recommended may cause
fire, electric shock or personal injury. Unplug the game from the outlet when not in use,
when moving from one location to another, and before cleaning/servicing.
Explanations which require special attention are indicated by signs of warning. Depending
on the potential hazardous degree, the terms: NOTE, NOTICE, and WARNING are used.
NOTE: A NOTE indicates useful hints or information about product usage.
NOTICE: A NOTICE indicates potential damage to product and how to avoid the problem.
WARNING: A WARNING indicates a potential for product damage or serious personal Injury.
It is important to understand the meaning of the following HAZARD SIGNS before continuing:
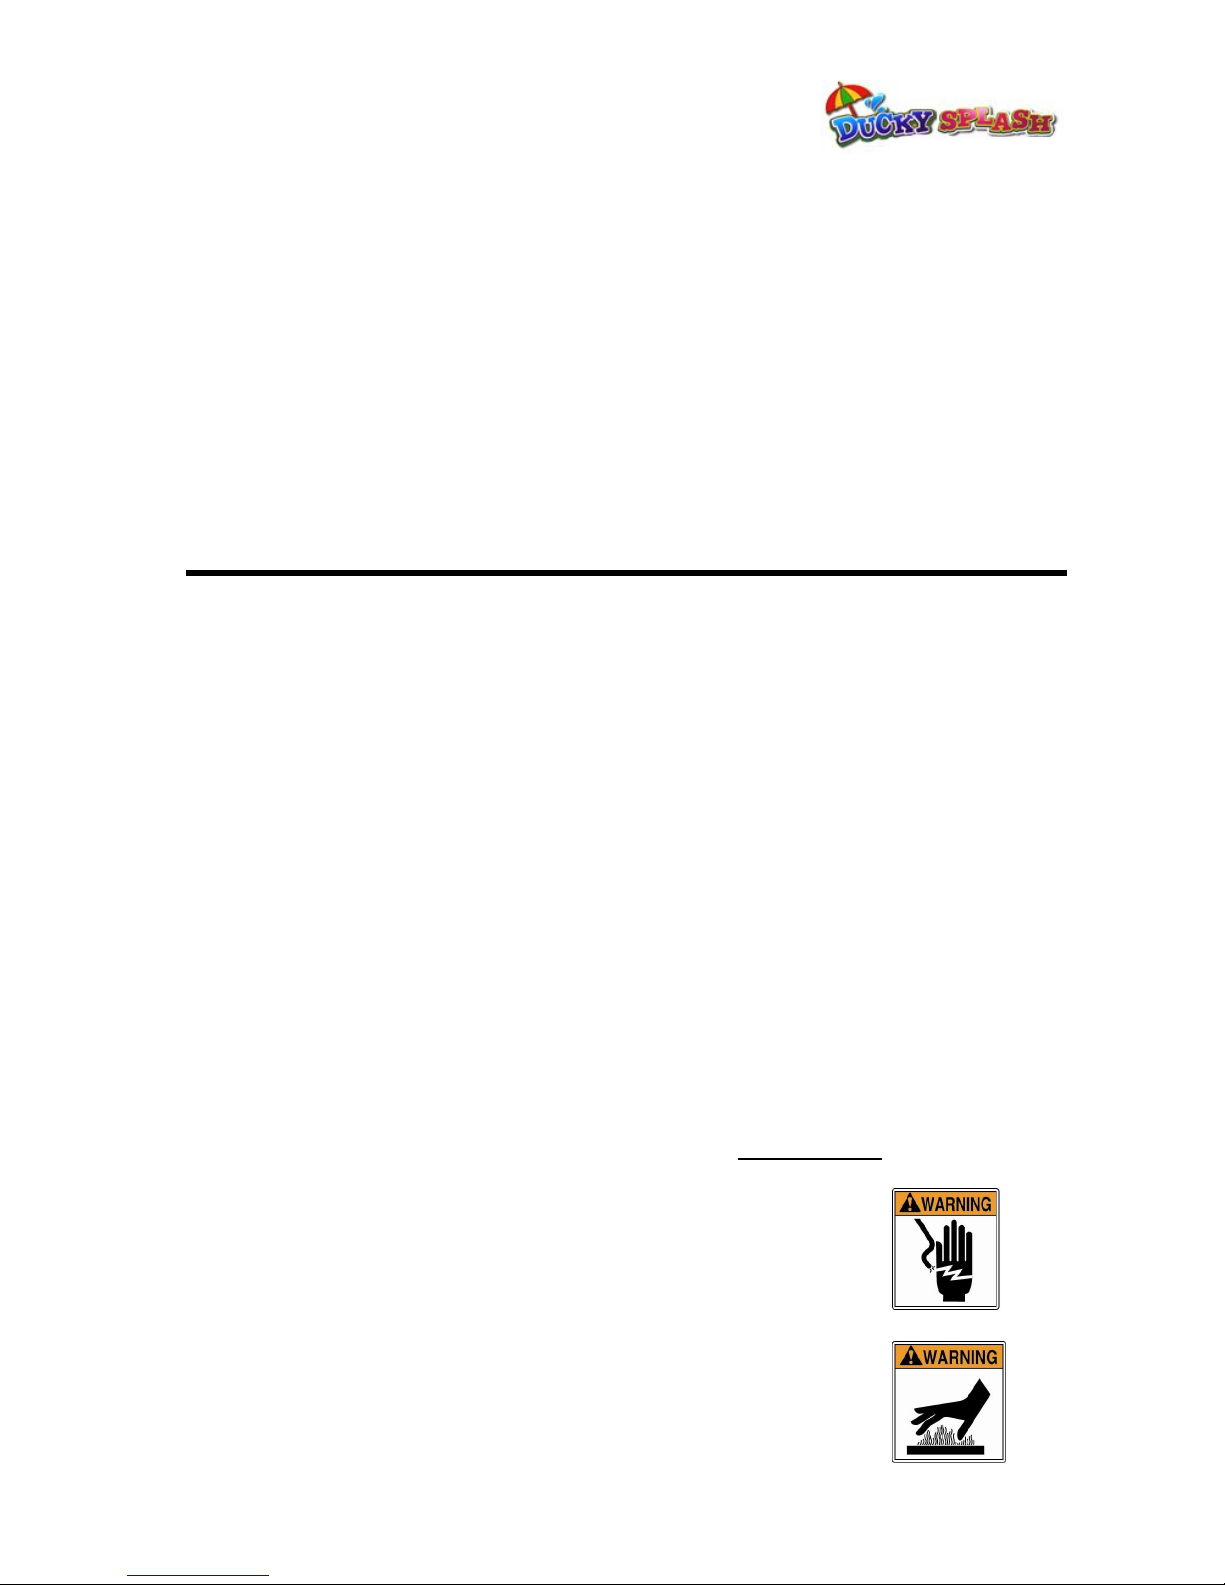
High Voltage and Shock Hazard:
High voltage can cause electric shock.
Turn off/unplug power before servicing.
High Temperature Hazard:
This part may cause scalding.
Do not touch. Surface may be hot.

3
No Touching Hazard:
This part may be hot or can cause electric shock.
Do not touch.
Use the following safety guidelines to help ensure your own personal safety and to help
protect your equipment and surrounding environment from potential damage.
This product is an indoor game machine. Do not install outdoors.
Avoid installing in the following places to prevent fire, electric shock, injury and/or
machine malfunctioning:
Places subject to rain/moisture, or places subject to high humidity.
Places subject to direct sunlight, or places subject to extremely hot or cold
temperatures to ensure that it is used within the specified operating range.
Places where inflammable gas may be present or in the vicinity of highly
inflammable/volatile chemicals or items that can easily catch fire
On unstable or sloped surfaces. The machine may topple or cause unforeseen
accidents.
Vicinity of fire exits, fire extinguishers etc that may block/prevent safety measures
Note: The contents of this manual may be updated without notice.
WARNING
Non-technical personnel who do not have technical knowledge and
Expertise should refrain from performing such work that this manual
require or perform tasks which are not explained in this manual.
Failing to comply can cause severe accidents such as electric shock or
other serious injuries.
WARNING: To reduce the risk of fire, electric shock or personal injury,
unplug or disconnect the machine from the power supply before
servicing.

4
1. SPECIFICATIONS
Rated power supply:220V 50/60Hz
Min. Power consumption: 120W
Max. Power consumption:6300W
Dimensions:W1930×D1000×H2090.3 (mm)
Weight:About 215Kg
NOTICE: After turning off the game, please wait at least 1 minute before
restarting again.
Note: Game parameters are subject to change without notice.

5
2. PACKAGE CONTENTS
Open the package and make sure all the items are included:
1 x Body Assembly
Following accessories
No. Part No. Name Spec. Qty. Illustration Note
1D108-806-000 AC power 10A/250V 1.8m 1
2
D108-453-000
Fuse
T5A
/250V(T10A/125V)
Φ5-20 1Choose by
area
D108-461-000
T5A/250V(T10A/125V)
Φ6-30
3D108-734-000 Manual English 1 Choose by
area
4D108-405-000 Key 171 2 Service door
5D108-403-000 Key 2222 2 Coin box door
6D108-464-000 Spanner 1
7D108-408-000 Ducky 20
(Recommended number of Ducks to use in game: 6 per side)
If any items are found to be missing, please contact your sales representative
for help immediately.
NOTE: Part models are subject to change without notice.

6
3. PART NAMES
2D VIEW
3D VIEW

7
4. SET UP & INSTALLATION
This product is an indoor game machine. Do not install outdoors.
Refer to IMPORTANT SAFETY INSTRUCTIONS for places to avoid
Place the unit on a dry level surface
Ventilation openings in the back of the unit must not be obstructed by objects or by wall.
4.1 Play Zone
This machine requires space for playing and for maintenance as shown below.
Leave space around the game upon installation:
Service area:50cm
Play area:100cm
安全遮板

8
4.2 Level Adjustment
Install this machine on a flat surface. Adjust levers to lift casters off the ground to level the
game. If the game is installed on an unsuitable floor, it could cause a malfunction.
To fix the game, adjust the Leveler down until it touches the floor, lifting the casters off the
ground by 5mm. Repeat the same for all levelers.
Make sure the machine is level with the ground and all the
adjustable legs should stick to the floor closely.
NOTICE
Leveler
Caster
About 5mm
Move
Fix

9
4.3 Transporting the Game
If you need to move the game, adjust the levelers back to an “up” position so the casters
touch the ground.
NOTICE
Be careful not to damage the machine during transport.
The machine should be handled with care when bringing it down from a higher
level.
Always unplug the game before moving.
Keep the machine in upright position during transport.
For longer distance transport, package the game properly to prevent damages.
Drain all water from the game before transporting.
Leveler Caster
Move Fix

10
4.4 Connecting Power
WARNING: Check the voltage rating before you connect the equipment to
an electrical outlet to ensure that the required voltage and frequency match
the available power source. Please refer the label of the machine.
Do not plug the equipment power cables into an electrical outlet if the power cable is
damaged.
Avoid putting many loads on one electrical outlet as it could generate heat and fire
resulting from overload.
Connect the grounding conductor to the earth terminal (GND):
WARNING
Ensure no heavy objects rest on the power cord. Check to make sure the game cabinet does
not sit on the power cord as this could damage the cord and become hazardous.
To disconnect the game, grip the plug and pull it from the wall outlet. Never pull by the cord.
To prevent electric shock, do not touch the power plug when hand is wet.
Ensure that nothing rests on the power cord and that it is not located where it can be
stepped on or tripped over.

11
5. HOW TO PLAY
Ducky Splash is a 1- 2 player water shooting game for
children and the whole family!
The object of the game is to use the Dino water guns to
shoot rubber ducks into the 2 tunnel entrances. Players
must shoot as many ducks as possible into their own
entrance before the time runs out!
Single Player Mode
Pick a side (left side OR right side), and
insert coin(s) to start.
Water gun is activated and the timer
starts counting down.
Aim and shoot ducks into the entrance ON
YOUR SIDE to earn points
(Ducks entering the wrong entrance will
not give points)
Each time a duck passes through the
entrance, player’s score increases.
Once time is up, tickets will be awarded
based on the final score.
2- Player Match Mode
Insert coin(s) at the same time to begin together.
Both water guns are activated and the timer starts counting down.
Shoot ducks into entrance of each corresponding side to earn points
(Shooting ducks into the opponent’s entrance will give them extra points!)
Once time is up, winner receives all the tickets. (Loser will be awarded mercy tickets.)
Note: Maximum memory score for each water gun is 1000 when there is no ticket payout.

12
6. GAME OPTIONS
6.1 Switching Control Signals
Please refer to the I/O chart and schematics included with the game.
To adjust DIP settings, please refer to the I/O chart. The initial settings are in CAPITAL
LETTERS.
Main Board :

13
Test Mode:
Press and hold the TEST button on the main board to enter Test Mode.
LED Display
Left score LED<1>3-1/Left time LED<1>6-5
Right score LED<2>3-1/Right time LED<2>6-5
(Flashing): Left credit LED<1>6-5 Right credit LED<2>6-5
Testing - Options
LED displays segment scan, digit scan and shows <1, 2, 3, 4, 5, 6, 7, 8> and <87654321> -
To check LED display.
Press TEST button again and LED displays 1 - shows the LED 1and LED2 of 1# in DIP SW.
Press TEST button again and LED displays 2 - shows the number of on-off SW
Press TEST button again and LED displays 3. Press IN1-40 to test sound/music.
Press TEST button and LED displays 4 - Corresponding lighting output.
Press TEST button again and LED displays 5, - Lighting moves slowly.
Error Codes
The following error codes will display if there is an error in the input signal:
E.01 Ticket. Reset error
E.83/E.84 Coin Mech signal error
E.04 Left entrance sensor error
E.07 Right entrance sensor error

14
6.2 DIP adjust(Default Setting)
Note: Game parameters are subject to change without notice.

15
6.3 Parameter Settings
DIP Adjust 1(SW1)
(1)Coin(s) per game
Item Content DIP Adjust(SW1)
Note
1 2
Coin(s) per
game
1ON ON
2 off on
3 on off
4 off off
(2)Game play time
Item Content DIP Adjust(SW1)
Note
3 4 5
Game play time
30 on on on
35 off on on
40 on off on
45 off off on
50 on on off
60 OFF ON OFF
75 on off off
90 off off off
(3)Mercy Tickets
Item Content DIP Adjust(SW1)
Note
6 7
Mercy tickets
0 on on
1 off on
2 on off
3 OFF OFF

16
(4)Score memory
Item Content DIP Adjust(SW1)
Note
8
Score memory Yes ON
No off
DIP Adjust 2(SW2)
(5)Payout (Score per ticket)
Item Content DIP Adjust(SW2)
Note
1 2 3
Payout
(Score per ticket)
1 on on on
2off off on on
5 on off on
10 off off on
15 on on off
20 OFF ON OFF
25 on off off
30 off off off
(6)Score
Item Content DIP Adjust(SW2)
Note
4 5 6
Score
1 on on on
2 off on on
5 off off on
10 OFF OFF ON
20 on on off
25 off on off
30 on off off

17
(7)Match
Item Content DIP Adjust(SW2)
Note
7
Match No Match ON
Match off
DIP Adjust 3(SW3)
(8)Max ticket payout
Item Content DIP Adjust(SW3)
Note
1 2 3
Max ticket
payout
No ticket on on on
4 off on on
5 on off on
6 off off on
8 on on off
10 off on off
15 ON OFF OFF
No off off off
(9)No use SW
12345678
SW2 ON
SW3 ON ON ON ON ON
SW4 ON ON ON ON ON ON ON ON

18
6.4 Input & Output Parts:
Input part:
INPUT CONTENT INPUT CONTENT INPUT CONTENT INPUT CONTENT
J9-1 Ticket reset J9-11 J9-21 J9-31
J9-2 J9-12 J9-22 J9-32
J9-3 J9-13 J9-23 J9-33
J9-4 Left sensor J9-14 J9-24 J9-34
J9-5 J9-15 J9-25 J9-35
J9-6 J9-16 J9-26 J9-36
J9-7 Right sensor J9-17 J9-27 J9-37
J9-8 J9-18 J9-28 J9-38
J9-9 J9-19 J9-29 J9-39
J9-10 J9-20 J9-30 J9-40
Output part:
OUTPUT CONTENT OUTPUT CONTENT OUTPUT CONTENT OUTPUT CONTENT
J22-1 J23-9 J24-17 Left gun J4-1
J22-2 J23-10 J24-18 J4-2
J22-3 J23-11 J24-19 Right gun J4-3 LAT
J22-4 J23-12 J24-20 J4-4 CLOCK
J22-5 J23-13 J24-21 J4-5 DATA
J22-6 J23-14 J24-22 J4-6
J22-7 J23-15 J24-23 Water pump J4-7
J22-8 J23-16 J24-24 J4-8
OUTPUT CONTENT OUTPUT CONTENT OUTPUT CONTENT OUTPUT CONTENT
J20-1 POT_L
○
1J19-1 L_Coin lock J21-1 L_Ticket drive J27-1 Speaker _L+
J20-2 POT_L
○
2J19-2 L_Coin signal J21-2 L_Ticket signal J27-2 Speaker _L -
J20-3 POT_R
○
1J19-3 GND J21-3 12V J28-1 Speaker _R +
J20-4 POT_R
○
2J19-4 R_Coin lock J21-4 GND J28-2 Speaker _R -
J20-5 POT_L
○
3J19-5 R_Coin signal J21-5 R_Ticket drive Counter
J20-6 POT_R
○
3J19-6 12V J21-6 R_Ticket signal J8-1 +12V
J21-7 12V J8-2 +12V
J21-8 GND J8-3 Coin counter
J8-4 TIK. counter

19
7. MAINTENANCE & INSPECTION
7.1 Safety Check
Check the points listed before operating the machine. These checks are necessary for safe
machine operation:
1. Try to run the game before operation each day.
2. Conduct monthly routine checks of game components ensure good working condition
3. Check the machine regularly for dust and clean when necessary.
Note: Parts and components require preventative maintenance to be kept running smoothly
7.2 Handling Precautions
When installing or inspecting the machine, be very careful of the following points and pay
attention to ensure that the player can enjoy the game safely.
Non-compliance with the following points or inappropriate handling running counter to the
cautionary matters herein stated can cause personal injury or damage to the machine
• Before servicing the machine, be sure to turn power off. Servicing without turning the
power off can cause electric shock or short circuit.
• To avoid electric shock or short circuit, do not plug then unplug the power quickly
• Do not expose power cords and earth wires, these are susceptible to damage.
• Damaged cords and wires can cause electric shock or short circuit and should be
replaced immediately.
• When or after installing the product, avoid pulling the power cord to prevent
unnecessary wear and tear. Use the power button to disconnect power.
• In case the power cord is damaged, ask for replacement through where the product was
purchased from or replace locally. Continued usage of damaged cord can cause fire,
electric shock or leakage.
• Perform grounding appropriately. Inappropriate grounding can cause electric shock.
• Use fuses that meet specified rating. Fuses exceeding can cause an electric shock.
Should a problem occur, turn off the power immediately and stop operating the
machine. Unplug the power cord of the service outlet. Operating the machine without
correcting the problem may cause a fire or injuries.
Insert the power plug securely into the outlet. Poor contact may cause overheating,
resulting in fire or burns.
To ensure the warning labels attached on the machine are visible and legible, install
the machine in a well-lit location, and keep the labels clean at all times. Make sure
the labels are not hidden behind other game machines.
WARNING
Table of contents
Other Universal Space Game manuals