sec. 4e
−−−−
9
2 VOICE - Technical Manual
CALL FORWARDING DEVICE
DEVICE INSTALLATION
The product is designed to be powered according to national system
regulations.
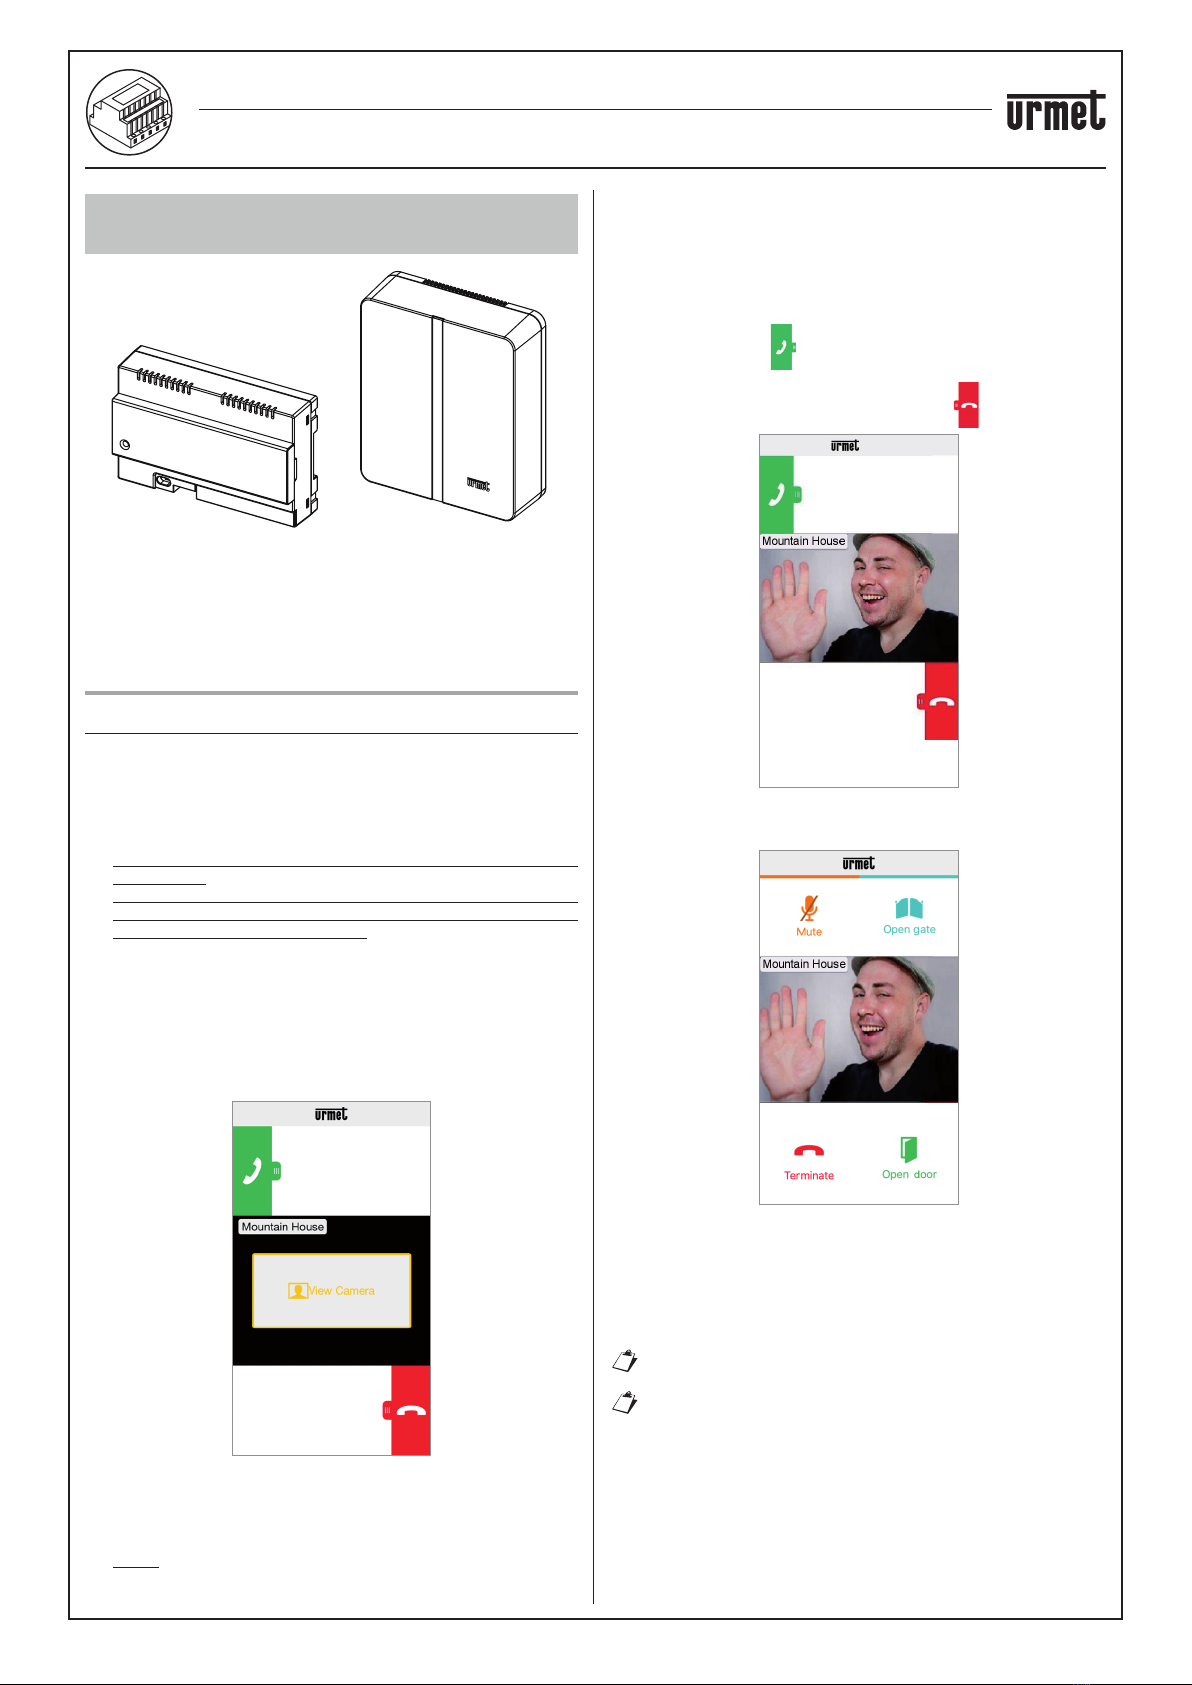
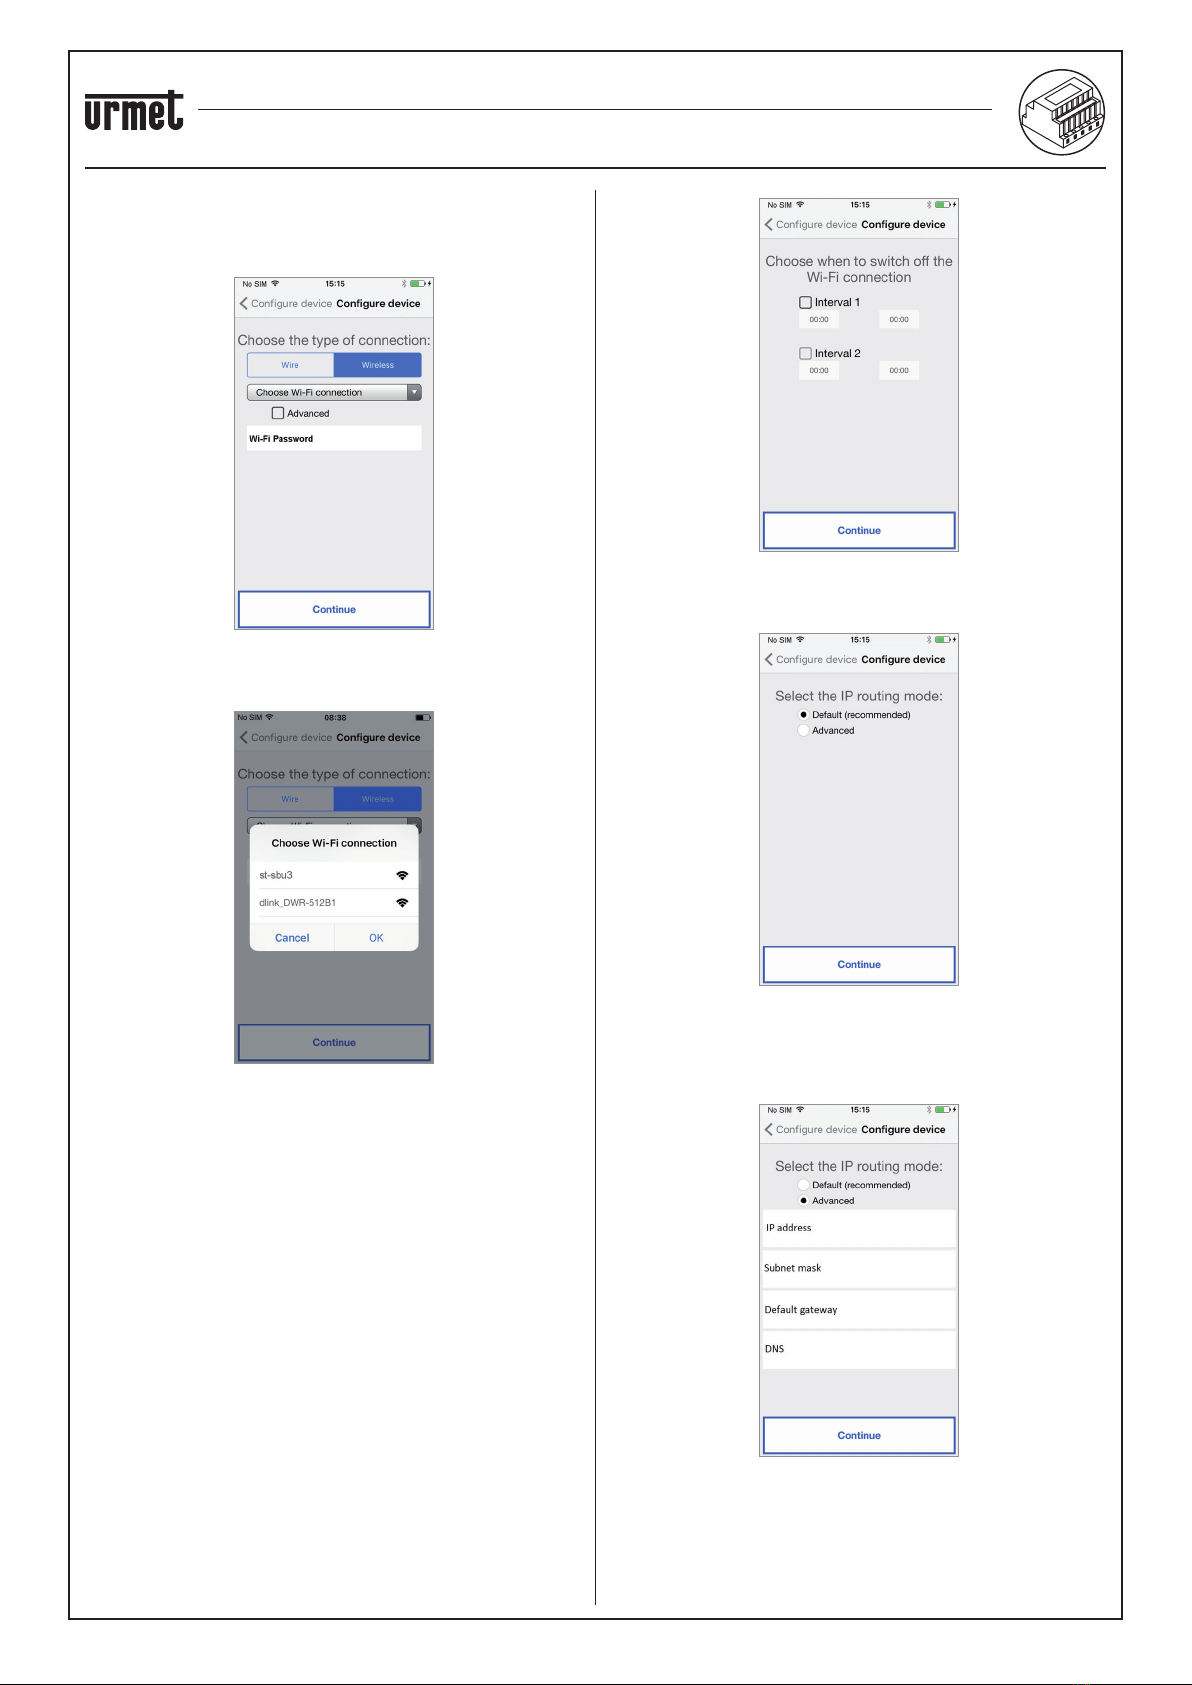
The Call Forwarding Device can be used to forward a voice-video call
or a voice-only call to a smartphone with the Android or iOS operating
system.
This is done by establishing an Internet connection through an ADSL
router/modem or via 3G/4G using a Cat5 cable or via Wi-Fi.
The device was designed for use in homes and can be
used to configure only some network parameters. If may
consequently not work on specific business IP networks.
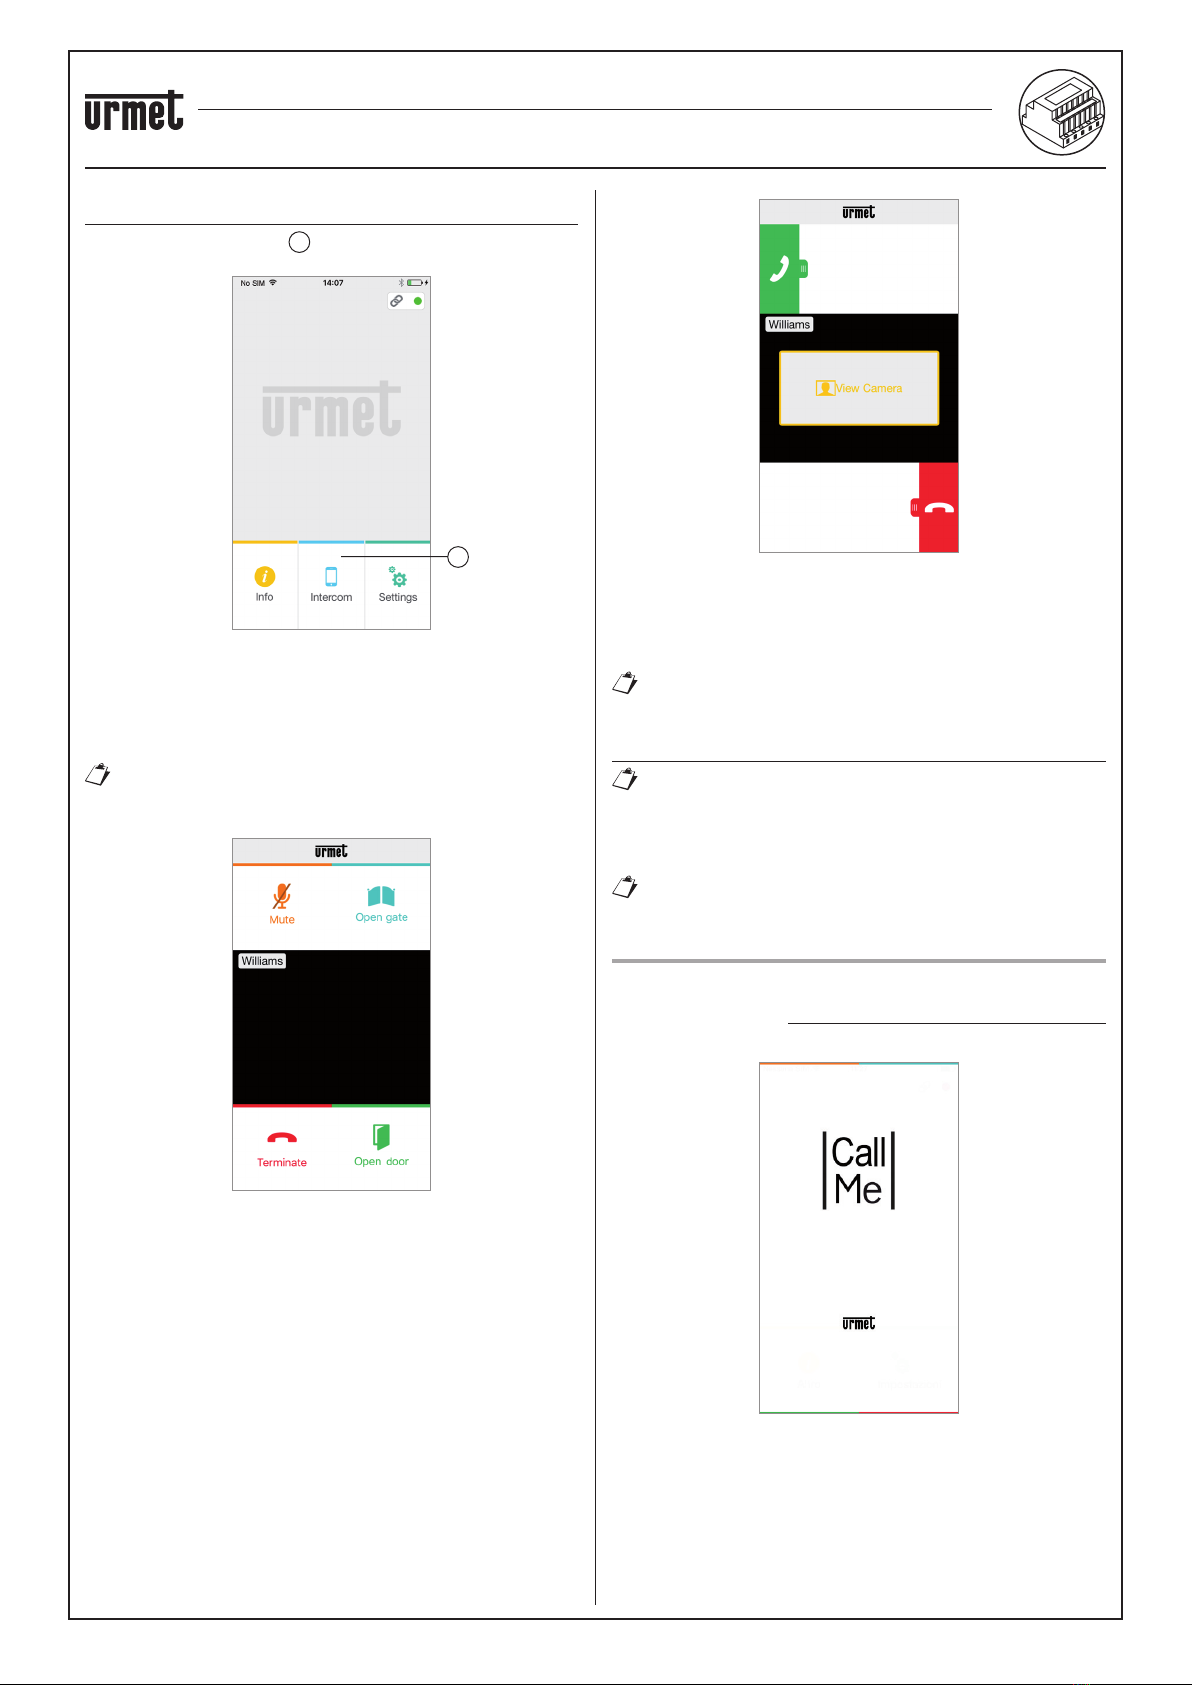
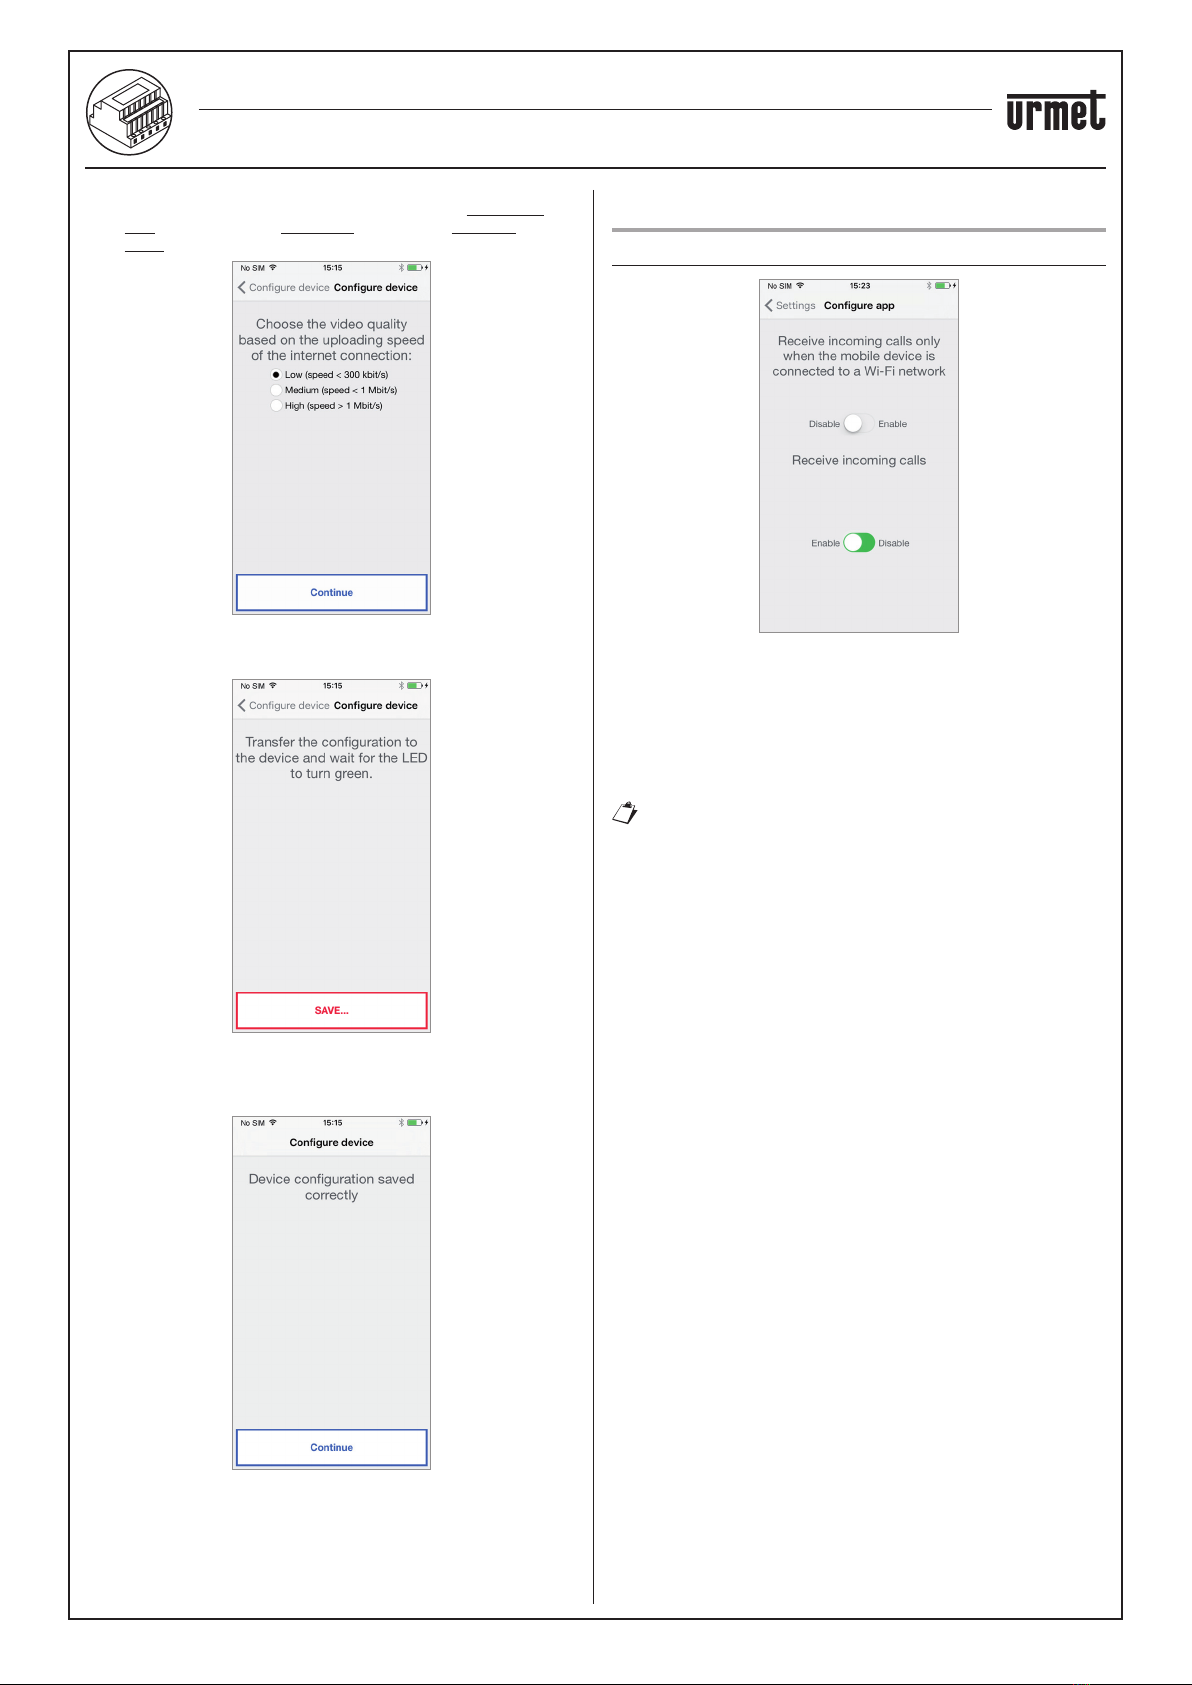
The Urmet CallMe App must be downloaded to the user’s smartphone,
connected to the Internet via a mobile data or Wi-Fi connection, in
order to be able to receive the call.
In addition to receiving the call, the Urmet CallMe App also ensures
intercommunication with other smartphones connected to the same
account.
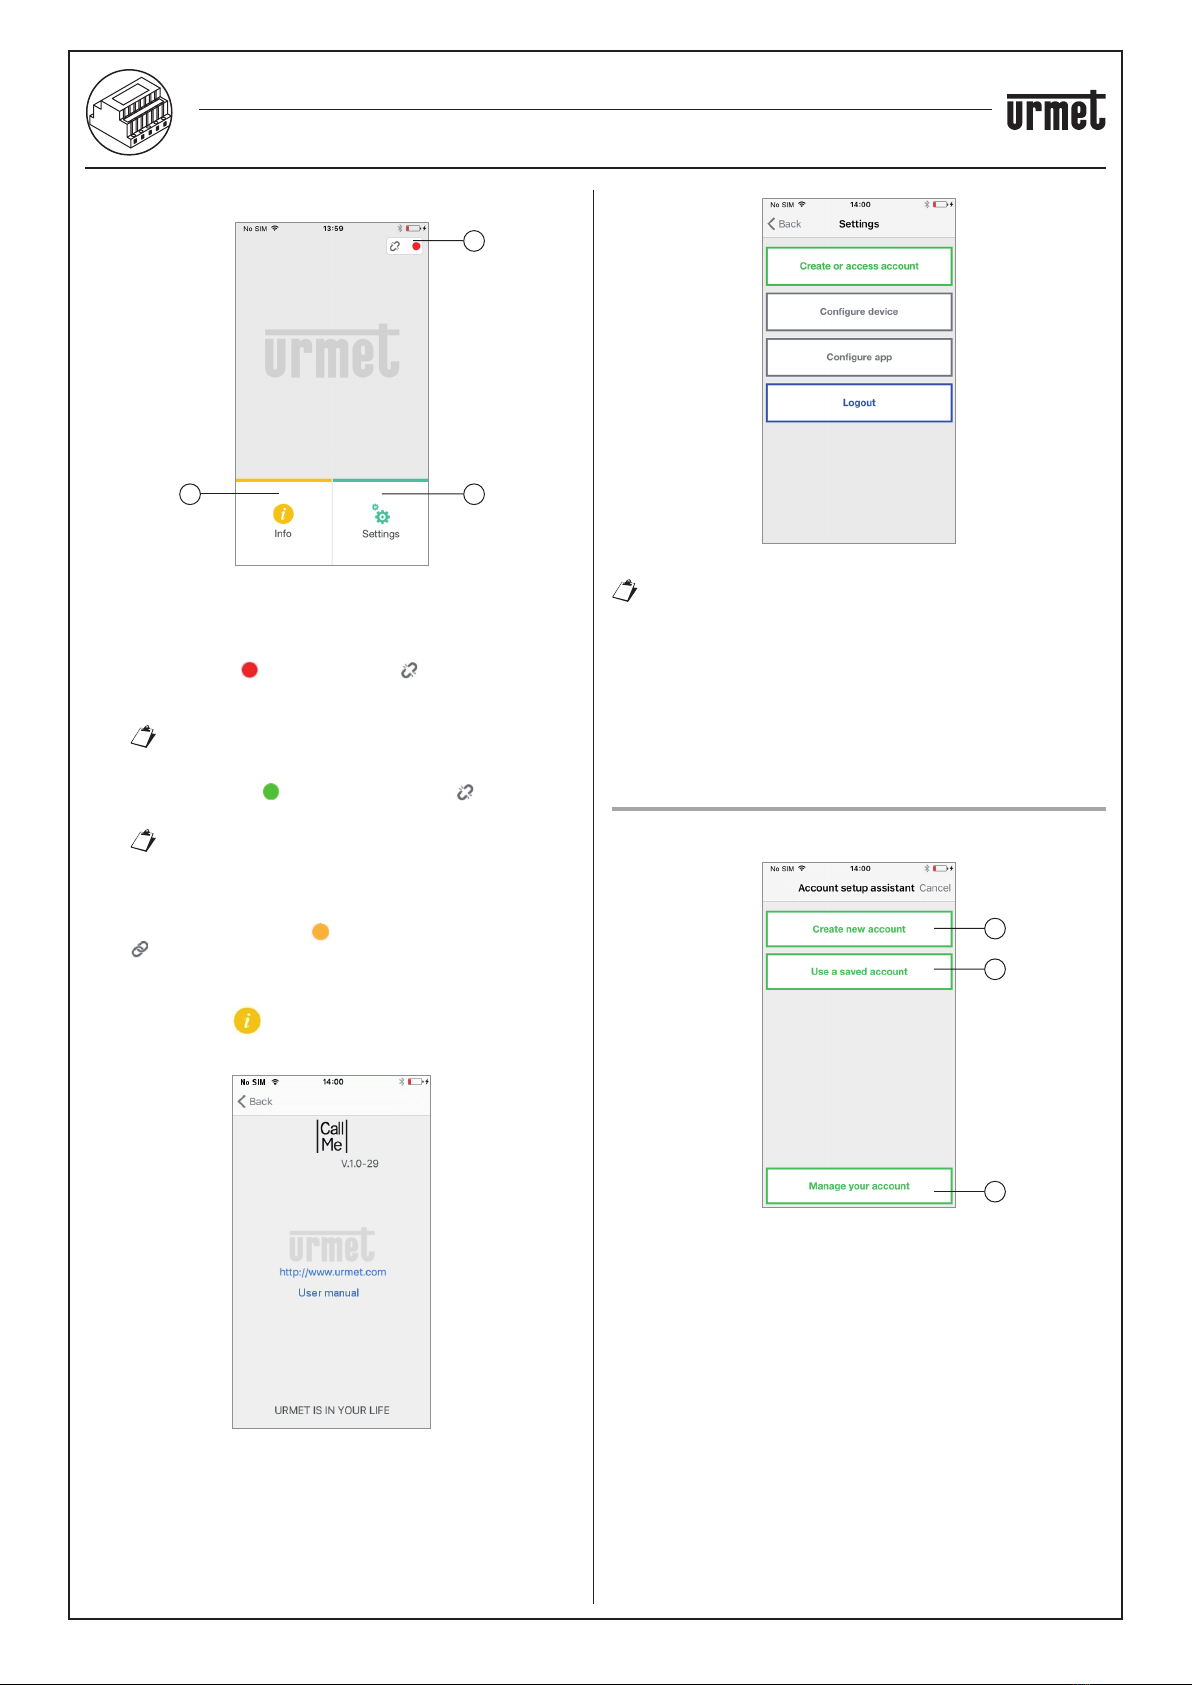
Moreover, the Urmet CallMe App is necessary to be able to configure
the device parameters.
The Call Forwarding Device only works in
combination with one or more indoor stations
available in the apartment and is always configured
as if it were an indoor station with ID/code equal to 3.
To ensure correct operation of the Urmet CallMe App, some essential
requirements must be verified:
1) good Wi-Fi signal quality on the device;
2) upload data band ≥300 kbps for the Internet service supplied by
your home provider to the device;
3) check that your smartphone data plan does not require VoIP data
flow locking.
WARNING
Applications that:
optimise the use of the battery,
ensure energy saving for your smartphone,
protect the device (antivirus or similar software),
could adversely affect the operation of the Urmet CallMe application
when in the off-screen (background) mode.
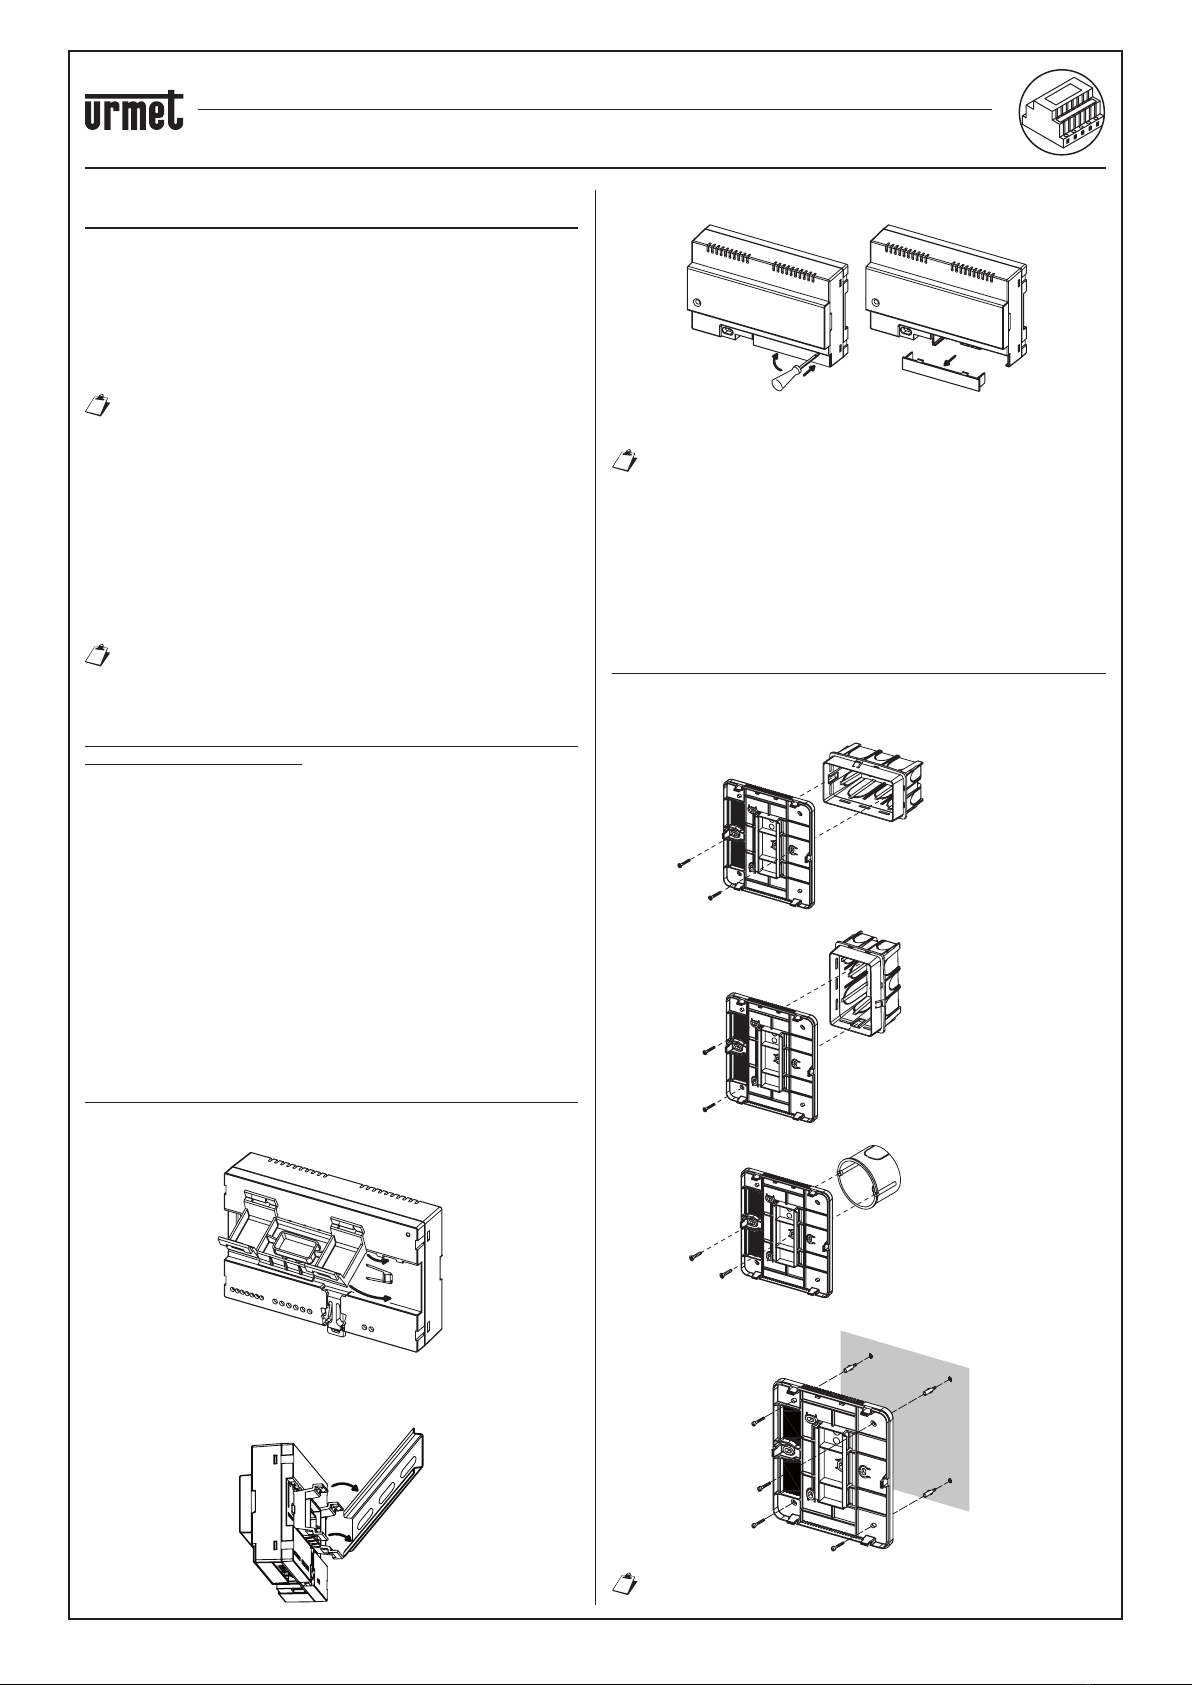
The Call Forwarding Device can be installed in one of the following
ways:
IN A CONTROL PANEL
1. Insert the spacer behind the device in its special seat, ensuring
that it is locked by the lever A.
A
1
2
2. Insert the retainers B of the spacer in the DIN rail in such a way
that the terminal strips of the device are pointing downwards,
then insert the retainers C.
C
C
B
B
—
—
—
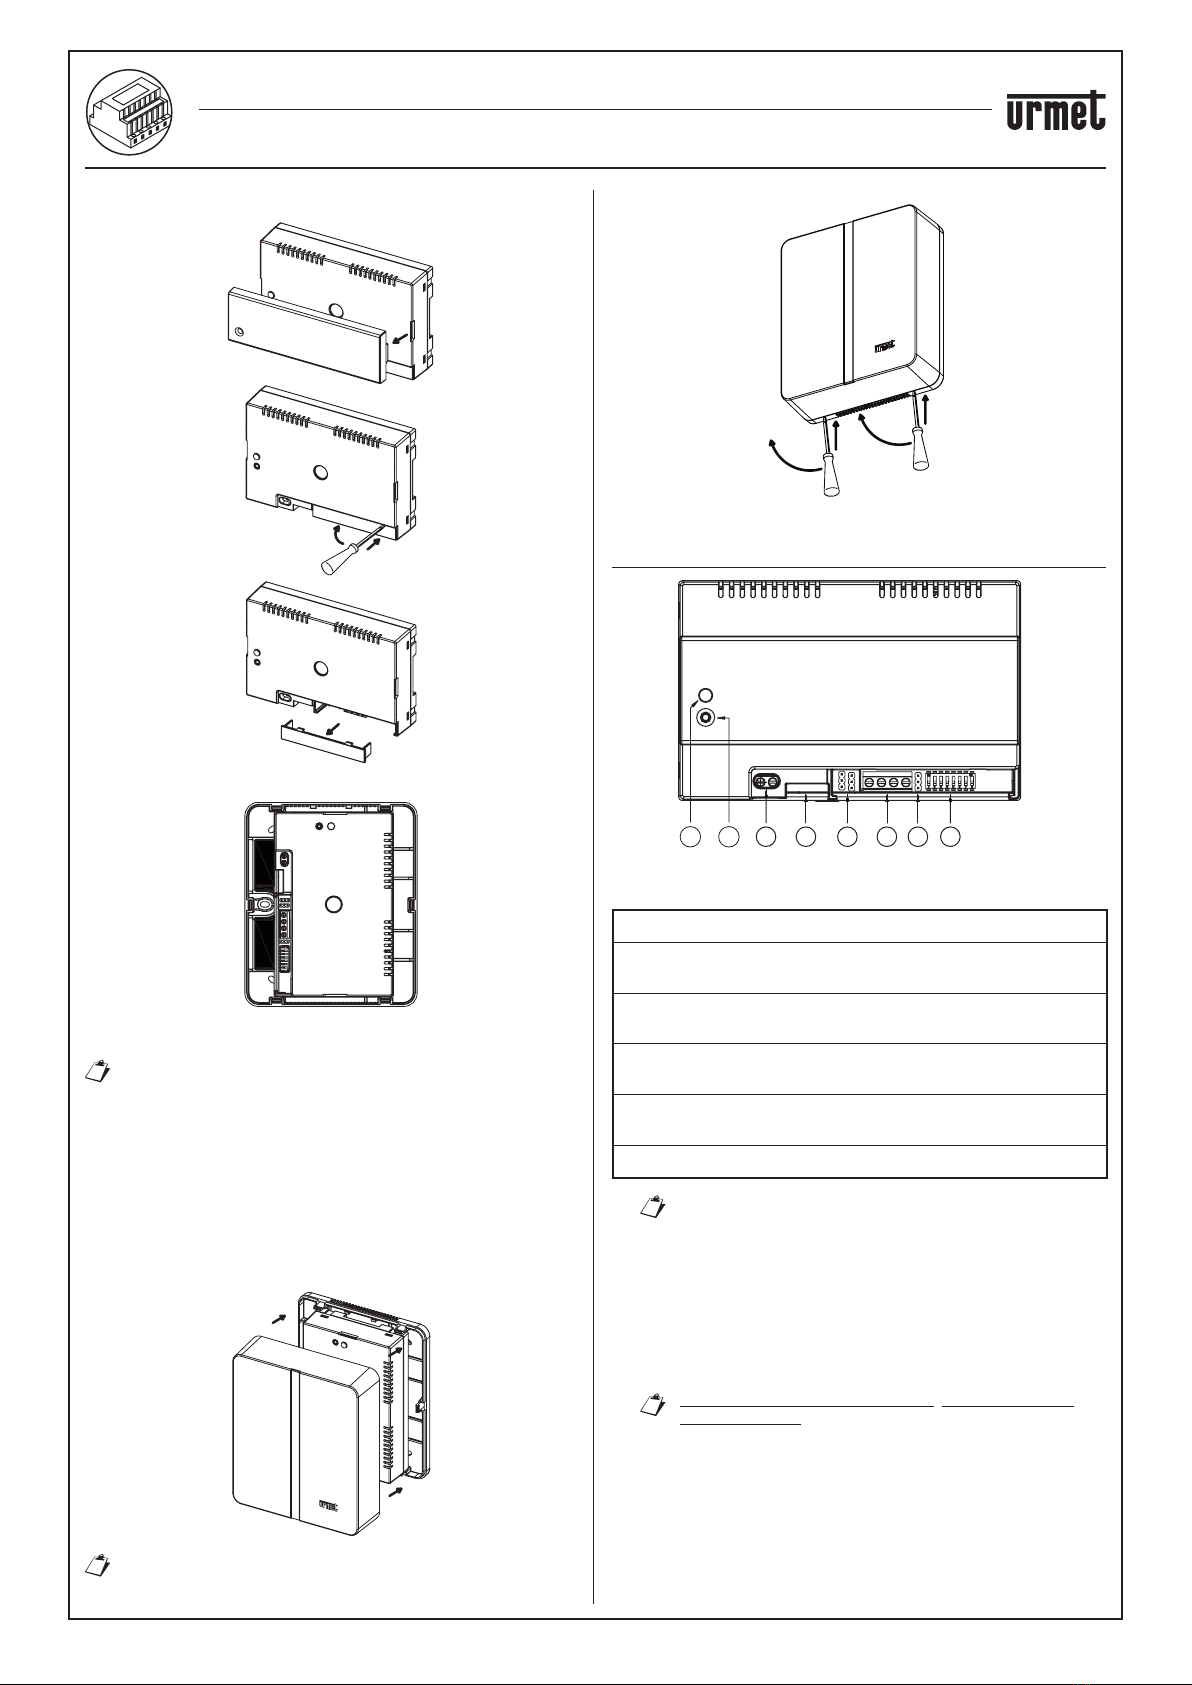
3. Remove the terminal strip cover.
2
1
3
4. Connect the assembly to the system.
The end of a stranded conductor must not be consolidated
with mild soldering in the points in which the conductor is
subject to contact pressure.
5. Carry out the device configuration by means of jumpers and/or
dip-switches.
6. Replace the terminal strip cover.
7. Power on the device.
8. Complete your parameter configuration by using the Urmet
CallMe App.
WALL MOUNTING WITH THE KIT Ref. 1083/88
1. Fix the base of the container (supplied in the kit) to the flush-
mounting box mod. 503 or Ø 60mm (2.36”) as shown in the
following figures:
n. 2 M3.5 x 19 mm
supplied
Box Mod.503 -
horizontal
n. 2 M3.5 x 19 mm
supplied
Box Mod.503 -
vertical
n. 2 2.9 x 13 mm with
countersunk head
Box
Ø 60 mm / 2.36''
or, alternatively, with screws and anchors supplied in the kit.
Ensure cables are led through the left side.
CALL FORWARDING DEVICE FOR 2 VOICE SYSTEM Ref. 1083/58
DEVICE INSTALLATION