UTC Fire and Security Det-Tronics xWatch X7050 User manual

Instructions 95-8600
xWatch®Explosion-Proof Camera
X7050
2.1 6/09 95-8600

Table Of Contents
DESCRIPTION ............................................1
FEATURES ...............................................1
GENERAL APPLICATION INFORMATION .......................2
SPECIFICATIONS ..........................................3
IMPORTANT SAFETY NOTES ................................4
INSTALLATION ............................................4
Protection Against Moisture Damage ........................4
Camera Location. . . . . . . . . . . . . . . . . . . . . . . . . . . . . . . . . . . . . . . . 5
Camera Mounting .......................................5
Wire Size and Type ......................................5
WiringProcedure .......................................6
Aiming the Camera ......................................7
Leveling the Camera.....................................7
CONVERTING A C7050 FLAME DETECTOR TO X7050 XWATCH . . . 8
TROUBLESHOOTING ......................................9
Replacing the xWatch Camera Module . . . . . . . . . . . . . . . . . . . . . . 9
MAINTENANCE ...........................................9
Cleaning ..............................................9
O-Rings...............................................9
DEVICEREPAIRANDRETURN .............................10
ORDERING INFORMATION .................................10
Accessories ..........................................10
Replacement Parts .....................................10
Assistance ...........................................10

95-860012.1 ©Detector Electronics Corporation 2009 6/09 95-8600
INSTRUCTIONS
xWatch®Explosion-Proof Camera
X7050
Important
Be sure to read and understand the entire
instruction manual before installing or operating the
system. Any deviation from the recommendations
in this manual may impair system performance and
compromise safety.
Description
The xWatch Surveillance Camera produces a high
resolution color video picture using a camera module
that is mounted inside an explosion-proof NEMA 4X rated
housing. The device’s explosion-proof rating makes it
suitable for Class I, Div. 1, Groups B, C and D locations.
xWatch can be used alone or in combination with fire
and gas detectors in any application that requires CCTV
surveillance capabilities.
The xWatch can be used in any of three configurations:
xWatch can be used as a stand alone device to•
perform typical CCTV functions.
An xWatch camera module can be retrofitted in place•
of the UV tube module in an existing C7050 Flame
Detector to provide basic visual information.
xWatch can be ordered from the factory as a•
combined unit with any X-Series flame detector. With
this arrangement, the camera and detector share the
same field of view.
In the event of a fire or gas alarm, the operator can
immediately view the monitored area to determine whether
personnel are present and safe. An accurate evaluation
of the hazard’s size, nature, location and severity can be
determined quickly and safely.
The use of a digital video recorder (DVR) to capture the
event provides a permanent record for future analysis of
what occured.
Features
Low cost surveillance of any flame, gas, or toxic•
hazard location
Parallel, non-interfering operation with hazard•
detection system
Easy connection to a video switcher using twisted•
pair wiring
Use existing wiring if suitable•
Easy retrofit into standard C7050 housing•
Simple no tool exchange of the tube module to•
camera
Compact housing for easy installation in small•
spaces
Ideally suited for remote and/or inaccessible areas•
Informed, appropriate response to incidents•
Pre- and post-event analysis of video recording•

2.1 95-86002
General application
inFormation
The xWatch has a balanced differential video output
for driving a long distance twisted pair signal to a
remote site for monitoring and/or recording. The video
output format can be either NTSC (National Television
Systems Committee) or PAL (Phase Alternating Line).
The xWatch video driver is designed for use with
twisted pair cable of 100 ohm impedance. The best
video performance in terms of distance, video quality,
and cost is attained using 22 AWG to 16 AWG, twisted
pair cable of 100 ohm impedance.
The monitor end must terminate the video cable
with 100 ohms. Since most monitors have a built-in
termination resistor of 75 ohms instead of 100 ohms,
a balun or other matching network (video converter)
must be used.
A variety of matrix control systems or DVRs can be
suitable for viewing or recording the video signal,
depending on the requirements of the individual
application. The detector’s auxiliary relay contacts are
typically used to signal the video system of an alarm
event.
Refer to Figure 1 for a schematic of a typical system.
VIDEO
CCTV MONITOR
OR PC
POWER
B2338
DVR ETHERNET
(Optional)
Figure 1—System Block Diagram

2.1 95-86003
speciFications
OPERATING TEMPERATURE—
–20°C to +70°C
HAZARDOUS LOCATION RATING—
–40°C to +75°C
STORAGE TEMPERATURE—
–30°C to +80°C
RELATIVE HUMIDITY—
5 to 95%, non-condensing
INGRESS PROTECTION—
NEMA/Type 4X
SENSOR—
Color low light CCD, 0.3 lux
RESOLUTION—
NTSC: 768 by 494 pixels, 570 lines of resolution
PAL: 752 by 582 pixels, 570 lines of resolution
VIDEO OUTPUT—
NTSC or PAL two wire twisted pair, unshielded,
Category 5
SHUTTER—
Electronic shutter, 1/60 – 1/100,000 second
OPERATING VOLTAGE—
24 Vdc nominal, 18 to 30 Vdc
POWER CONSUMPTION—
2.8 watts
FIELD OF VIEW—
90 degrees, with round image displayed on monitor.
Camera is typically aimed to match field of view of
associated flame detector.
CERTIFICATIONS—
FM/CSA: Class I, Div. 1, Groups B, C and D (T5).
Class II/III, Div. 1, Groups E, F, and G (T5).
NEMA/Type 4X.
ATEX: 0539
FM
®
II 2 G
Ex d IIC T5 IP66
FM07ATEX0053
Ta = –40°C to +75°C.
IECEx: Certificate of Conformity
IECEx FMG 07.0019
Ex d IIC T5 IP66
Ta = –40°C to +75°C.
USER INTERFACE—
Conventional off-the-shelf video switchers and
controllers can be used for the interface.
HOUSING MATERIAL—
Aluminum or 316 Stainless Steel
SHIPPING WEIGHT (Approximate)—
Aluminum: 1.2 pounds (0.6 kg)
Stainless Steel: 2.2 pounds (1.0 kg)
DIMENSIONS—
See Figures 2, 3 and 4.
Figure 2—Dimensions of xWatch in Inches (Centimeters)
4.75 (12.06)
2.5
(6.35)
1/2 INCH NPT
OR 20 MM
A2330
POSITIONING SWIVEL NUT
0.25 (.64) DIAMETER (3)
2.5 (6.4) DIAMETER
2.0 (5.1) DIAMETER
DETECTOR LOCK NUT
120°±2 (2)
45°(2)
2-1/2
(6.4)
A2 368
Figure 3—Dimensions of Q9001A Aluminum Mounting Bracket
in Inches (Centimeters)
5.25
(13.3)
2.5
(6.4)
MOUNTING BASE
1/2 INCH NUT USED TO ADJUST
ELBOW TO DESIRED ANGLE
1-3/8 INCH NUT USED TO ROTATE
SWIVEL/CAMERA ASSEMBLY TO DESIRED POSITION
3/4 INCH NUT USED TO SECURE
XWATCH TO SWIVEL MOUNT
A237
0
Figure 4—Dimensions of Q9001H Stainless Steel Mounting Bracket
in Inches (Centimeters)

2.1 95-86004
important saFety notes
WarnIng
Do not open the camera assembly in a hazardous
area when power is applied. The device contains
no serviceable components and should not be
opened, except during installation and setup.
CautIon
The wiring procedures in this manual are intended
to ensure proper functioning of the device under
normal conditions. However, because of the
many variations in wiring codes and regulations,
total compliance to these ordinances cannot be
guaranteed. Be certain that all wiring complies
with the NEC as well as all local ordinances. If
in doubt, consult the authority having jurisdiction
before wiring the system.
attentIon
Observe precautions for handling electrostatic
sensitive devices. Do not plug the camera module
into the base with power applied.
installation
CautIon
Installation and wiring of the xWatch should be
performed only by qualied personnel.
PROTECTION AGAINST MOISTURE DAMAGE
It is important to take proper precautions during installation
to ensure that moisture will not come in contact with the
electrical connections or components of the system. The
integrity of the system regarding moisture protection
must be maintained for proper operation and is the
responsibility of the installer.
If conduit is used, drains must be installed at water
collection points to automatically drain accumulated
moisture. Conduit breathers should be installed at upper
locations to provide ventilation and allow water vapor to
escape. At least one breather should be used with each
drain.
Conduit raceways should be inclined so that water will
flow to low points for drainage and will not collect inside
enclosures or on conduit seals. If this is not possible,
install conduit drains above the seals to prevent the
collection of water or install a drain loop below the camera
with a conduit drain at the lowest point of the loop.
Conduit seals are not required for compliance with
explosion-proof installation requirements, but are highly
recommended to prevent water ingress in outdoor
applications. Units with M25 thread must use an IP66
washer to prevent water ingress.

2.1 95-86005
CAMERA LOCATION
Cameras should be positioned to provide the best
unobstructed view of the area to be monitored. If the
xWatch is to monitor the same area as the detector,
it should be mounted as close to the detector as
practical. The following factors should also be taken into
consideration:
Be sure that the unit is easily accessible for cleaning•
and other periodic servicing.
Care must be taken to ensure that dirt, moisture or•
other contaminants will not accumulate on the lens
and obscure the vision of the camera. If possible,
point the xWatch slightly downward.
The xWatch should be mounted on a rigid surface in•
a low vibration area.
The xWatch should not be placed where rising•
combustion products can obscure its vision. If dense
smoke is expected to accumulate at the onset of a
fire, mount the xWatch on a side wall at least a few
feet (approximately 1 meter) down from the ceiling.
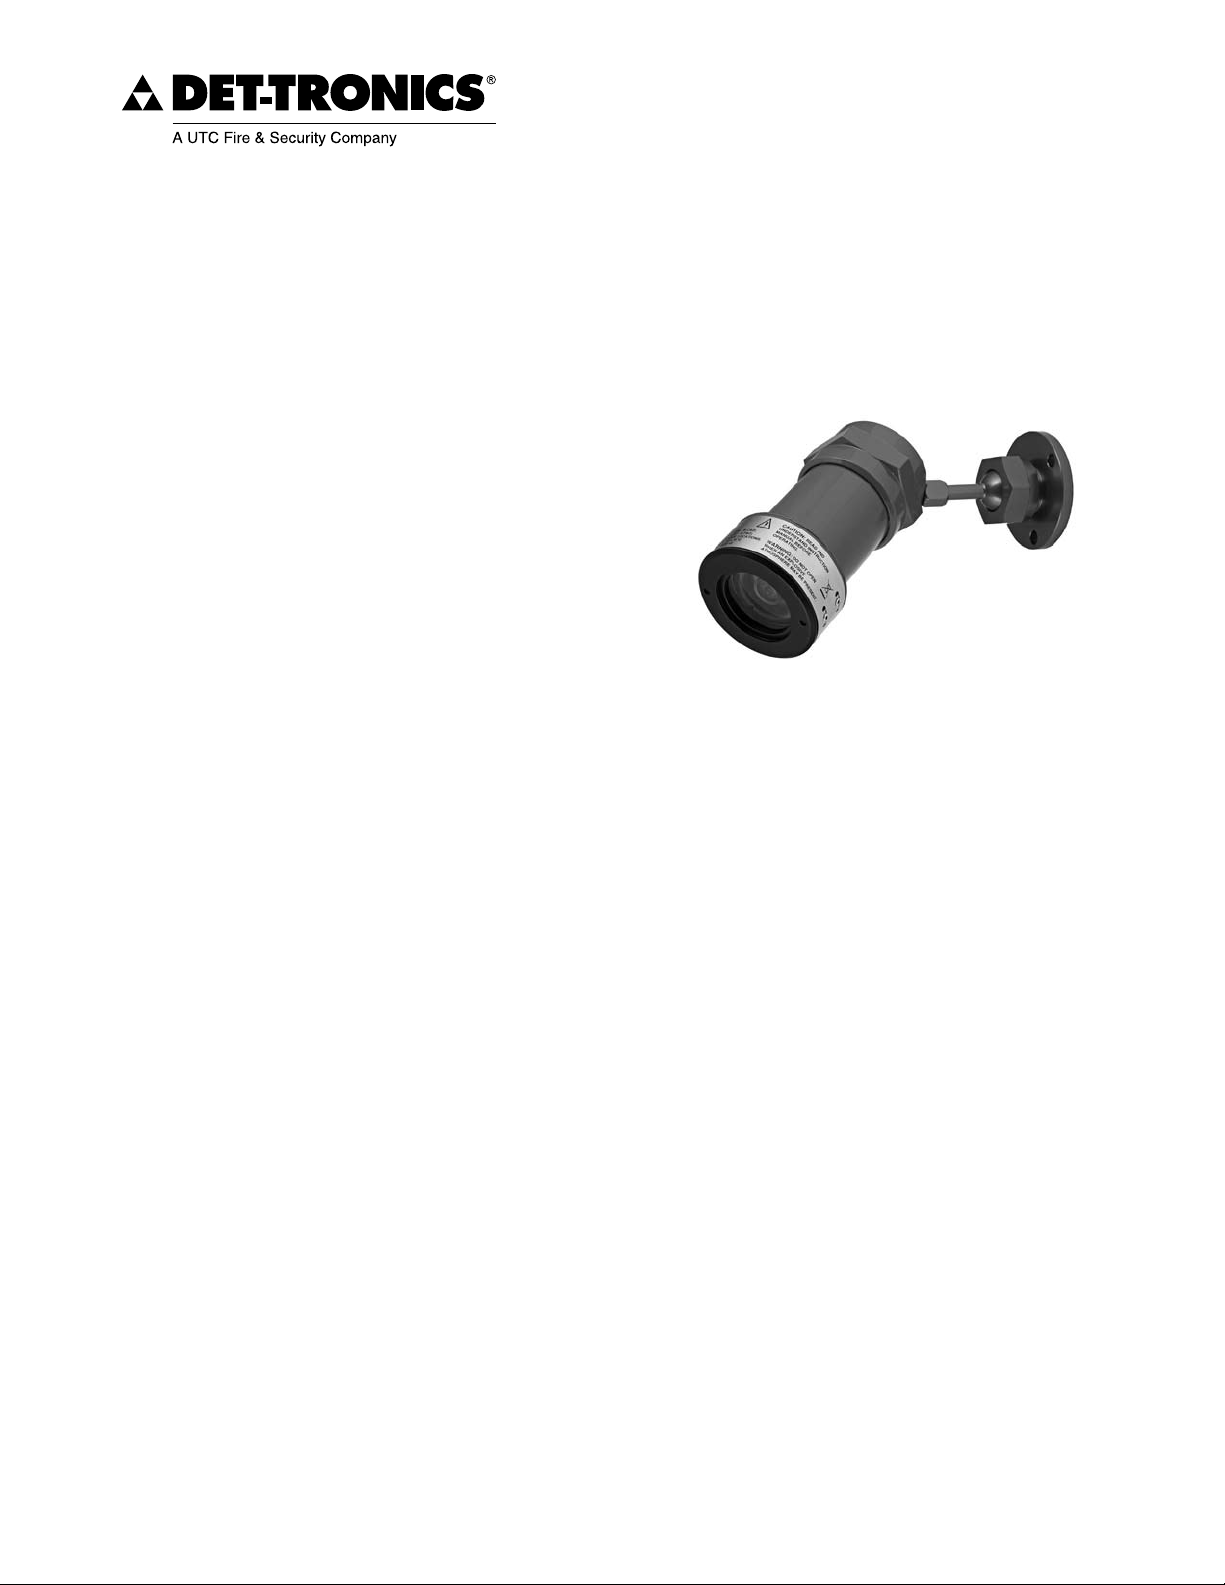
CAMERA MOUNTING
Install the swivel mounting bracket assembly on the wall.
The installation surface should be free of vibration and
suitable to receive 1/4 inch (M6) screws with a length of
at least 1 inch (25 mm), and have sufficient capacity to
hold the camera and bracket weight.
WIRE SIZE AND TYPE
General
The preferred wiring system for the xWatch utilizes
unshielded twisted pair for the video signal. Power
wiring requires a wire gauge large enough to ensure that
18 Vdc is available to the device at all times.
NOTE
In applications where the wiring cable is installed
in conduit, the conduit must not be used for wiring
to other electrical equipment.
Video Cable Considerations
Proper video cable will ensure that the best quality video
is displayed on a remote monitor. Because composite
video frequencies span the range of 25 Hz to 6 MHz,
most cables will display transmission line characteristics.
Ensure that the same cable type (impedance) is used
throughout the entire length. For example, do not mix
twisted pair cable and coaxial cable without using a
balun for matching. In addition, the monitor end must
be properly terminated. Failure to properly implement
the video cabling system may result in smearing (loss of
detail) and/or loss of color and/or loss of picture sync.
The xWatch employs a balanced differential video
driver designed to drive twisted pair cable of 100 ohm
impedance. The best video performance in terms of
distance, video quality, and cost is attained using a 22
AWG to 16 AWG unshielded twisted pair cable of 100
ohm impedance. The wiring can be Category 2 or better,
stranded or solid.
The monitor end must terminate the video cable with 100
ohms. Most monitors have a built in termination resistor.
If the monitor uses 75 ohms instead of 100, a balun or
other matching network must be used.
Coax such as RG-59 or RG-6 may be used, but be sure to
use proper matching and termination devices. There are
manufacturers who support driving many types of cable
systems using active transceivers that compensate for
cable losses.
Galvanic isolation of the video may also be necessary
to avoid horizontal bars caused by line frequency
interference. This may be accomplished using isolating
active transceiving systems or passive video isolation
transformers/baluns. Specify a baseband video isolation
system with a frequency response of at least 25 Hz to 6
MHz. Small cable TV transformers will generally not work
as their frequency response is not low enough.
Power Cable Considerations
To ensure proper operation, a minimum of 18 Vdc is
required at the xWatch terminal block, considering a
worst case current draw of 0.156 Amps (2.8 Watts).

2.1 95-86006
WIRING PROCEDURE
CautIon
Power must not be applied to the device while
opening the housing or while plugging in or
removing the module.
Disassemble the enclosure by turning the housing1.
cover counterclockwise. See Figure 5 for an
illustration of the xWatch assembly.
Carefully remove the camera module.2.
Connect the external wiring to the screw connectors3.
marked A-, B-, C-, and D- on the xWatch terminal
block. See Figure 6.
Important
Do not test any wiring connected to the xWatch
with a meg-ohmmeter. Disconnect wiring at
the camera before checking system wiring for
continuity.
Check all field wiring to be sure that the proper4.
connections have been made.
Using the index pin as a guide, install the camera5.
module on the terminal block.
Re-assemble the device housing.6.
Make the final sighting adjustments and ensure that7.
the mounting bracket hardware is tight.
QUICK CONNECT PLUG (4)
POWER + (B)
VIDEO + (D)
POWER – (C)
VIDEO – (A)
A2365 INDEX PIN
Figure 6—xWatch Wiring Terminal Block
WIRING TERMINAL BLOCK
INDEX PIN
O-RING (2) HOUSING COVER
CAMERA MODULE
TERMINAL CAP
A2366
QUICK CONNECT PLUG (4)
Figure 5—Exploded View of xWatch

2.1 95-86007
AIMING THE CAMERA
In installations where the xWatch is used for monitoring
the same hazardous area as a single detector, the
recommended procedure for ensuring that the camera
is correctly aligned with the detector’s cone of vision is to
use a Cone of Vision Tester (Laser Aimer) available from
Det-Tronics.
Using the COV tester, locate the center of the1.
detector’s field of view. (Refer to the instruction
manual provided with the COV tester for complete
information regarding its use.)
Place the COV tester on the xWatch. Loosen the2.
xWatch mounting bracket, then adjust the center of
the camera’s field of view to match the center of the
detector’s field of view.
The COV tester can also be used to locate the outside
edge of the field of view.
LEVELING THE CAMERA
If the image on the monitor does not appear to be level,
this can be corrected by rotating the camera module
within the xWatch.
Remove the housing cover from the xWatch. See1.
Figure 5.
Loosen the setscrew on the side of the xWatch2.
module. See Figure 7.
Align the two notches on the face of the module so3.
that they are level with the horizon or until the image
on the monitor looks level.
When proper orientation has been achieved, carefully4.
tighten the setscrew. Do not overtighten.
LOOSEN SETSCREW
USING 5/64 INCH ALLEN WRENCH
TURN RING TO ALIGN THE TWO NOTCHES
LEVEL WITH HORIZON OR UNTIL IMAGE IS LEVEL A2369
Figure 7—xWatch Camera Module

2.1 95-86008
convertinG a c7050 Flame
Detector to X7050 XWatch
An xWatch camera module can be installed in place of
the UV tube module in an existing C7050 Flame Detector
to provide basic visual monitoring capability.
CautIon
Under no circumstances can 290 Vdc be applied
to the xWatch.
Provide the correct wiring to the C7050/xWatch1.
location as described in “Wire Size and Type” in the
Installation section of this manual.
CautIon
Power must not be applied to the device while
opening the housing or while plugging in or
removing the module.
Disassemble the enclosure by turning the housing2.
cover counterclockwise. See Figure 8 for an
illustration of the xWatch assembly.
Remove the existing UV module from the C70503.
detector.
Disconnect the existing wiring at the controller.4.
Connect the grounding strap between the new
index pin and the terminal mounting screw per the
instructions. See Figure 9.
Important
Do not test any wiring connected to the xWatch
with a meg-ohmmeter. Disconnect wiring at
the camera before checking system wiring for
continuity.
Check all field wiring to be sure that the proper5.
connections have been made.
Using the index pin as a guide, install the xWatch6.
camera module on the terminal block.
Re-assemble the device housing.7.
Make the final sighting adjustments and ensure that8.
the mounting bracket hardware is tight.
HOUSING COVER
TERMINAL BLOCK
INDEX PIN REMOVE EXISTING
UV SENSOR TUBE MODULE
INSTALL xWATCH CAMERA MODULE
IN PLACE OF EXISTING UV MODULE
B2331 NOTE: REQUIRES REWIRING TO VIDEO EQUIPMENT.
Figure 8—Converting C7050 to xWatch
B
D
C
A
A2388
INDEX PIN
SCREW
GROUNDING STRAP
Figure 9—xWatch Terminal Block

2.1 95-86009
trouBleshootinG
The xWatch camera is not designed to be repaired in the
field. If it is determined that the problem is caused by
an electronic defect, the device must be returned to the
factory for repair.
NOTE
It is highly recommended that spare modules
be kept on hand for eld replacement to ensure
continuous protection.
REPLACING THE XWATCH CAMERA MODULE
CautIon
Power must not be applied to the device while
opening the housing or while plugging in or
removing the module.
Disassemble the enclosure by turning the housing1.
cover counterclockwise. See Figure 5 for an
illustration of the xWatch assembly.
Remove the existing camera module from the2.
xWatch.
Using the index pin as a guide, install the new xWatch3.
camera module on the terminal block.
Check the housing O-rings and service as required4.
(see Maintenance section of this manual for details).
Re-assemble the device housing.
Check camera sighting and ensure that the mounting5.
bracket hardware is tight.
Clean the camera lens if required.6.
maintenance
CLEANING
The xWatch camera requires no periodic calibration or
servicing. However, the camera lens should be cleaned
on a regular basis.
Clean the camera lens using a clean cloth or tissue
and Det-Tronics window cleaning solution (part number
001680-001). If a stronger solution is needed, isopropyl
alcohol may be used.
O-RINGS
Rubber O-rings are used on the xWatch housing to ensure
the watertight integrity of the device. It is imperative that
these O-rings be properly installed and in good condition.
Failure to properly maintain these rings can allow water to
enter the housing and cause premature failure.
When the housing cover is removed, the O-rings should
be inspected for breaks, cracks, or dryness. If cracks
are visible, the O-ring should be replaced. If they feel
dry to the touch, a thin coating of lubricant should be
applied. When re-installing the O-rings, be sure that they
are properly seated in the groove on the housing.
A coating of lubricant should also be applied to the
threads on the housing before reassembly. This will both
lubricate the threads and help to prevent moisture from
entering the housing.
CautIon
O-rings should be lubricated with a silicone-free
grease (such as p/n 005003-001 available from
Det-Tronics). If catalytic type combustible gas
sensors are being used anywhere on the premises,
silicone based lubricants should never be used,
since inadvertent use of a silicone lubricant on
or near the combustible gas sensor will cause
irreversible damage to the sensing element.

2.1 95-860010
Device repair anD return
Prior to returning devices, contact the nearest local
Detector Electronics office so that a Return Material
Identification (RMI) number can be assigned. A written
statement describing the malfunction must accompany
the returned device or component to assist and expedite
finding the root cause of the failure.
Pack the unit properly. Always use sufficient packing
material. Where applicable, use an antistatic bag as
protection from electrostatic discharge.
NOTE
Inadequate packaging that ultimately causes
damage to the returned device during shipment
will result in a service charge to repair the damage
incurred during shipment.
Return all equipment transportation prepaid to the factory
in Minneapolis.
orDerinG inFormation
When ordering, please specify:
x7050 xWatch explosion proof camera
Refer to the xWatch Model Matrix below for details.
ACCESSORIES
Swivel Mount Bracket is required for mounting the
camera:
Q9001B1175 Aluminum Mounting Bracket–
(p/n 002099-003)
Q9001H8001 Stainless Steel Mounting Bracket–
(p/n 004404-002)
Q1201A Laser Holder/Laser is used for sighting the
flame detector and xWatch camera. The Laser Holder
easily attaches to the front of the detector or camera.
The Laser projects a red laser beam to show the exact
center of the field of view. Additional laser positions are
provided to show the outside edges of the field of view.
REPLACEMENT PARTS
Part Number Description
009448-003 Model DE2020N –
Replacement Camera Module, NTSC
009448-004 Model DE2020P –
Replacement Camera Module, PAL
107427-004 Rubber O-rings
001680-001 Window cleaner squeeze bottle
(package of six bottles)
005003-001 Silicone-free grease
ASSISTANCE
For assistance in ordering a system to meet the needs of
a specific application, contact:
Detector Electronics Corporation
6901 West 110th Street
Minneapolis, Minnesota 55438 USA
Operator: (952) 941-5665 or (800) 765-FIRE
Customer Service: (952) 946-6491
Fax: (952) 829-8750
Web site: www.det-tronics.com
E-mail: det-tronics@det-tronics.com
xWATCH MODEL MATRIX
MODEL DESCRIPTION
X7050 xWatch Explosion Proof Camera
TYPE MATERIAL
AAluminum
BStainless Steel (316)
TYPE THREAD TYPE
1E 1/2’ NPT
1F M20
TYPE VIDEO OUTPUT
50 NTSC
51 PAL
TYPE APPROVAL AGENCY
WFM/CSA/ATEX/CE
TYPE CLASSIFICATION
2Division/Zone Ex d

Detector Electronics Corporation
6901 West 110th Street
Minneapolis, MN 55438 USA
T: 952.941.5665 or 800.765.3473
F: 952.829.8750
W: http://www.det-tronics.com
X3301 Multispectrum
IR Flame Detector
PointWatch Eclipse®
IR Combustible Gas Detector
Eagle Quantum Premier®
Safety System
Eagle Logic Solver
Safety System
Det-Tronics, the DET-TRONICS logo, and xWatch are registered trademarks or trademarks of Detector Electronics
Corporation in the United States, other countries, or both. Other company, product, or service names may be trademarks or service marks of others.
© Copyright Detector Electronics Corporation 2009. All rights reserved.
95-8600
Table of contents
Other UTC Fire and Security Digital Camera manuals