INSTALLATION INSTRUCTIONS/INSTRUCTIONS POUR L’INSTALLATION/INSTRUCCIONES DE INSTALACIÓN
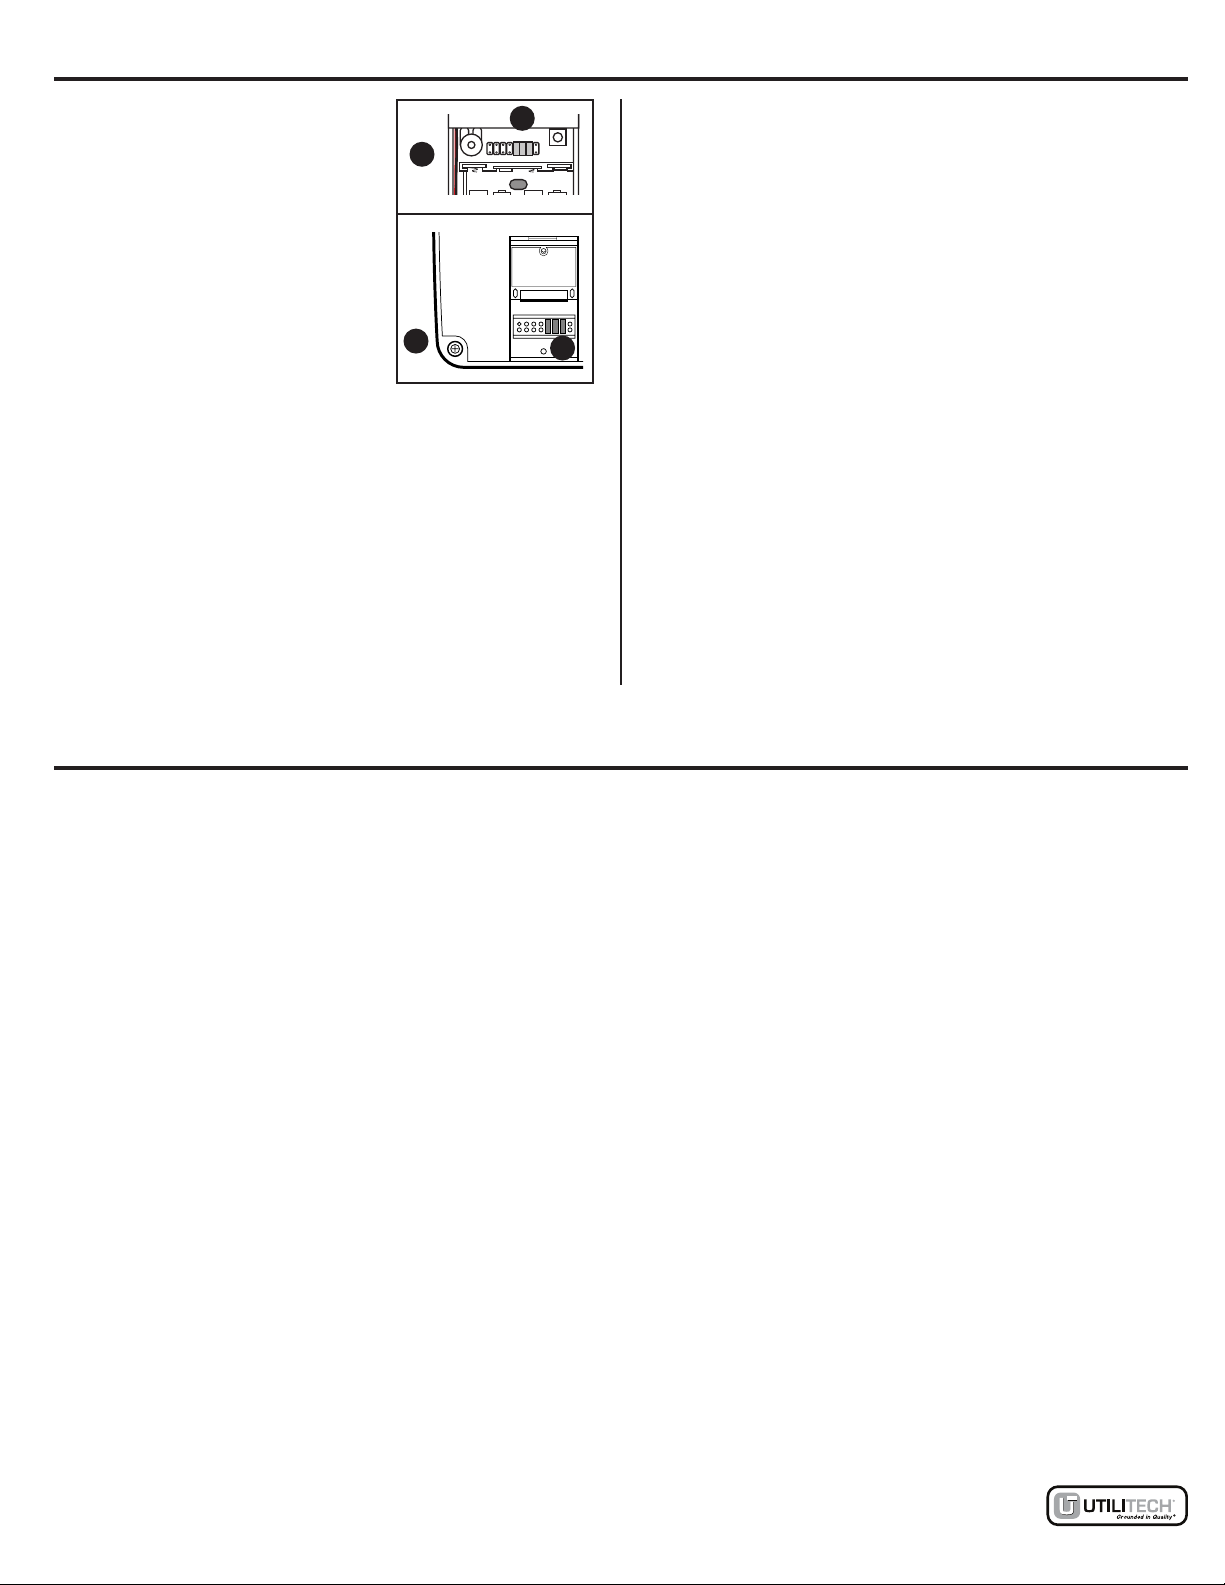
4. To test the function, keep the chime
extender(B)nexttoexistingchime
andactivatetheexistingchime.Ifthe
chime(A)sounds,thesystemisworking
correctly.Ifitdoesnotsound,tryoneor
more of the following steps.
Pourtesterlerelaisdecarillon(B),
tenez-leàcôtéducarillonexistant
etactivez-le.Silecarillon(A)sonne,
le système fonctionne correctement.
S’il ne sonne pas, essayez les étapes
suivantes.
Para probar la función, mantenga el
extensordelacampanilla(B)allado
de la campanilla existente y actívela.
Silacampanilla(A)suena,elsistema
está funcionando correctamente. Si
no suena, pruebe uno o más de los
siguientes pasos.
•
Turn the microphone sensitivity knob
insidechimeextender(B)clockwiseto
increase microphone sensitivity./Tournez
le bouton de sensibilité du microphone
durelaisdecarillon(B)danslesensdes
aiguilles d’une montre de façon à accroî-
tre la sensibilité du microphone./Girela
perilla de sensibilidad del micrófono den-
trodelextensordelacampanilla(B)en
elsentidodelasmanecillasdelrelojpara
aumentar la sensibilidad del micrófono.
•Movethechimeextender(B)todifferent
positions around the existing chime./
Déplacezlerelaisdecarillon(B)autour
du carillon existant./Moverelextensor
delacampanilla(B)adiferentesposi-
ciones de la campanilla existente.
•
Remove the microphone from chime ex-
tender(B)bygentlypryingmicrophoneout
ofchimeextender(B)androutingthewires
through the small slot in chime extender
(B).Attachmicrophonetoexistingchime
usingdouble-sided tape (DD). Note: Do
not mount microphone to chime bars and
make sure the small hole in the microphone
isnotcoveredwithdouble-sidedtape(DD)./Retirez le microphone du relais
decarillon(B)enletirantdoucementetenacheminantleslsàtravers
la petite fente du relais de carillon (B). Fixez le microphone au carillon
existantàl’aidederubanadhésifàdoubleface(DD).Remarque :Nexez
pas le microphone aux barres du carillon et assurez-vous que le petit trou
dumicrophonen’estpascouvertparlerubanadhésifàdoubleface(DD)./
Retireelmicrófonodelextensordelacampanilla(B)tirandosuavemente
delmicrófonoparasacarelextensordelacampanilla(B)ytiendaloscables
porlaranurapequeñaenelextensordelacampanilla(B).Fijeelmicrófono
alacampanillaexistenteusandolacintadoblefaz(DD).Nota:Nocoloque
elmicrófonoenlasbarrasdelacampanillayasegúresedequeeloricio
pequeñodelmicrófononoestécubiertoconlacintadoblefaz(DD).
5. Oncethechime(A)andchimeextender(B)areworkingcorrectly,
reduce the microphone sensitivity to the least sensitive position that
allows for reliable activation to minimize false activation from other
household noises.
Unefoisquelecarillon(A)etlerelaisdecarillon(B)fonctionnent
correctement,ajustezlasensibilitédumicrophoneauplusbasréglage
permettantd’assurerunedétectionable,defaçonàminimiserles
fausses détections pouvant être causées par d’autres sons.
Unavezquelacampanilla(A)yelextensordelacampanilla(B)estén
funcionando correctamente, reduzca la sensibilidad del micrófono a
laposiciónconmenorsensibilidadquepermitalaactivaciónconable
para minimizar la activación falsa por otros ruidos de la casa.
6. Useeitherscrews(AA)ordouble-sided
tape(DD)tomountchimeextender(B).
Tomountwithscrews(AA),temporarily
remove the batteries and place chime
extender(B)againstmountingsurface
and mark the two screw holes. Drill
two7/32in.pilotholesandinsertwall
anchors(BB).Alignholesinchime
extender(B)withwallanchors(BB)and
inserttwoscrews(AA).Tightensecurely
and replace batteries and cover.
Whenattachingchimeextender(B)with
double-sidedtape(DD),removepaper
from both sides of the double-sided tape
(DD)andapplytocleansurface.Install
cover.
Fixezlerelaisdecarillon(B)àl’aidede
vis(AA)ouderubanadhésifàdouble
face(DD).Pouruneinstallationàl’aide
desvis(AA),retireztemporairementles
piles, placez le relais de carillon contre
la surface de montage et marquez
l’emplacement des deux trous de vis.
Percez deux avant-trous à l’aide d’un
foretde7/32poetinsérezleschevillesd’ancrage(BB).Alignezles
trousdurelaisdecarillon(B)avecleschevillesd’ancrage(BB)et
insérezdeuxvis(AA).Serrezfermementetremettezlespilesetle
couvercle en place.
Sivousxezlerelaisdecarillon(B)àl’aidederubanadhésifàdeux
faces(DD),retirezlepapierdesdeuxcôtésdurubanetappliquezle
rubansurunesurfacepropre.Installezlecouvercle.
Usetornillos(AA)ocintadoblefaz(DD)paramontarelextensordela
campanilla(B).Paramontarcontornillos(AA),retiretemporalmente
lasbateríasycoloqueelextensordelacampanillacontralasupercie
demontajeymarquelosdosoriciosparalostornillos.Taladredos
oriciosguíade7/32"einserteanclasdeexpansióndepared(BB).
Alineelosoriciosenelextensordelacampanilla(B)conanclasde
expansiónparapared(BB)einsertedostornillos(AA).Aprietede
forma segura y reemplace las baterías y la cubierta.
Alcolocarelextensordelacampanilla(B)concintadoblefaz(DD),
retireelpapeldeambosladosdelacintadoblefaz(DD)yapliqueen
unasupercielimpia.Instalelacubierta.
7. Unplugchime(A).Useasmallscrewdrivertoadjustvolumecontrol
onthebackofchime(A)todesiredvolume.Plugchime(A)intowall
outlet.
Débranchezlecarillon(A).Tournezleboutondecommandeduvolume
situéàl’arrièreducarillon(A)àl’aided’unpetittournevispourréglerle
volume.Branchezlecarillon(A)suruneprisemurale.
Desenchufelacampanilla(A).Useundestornilladorpequeñopara
regular el control de volumen en la parte posterior de la campanilla al
volumendeseado.Enchufelacampanilla(A)enuntomacorrientesde
pared.
4
A
B
B
B
B
5
B
7A
6
B
B
DD DD