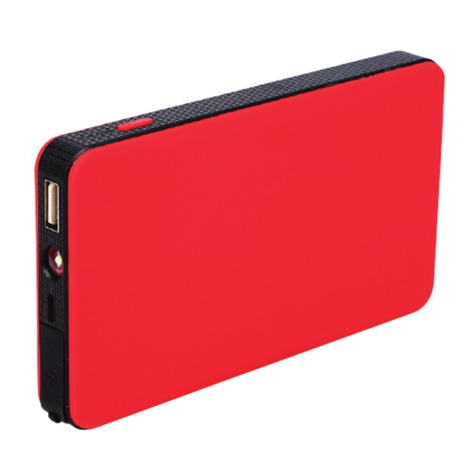
UTRAI Jstar One User manual

成品尺寸:90mm*120mm
封面157g铜版纸
内页128g铜版纸
四色-骑马钉

JSTARONE 1.0 1908

PJSTAR-V1.0
Jump Starter Jstar One
USER MANUAL

USER MANUAL
Guide de démarrage rapide
Deutsche Anleitung
Guida di Operazione Rapida
取り扱い説明書
01
11
22
33
44
..........................................
.........................
.....................................
.......................
............................................

— 01 —
Packing List
Smart Clamps
English
Type-C To
Type-C Cable
DC Cigarette
Lighter Adapter
Carrying Case
Jump Starter
USB To
Type-C Cable
User Manual

— 02 —
Layout
1
13
14
10
11
9
12
5
6
4
3
7
2
8

— 03 —
Function
1
2
3
4
5
6
7
8
9
10
11
12
13
14
Power Button
Power Level
Indicator Lights
Type-C Input /
Output Port
LED Flashlight
Situation
Normal, SOS, Strobe, and Off
EC5 Output Port Insert the plug into the jump starting port
Compass Direction
ON / OFF Button Turn ON / Turn OFF the jump starter
LED Indicator Show the work status of the battery clamp
Battery Clamps Plug Insert the plug completely into the jump starter
Red Battery Clamp Connect to positive terminal of the car battery
Black Battery Clamp Connect to negative terminal of the car battery
Charge your devices or charge the starter
• Press the button to show the remaining capacity.
• Long press the button to turn on / off the flashlight.
• When the flashlight turn on, press the button to
change the flashlight.
Showing the charging progress:
25%, 50%, 75%, 100%
USB Output Port 1
Charge your phone, tablet, camera, etc.
75% faster than a standard charge
USB Output Port 2
Charge your phone, tablet, camera, etc.
75% faster than a standard charge
DC 12V/8A
Output Port
Charge your devices

— 04 —
Specifications
Operation Guide
Battery Capacity
Battery Cycle Life
Peak Current
Starting Current
Car Jump Start Output
DC Output
Type-C Input
Type-C Output
USB1 Output
USB2 Output
Gas Engine Rating
Diesel Engine Rating
Operating Temperature
LED Light Power
Charging Time
Unite Size (L * W * H)
Indicator Lights
Battery Capacity
4 Solid
100%
22000mAh
≥300 times
2000A
1000A
12V
12V/8A
PD 5V/2A, 9V/2A
PD 5V/3A, 9V/2A, 12V/1.5A
5V/3A, 9V/2A, 12V/1.5A
Up to 8.0L
Up to 6.5L
-20℃~+75℃
White: 1W
Type-C Input: 4h-4.5h
170mm * 87mm * 47mm
3 Solid
75%
2 Solid
50%
1 Solid
25%
Power Level Indicator Lights
Press the Power Button to check the battery power level of the Jump Starter.
The number of solid lights indicates the battery level.

— 05 —
Charging your Jump Starter
• At Home :
1. Plug the USB cable into computer or any USB 2A wall adaptor (not included).
2. Connect the Type-C port into the Jump Starter.
• In Car :
1. Plug the car adaptor (not included) into the socket.
2. Connect the Type-C port into the Jump Starter.
NOTE: It is recommended to recharge the Jump Starter every 3-4 months to
maintain the efficiency and prolong the service life of the internal battery even if
the unit has not been used.
Charging your Smart Phones or any other Devices
Your Jump Starter comes with two USB charging ports and one Type-C charging
ports located at the front of the unit:
• Plug the USB cable or Type-C cable into the USB output ports or Type-C
output port on your Jump Starter.
• Connect it to your phone, tablet or other devices you want to charge. You can
charge 3 devices at the same time.
• Power on your Jump Starter to start charging!

— 06 —
Flashlight
1. Please press & hold Power Button for 3 seconds to turn on / off the flashlight.
2. In flashlight mode, press Power Button to select from 4 modes (normal,
strobe, SOS, off).
Jump Starting a Vehicle
By owning a Jump Starter, you have everything you need to jump start a vehicle
—no need to wait for help, Jstar One to the rescue!
We know you’re excited, but before jumping your vehicle, please be sure to take
some precautionary steps:
• Read your vehicle owner’s manual first as the manufacturer may have specific
steps and precautions that pertain to your vehicle.
• Be sure to turn off all electronics in your car (radio, lights, etc.) before jump
starting.
• Make sure you are in a dry, well-ventilated area. Never jump start a vehicle in
an enclosed area.
• Remove any moisture from your Jstar One unit, accessories, and your vehicle’s
battery. Never attempt to jump start a vehicle when moisture is present.
• Check that the vehicle’s battery terminals are clean to ensure the best
conductivity.
• Properly identify the vehicle battery’s positive (+, red) and negative (-, black)
terminals before connecting the clamps.
• When using the clamps, do not allow the metal teeth of the black clamp to
touch the metal teeth of the red clamp.

— 07 —
• When using the clamps, DO NOT connect the RED clamp to the vehicle
battery’s negative (-) terminal, or the BLACK clamp to the vehicle battery’s
positive (+) terminal.
• When connecting smart clamps to the battery terminals, ensure the copper
teeth on each side of the clamp make good contact with the terminal. The better
the connection, the easier it will be to start your vehicle.
NOTE: When adjusting the clamps please be sure to disconnect your Jump
Starter first. This will prevent the occurrence of minor sparks.
• How to Jump Start Your Car
Step 2: Connect the red clamp to the positive electrode (+) of the car battery and
the black clamp to negative one (-). The green light is always on.
RED BLACK
Step 1: Insert the plug of the battery clamps completely into the jump starter, the
red and green lights flashing alternately.

— 08 —
START
Step 4: When the vehicle is started, remove the battery clamp from the car battery
and the jump starter within 30 seconds.
Step 3: Start the vehicle.
If the engine does not start on the first try, disconnect it from the car battery and
wait for at least 20 seconds before reconnecting.

— 09 —
LED Indicator
Low power of the jump starter
Please try to replace the startup power supply
or charge it in time.
In any of the following situations, the smart clamp turns protection on:
The red light flashing
The red light is always on
and sound an alarm
The green light is always on
The red / green light flashing
alternately
Situations
Ready to work
Work status
1. Battery clamp is reversely connected
Please check whether the clamp is reversely
connected.
2. The clamp is short-circuited
Please check whether the red and black clamps
together connect or connect both cable clamps
to the same piece of metal.

— 10 —
Important Safety Information
WARNING: Read all instructions and warnings prior to using this product.
Improper use of this product may result in product damage, excess heat,
toxic fumes, fire or explosion,for which Corporation is not responsible.
• Always read all instructions carefully before using your Jump Starter.
• Do not submerge your Jump Starter in water, or expose it to rain or moisture.
• Never open or disassemble your Jump Starter as it will void your warranty.
• Do not expose your Jump Starter to fire, intense heat, or flammable liquids.
• Only charge the product at temperatures between -20℃~+75℃
• Keep away from and out of reach of children.
• Do not insert foreign objects into ANY inputs or outputs.
• Do not allow the metal teeth of the red clamp to touch the metal teeth of the
black clamp when connected to your Jump Starter.
• Do not connect the black clamp to the vehicle battery’s positive(+) terminal
when connected to your Jump Starter. Do not connect the red clamp to the
vehicle battery’s negative(-) terminal when connected to your Jump Starter.
• Do not open your Jump Starter to replace the internal battery. No user-replac
able parts are inside your Jump Starter.
• Always disconnect the jump start cables from your Jump Starter after use and
store separately.
• For protecting this unit, make sure the battery capacity of jump starter is above
75% before jumping start your car.
• Check the power of the product at least every three months, and charge the
product in time.

— 11 —
Contenu de l'emballage
Pinces intelligentes
Français
Câble de type C
à type C
Adaptateur
d'allume-cigarette DC
Sac de transport
Démarrage de voiture
Câble USB vers type C
Manuel de l'utilisateur

— 12 —
L'apparence
1
13
14
10
11
9
12
5
6
4
3
7
2
8

— 13 —
Fonction
1
2
3
4
5
6
7
8
9
10
11
Bouton d'Alimentation
Voyants de niveau
de puissance
Port d'entrée /
sortie de type C
Lampe de poche
Operation
Normal, SOS, stroboscopique et désactivé
Port de sortie EC5 Insérez la fiche dans le port de départ du saut.
Boussole Direction
Bouton ON / OFF Allumer / Eteindre le démarrage de voiture.
Led Indictor Vous montrer le statut de travail de la pince
intelligente.
Charger vos appareils ou charger le démarreur.
• Appuyez sur le bouton pour voir la capacité
restante.
• Appuyez longuement sur le bouton pour allumer /
éteindre la lampe de poche.
• Lorsque la lampe de poche est allumée, appuyez
sur le bouton pour la changer.
Affiche la progression de la charge:
25%, 50%, 75% et 100%.
Port de sortie USB 1
Chargez votre téléphone, tablette, appareil photo,
etc. 75% plus rapidement qu'une charge standard.
Port de sortie USB 2
Chargez votre téléphone, tablette, appareil photo,
etc. 75% plus rapidement qu'une charge standard.
11 Prise Smart Clamp Insérez la fiche complètement dans le démarreur
de saut.
13 Pince intelligente
rouge
Connectez-vous aux électrodes positives de la
batterie de la voiture.
14 Pince intelligente
noire
Connectez-vous aux électrodes négatives de
la batterie de la voiture.
Port de sortie
DC 12V / 8A
Charger vos appareils.

— 14 —
Spécifications Techniques
Commencer
Capacité de la batterie
Durée de vie de la batterie
Courant de crête
Courant de démarrage
Sortie de démarrage de voiture
Sortie DC
Entrée de type C
Sortie de type C
Sortie USB1
Sortie USB2
Puissance du moteur à essence
Puissance du moteur diesel
Température de fonctionnement
Puissance de la lumière LED
Temps de charge
Taille unifiée (L * W * H)
22000mAh
≥300 fois
2000A
1000A
12V
12V/8A
PD 5V/2A, 9V/2A
PD 5V/3A, 9V/2A, 12V/1.5A
5V/3A, 9V/2A, 12V/1.5A
Up to 8.0L
Up to 6.5L
-20℃~+75℃
Blanc: 1W
Entrée de Type-C: 4h-4.5h
170mm * 87mm * 47mm
Voyants
Capacité de la batterie
4 Solide
100%
3 Solide
75%
2 Solide
50%
1 Solide
25%
Voyants de niveau de puissance
Appuyez sur le bouton d'alimentation pour vérifier le niveau de charge de la
batterie du démarreur. Le nombre de voyants fixes indique le niveau de la
batterie.

— 15 —
Charger votre démarreur de saut
• À la maison :
1. Branchez le câble USB sur l'ordinateur ou sur un adaptateur mural USB 2A
(non fourni).
2. Connectez le port de type C au démarrage de voiture.
• Dans la voiture :
1. Branchez l'adaptateur de voiture (non fourni) dans la prise.
2. Connectez le port de type C au démarrage de voiture.
REMARQUE: On recommande de recharger le démarrage de voiture tous les
3-4 mois pour maintenir l'efficacité et prolonger la durée de vie de la batterie
interne, même si l'unité n'a pas été utilisée.
Charger votre iPhone, Smart Phones ou tout autre appareil
Votre démarrage de voiture est livré avec deux ports de charge USB et un port
de charge de type C situés à l'avant de l'unité:
• Branchez le câble USB ou le câble de type C aux ports de sortie USB ou au
port de sortie de type C de votre démarreur.
• Connectez-le à votre téléphone, à votre tablette ou à d'autres appareils que
vous souhaitez charger. Vous pouvez charger 3 appareils en même temps.
• Allumez votre démarrage de voiture pour commencer à charger!

— 16 —
Mode LED
• Appuyez sur le bouton ON / OFF pendant 3 secondes pour allumer la lumière
LED.
• En mode lumière, appuyez brièvement sur le bouton pour échanger les modes
entre éclairage, SOS, lumière du flash et éteindre.
Démarrer votre voiture
En possédant un démarrage de voiture, vous disposez de tout ce dont vous
avez besoin pour faire démarrer un véhicule - nul besoin d'attendre de l'aide,
Jstar One à la rescousse!
Nous savons que vous êtes excité, mais avant de sauter dans votre véhicule,
assurez-vous de prendre certaines mesures de précaution:
• Lisez d’abord le manuel du propriétaire de votre véhicule, car le fabricant peut
avoir des étapes et des précautions spécifiques concernant votre véhicule.
• Assurez-vous d'éteindre tous les appareils électroniques de votre voiture
(radio, phares, etc.) avant de commencer le saut.
• Assurez-vous d’être dans un endroit sec et bien ventilé. Ne démarrez jamais
un véhicule dans un espace clos.
• Retirez toute trace d’humidité de votre appareil Jstar One, de ses accessoires
et de la batterie de votre véhicule. Ne tentez jamais de démarrer un véhicule en
présence d'humidité.
• Vérifiez que les bornes de la batterie du véhicule sont propres pour assurer la
meilleure conductivité.
• Identifiez correctement les bornes positive (+, rouge) et négative (-, noire) de la
batterie du véhicule avant de connecter les pinces.
• Lors de l'utilisation des pinces, ne laissez pas les dents en métal de la pince
noire toucher les dents en métal de la pince rouge.
• Lors de l’utilisation des pinces, NE PAS brancher la pince ROUGE à la borne
négative (-) de la batterie du véhicule, ni la pince NOIRE à la borne positive (+)
de la batterie du véhicule.
• Lorsque vous connectez des pinces intelligentes aux bornes de la batterie,
assurez-vous que les dents en cuivre situées de chaque côté de la pince sont
Table of contents
Languages:
Other UTRAI Remote Starter manuals