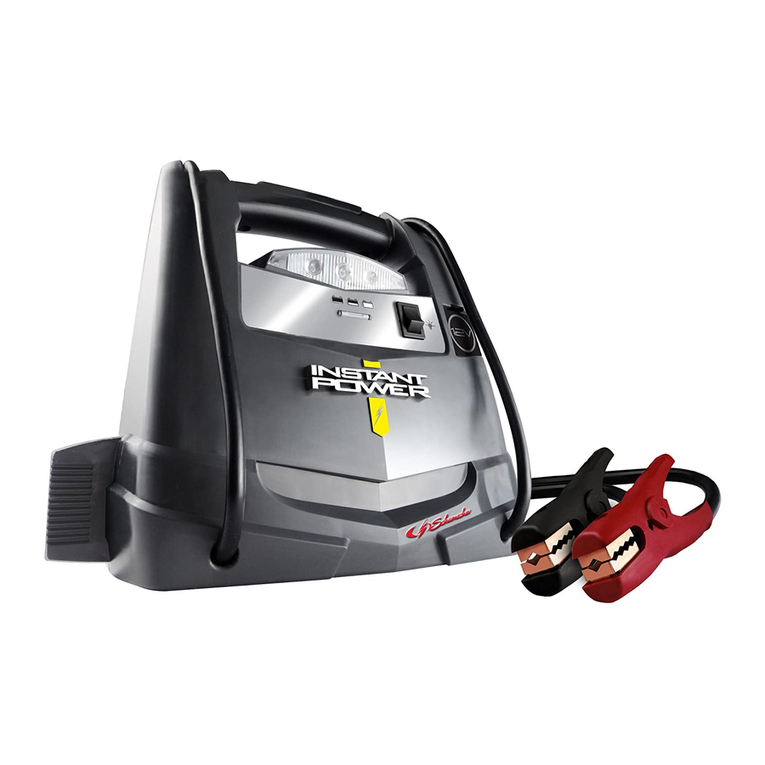
Telwin SPEED Start 1812 User manual

Instore "130"youcanfind and buy almostall necessary goodsforyourauto in
Kyiv and other cities,delivery by ground andpostal services.Ourexperienced
consultantswill provide youwithexhaustive informationand helpyoutochose
the very particular thing. We are waiting foryou atthe address
https://130.com.ua
PHONES
0 (800) 800 130
(050) 462 0 130
(063) 462 0 130
(067) 462 0 130
Internet storeof
autogoods
CARRECEIVERS —Receivers •Mediareceiversandstations•Nativereceivers •CD/DVD changers •FM-modulators/USBadapters•Flashmemory•Faciaplates and adapters •Antennas •Accessories |
CARAUDIO —Car audiospeakers •Amplifiers•Subwoofers •Processors•Crossovers •Headphones•Accessories|TRIPCOMPUTERS —Universalcomputers •Modelcomputers •Accessories|
GPSNAVIGATORS —PortableGPS•Built-in GPS•GPSmodules •GPStrackers •Antennas forGPSnavigators•Accessories|VIDEO —DVR •TVsetsand monitors•Car TVtuners•Cameras •Videomodules
•Transcoders •Car TVantennas•Accessories|SECURITYSYSTEMS —Car alarms •Bikealarms •Mechanicalblockers •Immobilizers •Sensors •Accessories |OPTICANDLIGHT —Xenon•Bixenon •Lamps
•LED •Stroboscopes •OpticandHeadlights •Washers •Light,rainsensors •Accessories |PARKTRONICS ANDMIRRORS —Rear parktronics•Frontparktronics •Combined parktronics •Rear-viewmirrors
•Accessories |HEATINGANDCOOLING —Seat heaters •Mirrorsheaters •Screen-wipers heaters •Engineheaters •Auto-refrigerators •Airconditioningunits •Accessories |TUNING —Vibro-isolation
•Noise-isolation •Tintfilms •Accessories |ACCESSORIES —Radar-detectors•Handsfree,Bluetooth•Windowlifters•Compressors •Beeps,loudspeakers •Measuring instruments •Cleaners •Carsits
•Miscellaneous|MOUNTING —Installationkits •Upholstery•Grilles•Tubes•Cableand wire •Tools•Miscellaneous|POWER —Batteries •Converters •Start-chargingequipment•Capacitors
•Accessories |MARINE AUDIOANDELECTRONICS —Marinereceivers•Marineaudiospeakers •Marinesubwoofers •Marineamplifiers•Accessories |CARCARE PRODUCTS —Additives •Washer fluid •
Care accessories •Car polish •Flavors •Adhesives andsealants |LIQUIDANDOIL —Motoroil•Transmissionoil •Brakefluid •Antifreeze•Technicallubricant
SKYPE
km-130

Cod. 953674
GB EXPLANATION OF DANGER. PL
I LEGENDA SEGNALI DI PERICOLO. Ż
F LÉGENDE SIGNAUX DE DANGER. CZ
D LEGENDE DER GEFAHREN.
E LEYENDA SEÑALES DE PELIGRO. SK
P LEGENDA DOS SINAIS DE PERIGO.
NL LEGENDE SIGNALEN VAN GEVAAR. SI
DK OVERSIGT OVER FARE.
SF VAROITUS, VELVOITUS. LEGENDA ZNAKOVA
N SIGNALERINGSTEKST FOR FARE. OPASNOSTI.
S BILDTEXT SYMBOLER FÖR FARA. LT PAVOJAUS ŽENKLŲ PAAIŠKINIMAS.
GR ΛΕΖΑΝΤΑ ΣΗΜΑΤΩΝ ΚΙΝΔΥΝΟΥ. EE OHU KIRJELDUS.
RU ЛЕГЕНДА СИМВОЛОВ LV BĪSTAMĪBAS SIGNĀLU SARAKSTS.
БЕЗОПАСНОСТИ. BG ЛЕГЕНДА СЪС СИГНАЛИТЕ ЗА
HVÉSZJELZÉSEK FELIRATAI. ОПАСНОСТ.
RO
OBJAŚNIENIA SYGNAŁÓW
ZAGRO ENIA.
VYSVĚTLIVKY K SIGNÁLŮM
NEBEZPEČÍ.
VYSVETLIVKY K SIGNÁLOM
NEBEZPEČENSTVA.
LEGENDA SIGNALOV ZA
NEVARNOST.
LEGENDĂ INDICATOARE DE
AVERTIZARE.
HR/SCG
DANGER OF EXPLOSION - PERICOLO ESPLOSIONE - RISQUE D'EXPLOSION -
EXPLOSIONSGEFAHR - PELIGRO EXPLOSIÓN - PERIGO DE EXPLOSÃO - GEVAAR ONTPLOFFING -
SPRÆNGFARE - RÄJÄHDYSVAARA - FARE FOR EKSPLOSJON - FARA FÖR EXPLOSION - ΚΙΝΔΥΝΟΣ
ΕΚΡΗΞΗΣ - ОПАСНОСТЬ ВЗРЫВА - ROBBANÁSVESZÉLY - PERICOL DE EXPLOZIE -
NIEBEZPIECZEŃSTWO WYBUCHU - NEBEZPEČÍ VÝBUCHU - NEBEZPEČENSTVO VÝBUCHU -
NEVARNOST EKSPLOZIJE - OPĆA OPASNOST - SPROGIMO PAVOJUS - PLAHVATUSOHT -
SPRĀDZIENBĪSTAMĪBA - ОПАСНОСТ ОТ ЕКСПЛОЗИЯ.
GENERAL HAZARD - PERICOLO GENERICO - DANGER GÉNÉRIQUE - GEFAHR ALLGEMEINER ART -
PELIGRO GENÉRICO - PERIGO GERAL - ALGEMEEN GEVAAR - ALMEN FARE - YLEINEN VAARA -
GENERISK FARE STRÅLNING - ALLMÄN FARA - ΓΕΝΙΚΟΣ ΚΙΝΔΥΝΟΣ - ОБЩАЯ ОПАСНОСТЬ -
ÁLTALÁNOS VESZÉLY - PERICOL GENERAL - OGÓLNE NIEBEZPIECZEŃSTWO - VŠEOBECNÉ
NEBEZPEČÍ - VŠEOBECNÉ NEBEZPEČENSTVO - SPLOŠNA NEVARNOST - OPĆA OPASNOST -
BENDRAS PAVOJUS - ÜLDINE OHT - VISPĀRĪGA BĪSTAMĪBA - ОПАСНОСТ ОТ ОБЩ ХАРАКТЕР.
DANGER OF CORROSIVE SUBSTANCES - PERICOLO SOSTANZE CORROSIVE - SUBSTANCES
CORROSIVES DANGEREUSES - ÄTZENDE GEFAHRENSTOFFE - PELIGRO SUSTANCIAS
CORROSIVAS - PERIGO SUBSTÂNCIAS CORROSIVAS - GEVAAR CORROSIEVE STOFFEN - FARE,
ÆTSENDE STOFFER - SYÖVYTTÄVIEN AINEIDEN VAARA - FARE: KORROSIVE SUBSTANSER - FARA
FRÄTANDE ÄMNEN - ΚΙΝΔΥΝΟΣ ΔΙΑΒΡΩΤΙΚΩΝ ΟΥΣΙΩΝ - ОПАСНОСТЬ КОРРОЗИВНЫХ ВЕЩЕСТВ
- MARÓ HATÁSÚ ANYAGOK VESZÉLYE - PERICOL DE SUBSTANŢE COROSIVE -
NIEBEZPIECZEŃSTWO WYDZIELANIA SUBSTANCJI KOROZYJNYCH - NEBEZPEČÍ PLYNOUCÍ Z
KOROSIVNÍCH LÁTEK - NEBEZPEČENSTVO VYPLÝVAJÚCE Z KOROZÍVNYCH LÁTOK - NEVARNOST
JEDKE SNOVI - OPASNOST OD KOROZIVNIH TVARI - KOROZINIŲ MEDŽIAGŲ PAVOJUS -
KORRUDEERUVATE MATERIAALIDE OHT - KOROZIJAS VIELU BĪSTAMĪBA - ОПАСНОСТ ОТ
КОРОЗИВНИ ВЕЩЕСТВА.
1
DANGER OF ELECTRIC SHOCK - PERICOLO SHOCK ELETTRICO - RISQUE DE CHOC ÉLECTRIQUE -
STROMSCHLAGGEFAHR - PELIGRO DESCARGA ELÉCTRICA - PERIGO DE CHOQUE ELÉTRICO -
GEVAAR ELEKTROSHOCK - FARE FOR ELEKTRISK STØD - SÄHKÖISKUN VAARA - FARE FOR
ELEKTRISK STØT - FARA FÖR ELEKTRISK STÖT - ΚΙΝΔΥΝΟΣ ΗΛΕΚΤΡΟΠΛΗΞΙΑΣ - ОПАСНОСТЬ
ПОРАЖЕНИЯ ЭЛЕКТРИЧЕСКИМ ТОКОМ - ÁRAMÜTÉS VESZÉLYE - PERICOL DE ELECTROCUTARE
- NIEBEZPIECZEŃSTWO SZOKU ELEKTRYCZNEGO - NEBEZPEČÍ ZÁSAHU ELEKTRICKÝM
PROUDEM - NEBEZPEČENSTVO ZÁSAHU ELEKTRICKÝM PRÚDOM - NEVARNOST ELEKTRIČNEGA
UDARA - OPASNOST STRUJNOG UDARA - ELEKTROS SMŪGIO PAVOJUS - ELEKTRILÖÖGIOHT -
ELEKTROŠOKA BĪSTAMĪBA - ОПАСНОСТ ОТ ТОКОВ УДАР.
MANUALE
ISTRUZIONE
GB.......pag. 03 NL....... pag. 20 RU...... pag. 37 SI....... pag. 55
I........... pag. 05 DK...... pag. 23 H......... pag. 40 HR/SCG pag. 58
F..........pag. 08 SF....... pag. 26 RO.......pag. 43 LT....... pag. 61
D......... pag. 11 N......... pag. 29 PL....... pag. 46 EE....... pag. 63
E......... pag. 14 S......... pag. 32 CZ....... pag. 49 LV....... pag. 66
P......... pag. 17 GR...... pag. 34 SK....... pag. 52 BG....... pag. 69
Autogoods “130”
130.com.ua

Symbol indicating separation of electrical and electronic appliances for refuse collection. The user is not
allowed to dispose of these appliances as solid, mixed urban refuse, and must do it through authorised
refuse collection centres. - Simbolo che indica la raccolta separata delle apparecchiature elettriche ed
elettroniche. L'utente ha l'obbligo di non smaltire questa apparecchiatura come rifiuto municipale solido
misto, ma di rivolgersi ai centri di raccolta autorizzati. - Symbole indiquant la collecte différenciée des
appareils électriques et électroniques. L'utilisateur ne peut éliminer ces appareils avec les déchets
ménagers solides mixtes, mais doit s'adresser à un centre de collecte autorisé. - Symbol für die getrennte
Erfassung elektrischer und elektronischer Geräte. Der Benutzer hat pflichtgemäß dafür zu sorgen, daß
dieses Gerät nicht mit dem gemischt erfaßten festen Siedlungsabfall entsorgt wird. Stattdessen muß er eine der
autorisierten Entsorgungsstellen einschalten. - Símbolo que indica la recogida por separado de los aparatos eléctricos
y electrónicos. El usuario tiene la obligación de no eliminar este aparato como desecho urbano sólido mixto, sino de
dirigirse a los centros de recogida autorizados. - Símbolo que indica a reunião separada das aparelhagens eléctricas e
electrónicas. O utente tem a obrigação de não eliminar esta aparelhagem como lixo municipal sólido misto, mas deve
procurar os centros de recolha autorizados. - Symbool dat wijst op de gescheiden inzameling van elektrische en
elektronische toestellen. De gebruiker is verplicht deze toestellen niet te lozen als gemengde vaste stadsafval, maar
moet zich wenden tot de geautoriseerde ophaalcentra. - Symbol, der står for særlig indsamling af elektriske og
elektroniske apparater. Brugeren har pligt til ikke at bortskaffe dette apparat som blandet, fast byaffald; der skal rettes
henvendelse til et autoriseret indsamlingscenter. - Symboli, joka ilmoittaa sähkö- ja elektroniikkalaitteiden erillisen
keräyksen. Käyttäjän velvollisuus on kääntyä valtuutettujen keräyspisteiden puoleen eikä välittää laitetta kunnallisena
sekajätteenä. - Symbol som angir separat sortering av elektriske og elektroniske apparater. Brukeren må oppfylle
forpliktelsen å ikke kaste bort dette apparatet sammen med vanlige hjemmeavfallet, uten henvende seg til autoriserte
oppsamlingssentraler. - Symbol som indikerar separat sopsortering av elektriska och elektroniska apparater.
Användaren får inte sortera denna anordning tillsammans med blandat fast hushållsavfall, utan måste vända sig till en
auktoriserad insamlingsstation. - Σύμβολο που δείχνει τη διαφοροποιημένη συλλογή των ηλεκτρικών κια
ηλεκτρονικών συσκευών. Ο χρήστης υποχρεούται να μην διοχετεύει αυτή τη συσκευή σαν μικτό στερεό αστικό
απόβλητο, αλλά να απευθύνεται σε εγκεκριμένα κέντρα συλλογής. - Символ, указывающий на раздельный сбор
электрического и электронного оборудования. Пользователь не имеет права выбрасывать данное
оборудование в качестве смешанного твердого бытового отхода, а обязан обращаться в специализированные
центры сбора отходов. - Jelölés, mely az elektromos és elektronikus felszerelések szelektív hulladékgyűjtését jelzi. A
felhasználó köteles ezt a felszerelést nem a városi törmelékhulladékkal együttesen gyűjteni, hanem erre engedéllyel
rendelkező hulladékgyűjtő központhoz fordulni. - Simbol ce indică depozitarea separată a aparatelor electrice şi
electronice. Utilizatorul este obligat să nu depoziteze acest aparat împreună cu deşeurile solide mixte ci să-l predea
într-un centru de depozitare a deşeurilor autorizat. - Symbol, który oznacza sortowanie odpadów aparatury elektrycznej
i elektronicznej. Zabrania się likwidowania aparatury jako mieszanych odpadów miejskich stałych, obowiązkiem
użytkownika jest skierowanie się do autoryzowanych ośrodków gromadzących odpady. - Symbol označující
separovaný sběr elektrických a elektronických zařízení. Uživatel je povinen nezlikvidovat toto zařízení jako pevný
smíšený komunální odpad, ale obrátit se s ním na autorizované sběrny. - Symbol označujúci separovaný zber
elektrických a elektronických zariadení. Užívateľ nesmie likvidovať toto zariadenie ako pevný zmiešaný komunálny
odpad, ale je povinný doručiť ho do autorizovaný zberní. - Simbol, ki označuje ločeno zbiranje električnih in
elektronskih aparatov. Uporabnik tega aparata ne sme zavreči kot navaden gospodinjski trden odpadek, ampak se
mora obrniti na pooblaščene centre za zbiranje. - Simbol koji označava posebno sakupljanje električnih i elektronskih
aparata. Korisnik ne smije odložiti ovaj aparat kao običan kruti otpad, već se mora obratiti ovlaštenim centrima za
sakupljanje. - Simbolis, nurodantis atskirų nebenaudojamų elektrinių ir elektroninių prietaisų surinkimą. Vartotojas
negali išmesti šių prietaisų kaip mišrių kietųjų komunalinių atliekų, bet privalo kreiptis į specializuotus atliekų
surinkimo centrus. - Sümbol, mis tähistab elektri- ja elektroonikaseadmete eraldi kogumist. Kasutaja kohustuseks on
pöörduda volitatud kogumiskeskuste poole ja mitte käsitleda seda aparaati kui munitsipaalne segajääde. - Simbols,
kas norāda uz to, ka utilizācija ir jāveic atsevišķi no citām elektriskajām un elektroniskajām ierīcēm. Lietotāja
pienākums ir neizmest šo aparatūru municipālajā cieto atkritumu izgāztuvē, bet nogādāt to pilnvarotajā atkritumu
savākšanas centrā. - Символ, който означава разделно събиране на електрическата и електронна апаратура.
Ползвателят се задължава да не изхвърля тази апаратура като смесен твърд отпадък в контейнерите за смет,
поставени от общината, а трябва да се обърне към специализираните за това центрове.
2
EYE PROTECTIONS MUST BE WORN - OBBLIGO DI INDOSSARE OCCHIALI PROTETTIVI - PORT DES
LUNETTES DE PROTECTION OBLIGATOIRE - DAS TRAGEN EINER SCHUTZBRILLE IST PFLICHT -
OBLIGACIÓN DE USAR GAFAS DE PROTECCIÓN - OBRIGAÇÃO DE VESTIR ÓCULOS DE
PROTECÇÃO - VERPLICHT DRAGEN VAN BESCHERMENDE BRIL - PLIGT TIL AT ANVENDE
BESKYTTELSESBRILLER - SUOJALASIEN KÄYTTÖ PAKOLLISTA - DET ER OBLIGATORISK Å HA PÅ
SEG VERNEBRILLEN - OBLIGATORISKT ATT ANVÄNDA SKYDDSGLASÖGON - ΥΠΟΧΡΕΩΣΗ ΝΑ
ΦΟΡΑΤΕ ΠΡΟΣΤΕΤΕΥΤΙΚΑ ΓΥΑΛΙΑ - ОБЯЗАННОСТЬ НОСИТЬ ЗАЩИТНЫЕ ОЧКИ.
WEARING PROTECTIVE CLOTHING IS COMPULSORY - OBBLIGO INDOSSARE INDUMENTI
PROTETTIVI - PORT DES VÊTEMENTS DE PROTECTION OBLIGATOIRE - DAS TRAGEN VON
SCHUTZKLEIDUNG IST PFLICHT - OBLIGACIÓN DE LLEVAR ROPA DE PROTECCIÓN - OBRIGATÓRIO
O USO DE VESTUÁRIO DE PROTEÇÃO - VERPLICHT BESCHERMENDE KLEDIJ TE DRAGEN - PLIGT
TIL AT ANVENDE BESKYTTELSESTØJ - SUOJAVAATETUKSEN KÄYTTÖ PAKOLLISTA -
FORPLIKTELSE Å BRUKE VERNETØY - OBLIGATORISKT ATT BÄRA SKYDDSPLAGG - ΥΠΟΧΡΕΩΣΗ
ΝΑ ΦΟΡΑΤΕ ΠΡΟΣΤΑΤΕΥΤΙΚΑ ΕΝΔΥΜΑΤΑ - ОБЯЗАННОСТЬ НАДЕВАТЬ ЗАЩИТНУЮ ОДЕЖДУ -
VÉDŐRUHA HASZNÁLATA KÖTELEZŐ - FOLOSIREA ÎMBRĂCĂMINTEI DE PROTECŢIE
OBLIGATORIE - NAKAZ NOSZENIA ODZIEŻY OCHRONNEJ- POVINNÉ POUŽITÍ OCHRANNÝCH
PROSTŘEDKŮ - POVINNÉ POUŽITIE OCHRANNÝCH PROSTRIEDKOV - OBVEZNO OBLECITE
ZAŠČITNA OBLAČILA - OBAVEZNO KORIŠTENJE ZAŠTITNE ODJEĆE - PRIVALOMA DĖVĖTI
APSAUGINĘ APRANGĄ - KOHUSTUSLIK KANDA KAITSERIIETUST - PIENĀKUMS ĢĒRBT
AIZSARGTĒRPUS - ЗАДЪЛЖИТЕЛНО НОСЕНЕ НА ПРЕДПАЗНО ОБЛЕКЛО.
Autogoods “130”
130.com.ua

- Do not allow the black and red clamps to
______________(GB)____________ touch. If this happens, clamps or other metal
objects may melt. Place clamps only on the
INSTRUCTION MANUAL corresponding terminals.
4 - 12 VOLT SYSTEMS ONLY. Use only with
vehicles and boats with 12 volt electrical
GENERAL INFORMATION systems.
A truly portable starter with battery. Ideal for 5 - For emergency use only. Do not use this
anyone needing a starter . Applications include starter in the place of a vehicle battery. Only
boats, cars, trucks, tractors, generators and more. use to start your vehicle.
Full compatible with any 12 volt starting system. 6 - Avoid working alone. If an accident happens,
SPEED START utilizes a MAINTENANCE FREE an assistant can bring help.
SEALED BATTERY which allows the unit to be
stored in any position, anywhere, without fear of
leakage. 7 - Avoid electrical shock. Use extreme
The SPEED START also has a special switch that
must be turned on deliberately before using the caution when clamping around uninsulated
starter. conductors or bus bars. Prevent body contact
This starter conveniently stores under or behind a with grounded surfaces such as pipes,
seat or where is handy. radiators and cabinet enclosures when testing
voltages.
Save this Manual 8 - Keep work area clean. Cluttered areas invire
You will need the manual for the safety warnings injuries.
and precautions, operating and maintenance 9 - Avoid damaging speed start system. Use only
procedures, parts list and specifications. as specified in this manual.
Keep the manual in a safe and dry place for future 10- Observe work area conditions. Do not use in
reference. damp or wet location. Do not expose to rain.
Keep work area well lighted.
11- Do not places this unit in direct sunlight , direct
heat or moisture.
READ ALL INSTRUCTION BEFORE USING
THIS STARTER! 12- Keep children away. Children must
never be allowed in the work area. Do not let
SAFETY WARNINGS AND PRECAUTIONS them handle machines, tools, or extension
Warning: When using this starter, basic safety cords.
precautions should always be followed to 13- Store idle equipment. When not in use, the
reduce the risk of personal injury and damage starter must be stored in a dry location to
to equipment. inhibit rust. Always lock it up and keep out of
reach of childern.
1 - Wear eye protection. When working 14- Dress properly. Do not wear loose
on or around lead-acid always wear eye clothing or jewelry as they can be caught in
protection. moving parts. Protective, electrically non
conductive clothes and nonskid footwear are
2 - Avoid contact with battery acid. If recommended when working. Wear restrictive
hair covering to contain long hair.
splashed, immediatly wash affected area with 15- Repair should be carried out by experts only
clean water. Continue washing area until otherwise it may cause considerable danger
medical help arrives. for user.
16- Replacement parts and accessories. When
servicing, use only identical replacement
3 - Connect cables to proper polarities: parts. Use of any other parts will void the
warranty.
17- Do not overreach. Keep proper footing and
balance at all times. Do not reach over or
across electrical cables or frames.
18- Maintain this starter with care. Inspect starter
-Use this starter in well ventilated areas. Do not cords periodically and if damaged have them
attempt to jump start vehicle around repaired by an autorized technician.
flammable gases or liquids.
Connect the red charge clamp to the positive
terminal of the battery (+ symbol).
Connect the black charge clamp to the vehicle
chassis, far away from the battery and from the
fuel pipe.
3
Autogoods “130”
130.com.ua

conductor.
19- Check for damaged parts. Before using this While the engine is running, follow the whole
starter any part that appears damaged should sequence of instructions below with great care:
be carrefully checked to determine that it will 1. Switch off the starter: switch to OFF position.
operate properly and perform its intended 2. Disconnect the black (negative) clamp from the
function. Check for alignment and binding of vehicle.
moving parts, any broken parts or mounting 3. Disconnect the red (positive) clamp from the
fixtures, and any other condition that may vehicle.
affect proper operation. Any part that is 4. Return the clamps to their housing.
damaged should be properly repaired or We advise recharging the SPEED START as soon
replaced by a qualified technician. Do not use as possible.
this starter if any switch does not turn On and
Off properly. Using the SPEED START as a power supply:
- Take the top off the cigar-lighter type socket (FIG.
OPERATION A-1).
- Insert the cigar-lighter plug of the device to be
powered into the socket as in fig. A-1.
Warning: Electrical shock can use death or RECHARGING
injury. Avoid touching exposed conductors of Important! To protect the battery and lengthen
electricity. its working life, charge it for 12 hours before
using it for the first time, then every time it is
The SPEED START system is designed for use used and at least every 3 months.
The unit can be recharged using a 230VAC power
with vehicle or boats. You will not need a host supply (using the appropriate power supply adapter)
vehicle or 230VAC power supply. or using a 12VDC power supply. We recommend
You can also use this system as a portable power keeping the battery fully charged at all times. A low
source of 12 VDC in remote areas or emergencies. charge level could shorten the life of the battery.
Bear in mind that the time needed to recharge the
Using the SPEED START to start a vehicle: battery depends on the number of times it has been
used as a starter. To check whether the battery
needs recharging, position the switch in fig. C to ON.
WARNING: follow the instructions
meticulously, always in the order given below!
- Make sure that the starter is switched off: the WARNING! When the switch is in the ON
switch in fig. C must be in the OFF position. position, the clamps are live! Do not allow the
- Make sure that the vehicle or boat to be started is black and red clamps to come into contact or to
switched off (switch or ignition key in the OFF touch a common conductor.
position). The three central LED's in fig. A-3 indicate the
- First connect the red clamp (+) to the positive charge status of the battery, with the following
terminal on the vehicle battery. meanings:
- Then connect the black clamp (-) to a non-movable
metal part of the engine; do not connect the clamp - : the battery is very flat;
to the negative terminal of the battery.
- : the battery is flat;
WARNING:
- : the battery is fully charged.
DANGER! Return the switch in fig. C to "OFF".
Never ever turn the starter switch on unless you The red "Charging" LED in fig. A-11 lights up when
are absolutely sure that you have connected the the unit is recharging.
cables to the correct polarities of the vehicle and
its battery.
- Turn the starter switch to ON: this is done by
turning it clockwise through 90° (FIG. C).
- Turn the ignition switch (or key) of the vehicle or
boat to ON. Wait about one minute. Turn the
vehicle ignition to the start position for no more
than 3÷4 seconds. If the vehicle or boat does not Recharging using a 230V AC power supply
start, wait at least 3 minutes before trying again. WARNING: Use the supplied power supply
adapter only and exclusively for recharging the
Warning: Do not allow the black and red clamps SPEED START.
to come into contact or to touch a common 1- First insert the power supply adapter plug (FIG.
The "Remove Charger" yellow led in fig. A-12
switches on during the recharging phase when the
control device protecting the power supply or the
battery comes into operation. It is advisable to
disconnect the power supply jack from the relevant
socket fig. A-6.
4
Autogoods “130”
130.com.ua

B-4) into a 230VAC socket. Battery capacity: 38Ah
Then insert the corresponding output plug (FIG. Power out: 1500 A peak
B-5) into the recharging socket (FIG. A-6). 600A starting power
2- Make sure that the switch in fig. A-2 is turned to Copper cables: rubber insulated
"OFF". Cable lenght: 60cm
Spot light: 12V-3.6W
Output socket: 12VDC / current max 15A
Features: ON / OFF switch;
overload protection
automatic cut off to prevent overcharging
12VDC cigarette lighter socket
Weight: 16.5kg
Accessories included:
- power charger (FIG.B-4) 12VDC/1200mA
output;
- patch cord input/output (FIG.B-9);
-Fuses.
______________(I)______________
MANUALE ISTRUZIONE
GENERALITA'
1- Insert the power cord with the cigarette lighter Lo SPEED START è un vero avviatore a batteria
plug (FIG. B-7) into the 12 VDC, cigarette portatile. L'ideale per chiunque abbia bisogno di un
lighter receptacle on your vehicle or boat. avviatore. Le sue applicazioni includono
2- Insert the power cord with the proper plug imbarcazioni, automobili, camion, generatori e altro
(FIG. B-8) into the recharge receptacle (FIG. ancora.
A-6) and make sure the switch in fig. A-2 is Pienamente compatibile con qualsiasi sistema di
“OFF”. avviamento a 12 volt.
3- The “Charging” LED lights up and the starter is Lo SPEED START utilizza una BATTERIA
being recharged. ERMETICA SENZA MANUTENZIONE che
consente di collocare l'unità in qualsiasi posizione
e in qualsiasi luogo senza pericolo di versare acido.
Lo Speed Start è inoltre dotato di un apposito
interruttore che deve essere volutamente attivato
per permettere l'avviamento.
L'avviatore può essere comodamente riposto sotto
o dietro un sedile o essere tenuto a portata di mano.
Pb Conservare questo manuale.
BATTERY DISPOSAL Il manuale è necessario per consultare le
avvertenze e precauzioni relative alla sicurezza,
After the battery in the Start System has expired, per le procedure di funzionamento e di
it should be recycled. Some states require this manutenzione, per l'elenco dei componenti e per le
recycling. Contact your local solid waste specifiche tecniche.
authority for recycling information. Conservare il manuale per eventuali future
consultazioni in un luogo sicuro ed asciutto.
WARNING: Do not dispose of by fire. This could
result in an explosion. Before disposing of PRIMA DI USARE L'AVVIATORE LEGGERE
battery, cover exposed terminals with heavy duty TUTTE LE ISTRUZIONI!
electrical tape to prevent shorting. Do not expose
battery to intense heat or fire as this could cause AVVERTENZE E PRECAUZIONI SULLA
an explosion. SICUREZZA
Attenzione: allo scopo di ridurre il rischio di
SPECIFICATIONS lesioni personali e di danni all'attrezzatura, vi
SPEED START 1812 raccomandiamo di usare l'avviatore
Battery type: 12V sealed lead acid, rispettando sempre le fondamentali misure
rechargeable precauzionali sulla sicurezza.
3- The led indicating "Charging" switches on and
the starter goes into the recharging phase. The
SPEED START is equipped with a control device
which prevents overcharging both the battery
and power supply. Leave the system to recharge
for as long as necessary.
Note: in order to check the battery's state of charge,
disconnect the power supply and turn the switch
shown in fig. C to the ON position: the leds of fig. A-
3 signal the battery's state of charge with the
meaning described above.
Recharging on board the vehicle using a 12V
DC power supply:
WARNING: Carry out the recharging
operation with the engine running.
NOTE: this function allows to maintain the charge
in the starter during a journey and may not charge
the battery to its maximum.
5
Autogoods “130”
130.com.ua

lavoro né di maneggiare macchine, strumenti o
prolunghe.
13- Quando l'avviatore non è in uso deve essere
1- Proteggere gli occhi. Indossare sempre riposto in un luogo asciutto per evitare la
occhiali protettivi quando si lavora con formazione di ruggine. Custodire sempre
accumulatori al piombo acido. l'avviatore sotto chiave e tenerlo lontano dalla
portata dei bambini.
2- Evitare il contatto con l'acido della
14- Vestirsi in maniera appropriata.
batteria. Nel caso si venga schizzati o si venga
a contatto con l'acido, risciacquare Non indossare abiti larghi o gioielli che possano
immediatamente la parte interessata con impigliarsi in parti mobili. Durante i lavori si
acqua pulita. Continuare a risciacquare fino raccomanda l'uso di abiti protettivi isolati
all'arrivo del medico. elettr icamente nonch é di calzat ure
antisdrucciolo. Nel caso di capigliatura lunga
indossare copricapi contenitivi.
3- È importante collegare i cavi alle 15- Le riparazioni devono essere effettuate
corrette polarità: esclusivamente da esperti altrimenti
potrebbero comportare pericoli considerevoli
per l' utilizzatore.
16- Sostituzione di par ti ed accessor i.
Nell'effettuare la manutenzione, usare solo
parti di ricambio identiche. L'uso di qualsiasi
- Usare l'avviatore in aree ben ventilate. Non altro pezzo renderà nulla la garanzia.
tentare di effettuare avviamenti quando ci si 17- Mantenere in ogni momento un' adeguata
trova in mezzo a gas o liquidi infiammabili. posizione di stabilità e punti stabili di appoggio.
- Impedire alle pinze nere e rosse di venire in Non spostarsi sopra cavi o strutture elettriche.
contatto in quanto questo può provocare la loro 18- Effettuare con cura la manutenzione
fusione o quella di altri oggetti in metallo. dell'avviatore. Controllarne periodicamente i
Riporre le pinze esclusivamente sugli appositi cavi e nel caso di danni fare effettuare la
supporti. riparazione ad un tecnico autorizzato.
4- SOLO PER SISTEMI A 12 VOLT. Usare solo su 19- Verificare che non ci siano parti danneggiate.
imbarcazioni e veicoli con sistemi elettrici a 12 Prima di utilizzare questo avviatore, controllare
volt. attentamente tutte le parti che sembrano
5- USARE SOLO IN CASO DI EMERGENZA: non danneggiate per stabilire se siano in grado di
usare l'avviatore al posto della batteria del funzionare correttamente. Controllare che i cavi
veicolo. Usare esclusivamente per effettuare siano ben fissati all'avviatore. Si raccomanda di
l'avviamento. far riparare o sostituire le parti danneggiate da
6- Evitare di lavorare da soli. Nel caso di incidente un tecnico qualificato. Non usare l'avviatore nel
l'assistente può prestare aiuto. caso in cui uno qualsiasi degli interruttori non
funzioni correttamente sulle posizioni ON /OFF.
7- Evitare le scosse elettriche. Usare FUNZIONAMENTO
estrema cautela nell'applicare le pinze a dei
conduttori o barre di distribuzione non isolati.
Evitare il contatto corporeo con superfici quali
tubi, radiatori e armadi metallici mentre si sta ATTENZIONE: La scossa elettrica può
testando il voltaggio. provocare lesioni o morte. Evitare di toccare
8- Tenere pulita l'area di lavoro. Le aree ingombre conduttori di elettricità scoperti.
possono provocare lesioni. Lo SPEED START è progettato per l'uso su veicoli o
9- Evitare di danneggiare lo speed start. Utilizzare imbarcazioni. Non sarà necessario disporre di un
esclusivamente come specificato in questo altro veicolo o di una presa di alimentazione a
manuale. 230VAC.
10- Rispettare le indicazioni relative all'area di E' altresì possibile utilizzare questo avviatore come
lavoro. Non usare in luoghi umidi o bagnati. Non fonte di energia portatile a 12 VDC in aree remote o
esporre alla pioggia. Lavorare in aree bene in casi di emergenza.
illuminate.
11- Non esporre alla luce del sole diretta, a fonti di Utilizzo dello SPEED START per avviare un
calore dirette o all'umidità. veicolo:
12- Tenere lontani i bambini: non dovrà mai ATTENZIONE: eseguire le istruzioni
essere loro consentito di accedere alle aree di seguendo scrupolosamente l'ordine sotto
Collegare la pinza di carica di colore rosso al
morsetto positivo della batteria (simbolo +).
Collegare la pinza di carica di colore nero al
telaio della macchina, lontano dalla batteria e
dal condotto del carburante.
6
Autogoods “130”
130.com.ua

riportato! ricaricata posizionare l'interruttore di fig. C in ON.
- Accertarsi che l'avviatore sia spento: l'interruttore
di fig.C deve essere in posizione OFF.
- Accertarsi che il veicolo o l'imbarcazione da ATTENZIONE! Quando l'interruttore è in
avviare sia spenta (interruttore o chiave di posizione ON le pinze sono in tensione!
accensione in posizione OFF). Impedire alle pinze nera e rossa di venire in
- Collegare per prima la pinza rossa (+) al contatto o di toccare un conduttore comune.
terminale positivo posto sulla batteria del veicolo. I tre led centrali di fig. A-3 segnalano lo stato di
- Poi collegare la pinza nera (-) ad una parte carica della batteria con il seguente significato:
metallica non-mobile del motore; non collegare la
pinza al morsetto negativo della batteria. - : la batteria è molto scarica;
ATTENZIONE: - : la batteria è scarica;
PERICOLO! - : la batteria è completamente carica.
Riposizionare l'interruttore di fig. C in “OFF”.
Non azionare assolutamente l'interruttore Il led rosso “Charging” di fig. A-11 si accende
dell'avviatore se non si è sicuri di aver collegato quando l'unità è in ricarica.
i cavi alle corrette polarità della batteria del
veicolo da avviare.
- Posizionare l'interruttore dell'avviatore in ON: ciò
si ottiene premendolo e quindi ruotandolo di 90°
in senso orario (FIG. C).
- Posizionare l'interruttore di accensione del
veicolo o dell'imbarcazione su ON. Aspettare per
un minuto circa. Portare l'interruttore del veicolo Ricarica con alimentazione A 230V AC
in posizione di avviamento per un tempo non ATTENZIONE: Usare l’alimentatore in
superiore ai 3÷4 secondi. Se l'auto o dotazione esclusivamente per la ricarica dello
l'imbarcazione non si avvia, aspettare almeno 3
minuti prima di riprovare. SPEED START.
1- Inserire dapprima la spina dell'alimentatore
Attenzione: Impedire sempre alle pinze nera e (FIG. B-4) in una presa a 230VAC.
rossa di venire in contatto o di toccare un Inserire successivamente l'apposita spina di
conduttore comune. uscita (FIG. B-5) nella presa di ricarica (FIG. A-
Mentre il motore è in funzione, seguire 6).
rigorosamente la sequenza di istruzioni: 2- Verificare che l'interruttore di fig. A-2 sia
1. Spegnere l'avviatore: interruttore in posizione posizionato in “OFF”.
OFF.
2. Scollegare la pinza nera (negativo) dal veicolo.
3. Scollegare la pinza rossa (positivo) dal veicolo.
4. Riporre le pinze nell'apposita sede.
Si raccomanda di ricaricare appena possibile lo
Speed Start.
Utilizzo dello SPEED START come dispositivo
di alimentazione:
- Sollevare il coperchio della presa tipo
accendisigari (FIG. A-1).
- Inserire la spina accedisigari del dispositivo da
alimentare nella presa di fig. A-1.
RICARICA
Importante! Per salvaguardare l'integrità della
batteria, caricare per 12 ore prima dell'uso,
dopo ogni uso e comunque ogni 3 mesi.
È possibile ricaricare l'unità servendosi di
un'alimentazione a 230VAC (usando l'adeguato 1- Inserire il cavo con la spina accendisigari (FIG.
alimentatore) o tramite alimentazione a 12VDC. Si B-7) nella apposita presa a bordo dell'auto o
raccom anda di ma ntene re la batte ria dell'imbarcazione.
completamente carica in ogni momento. Un livello 2- Inserire il cavo con l'apposita spina (FIG. B-8)
di carica basso può accorciare la vita della batteria. nella presa di ricarica (FIG. A-6) e verificare che
Ricordare che il tempo necessario per ricaricare la l'interruttore di fig. A-2 sia posizionato in “OFF”.
batteria dipende dal numero degli avviamenti 3- Il led “Charging” si accende e l'avviatore è in
effettuati. Per controllare se la batteria deve essere
Il led giallo "Remove Charger" di fig. A-12 si
accende durante la fase di ricarica quando
interviene il dispositivo di controllo che protegge
l'alimentatore o la batteria. Si consiglia di
scollegare il jack dell'alimentatore dalla presa di
fig. A-6.
3- Il led "Charging" si accende e l'avviatore è in
fase di ricarica. Lo SPEED START è munito di
un dispositivo di controllo che permette di
evitare il sovraccarico della batteria e
dell'alimentatore. Lasciare il sistema in ricarica
per tutto il tempo necessario.
Nota: per verificare lo stato di carica della batteria
scollegare l'alimentatore e posizionare
l'interruttore di fig. C in ON: I led di fig. A-3
segnalano lo stato di carica della batteria con il
significato sopra descritto.
Ricarica a bordo del veicolo con alimentazione
12VDC:
ATTENZIONE: Effettuare l’operazione
di ricarica con il veicolo in moto.
7
Autogoods “130”
130.com.ua

fase di ricarica. _______________(F)_____________
MANUEL D’INSTRUCTIONS
GÉNÉRALITÉS
Un véritable démarreur de batterie portatif.
L'idéal pour toutes les nécessités. Sa gamme
d'application couvre embarcations, automobiles,
camions, générateurs et autres.
Pb Entièrement compatible avec n'importe quel
SMALTIMENTO DELLA BATTERIA système de démarrage à 12 volts.
La batteria esausta dell'avviatore dovrebbe essere Le SPEED START utilise une BATTERIE
riciclata. In alcuni stati questo è obbligatorio. HERMÉTIQUE SANS ENTRETIEN permettant
Contattare le autorità locali per i rifiuti solidi per de placer l'unité dans n'importe quelle position ou
ricevere informazioni relative al riciclaggio. lieu sans risque de renversement de l'acide.
Le SPEED START est également équipé d'un
interrupteur spécialement prévu devant être
volontairement activé pour le démarrage.
AVVERTENZA: Non smaltire la batteria Le démarreur peut être aisément placé sous ou
bruciandola. Questo potrebbe causare derrière un siège, ou gardé à portée de la main.
un'esplosione. Prima di smaltire la batteria, coprire i
terminali scoperti con nastro isolante adeguato allo Conserver ce manuel.
scopo di evitare i corti circuiti. Non esporre la Ce manuel est nécessaire pour la consultation
batteria a calore intenso o a fuoco poiché questo des avertissements et précautions de sécurité,
potrebbe causare un'esplosione. pour les opérations de fonctionnement et
d'entretien, ainsi que pour la liste des
SPECIFICHE composants et spécifications techniques.
SPEED START 1812 Conserver le manuel dans un endroit sûr et sec.
Tipo di batteria: 12V batteria al piombo
ermetica, ricaricabile.
Capacità della batteria: 38Ah
Corrente di uscita: 1500A corrente di picco.
600A corrente di avviamento. LIRE TOUTES LES INSTRUCTIONS AVANT
Cavi in rame: isolati in gomma. DE METTRE LE DÉMARREUR EN FONCTION!
Lunghezza cavo: 60cm
Lampada: 12V-3.6W AVERTISSEMENTS ET PRÉCAUTIONS DE
Presa di uscita: 12VDC / corrente max 15A SÉCURITÉ
Caratteristiche: interruttore ON / OFF; Attention: afin de réduire les risques de blessure
protezione in uscita contro i sovraccarichi; et de dommages à l'appareil, il est conseillé
interruzione automatica livello di carica; d'utiliser le démarreur en respectant dans tous
12VDC presa per accendisigari. les cas les mesures de précaution essentielles.
Peso: 16.5kg
Accessori inclusi: 1- Protéger les yeux. Toujours porter des
- Alimentatore (FIG.B-4) 12VDC/1200mA uscita; lunettes de protection en cas d'utilisation
- Cavo di collegamento input/output (FIG.B-9); d'accumulateurs au plomb acide.
- Fusibili.
2- Éviter tout contact avec l'acide de la
batterie. En cas de projections ou de contact
avec l'acide, rincer immédiatement la partie
touchée avec de l'eau claire. Continuer
jusqu'à l'arrivée d'un médecin.
3- Il est important de brancher
correctement les câbles aux pôles:
NOTA: questa funzionalità serve per mantenere in
buono stato di carica l’avviatore durante il viaggio e
potrebbe non consentire il raggiungimento della
carica completa.
Connecter la pince de charge rouge à la
borne positive de la batterie (symbole +).
Connecter la pince de charge noire au
8
Autogoods “130”
130.com.ua

châssis de la machine, à distance de la
batterie et du conduit du carburant. électriquement ainsi que des chaussures
antidérapantes. Protéger les cheveux longs
- Utiliser le démarreur dans des zones sous un bonnet.
correctement ventilées. Ne tenter aucun 15- Les réparations peuvent comporter des
démarrage à proximité de gaz ou de liquides risques considérables pour l'utilisateur et ne
inflammables. doivent être effectuées que par un
- Ne pas mettre en contact les pinces noire et spécialiste.
rouge, ce qui pourrait entraîner la fusion de 16- Remplacement de parties et accessoires.
ces dernières ou celle d'autres objets en Lors des opérations d'entretien, n'utiliser que
métal. Replacer exclusivement les pinces sur des pièces détachées identiques. L'utilisation
les supports prévus. d'un autre type de pièces entraînera
4- P O U R SYS T È M E S À 12 V OLT S l'annulation de la garantie.
UNIQUEMENT. N'utiliser que sur des 17- Garder à tout moment une position stable et
embarcations ou véhicules avec systèmes des points d'appui stables. Ne pas se
électriques à 12 volts. déplacer sur les câbles ou structures
5- N'UTILISER QU'EN CAS D'URGENCE: ne électriques.
pas utiliser le démarreur à la place de la 18- Effectuer un entretien minutieux du
batterie du véhicule, mais exclusivement démarreur. Contrôler régulièrement les
pour procéder au démarrage. câbles et faire effectuer les réparations
6- Éviter de travailler seul. Une autre personne nécessaires par un technicien agréé.
peut être utile en cas d'accident. 19- C o n t r ô l e r l ' a b s e n c e d e p a r t i e s
endommagées. Avant d'utiliser le démarreur,
contrôler soigneusement toutes les parties
7- Éviter les secousses électriques. semblant endommagées afin d'établir si un
fonctionnement correct peut être assuré.
Appliquer les pinces à des conducteurs ou Contrôler que les câbles sont correctement
barres de distribution non isolés en faisant fixés au démarreur. Il est conseillé de faire
preuve d'une attention extrême. Éviter tout réparer ou remplacer les parties
contact corporel avec des surfaces telles que endommagées par un technicien qualifié. Ne
tubes, radiateurs et armoires métalliques pas utiliser le démarreur si l'un des
durant l'essai du voltage. interrupteurs ne fonctionne pas correctement
8- Maintenir la zone de travail propre. Les zones sur les positions ON /OFF.
encombrées peuvent être cause de lésions.
9- Éviter d'endommager le speed start. Utiliser FONCTIONNEMENT
exclusivement comme spécifié dans ce
manuel.
10- Respecter les indications concernant la zone
de travail. Ne pas utiliser dans des endroits
humides ou mouillés. Ne pas exposer à la ATTENTION : Une secousse électrique peut
pluie. Opérer dans des zones bien éclairées. entraîner des lésions ou la mort. Ne pas
11- Ne pas exposer à la lumière directe du soleil, toucher les conducteurs électriques
à des sources de chaleur directe ou à dénudés.
l'humidité. Le SPEED START est conçu pour être utilisé sur
véhicules ou embarcations. Aucun autre véhicule
12- Tenir éloigné de la portée des enfants: ou prise d'alimentation à 230VAC n'est
nécessaire.
ne jamais les laisser accéder à la zone de Ce démarreur peut également être utilisé comme
travail, ni manipuler machines, instruments source d'énergie portable à 12 VDC pour les
ou rallonges. zones isolées ou en cas d'urgence.
13- Lorsque le démarreur n'est pas utilisé, le
ranger dans un endroit sec pour éviter toute Utilisation du SPEED START pour le démarrage
formation de rouille. Toujours ranger le d'un véhicule :
démarreur sous clé et loin de la portée des
enfants.
ATTENTION: se conformer aux
14- S'habiller de manière appropriée. instructions en suivant rigoureusement l'ordre
ci-dessous !
Ne pas porter de vêtements larges ou de - S'assurer que le démarreur est éteint :
bijoux pouvant se prendre dans les parties en l'interrupteur de la fig. C doit être en position OFF.
mouvement. Durant le travail, il est conseillé - S'assurer que le véhicule ou l'embarcation à
de porter des vêtements de protection isolés démarrer est éteint (interrupteur ou clé
9
Autogoods “130”
130.com.ua

d'allumage sur OFF).
- Brancher d'abord la pince rouge (+) à la borne
positive de la batterie du véhicule. ATTENTION : Quand l'interrupteur est en
- Brancher ensuite la pince noire (-) à une partie position ON, les pinces sont sous tension !
métallique non mobile du moteur ; ne pas Éviter rigoureusement tout contact des pinces
brancher la pince à la borne négative de la (rouge et noire) entre elles ou avec un
batterie. conducteur commun.
Les trois DEL centrales fig. A-3 signalent l'état de
ATTENTION : charge de la batterie avec la signification suivante :
- : la batterie est très déchargée ;
DANGER !
N'actionner sous aucun prétexte l'interrupteur - : la batterie est déchargée ;
du démarreur avant d'avoir contrôlé que les
câbles sont branchés aux polarités correctes - : la batterie est entièrement chargée.
de la batterie du véhicule à démarrer. Repositionner l'interrupteur fig. C sur "OFF".
- Positionner l'interrupteur du démarreur sur ON :
pour cela, enfoncer l'interrupteur en le tournant de La DEL rouge "Charging" de la fig. A-11 s'allume
lorsque le groupe est en charge.
90° dans le sens des aiguilles d'une montre (FIG.
C).
- Positionner l'interrupteur d'allumage du véhicule
ou de l'embarcation sur ON. Attendre environ une
minute. Placer l'interrupteur du véhicule en
position de démarrage durant 3÷4 secondes max.
Si la voiture ne démarre pas, attendre 3 minutes
min. avant de faire un nouvel essai. Recharge avec alimentation à 230V CA
Attention : Éviter rigoureusement tout contact ATTENTION : Utiliser exclusivement
des pinces (rouge et noire) entre elles ou avec l'alimentation fournie pour la recharge du
un conducteur commun. SPEED START.
Durant le fonctionnement du moteur, se conformer 1- Insérer tout d'abord la fiche de l'alimentation
rigoureusement à la séquence d'instructions (FIG. B-4) dans une prise à 230VCA.
suivante : Insérer ensuite la fiche de sortie prévue (FIG. B-
1. Éteindre le démarreur : interrupteur en position 5) dans la prise de recharge (FIG. A-6).
OFF. 2- Vérifier que l'interrupteur de la fig. A-2 est
2. Débrancher la pince noir (négatif) du véhicule. positionné sur "OFF".
3. Débrancher la pince rouge (positif) du véhicule.
4. Remettre les pinces dans le logement prévu.
Il est recommandé de recharger le SPEED START
dès que possible.
Utilisation du SPEED START comme dispositif
d'alimentation :
- Soulever le couvercle de la prise type allume-
cigare (FIG. A-1).
- Insérer la fiche allume-cigare du dispositif à
alimenter dans la prise fig. A-1.
RECHARGE
Important ! Pour garantir le bon état de la
batterie, procéder à son chargement durant 12
heures avant et après son utilisation et, dans
tous les cas, tous les trois mois.
L'unité peut être rechargée au moyen d'une
alimentation à 230VCA (en utilisant l'alimentation
adéquate) ou à 12VCC. Il est conseillé de toujours 1- Introduire le câble avec la fiche allume-cigare
laisser la batterie entièrement chargée. Un niveau (FIG. B-7) dans la prise prévue à bord de la
de charge faible peut réduire la durée de vie de la voiture ou de l'embarcation.
batterie. Ne pas oublier que le temps nécessaire à 2- Introduire la fiche du câble (FIG. B-8) dans la
recharger la batterie dépend du nombre de prise de rechargement (FIG. A-6) et vérifier
démarrages effectués. Pour contrôler si la batterie que l'interrupteur fig. A-2 est positionné sur
doit être rechargée, positionner l'interrupteur fig. C “OFF”.
sur ON. 3- La DEL “Charging” s'allume et le démarreur
La DEL jaune "Remove Charger" de la fig. A-12
s'allume durant la phase de charge en cas
d'intervention du dispositif de contrôle et de
protection de l'alimentation ou de la batterie. Il est
conseillé de débrancher le jack de l'alimentation de
la prise de la fig. A-6.
3- La DEL "Charging" s'allume et le démarreur est
en phase de charge. Le SPEED START est
équipé d'un dispositif de contrôle permettant
d'éviter toute surcharge de la batterie et de
l'alimentation. Laisser le système en charge
durant tout le temps nécessaire.
Remarque : pour vérifier l'état de charge de la
batterie, débrancher l'alimentation et placer
l'interrupteur de la fig. C sur ON : les DELs de la fig.
A-3 signalent l'état de charge de la batterie avec la
signification décrite plus haut.
Charge à bord de véhicules avec alimentation
12V DC:
ATTENTION: Effectuer l'opération de
charge avec le moteur du véhicule allumé.
10
Autogoods “130”
130.com.ua

est en phase de charge. _______________(D)____________
BEDIENUNGSANLEITUNG
ALLGEMEINES
Ein vollwertiger tragbarer batteriebetriebener
Starter. Ideal für jeden, der einen Starter braucht.
Er eignet sich für Boote, Autos, Lastkraftwagen,
Generatoren und anderes mehr.
Pb Vo ll k om pa ti be l m i t je d e r 1 2 -Vo l t-
ÉLIMINATION DE LA BATTERIE Anlasseranlage.
La batterie usée du démarreur doit être recyclée, S P E ED STAR T b e s i t z t e i ne DICHT
opération obligatoire dans certains pays. S C H L I ES S E N D E, WA RTU N G S F R E I E
S'adresser aux autorité locales pour les déchets BATTERIE, dadurch läßt sich die Einheit in jeder
solides pour obtenir des informations au sujet du Lage und an jedem Ort abstellen, ohne daß die
recyclage. Gefahr auslaufender Säure besteht.
SPEED START ist außerdem mit einem speziellen
Schalter ausgestattet, der zum Anlassen gewollt
betätigt werden muss.
Der Starter kann bequem unter oder hinter einem
ATTENTION: Ne pas éliminer la batterie en la Sitz verstaut oder in Griffweite aufbewahrt
brûlant, risque d'explosion. Avant d'éliminer la werden.
batterie, couvrir les bornes nues avec du ruban Bewahren Sie dieses Handbuch auf
isolant afin d'éviter tout court-circuit. Ne pas Das Handbuch enthält Sicherheitshinweise- und
exposer la batterie à de fortes températures ni au v o r s c h r i f t e n , B e t r i e b s a b l ä u f e u n d
feu, risque d'explosion. W a r t u n g s h i n w e i s e , e i n
Komponentenverzeichnis und die technischen
SPÉCIFICATIONS Daten.
SPEED START 1812 Bewahren Sie das Handbuch zur späteren
Type de batterie: 12V batterie au plomb Einsichtnahme an einem sicheren, trockenen Ort
hermétique rechargeable auf.
Capacité de la batterie: 38Ah
Courant de sortie: 1500A courant de crête
600A courant de démarrage
Câbles en cuivre: Isolés caoutchouc BEVOR SIE DEN STARTER BENUTZEN,
Longueur câble: 60cm L E S E N S I E B I T T E E R S T A L L E
Lampe: 12V-3.6W ANWEISUNGEN!
Prise de sortie: 12VDC / courant max. 15A S I C H E R H E I T S H I N W E I S E U N D -
Caractéristiques: interrupteur ON / OFF; VORSCHRIFTEN
protection en sortie contre Vorsicht: Um die Verletzungsgefahr zu
les surcharges Interruption automatique verringern, legen wir Ihnen ans Herz, beim
niveau de charge Gebrauch des Starters stets folgende
12VDC prise pour allume-cigare grundlegende Sicherheitsvorkehrungen zu
Poids: 16.5kg treffen.
Accessoires inclus:
- Alimentateur (FIG.B-4) 12VDC/1200mA sortie; 1- Schützen Sie Ihre Augen. Tragen Sie
- Câble de connexion entrée/sortie (FIG.B-9); stets eine Schutzbrille, wenn Sie mit
- Fusibles. Bleisäureakkus umgehen.
2- Vermeiden Sie den Kontakt mit Säure
aus der Batterie. Wird man angespritzt oder
kommt man in Kontakt mit der Säure, spülen
Sie das betroffene Körperteil sofort mit
sauberem Wasser solange ab, bis der Arzt
eintrifft.
REMARQUE: cette fonction permet de maintenir le
démarreur en bonnes conditions de charge durant
le voyage et peut empêcher d'effectuer une charge
complète.
11
Autogoods “130”
130.com.ua

er an einem trockenen Ort abgestellt werden,
damit sich kein Rost bildet. Schließen Sie den
3- Es ist wichtig, daß die Kabel an die Starter stets weg und sorgen Sie dafür, daß
Kinder nicht an ihn herankommen.
richtigen Pole angeschlossen werden:
14- Tragen Sie zweckmäßige
Kleidung. Keine weiten Kleidungs- oder
Schmuckstücke tragen, die sich in
beweglichen Teilen verfangen könnten.
- Setzen Sie den Starter nur in gut belüfteter Während der Arbeiten sollten unbedingt
Umgebung ein. Machen Sie keine elektrisch isolierte Schutzkleidung und
Startversuche, wenn sich um sie herum Gase rutschfeste Schuhe getragen werden. Lange
oder feuergefährliche Flüssigkeiten Haare sind mit einer Kopfbedeckung zu
befinden. bändigen.
- Die schwarze und rote Klemme dürfen nicht 15- Reparaturen dürfen nur von Fachleuten
miteinander in Kontakt kommen, weil sie durchgeführt werden, für den Besitzer ist dies
d a b e i s i c h s e l b s t o d e r a n d e r e zu gefährlich.
Metallgegenstände anschmelzen könnten.
Die Klemmen dürfen nur in die vorgesehenen 16- Austausch von Teilen und Zubehör. Für die
Halterungen gesteckt werden. Instandhaltung nur identische Ersatzteile
benutzen. Der Verwendung nicht-originaler
4- NUR FÜR 12-VOLT-ANLAGEN. Nur auf Teile hat den Verfall der Gewährleistung zur
Booten und Fahrzeugen mit elektrischer 12- Folge.
Volt-Anlage benutzen. 17- Nehmen Sie jederzeit eine geeignete und
5- NUR IM NOTFALL BENUTZEN: Verwenden stabile Position ein, stützen Sie sich dabei gut
Sie den Starter nicht anstelle der ab. Nicht über Kabel oder elektrische
Fahrzeugbatterie. Er darf ausschließlich zum Strukturen weiterbewegen.
Anlassen im Notfall benutzt werden. 18- Der Starter muß gewissenhaft gewartet
6- Arbeiten Sie nicht allein. Bei Unfällen kann der werden. Seine Kabel sind regelmäßig zu
Begleiter Hilfe leisten. kontrollieren und bei Beschädigungen von
einem autorisierten Techniker zu reparieren.
7- Vermeiden Sie elektrische Schläge. 19- Vergewissern Sie sich, daß keine Bauteile
beschädigt sind. Vor Benutzung des Starters
Seien Sie äußerst vorsichtig, wenn Sie die sind alle Teile, die scheinbar defekt sind,
Klemmen an nicht isolierte Leiter oder aufmerksam zu kontrollieren und zu
Verteilerschienen anschließen. Vermeiden ermitteln, ob sie in der Lage sind, einwandfrei
Sie, während Sie die Voltzahl testen, den zu funktionieren. Kontrollieren Sie, ob die
direkten Kontakt mit Oberflächen von Kabel gut am Starter befestigt sind.
Rohren, Heizkörpern und Metallschränken. Schadhafte Teile sollten von einem
8- Halten Sie den Arbeitsbereich sauber. Nicht Fachtechniker repariert oder ausgetauscht
g e r ä u m t e Z o n e n b e r g e n werden. Den Starter nicht benutzen, wenn
Verletzungsgefahren. einer der Schalter nicht richtig in den
9- Beschädigen Sie das Gerät Speed start nicht. Positionen ON /OFF funktioniert.
Verwenden Sie das Gerät ausschließlich so,
wie es in diesem Handbuch beschrieben FUNKTIONSWEISE
wird.
10-Befolgen Sie die Anweisungen zum
Einsatzbereich. Nicht in feuchter oder nasser
Umgebung benutzen. Nicht dem Regen VORSICHT: Bei elektrischen Schläge besteht
aussetzen. Arbeiten Sie in gut beleuchteter
Umgebung. Verletzungs- und sogar Lebensgefahr.
11-N i cht d e m dir e kte n S onn e nli c ht, Berühren Sie keine freiliegenden Stromleiter.
Wärmequellen oder Feuchtigkeit aussetzen. Das Gerät SPEED START ist für den Gebrauch
auf Fahrzeugen oder Booten ausgelegt. Ein
12- Halten Sie Kinder fern: Ihnen darf unter zweiter Wagen oder eine Steckdose mit 230VAC
werden nicht benötigt.
keinen Umständen gestattet werden, den Dieser Starter kann ebenso als tragbare 12 VDC-
Arbeitsplatz zu betreten oder mit Maschinen, Energiequelle in abgelegenen Gegenden oder im
Geräten oder Verlängerungsschnüren zu Notfall benutzt werden.
hantieren.
13- Wenn der Starter nicht gebraucht wird, muß Benutzung von SPEED START zum Anlassen
Die rote Ladeklemme an den Pluspol der
Batterie (Symbol +) anschließen.
Die schwarze Ladeklemme, weitab von der
Batterie und der Treibstoffleitung, an das
Fahrgestell des Autos anschließen.
12
Autogoods “130”
130.com.ua

eines Fahrzeugs: Zigarettenanzündern verwendet wird) des zu
speisenden Gerätes in die Buchse einfügen
(Abb. A-1).
ACHTUNG: Halten Sie sich bei der AUFLADEN
Befolgung der nachstehenden Anleitung genau Wichtig! Um die Batterie funktionstüchtig zu
an die Reihenfolge! erhalten, muss sie 12 Stunden vor dem
- Vergewissern Sie sich, dass der Starter aus ist: Gebrauch, nach jedem Gebrauch und
Der Schalter aus Abb. C muss sich in der Stellung anschließend spätestens alle 3 Monate
OFF befinden. aufgeladen werden.
- Stellen Sie sicher, dass das zu startende Die Einheit kann mit 230VAC (unter Nutzung des
Fahrzeug oder Boot ausgestellt ist (Zündschalter entsprechenden Netzteils) oder mit 12VDC
oder Zündschlüssel in der Stellung OFF). aufgeladen werden. Es wird empfohlen, die
- Zunächst die rote Klemme (+) an den Pluspol der Batterie jederzeit in vollständig aufgeladenem
Fahrzeugbatterie anschließen. Zustand zu halten. Ein zu geringer Ladestand kann
- Dann die schwarze Klemme (-) an ein nicht die Lebensdauer der Batterie verkürzen. Denken
bewegliches Metallteil des Motors anschließen. Sie daran, dass die erforderliche Batterieladedauer
Die Klemme darf nicht mit dem Minuspol der von der Anzahl der ausgeführten Startvorgänge
Batterie verbunden werden. abhängt. Um zu kontrollieren, ob die Batterie
aufgeladen werden muss, positionieren Sie den
ACHTUNG: Schalter auf ON (Abb. C).
GEFAHR! ACHTUNG! Wenn sich der Schalter in der
Unter keinen Umständen darf der Schalter des Stellung ON befindet, führen die Klemmen
Startgerätes betätigt werden, wenn nicht die Spannung! Verhindern Sie, dass die schwarze
Sicherheit besteht, dass die Kabel mit den und die rote Klemme in Kontakt miteinander
richtigen Polen an die Batterie des zu kommen oder einen gemeinsamen Leiter
startenden Fahrzeugs angeschlossen sind. berühren.
- Den Schalter des Starters auf ON umlegen: Dazu Die drei in Abb. A-3 dargestellten mittleren LEDs
den Schalter niederdrücken und dann um 90° im zeigen folgendermaßen den Ladezustand der
Uhrzeigersinn drehen (ABB. C).Batterie an:
- Den Zündschalter des Fahrzeuges oder Bootes
auf ON positionieren. Etwa eine Minute lang - : die Batterie ist sehr stark entladen;
abwarten. Den Schalter des Fahrzeuges nicht
länger als 3 bis 4 Sekunden in Startstellung - : die Batterie ist entladen;
führen. Wenn das Auto oder Boot nicht startet,
muss mindestens 3 Minuten abgewartet werden,
bevor ein erneuter Versuch unternommen wird. - : die Batterie ist vollständig aufgeladen.
Den Schalter wieder auf „OFF" umlegen (Abb. C).
Achtung: Es muss stets verhindert werden, Die rote LED "Charging" aus Abb. A-11 leuchtet
dass die schwarze und die rote Klemme in auf, während die Einheit aufgeladen wird.
Kontakt miteinander kommen oder einen
gemeinsamen Leiter berühren.
Wenn der Motor läuft, folgen Sie genau der
nachstehenden Schrittfolge:
1. Das Startgerät ausstellen: Schalter in Stellung
OFF.
2. Die schwarze Klemme (Minus) vom Fahrzeug
abklemmen.
3. Die rote Klemme (Plus) vom Fahrzeug Aufladen mit 230 VAC
abklemmen. ACHTUNG: Verwenden Sie das mitgelieferte
4. Die Klemme n an die vorgese henen Netzteil ausschließlich zum Aufladen des
Aufnahmestellen zurücklegen. Gerätes SPEED START.
Es wird empfohlen, das Gerät SPEED START 1- Zunächst den Stecker des Netzteils (ABB. B-4)
möglichst bald wieder aufzuladen. in eine Steckdose 230VAC einführen.
Anschließend den Ausgangsstecker (ABB. B-5)
B e n u t zu n g vo n S P E ED S TA R T a l s des Netzteils in die Aufladedose (ABB. A-6)
Versorgungseinrichtung: einführen.
- Die Buchse ist von der Art, wie sie bei 2- Prüfen, ob sich der Schalter (Abb. A-2) in der
Zigarettenanzündern zum Einsatz kommt. Ihre Stellung "OFF" befindet.
Abdeckung muss abgehoben werden (ABB. A-
1).
- Den Stecker (von der Art, wie er bei
Die gelbe Led "Remove Charger" in Abb. A-12
leuchtet während des Ladevorgangs auf, wenn die
Überwachungseinrichtung einschreitet, welche die
Spannungsquelle oder die Batterie schützt. Es wird
e m p f o h l e n , d e n K l i n k e n s t e c k e r d e r
Spannungsquelle aus der Buchse zu ziehen (Abb.
A-6).
3- Die Led "Charging" leuchtet auf, der Starter
befindet sich im Aufladebetrieb. SPEED START
ist mit einer Überwachungseinrichtung
13
Autogoods “130”
130.com.ua

ausgestattet, welche die Überlastung der
Batterie und der Spannungsquelle verhindert.
Lassen Sie den Aufladevorgang des Systems
bis zum Ende laufen.
Anmerkung: Um den Ladezustand der Batterie zu
prüfen, muss die Spannungsquelle vom Netz
getrennt werden. Dann den Schalter aus Abb. C
auf ON stellen: Die Leds (Abb. A-3) zeigen den
Ladezustand der Batterie. Die Bedeutung ist oben
dargestellt.
Aufladen an Bord des Fahrzeuges mit einer
Versorgungsspannung von 12V DC:
ACHTUNG: Beim Ladevorgang muß das
Fahrzeug laufen.
ANMERKUNG: Diese Funktion dient dazu, den
Starter während der Fahrt in einem einwandfreien
Ladezustand zu halten. Dabei ist es möglich, daß
der volle Ladezustand nicht erreicht wird.
Ladekapazität: 38Ah
Ausgangsstrom: 1500 A Scheitelstrom
600A Anlaßstrom
Kupferkabel: Gummi isoliert
Kabellänge: 60cm
Lampe: 12V-3.6W
Ausgangssteckdose: 12VDC / Strom max 15A
Eigenschaften: Schalter ON / OFF;
Am Ausgang Schutz vor
Überstrom Automatische Unterbrechung
bei vorgesehenem Ladestand
12VDC Steckdose für Zigarettenanzünder
Gewicht: 16.5kg
Im Lieferumfang enthaltenes Zubehör:
- Netzadapter (Abb.B-4) 12VDC/1200mA
Ausgang;
- erbindungskabel Input/Output (Abb.B-9);
1- Fügen Sie das Kabel mit dem für den - Schmelzsicherungen.
Zigarettenanzünder geeigneten Stecker
(Abb. B-7) in die entsprechende Dose des ________________(E)____________
Fahrzeuges oder Bootes.
2- Nun das Kabel mit dem vorgesehenen
Stecker (Abb. B-8) in die Ladedose stecken MANUAL DE INSTRUCCIONES
(Abb. A-6) und prüfen, ob der Schalter aus
Abb. A-2 auf “OFF” steht. DATOS GENERALES
3- Die Led “Charging” leuchtet auf und der Un verdadero arrancador a batería portátil. Ideal
Starter wird aufgeladen. para quien necesite un arrancador. Sus
aplicaciones incluyen embarcaciones,
automóviles, camiones, generadores y más aún.
Totalmente compatible con cualquier sistema de
arranque a 12 voltios.
El SPEED START utiliza una BATERÍA
HERMÉTICA SIN MANTENIMIENTO que
permite colocar la unidad en cualquier posición y
lugar sin peligro de que caiga ácido.
Además, SPEED START está dotado de un
Pb interruptor especial que debe accionarse
ENTSORGUNG VON ALTBATTERIEN voluntariamente para permitir el arranque.
Die erschöpfte Batterie des Startgerätes sollte El arrancador puede recolocarse cómodamente
der Wiederverwendung zugeführt werden. In debajo o detrás de un asiento o mantenerse al
einigen Ländern ist dies bereits Vorschrift. alcance de la mano.
Fragen Sie bei den örtlichen Behörden um
Informationen über die Wiederverwertung von Conservar este manual.
Festabfällen nach. Este manual es necesario para consultar las
advertencias y precauciones relativas a la
seguridad, para los procedimientos de
funcionamiento y de mantenimiento, para la lista
HINWEIS: Entsorgen Sie die Batterie nicht durch de los componentes y para las especificaciones
Verbrennen. Es besteht Explosionsgefahr! Vor técnicas.
der Entsorgung der Batterie müssen die Conservar el manual para posibles consultas en
freiliegenden Endstücke mit Isolierband bedeckt el futuro en un lugar seguro y seco.
werden, um Kurzschlüssen vorzubeugen.
Setzen Sie die Batterie keiner großen Hitze oder
offenem Feuer aus, weil in diesem Falle
Explosionsgefahr besteht. ¡ ANTES DE USAR EL ARRANCADOR LEER
TODAS LAS INSTRUCCIONES !
TECHNISCHE DATEN
SPEED START 1812 ADVERTENCIAS Y PRECAUCIONES SOBRE
Batterietyp: Dicht schließende 12V SEGURIDAD
Bleibatterie, aufladbar Atención: con el objetivo de reducir el riesgo de
14
Autogoods “130”
130.com.ua

lesiones personales y de daños al equipamiento, mojados. No exponer a la lluvia. Trabajar en
les recomendamos utilizar el arrancador áreas bien iluminadas.
respetando siempre las medidas de precaución 11- No exponer a la luz del sol directa, a fuentes
fundamentales sobre seguridad. de calor directas o a la humedad.
1- Proteger los ojos. Ponerse siempre 12- Mantener los niños alejados: no se les
gafas de protección cuando se trabaja con deberá permitir acceder a las áreas de
acumuladores al plomo ácido. trabajo, ni manejar máquinas, instrumentos o
cables de prolongación.
13- Cuando no se usa el arrancador debe volver
2- Evitar el contacto con el ácido de la a ponerse en un lugar seco para evitar que se
oxide. Guardar siempre el arrancador bajo
batería. En el caso que éste le salpique o se llave y mantenerlo fuera del alcance de los
ponga en contacto con el ácido, enjuagar niños.
inmediatamente la parte afectada con agua
limpia. Continuar enjuagando hasta que
llegue el médico. 14- Vestirse de manera apropiada.
No llevar ropas largas o joyas que puedan
3- Es importante conectar los cables a las quedarse atrapadas en las partes móviles.
Durante los trabajos se recomienda el uso de
polaridades correctas: v e s t i d o s d e p r o t ec c i ó n a i s l a do s
eléctricamente así como de calzado
antideslizante. En el caso de tener una
cabellera larga ponerse un cubre cabello que
la mantenga recogida.
15- Las reparaciones deben ser efectuadas
- Usar el arrancador en áreas bien ventiladas. únicamente por expertos ya que pueden
No intentar efectuar arranques cuando se representar un peligro importante para el
está cerca de gas o líquidos inflamables. utilizador.
- Impedir que las pinzas roja y negra se 16- Cambio de partes o accesorios. Al efectuar el
pongan en contacto, ya que esto puede mantenimiento, usar sólo partes de recambio
provocar su fusión o la de objetos de metal. idénticas. El uso de cualquier otra pieza
Volver a poner las pinzas únicamente en los anulará la garantía.
relativos soportes. 17- Mantener en todo momento una posición de
4- SÓLO PARA SISTEMAS A 12 VOLTIOS . estabilidad adecuada y los puntos de apoyo
Usar sólo en embarcaciones o vehículos con estables. No desplazarse encima de cables o
sistemas eléctricos a 12 voltios. estructuras eléctricas.
5- USAR SÓLO EN CASO DE EMERGENCIA: 18- Efectuar con cuidado el mantenimiento del
no usar el arrancador en lugar de la batería arrancador. Controlar periódicamente los
del vehículo. Usar exclusivamente para cables y en el caso de que se detecten daños
efectuar el arranque. dirigirse a un técnico autorizado para
6- Evitar trabajar solos. En caso de accidente, el efectuar la reparación.
asistente puede prestarle ayuda. 19- Comprobar que haya ninguna parte dañada.
Antes de utilizar este arrancador, controlar
7- Evitar las descargas eléctricas. Usar atentamente todas las partes que parecen
dañadas para establecer si pueden funcionar
con mucho cuidado al aplicar las pinzas a los correctamente. Controlar que los cables
conductores o barras de distribución no estén bien fijados al arrancador. Se
aislados. Evitar el contacto corporal con recomienda hacer reparar o cambiar las
superficies como tubos, radiadores, y partes dañadas por un técnico calificado. No
armarios metálicos mientras se está usar el arrancador en el caso que uno de los
probando el voltaje. interruptores no funcione correctamente en
8- Mantener limpia el área de trabajo. Se las posiciones ON /OFF.
pueden producir lesiones en las áreas con
obstáculos. FUNCIONAMIENTO
9- Evitar dañar el speed start. Utilizar
únicamente tal y como se especifica en este
manual.
10- Respetar las indicaciones relativas al área de ATENCIÓN: La descarga eléctrica puede
trabajo. No usar en lugares húmedos o
Conectar la pinza de carga de color rojo al
borne positivo de la batería (símbolo +).
Conectar la pinza de carga de color negro al
chasis del coche, lejos de la batería y del
conducto del carburante.
15
Autogoods “130”
130.com.ua

provocar lesiones o la muerte. Evitar tocar los Utilización de SPEED START como dispositivo
conductores de electricidad descubiertos. de alimentación:
El SPEED START ha sido diseñado para su uso - Levante la tapa de la toma de tipo encendedor de
en vehículos o embarcaciones. No será cigarrillos (FIG. A-1).
necesario disponer de otro vehículo o de una - Introducir el enchufe del encendedor de
toma de alimentación de 230V AC. cigarrillos del dispositivo que se tiene que
Además es posible utilizar este arrancador como alimentar en la toma de Fig. A-1.
fuente de energía portátil de 12 V DC en áreas
remotas o en casos de emergencia. RECARGA
¡Importante! Para proteger la integridad de la
Utilización de SPEED START para arrancar un batería, cargue durante 12 horas antes del uso,
vehículo: después de cada uso y cada 3 meses.
Es posible recargar la unidad usando una
alimentación a 230 VCA (usando un alimentador
ATENCIÓN: ¡seguir las instrucciones adecuado) o con alimentación a 12 VCC. Se
respetando escrupulosamente el orden que a recomienda mantener la batería completamente
continuación se indica! cargada en todo momento. Un nivel de carga bajo
- Asegúrese de que el arrancador esté apagado: el puede reducir la vida de la batería. Recuerde que el
interruptor de Fig. C debe estar en posición OFF. tiempo necesario para cargar la batería depende
- Asegúrese de que el vehículo o la embarcación del número de arranques efectuados. Para
que se tiene que arrancar esté apagado controlar si la batería debe recargarse colocar el
(interruptor o llave de encendido en posición interruptor de la Fig. C en ON.
OFF).
- Conecte en primer lugar la pinza roja (+) al
terminal positivo colocado en la batería del ¡ATENCIÓN! ¡Cuando el interruptor está
vehículo. en posición de ON las pinzas están bajo
- Después conectar la pinza negra (-) a una parte tensión! Impida que las pinzas roja y negra
metálica no móvil del motor; no conecte la pinza al entren en contacto o toquen un conductor
terminal negativo de la batería. común.
Los tres leds centrales de la Fig. A-3 indican el
ATENCIÓN: estado de carga de la batería con el siguiente
significado:
¡PELIGRO! - : la batería está muy descargada;
No accionar bajo ningún concepto el
interruptor del arrancador si no está seguro de - : la batería está descargada;
haber conectado los cables a las polaridades
correctas del vehículo que se debe arrancar. - : la batería está completamente cargada.
- Coloque el interruptor del arrancados en ON: ello Vuelva a colocar el interruptor de la Fig. C en
se obtiene apretándolo y después girándolo 90º "OFF".
en sentido horario (FIG. C).El led rojo "Charging" de la Fig. A-11 se enciende
- Coloque el interruptor de encendido del vehículo cuando la unidad está en recarga.
o de la embarcación en ON. Espere un minuto
aproximadamente. Ponga el interruptor del
vehículo en la posición de arranque durante un
intervalo no superior a los 3÷4 segundos. Si el
coche o la embarcación no se pone en marcha,
espere al menos 3 minutos antes de volver a
probar. Recarga con alimentación A 230 V CA
ATENCIÓN: Use el alimentador incluido
Atención: Impida siempre que las pinzas roja y exclusivamente para la recarga de SPEED
negra entren en contacto o toquen un START.
conductor común. 1- En primer lugar introduzca el enchufe del
Mientras el motor está en funcionamiento, siga
rigurosamente la secuencia de instrucciones: alimentador (FIG. B-4) en una toma de 230 VCA.
Después, introduzca el relativo enchufe de
1. Apagar el arrancador - interruptor en posición
OFF. salida (FIG. B-5) en la toma de recarga (FIG. A-
2. Desconecte la pinza negra (negativo) del 6).
vehículo. 2- Compruebe que el interruptor de Fig. A-2 esté
3. Desconecte la pinza roja (positivo) del vehículo. colocado en "OFF".
4. Vuelva a colocar las pinzas en su lugar.
Se recomienda volver a cargar en cuanto sea
posible el SPEED START.
El led amarillo "Remove Charger" de la Fig. A-12
se enciende durante la fase de recarga cuando
interviene el dispositivo de control que protege el
alimentador o la batería. Se aconseja desconectar
el jack del alimentador de la toma de la Fig. A-6.
3- El led "Charging" se enciende y el arrancador
está en fase de recarga. El SPEED START está
provisto de un dispositivo de control que permite
16
Autogoods “130”
130.com.ua

evitar la sobrecarga de la batería y del
alimentador. Dejar el sistema en recarga
durante todo el tiempo necesario.
Nota: para comprobar el estado de carga de la
batería desconectar el alimentador y colocar el
interruptor de la Fig. C en ON. Los leds de la Fig. A-
3 indican el estado de carga de la batería con el
significado antes descrito.
Recarga a bordo del vehículo con alimentación
12 VCC:
ATENCIÓN: Efectuar la operación de
recarga con el vehículo en movimiento.
NOTA: esta función sirve para mantener en buen
estado de carga el arrancador durante el viaje y
podría no permitir que se alcance la carga
completa.
Lámpara: 12V-3.6W
Toma de salida: 12VDC / corriente máx. 15A
Características : Interruptor ON/OFF;
protección en salida contra
las sobrecargas;
Interrupción automática nivel de carga;
12VDC toma para encendedor de cigarrillos.
Peso: 16.5Kg.
Accesorios incluidos:
- Alimentador (FIG.B-4) 12V DC/ 1200mA salida;
- Cable de conexión input/output (FIG. B-9);
- Fusibles.
_______________(P)_____________
1- Introducir el cable con el enchufe encendedor
de cigarrillos (FIG. B-7) en la toma relativa a MANUAL DE INSTRUÇÕES
bordo del coche o de la embarcación.
2- Introducir el cable en el enchufe relativo GENERALIDADES
(FIG. B-8) en la toma de recarga (FIG. A-6) y Um verdadeiro dispositivo de arranque com
comprobar que el interruptor de Fig. A-2 esté bateria portátil. O ideal para todas as pessoas
colocado en “OFF”. que precisam de um dispositivo de arranque. As
3- El led “Charging” se enciende y el arrancador aplicações dele incluem embarcações,
está en fase de recarga. automóveis, camiões, geradores e outro ainda.
Totalmente compatível com qualquer sistema de
arranque de 12 volt.
O SPEED START utiliza uma BATERIA
HERMÉTICA SEM MANUTENÇÃO que permite
de colocar a unidade em qualquer posição e em
qualquer lugar sem perigo de entornar ácido.
O SPEED START possui também um interruptor
e s p e c í f i c o q u e d e v e s e r a c t i v a d o
propositadamente para permitir o arranque.
Pb O dispositivo de arranque pode ser
ELIMINACIÓN DE LA BATERÍA comodamente reposto sob ou atrás de um
Debe reciclarse la batería gastada del assento ou ser tido ao alcance da mão.
arrancador. En algunos estados es obligatorio.
Contactar las autoridades locales para los Conservar este manual.
residuos sólidos para recibir las informaciones O manual é necessário para consultar as
relativas al reciclaje. advertências e precauções relativas à
segurança, para os processos de funcionamento
e de manutenção, para a lista das componentes
e para as especificações técnicas.
Conservar o manual para eventuais futuras
ADVERTENCIA: Non eliminar la batería consultas em um lugar seguro e seco.
quemándola. Esto podría causar una explosión.
Antes de eliminar la batería, cubrir los terminales
descubiertos con una cinta aislante adecuada
para evitar cortocircuitos. No exponer la batería a
un calor intenso o al fuego ya que esto podría ANTES DE UTILIZAR O DISPOSITIVO DE
causar una explosión. ARRANQUE LER TODAS AS INSTRUÇÕES!
ADVERTÊNCIAS E PRECAUÇÕES SOBRE A
ESPECIFICACIONES SEGURANÇA
SPEED START 1812 Cuidado: para reduzir o risco de lesões pessoais
Tipo de batería: 12V batería al plomo e de prejuízos à aparelhagem, aconselhamo-vos
hermética, recargable de utilizar o dispositivo de arranque respeitando
Capacidad de la batería: 38Ah sempre as fundamentais medidas preventivas
Corriente de salida: 1500 A corriente de pico sobre a segurança.
600A corriente de arranque
Cable de cobre: Aislados en goma 1- Proteger os olhos. Vestir sempre óculos
Longitud cable: 60cm
17
Autogoods “130”
130.com.ua

de protecção quando se trabalha com permitido a elas de aceder às áreas de
acumuladores com chumbo ácido. trabalho nem de manipular máquinas,
instrumentos ou extensões.
13- Quando o dispositivo de arranque não for
2- Evitar o contacto com o ácido da utilizado deve ser reposto em um lugar seco
para evitar a formação de ferrugem.
bateria. No caso forem atingidos pelos Guardar sempre o dispositivo de arranque
esguichos ou forem em contacto com o ácido, debaixo de chave e tê-lo fora do alcance das
enxaguar imediatamente a parte interessada crianças.
com água limpa. Continuar enxaguando até
chegar o médico.
14- Vestir-se de maneira apropriada.
3- È importante conectar os cabos às Não vestir roupa larga ou jóias que possam
ficar presas em partes móveis. Durante os
correctas polaridades: trabalhos aconselha-se a utilização de
roupa de protecção isolada electricamente e
também de calçados anti-deslizantes. No
caso de cabelos compridos vestir chapéus
para contê-los.
15- As reparações devem ser efectuadas
- Utilizar o dispositivo de arranque em áreas exclusive por peritos, de outra forma
bem ventiladas. Não tentar efectuar poderiam comportar perigos notáveis para o
arranques quando forem no meio de gases ou utilizador.
líquidos inflamáveis. 16- Substituição de partes e acessórios.
- Impedir aos alicates vermelhos e pretos de Quando efectuar a manutenção, utilizar
entrar em contacto dado que isso pode somente partes de substituição iguais. A
provocar a fusão deles ou a de outros utilização de qualquer outra peça anulará a
objectos de metal. Repor os alicates exclusive garantia.
nos apropriados suportes. 17- Manter em cada momento uma adequada
4- SOMENTE PARA SISTEMAS DE 12 VOLT. posição de estabilidade e pontos estáveis
Utilizar somente em embarcações e veículos de apoio. Não deslocar-se sobre cabos ou
com sistemas eléctricos de 12 volt. estruturas eléctricas.
5- UTILIZAR SOMENTE EM CASO DE 18- Efectuar com cuidado a manutenção do
EMERGÊNCIA: não utilizar o dispositivo de dispositivo de arranque. Controlar
arranque em lugar da bateria do veículo. periodicamente os cabos dele e no caso de
Utilizar exclusive para efectuar o arranque. prejuízos fazer efectuar a reparação por um
6- Evitar de trabalhar sozinhos. No caso de técnico autorizado.
acidente o assistente pode prestar ajuda. 19- Verificar que não haja partes prejudicadas.
Antes de utilizar este dispositivo de
7- Evitar os choques eléctricos. Utilizar arranque, controlar com cuidado todas as
partes que parecem prejudicadas para
extremo cuidado no aplicar os alicates a uns estabelecer se puderem funcionar
condutores ou barras de distribuição não correctamente. Controlar que os cabos
isoladas. Evitar o contacto do corpo com sejam bem fixados ao dispositivo de
superfícies como tubos, radiadores e arranque. Aconselha-se de fazer reparar ou
armários metálicos enquanto estão testando substituir as partes prejudicadas por um
a voltagem. técnico qualificado. Não utilizar o dispositivo
8- Ter limpa a área de trabalho. As áreas cheias de arranque no caso qualquer um dos
podem provocar lesões. interruptores não funcionar correctamente
9- Evitar de prejudicar o speed start. Utilizar nas posições ON /OFF.
exclusive conforme especificado em este
manual. FUNCIONAMENTO
10-Respeitar as indicações relativas à área de
trabalho. Não utilizar em lugares húmidos ou
molhados. Não expor à chuva. Trabalhar em
áreas bem iluminadas. CUIDADO : O choque eléctrico pode provocar
11- Não expor à luz do sol directa, a fontes de lesões ou morte. Evitar de tocar condutores
calor directas ou à humidade. de electricidade descobertos.
12- Ter longe as crianças: nunca deve ser O SPEED START é projectado para ser utilizado
sobre veículos ou embarcações. Não será
Junte a pinça de carga de cor vermelha ao
borne positivo da bateria (símbolo +).
Junte a pinça de carga de cor preta ao chassis
do veículo, longe da bateria e da conduta do
combustível.
18
Autogoods “130”
130.com.ua

- Introduza a ficha acendedor de cigarros do
necessário dispor de um outro veículo ou de uma dispositivo a alimentar na tomada da fig. A-1.
tomada de alimentação de 230VAC. RECARGA
É também possível utilizar este dispositivo de Importante! Para salvaguardar a integridade da
arranque como fonte de energia portátil de 12 bateria, carregue durante 12 horas antes do
VDC em áreas remotas ou em casos de uso, após cada uso e de qualquer maneira cada
emergência. 3 meses.
É possível recarregar a unidade por meio do
Utilização do SPEED START para arrancar um alimentador a 230VAC (usando o alimentador
veículo: adequado) ou através da alimentação a 12VDC.
Recomenda-se de manter sempre a bateria
totalmente carregada. Um nível baixo de carga
ATENÇÃO: execute as instruções pode reduzir a vida da bateria. Lembre que o tempo
seguindo rigorosamente a ordem indicada necessário para recarregar a bateria depende do
abaixo! número de arranques efectuados. Para controlar se
- Verifique que o motor de arranque esteja a bateria deve ser recarregada posicione o
desligado: o interruptor da fig. C deve estar na interruptor da fig. C em ON.
posição OFF.
- Verifique que o veículo ou a embarcação a ser
arrancada esteja desligado (interruptor ou chave ATENÇÃO! Quando o interruptor está na
de ignição na posição OFF). posição ON as pinças estão sob tensão! Deve
- Ligue antes a pinça vermelha (+) ao terminal ser impedido às pinças preta e vermelha de
positivo situado na bateria do veículo. entrar em contacto ou de tocar um condutor
- Depois ligue a pinça preta (-) a uma parte comum.
metálica não móvel do motor; não ligue a pinça ao Os três leds centrais da fig. A-3 sinalizam o estado
borne negativo da bateria. de carga da bateria com o seguinte significado:
ATENÇÃO: - : a bateria está muito descarregada;
PERIGO! - : a bateria está descarregada;
Não accione de maneira nenhuma o interruptor do - : a bateria está totalmente carregada.
motor de arranque se não tiver a certeza de ter
ligado os cabos nas polaridades correctas da Reposicione o interruptor da fig. C em "OFF".
bateria do veículo a arrancar. O led vermelho "Charging" da fig. A-11 acende
- Posicione o interruptor do motor de arranque em quando a unidade estiver em recarga.
ON: isso é efectuado carregando-o e depois
virando-o 90° no sentido horário (FIG. C).
- Posicione o interruptor de ligação do veículo ou
da embarcação em ON. Espere durante um
minuto aproximadamente. Coloque o interruptor
do veículo na posição de arranque durante um
tempo não superior a 3÷4 segundos. Se o Recarga com alimentação A 230V AC
automóvel ou a embarcação não arrancar, ATENÇÃO: Use o alimentador fornecido
espere pelo menos 3 minutos antes de tentar de exclusivamente para a recarga do SPEED
novo. START.
1- Introduza antes o plugue do alimentador (FIG.
Atenção: Deve ser sempre Impedido às pinças B-4) em uma tomada a 230VAC.
preta e vermelha de entrar em contacto ou de Introduza em seguida a ficha de saída
tocar um condutor comum. apropriada (FIG. B-5) na tomada de recarga
Enquanto o motor está a funcionar, siga (FIG. A-6).
rigorosamente a sequência de instruções: 2- Verifique que o interruptor da fig. A-2 esteja
1. Desligue o motor de arranque: interruptor na posicionado em "OFF".
posição OFF.
2. Desprenda a pinça preta (negativo) do veículo.
3. Desligue a pinça vermelha (positivo) do veículo.
4. Recoloque as pinças no alojamento apropriado.
Recomenda-se de recarregar tão logo possível o
SPEED START.
Utilização do SPEED START como dispositivo
de alimentação:
- Erga a tampa da tomada tipo acendedor de
cigarros (FIG. A-1).
O led amarelo "Remove Charger" da fig. A-12
acende durante a fase de recarga quando intervém
o dispositivo de controlo que protege o alimentador
ou a bateria. Recomenda-se para desligar o jack do
alimentador da tomada da fig. A-6.
3- O led "Charging" acende e o motor de arranque
está na fase de recarga. O SPEED START é
munido de um dispositivo de controlo que
permite evitar a sobrecarga da bateria e do
alimentador. Deixe o sistema em recarga
durante todo o tempo necessário.
Observação: para verificar o estado de carga da
bateria desligue o alimentador e posicione o
interruptor da fig. C em ON: Os leds da fig. A-3
sinalizam o estado de carga da bateria com o
19
Autogoods “130”
130.com.ua
Table of contents
Languages:
Other Telwin Remote Starter manuals
