STEP 3:
Clean the
hole and use
the 1” pipe
tap to inter-
nally thread
the inside of
the 1-1/8” hole. Thread the Reducer
Bushing Assembly into the 1” thread-
ed hole. Be careful to make sure the
bushing is in contact with the fitting so the 8 lbs. weight of
the SVRS unit is resting on the pipe and not supported only
by the nipple.
STEP 1:
Take the 1” x 4” Schedule 80 PVC
pipe nipple and cut the nipple 1-3/4”
from one end. This cut will produce
a 1” thread x 1” slip adapter. The
other end of the remaining section
of the pipe nipple can be used to
make a second adapter. ApplyTeflon
tape to the threaded end of the cut
adapter.
The slip end of the cut adapter
is to be solvent welded into the
1” slip opening of the 1” Slip x
1-1/2” Slip Schedule 40 Reducer
Bushing.
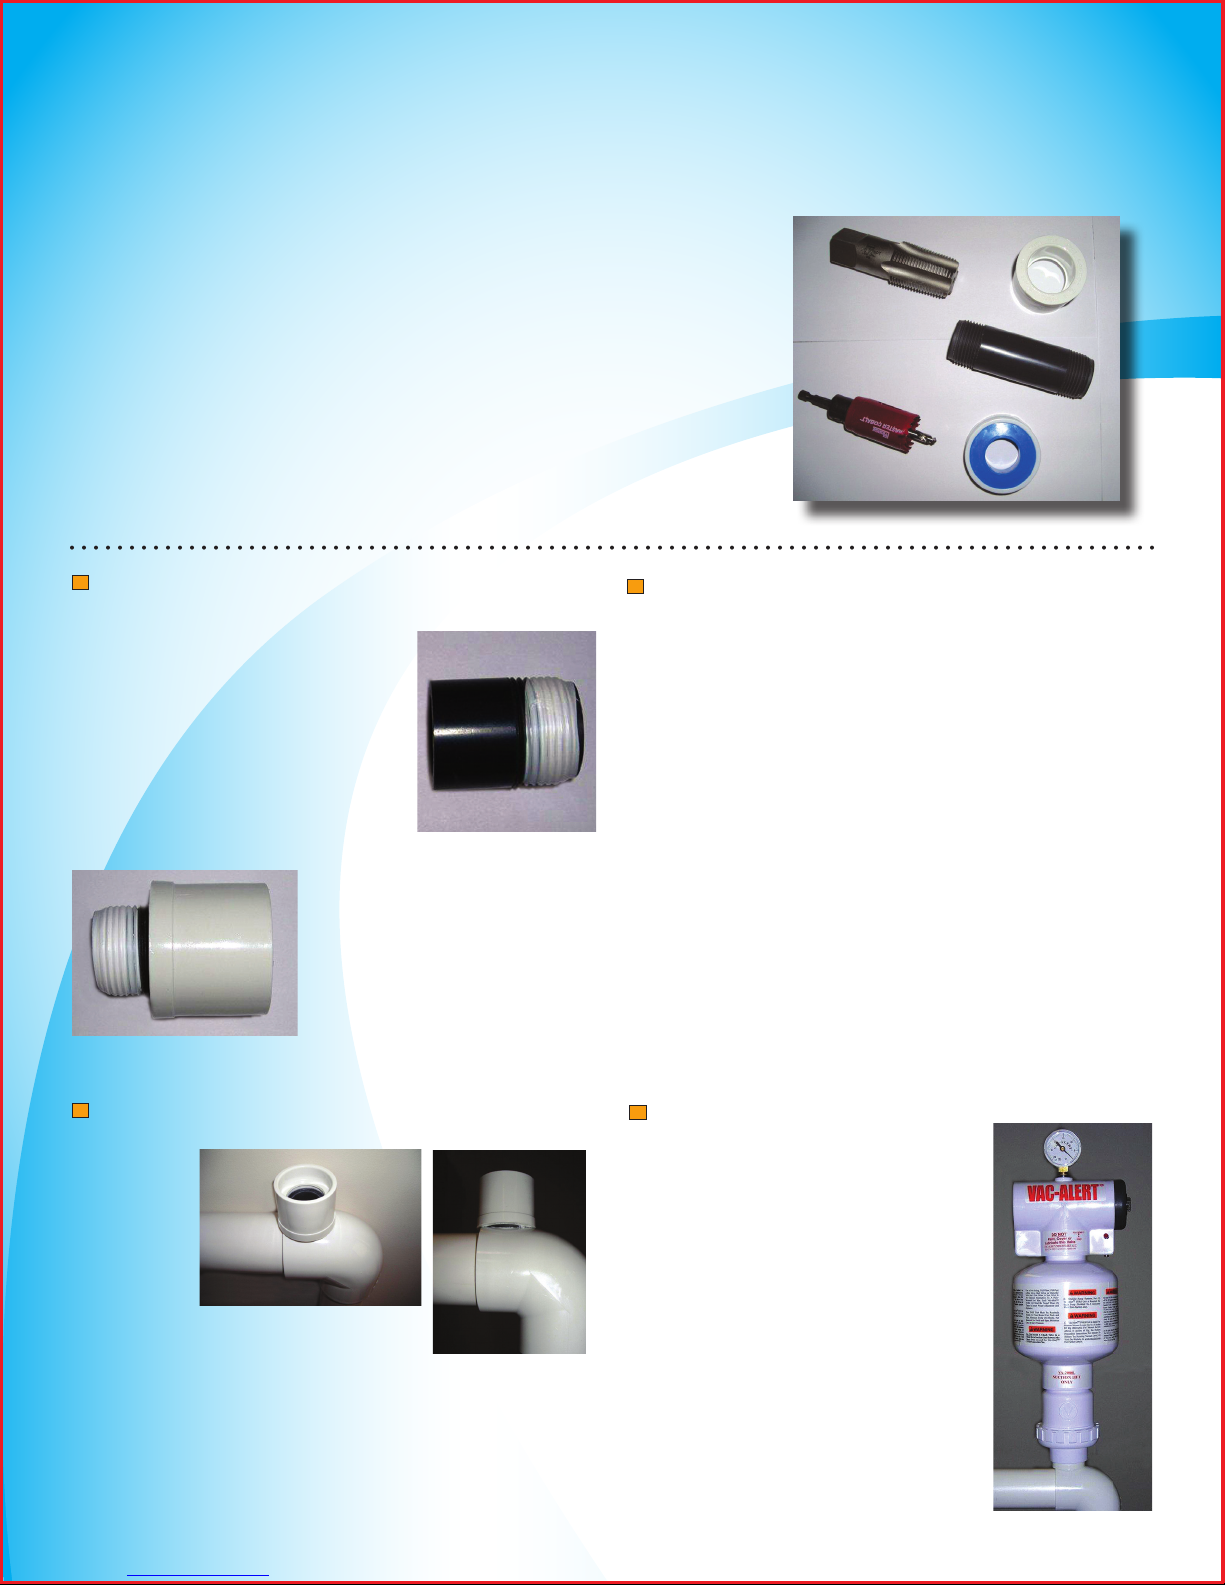
VAC-ALERT MODEL VA-2000L OR VA-2000S
DRILL AND TAP INSTALLATION INSTRUCTIONS
Materials and Tools Needed:
(1) 1” Diameter x 4” Long Schedule 80 PVC Pipe Nipple
(1) 1” Slip x 1-1/2” Slip Schedule 40 Reducer Bushing
(1) Teflon Tape
(1) 1-1/8” Diameter Hole Saw with Arbor and Center Drill Bit
(1) 1” Diameter Pipe Tap
(1) Battery Powered Drill and Channel Locks
STEP 2:
Find the main drain suction line and locate the installa-
tion site of the Vac-Alert SVRS unit based on the instruc-
tions included with the unit. The location of the drill and
tap for the SVRS unit installation must be at the junction
of the main drain pipe line and an elbow or coupling.
The 1” diameter drill and tap can be accomplished on
PVC pipe sizes from 1-1/2” diameter and larger.
Isolate the main drain line to prevent water flow from the
piping system. Drill a 1-1/8” hole on top of the elbow or
coupling, centered 7/8” from the slip end of the fitting.
The hole should be drilled to cut through the slip end of
the fitting, and to cut through the slip end of the pipe for
added thread depth.
STEP 4:
Solvent weld the Vac-Alert SVRS unit
to the Reducer Bushing. Make sure
the orientation of the Vac-Alert SVRS
unit is where it can be easily viewed
and accessed for testing and adjust-
ment. Once solvent welded, the
SVRS unit can be removed if needed
by unthreading the unit from the pip-
ing system. Once installed, be sure
to test the SVRS unit three (3) times
in accordance with the instructions
included with the unit.


