VACITUP Optimuum 3 kW User manual

Vacitup AB,Smedvägen 24, SE-433 61 Stenkullen, Sweden
USER’S MANUAL
CENTRAL VACUUM CLEANER
3, 4 and 5,5 kW

www.vacitup.se
1
Contents
2|
Symbols
3|
Safety Instructions
3|
Intended Use
4|
Design of the Central Vacuum Cleaner
5|
Product Description
6|
Technical Data
7|
Warnings
8|
Installation
9|
Maintenance and Service
10|
Replacement of the Dust Bag
11|
Replacement of the Filter
12|
Manual Cleaning of the Filter (Back Flush)
13|
Trouble-Shooting
14|
Service Protocol
15|
EC Declaration of Conformity
Addendums
➢Machine Specification Card
➢Wiring Diagram
➢Operating instructions for ESAM vacuum pump
➢Instructions for frequency inverter

www.vacitup.se
2
Symbols
Warning!
Be cautious when you see this sign and pay attention to the
warning relevant to the situation.
Safety precautions accompanied by this symbol indicate a
danger of injury.
Important!
When you see this symbol, pay attention as some important and
relevant information is mentioned.
Safety precautions accompanied by this symbol indicate a
danger of damage to the machine.
Read carefully
Take the time to read this manual before using the machine for
the first time. It contains useful information about its
installation, its functions and its maintenance.
Maintenance
When this symbol is displayed, instructions relevant to the
maintenance of the machine will be given.
Unplug the machine
When this symbol is displayed, the machine must be turned off
and its power supply removed from the electricity outlet.
Visual check
When this symbol appears, make sure to look attentively at the
part of the machine mentioned in the instructions.

www.vacitup.se
3
Safety Instructions
The following documents should be read attentively and in their whole. They need to be understood by all
involved staff before proceeding with the installation and the start up as well as under use, maintenance
and service:
•The user’s manual (this document)
•Enclosed operating instructions for the vacuum pump
•Enclosed operating instructions for the frequency inverter
These instructions must be followed closely and kept where the machine is used.
Installation and use are to be performed only by trained and authorised staff.
All instructions in this manual are to be followed for the warranty to be valid. Performing an
action against recommended instructions will invalidate the warranty and can, in some case,
cause damage to the machine and/or injuries to the user.
Intended Use
The central vacuum cleaners from the Optimuum Series are intended for general cleaning in both
commercial and industrial environments.
The number of simultaneous users varies depending on the model and the use of the machine. Please
refer to the technical data to find out more about your model.
The vacuum cleaner in its standard version is NOT intended for the
suction of water or wet, explosive or inflammable material.

www.vacitup.se
4
Design of the Central Vacuum Cleaner
Filter cleaning handle
Top of the filter housing
Electrical cabinet
Cyclone (filter housing) with filter
Lenses for level guard (optional)
Lever to open the dust container
Dust container
Vacuum pump
(behind the machine)
Stand

www.vacitup.se
5
Product Description
Product designation Central vacuum cleaner
Model Optimuum 3/4/5,5 kW
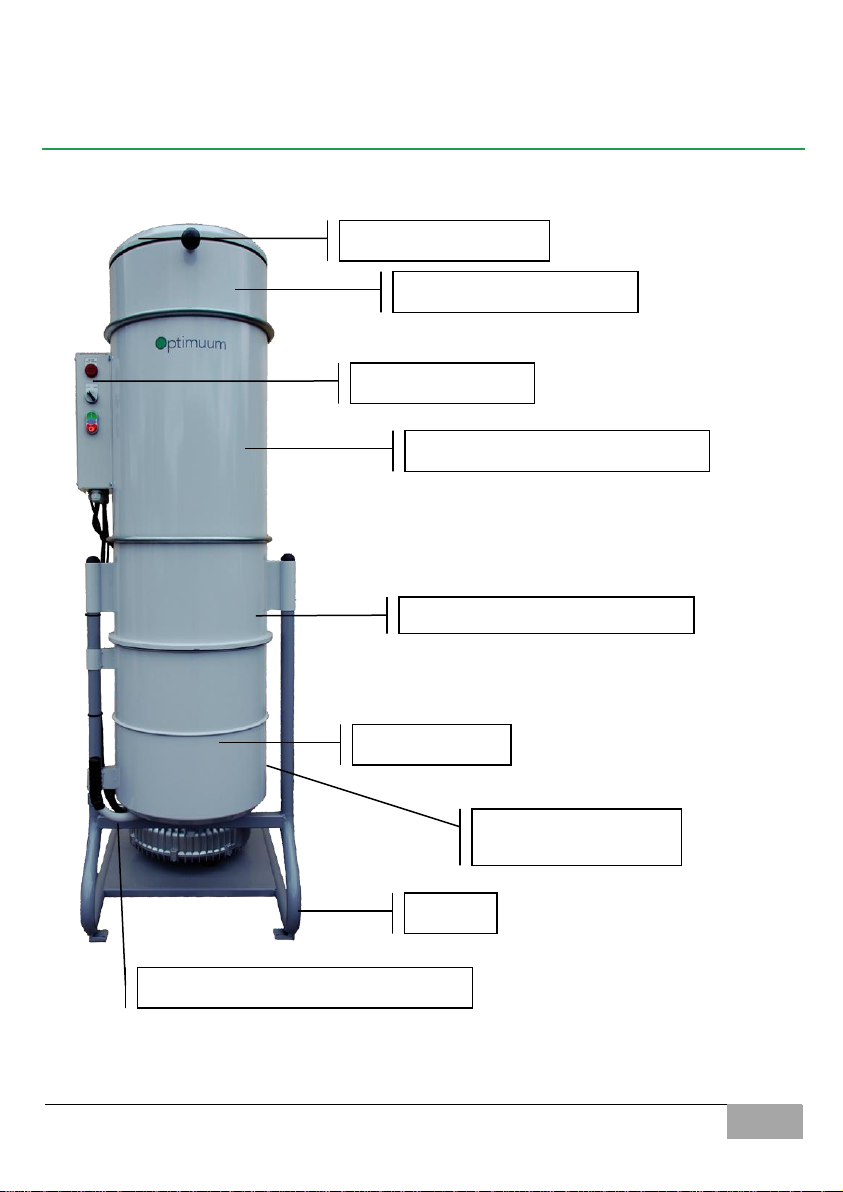
Description Central vacuum cleaner consisting of a vacuum pump, an electrical cabinet, a
cyclonic separator with filter and a steel stand. Models denoted with the letter
F are also equipped with a frequency inverter.
The central vacuum cleaner is mainly made of iron and is painted with powder
coating.
The vacuum pump is made of aluminium and cast iron.
Environment A great importance has been put on the choice of material and the production
methods during the design of the central vacuum cleaner. It is worth noting
that 98% of the machine is recyclable. The remaining portion is made of
electrical components. No solvents are used during the coating, neither for
cleaning nor coat mixture.
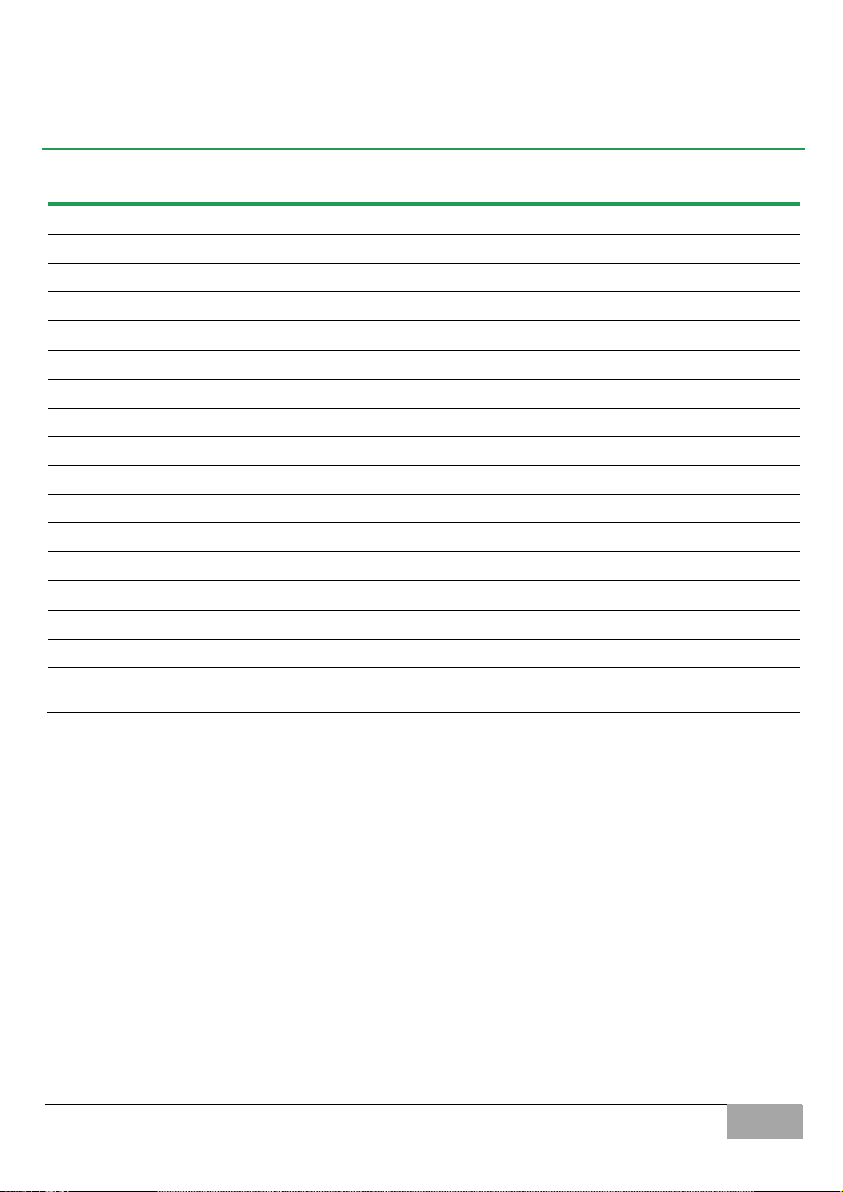
Material
Stand Iron, quality SIS 1312
Cyclone Iron, quality SIS 1312
Vacuum pump Pump, impeller and stator of aluminium and/or cast iron.
Engine shaft of iron.
Electrical windings of copper.
Filter End plates of metal or plastic.
Filter material of cellulose or polyester.
Electrical cabinet Cabinet of iron.
Components of plastic and copper.
Plastic details Polyethylene and Bakelite.
Paint Polyester powder, TGIC-free.
Sealing Natural rubber.
Manufacturer Vacitup AB
Smedvägen 24
SE-433 61 Stenkullen
Sweden
Tel: +46 (0)31 44 32 00
Email: info@vacitup.se
www.vacitup.se

www.vacitup.se
6
Technical data
3 kW
3 kW F
4 kW
4 kW F
5,5 kW F
Article number
223100
223200
224100
224200
225200
Size (LxWxH)
[cm]
52x78x162
52x78x162
52x78x162
52x78x162
52x78x162
Weight (approx.)
[kg]
72
74
78
80
140
Power supply
[V/kW]
400/3,0
400/3,0
400/4,0
400/4,0
400/5,5
Power
consumption
[A]
7
7
9
9
13
Fuse, delayed
[A]
10
10
10
10
16
Starter/type
[D/FI]
Direct
Freq.Inverter
Direct
Freq.Inverter
Freq.Inverter
Motor protection
Clixon
Clixon
Clixon
Clixon
Clixon
Airflow*
[m3/h]
330
420
330
420
650
Vacuum
[mbar]
280
280
300
300
280
Inlet
[Ø mm]
63
63
63
63
76
Outlet
[Ø mm]
80
80
80
80
80
Filter size
[m2]
4,0
4,0
4,0
4,0
4,0
Filtration
[BIA
Class M]
99,9
99,9
99,9
99,9
99,9
Dust container
[l]
40
40
40
40
40
Dust bag
[l]
50
50
50
50
50
No of
simultaneous
users
-
1-2
1-2
2-3
2-3
3-4
* Max. airflow is dependent on the parameters of the frequency inverter.
Options:
Washable polyester filter, 4,0 m2
160422
Micro filter HEPA
Special
Filter monitoring
Level indicator for dust container
Automatic filter cleaning
Consumables
Dust bags (10 pcs)
400040
Filter, polyester, 4,0 m2
160422

www.vacitup.se
7
Warnings
1. Before any kind of maintenance or service is carried out, turn off the
machine and remove the power supply from its socket.
This does not apply for the manual cleaning of the filter.
2. During installation, service, maintenance or use, precautions must be taken
to ensure that no foreign objects will enter the vacuum pump. Should this
happen, the pump must be turned off and under no circumstances be
started against before the object has been removed. Doing otherwise can
cause the destruction of the pump.
3. The vacuum cleaner is not to be used for vacuuming wet or damp
material/dust. If water or any wet/damp material enters the vacuum
cleaner, the machine must be stopped immediately, taken apart and dried
up before it can be used again.
4. The vacuum cleaner should, under no circumstances, be used for
the suction of burning, glowing, explosive or inflammable fluids or
materials.
5. If the filter shows any sign of damage, it must be replaced before the
vacuum cleaner is used in order to avoid damages to the vacuum pump.
6. The cooling air intake to the vacuum pump must at all times be kept open
and free from dust and foreign objects.
7. Always treat used filters and used dust bags with care since they might
contain hazardous dust. Put the used filter in a large plastic bag and seal it
tightly. You should always seal used dust bags too.
8. The vacuum cleaner must never be used without filter, dust bag or vacuum
filter.
9. All service, repair and trouble-shooting of the central vacuum cleaner and
the vacuum pump are to only be performed by authorised staff.
10. Some dust may be harmful to the health and/or the environment. Check
with the regulation at your workplace and in your country. Disposal of used
filters and dust bags must be made in accordance with governmental
regulations.

www.vacitup.se
8
Installation
1. The vacuum cleaner must be installed in a well-ventilated and dry area. The
temperature around the machine must not exceed normal room temperature.
2. The vacuum cleaner must not be installed in potentially explosive
environments. Make sure to know in which ATEX zone the machine is installed.
3. The area must comply with the electrical insulation class of the vacuum
cleaner.
4. Make sure there is enough space around the vacuum cleaner to allow for
maintenance and service. Keep in mind that cleaning and changing the filter
will require additional room above the machine.
5. The floor must be even and stable enough to carry the weight of the vacuum
cleaner.
6. The central vacuum cleaner must be anchored to the floor to keep it from
tilting.
7. The central vacuum cleaner should be connected to the main electrical system
with the power supply. Check the tension before connecting the vacuum
cleaner.
8. The connection to the piping system is optimally performed with a flexible
hose in order to avoid the transfer of vibrations.
9. Make sure that the electrical system between the vacuum cleaner and the
piping system is properly grounded, if the piping system is made of metal.
10. All electrical installation and maintenance on electrical parts are only to be
performed by an authorised electrician.

www.vacitup.se
9
Maintenance and service
1. Before any kind of maintenance or service is carried out, turn off the machine
and remove the power supply from its socket.
This does not apply for the manual cleaning of the filter.
2. Check the filter regularly, at least once a week or other suitable interval
depending on use. If necessary, clean the filter.
3. Change the filter at least once a year or more frequently depending on use.
4. Change the filter if it shows any sign of damage or has a hole.
5. Change the dust bag before it becomes too full.
6. Check that the cooling air intake to the vacuum pipe is free.
7. Check the vacuum filter. It is found inside the hose going from the dust
container to the pipe connecting the cyclone top to the vacuum pump. Clean
if necessary.
8. For service of the vacuum pump, please read the manufacturer’s operating
instructions, which are enclosed with this user manual.
9. Please note that service and repair of the electrical system and the vacuum
pump are only to be performed by authorised staff.

www.vacitup.se
10
Replacement of the dust bag
1. Turn the central vacuum off and unplug the
power supply.
2. Pull the lever located to the side of the dust
container all the way to the right.
3. Swing out the dust container by pulling the
handle.
4. Close the dust bag with the sealing strip,
which is found at the upper edge of the
plastic bag.
5. Lift out the dust bag carefully to keep it from
being damaged.
6. Fit a new dust bag in the dust container and
fold the upper edge of the bag around the
edge of the dust container.
7. Using the handle, push the dust container
back until it stops.
8. Hold the dust container in this position and
move the lever at the same time to the left
until it stops.
The dust bag might contain hazardous and poisonous dust and should therefore be disposed of according
to governmental regulations. Used dust bags should always be closed completely and be treated carefully.
Use only original dust bags.
Lever
Handle
Lever
Handle
Sealing
strip

www.vacitup.se
11
Replacement of the filter
When replacing the filter, it is recommendable to use a breathing mask. Always treat
both new and used filters with utmost care. Even a very small damage or a hole on a
filter will severely reduce its filtration abilities. A used filter may still contain dust,
which can be potentially harmful to the health and/or the environment and should
therefore be disposed of according to governmental regulations. Put the used filter in a
plastic bag and seal it tightly. Only use original filters.
1. Turn the central vacuum off and unplug the power supply.
2. Loosen the upper hose clamp on the hose connecting the top of the filter housing and the
suction pipe to the pump.
3. Loosen the locking ring that hold the top of the filter housing.
4. Lift off the top.
5. Carefully lift the filter out of the housing so that the dust does not spread out.
6. Place the filter upside down on the floor.
7. Remove the nut and shim (M8, 13 mm wrench) at the bottom of the filter.
8. Put a plastic bag over the filter and remove the filter from the filter top.
9. Fit a new filter. Fit the shim and nut. Tighten the nut so that the distance between the filter and
the filter top is approximately 8 mm.
10. Lift the filter back into the filter housing. Make sure that the filter is correctly centred in the filter
housing and that the gasket is in the right position.
11. Mount the lid on the filter housing. Make sure that the pipe is correctly fitted in the hose.
12. Fit the locking ring.
13. Tighten the hose clamp on the hose between the top of the filter housing and the suction pipe to
the clamp.
Hose
clamps
Filter
cleaning
handle

www.vacitup.se
12
Manual cleaning of the filter (Back flush)
1. Start the vacuum cleaner by turning the main switch to the “MAN” position. Let the pump work
for approximately 15 seconds until it reaches the maximum number of revolutions.
2. Pull the filter cleaning handle (black knob) on the top of the vacuum cleaner until you hear a
loud bang.
3. Turn off the vacuum cleaner by turning the main switch to the “OFF” position.
4. Wait until the pump has stopped completely, which takes approximately 20 seconds.
5. Pull the filter cleaning handle again and then push it all the way in until it stops.
6. If the filter has not been properly cleaned, repeat the previous steps (1-5).
If the suction capacity is still low, this process may be repeated. If the suction capacity is still low after
several back flushes, the filter needs to be replaced.
Step 2
Pull on the filter cleaning handle
Step 5
Pull on the filter cleaning handle then push
it in.

www.vacitup.se
13
Trouble-shooting
The trouble-shooting must be carried out by an authorised professional.
1. The vacuum cleaner does not start, either with the main switch in “MAN” or “AUTO” position.
a. Check that there is power to the vacuum cleaner.
b. Check that the control fuse in the electrical cabinet is not tripped. If so, reset it.
c. Check that the motor protection is not tripped. If so, reset it.
d. If any of the above protection or fuse are tripped again when trying to start the unit,
the probable cause can be a short circuit or the loss of one or two phases. Before a
new attempt is made, an authorised electrician must check the electrical installation,
the power supply and the vacuum pump for a possible short circuit.
2. The vacuum cleaner only starts with the main switch in “MAN” position.
a. Check the low voltage wiring from the machine to the vacuum outlets.
3. The yellow lamp “FILTER” is lit (on applicable models)
a. Take out and clean the filter. Check for damage or holes in the filter. If it is damaged,
the filter must be replaced.
4. The red lamp “LEVEL” is lit (on application models)
a. Change the plastic bag located in the dust container. Check also the filter and clean or
replace it accordingly. If the lamp is still lit after the bag change, the lenses at the
bottom of the cyclone need to be cleaned.
5. Poor suction.
a. Clean or replace the filter. If this does not help, the density of the piping system must
be checked.
6. Unusual noise from the vacuum pump.
a. Turn off the vacuum pump immediately and contact the supplier.
7. The dust bag is sucked into the cyclone/filter housing.
a. Check that the vacuum hose going from the dust container to the vacuum pump has
not come loose or been damaged. If so, tighten it or replace it with a new one.
b. Check that the vacuum filter located in the above-mentioned hose is clean. If
necessary, clean it. Also clean the dust container.
c. Check that the dust container fits tightly with the cyclone.

www.vacitup.se
14
Service protocol
Vacitup Central Vacuum Cleaning System
Date:
Model:
Serial number:
Customer:
Central unit
Rem.
Missing
Done
1.
Replacement of the filter
2.
Cleaning of filter housing and dust container.
3.
Check vacuum pump, screws, cables and connections.
4.
Check density and hoses.
5.
Check back flush function.
6.
Test and check any discordant sounds from the pump.
System
Rem.
Missing
Done
1.
Check vacuum inlets. Density and function.
2.
Check automatic hose hanger. Density and function of the valve.
3.
Check hose reels. Function, winding, density, hose and valves.
4.
Check pre-separator. Function, density and wear.
5.
Check piping system. Density and wear.
6.
Check low voltage system. Cables, connections and micro switch.
7.
Cleaning system, other. Hoses, nozzles. Wear, damages and function.
Remarks
Service done by:
Date:

www.vacitup.se
15
EC declaration of conformity
Manufacturer
Vacitup AB
Smedvägen 24
SE-433 61 Stenkullen
Sweden
Product designation
Central Vacuum Cleaner
3, 4 and 5,5 kW
We declare that the above-mentioned products comply with the following European Directives:
-Low Voltage Directive IEC/EN 60335-2-69, IEC/EN 60335-1
-Machinery Directive EN ISO 12100
-EMC Directive 2004/108/EC with regards to the Harmonised Standard EN 60 439-1
Stenkullen, 07 April 2020
Almir Karahodzic
CEO, Vacitup AB
This manual suits for next models
9
Table of contents