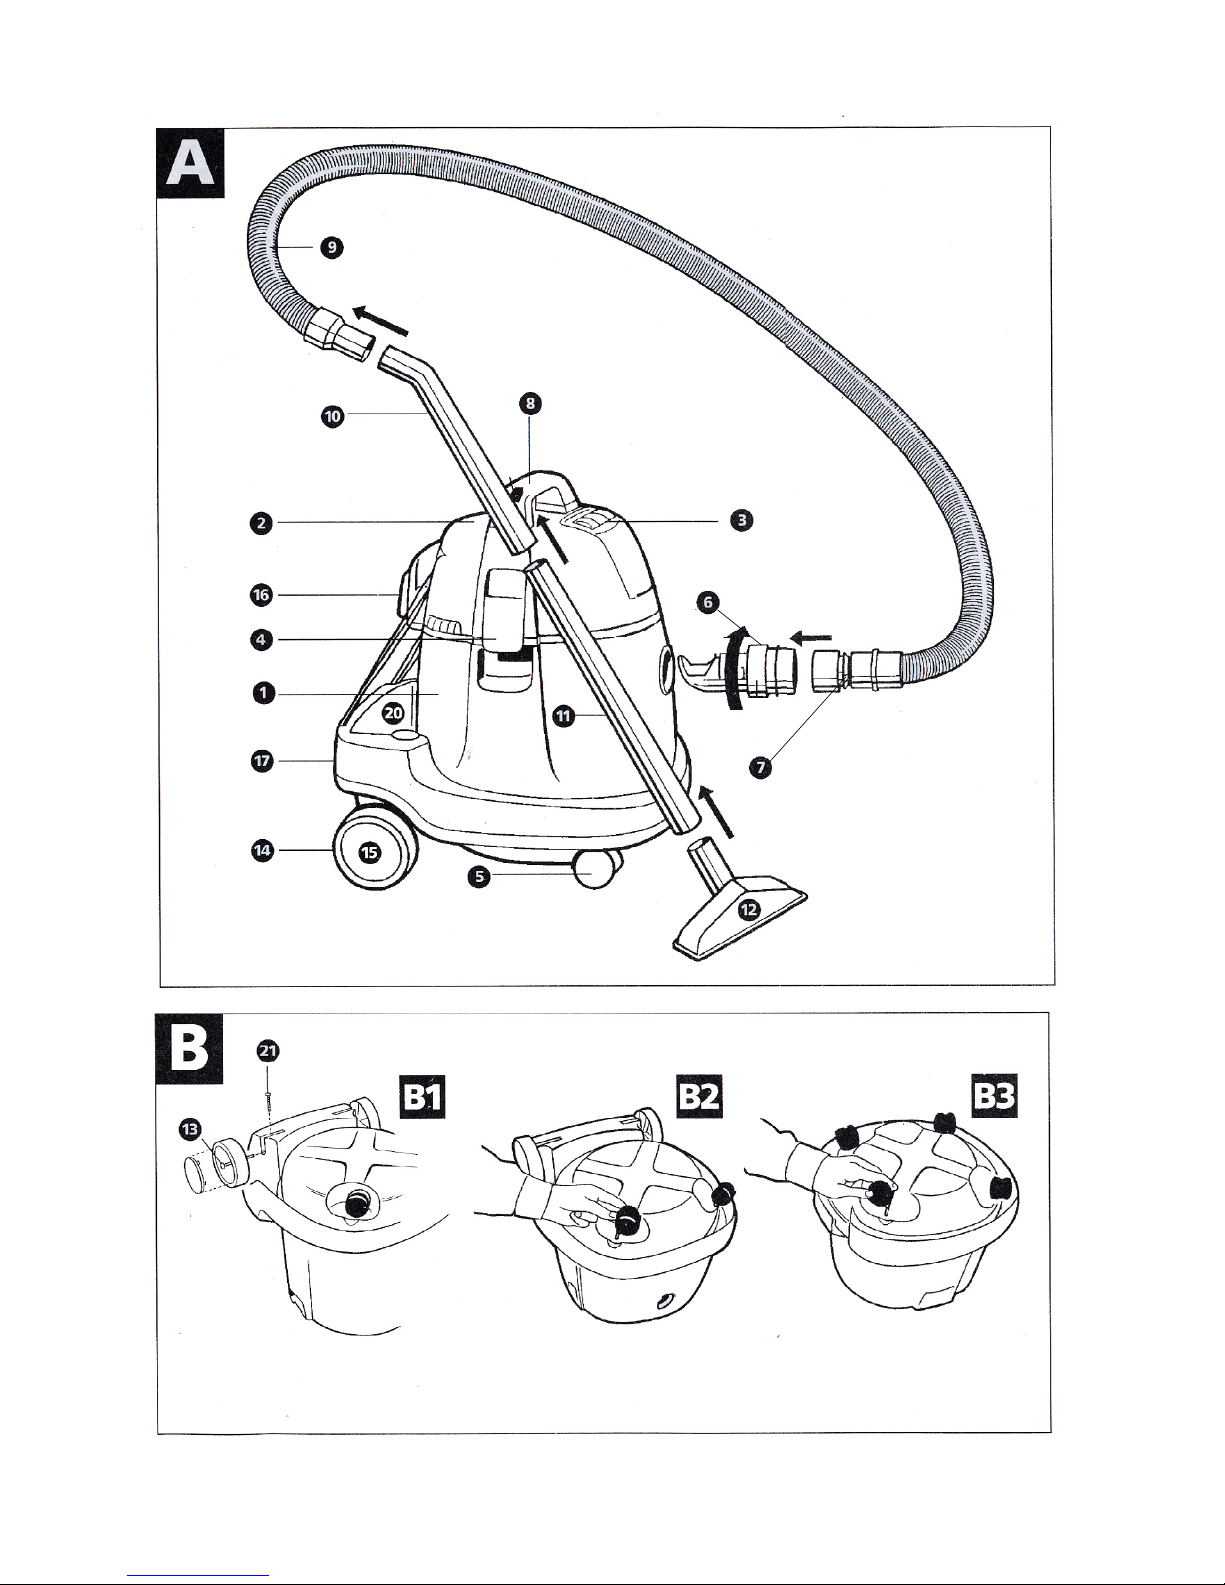
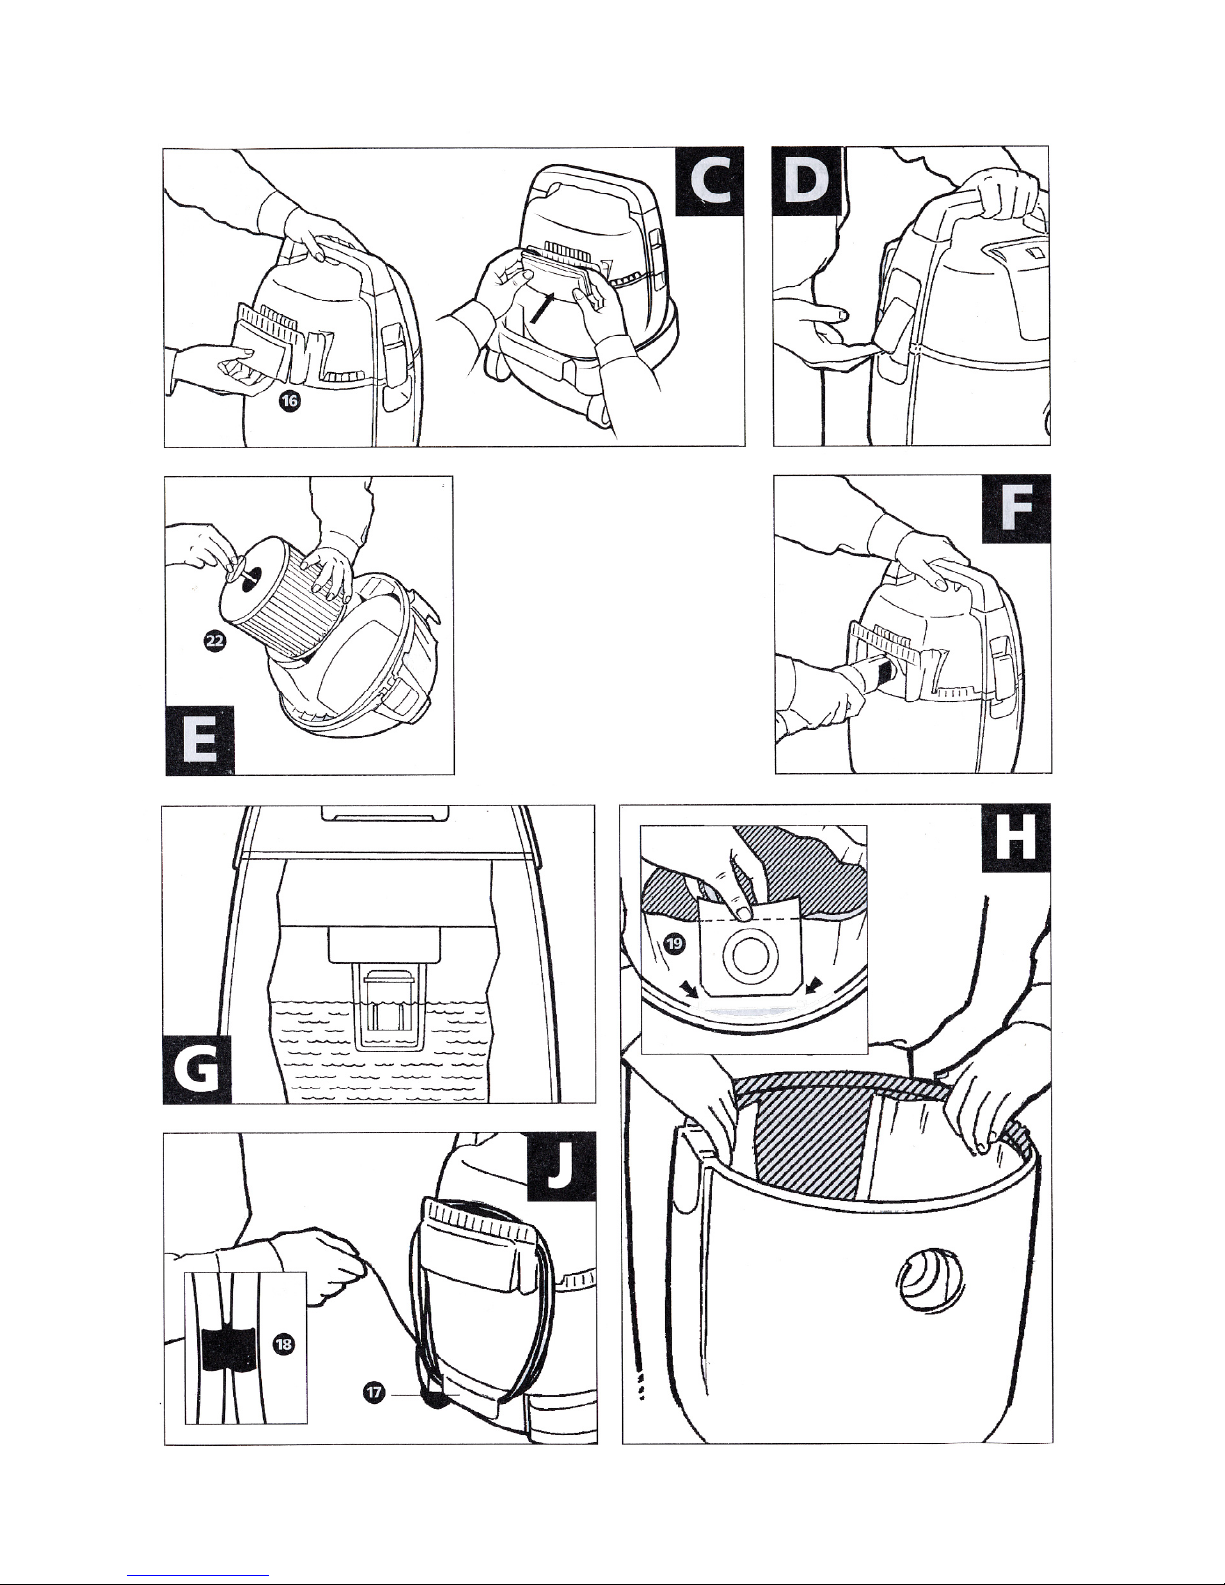
•
•
•
•
••••••••••••••••••••••••••••••••••
•
•
•
•
Introduction
The machine is not intended for use by
persons (incl. children) with reduced
physical, sensory or mental capabilities, or
lack of experience and knowledge, unless
they have been given supervision or
instruction concerning the use of the
machine by a person responsible for their
safety.
Children should be supervised to ensure
that they do not play with the machine.
The packaging components (eg. plastic
bags) could constitute potential dangers
and must be kept out of the reach of
children or animals.
For proper disposal of the packaging follow
local laws.
The machine should be used in accordance
with this manual in order to avoid any
potential danger.
••••••••••••••••••••••••••••••••••
ATTENTION
ATTENTION: the operator must be properly
trained to use the machine.
ATTENTION: the machine must be stored
according to its weight, on a stable surface
and in a closed environment without any
dampness.
ATTENTION: do not use outdoors when
temperatures are low.
ATTENTION: don’t ever point the suction
opening towards delicate parts of the body
- of people or animals - such as eyes, ears,
mouth, etc.
ATTENTION: if the machine is tted with a
supplementary plug, do not exceed the
power reported on the plug.
Non-compliance with this norm could
cause re and damage lethal to the user.
ATTENTION: the machine is not suitable for
areas protected against electrostatic
discharges.
ATTENTION: use only the brushes supplied
with the machine or those specied in the
instruction manual. Using other brushes
could jeopardize safety.
ATTENTION: do not leave the functioning
machine unattended, always remove the
plug from the socket when not using the
machine and store it away from the reach of
children or people who are not conscious of
their actions.
ATTENTION: in case of foam or liquid
discharge switch of immediately.
ATTENTION: in case of tipping over, lift the
machine before switching o.
ATTENTION: when using the machine do
not exceed the power recorded on the
aspirator supplementary accessories plug.
Ensure that the feeding voltage of the
electro-utensil corresponds to that
recorded of the tag of the aspirator’s
technical data. Non-compliance with these
rules could cause re and lethal damages to
the user.
ATTENTION: this machine is not suitable for
collection of dangerous dust. Do not
exhaust toxic, explosive, ammable or
incandescent substances. The maximum
temperature allowed is (40˚C / 104˚F)
(120˚C / 478˚F).
•
•
•
•
•
•
•
•
•
••••••••••••••••••••••••••••••••••
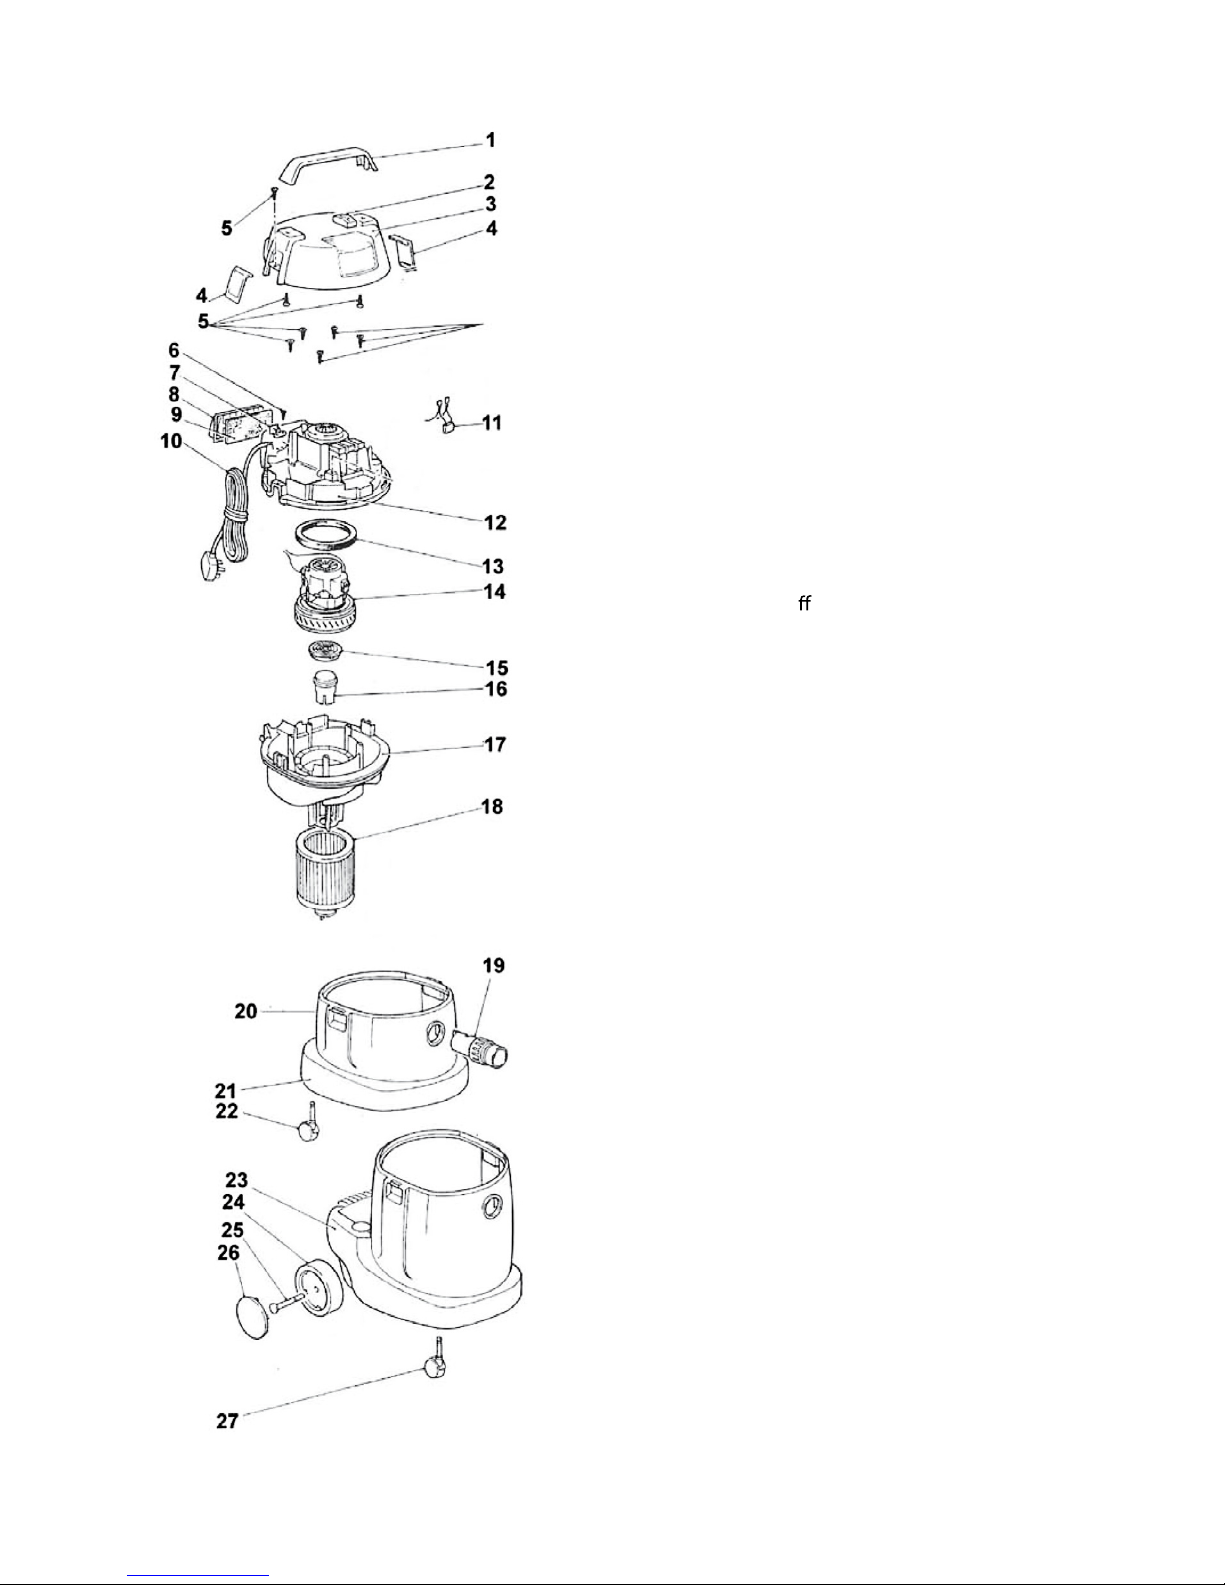
USE
Every part of the machine must be correctly
assembled before using it, ensuring that
the ltering elements have been correctly
and eciently assembled.
The equipment must be used, assembled,
repaired and delivered on a safe and stable
surface.
Ascertain that the values indicated on the
engine block correspond to those of the
network to which you intend to connect
the machine and that the socket is compat-
ible with the plug.
Do not aspire water from containers, sinks,
basins, etc.
Do not aspire aggressive detergents
because they could damage the machine.
Do not aspire materials that could damage
the ltering elements (such as glass, metal,
etc.)
•
•
•
•
•
•