12
B
A
Wall
600
4
3
B
A
600
wall / mur / muur / pared
50 mm
50 mm
4 x
50mm
50mm
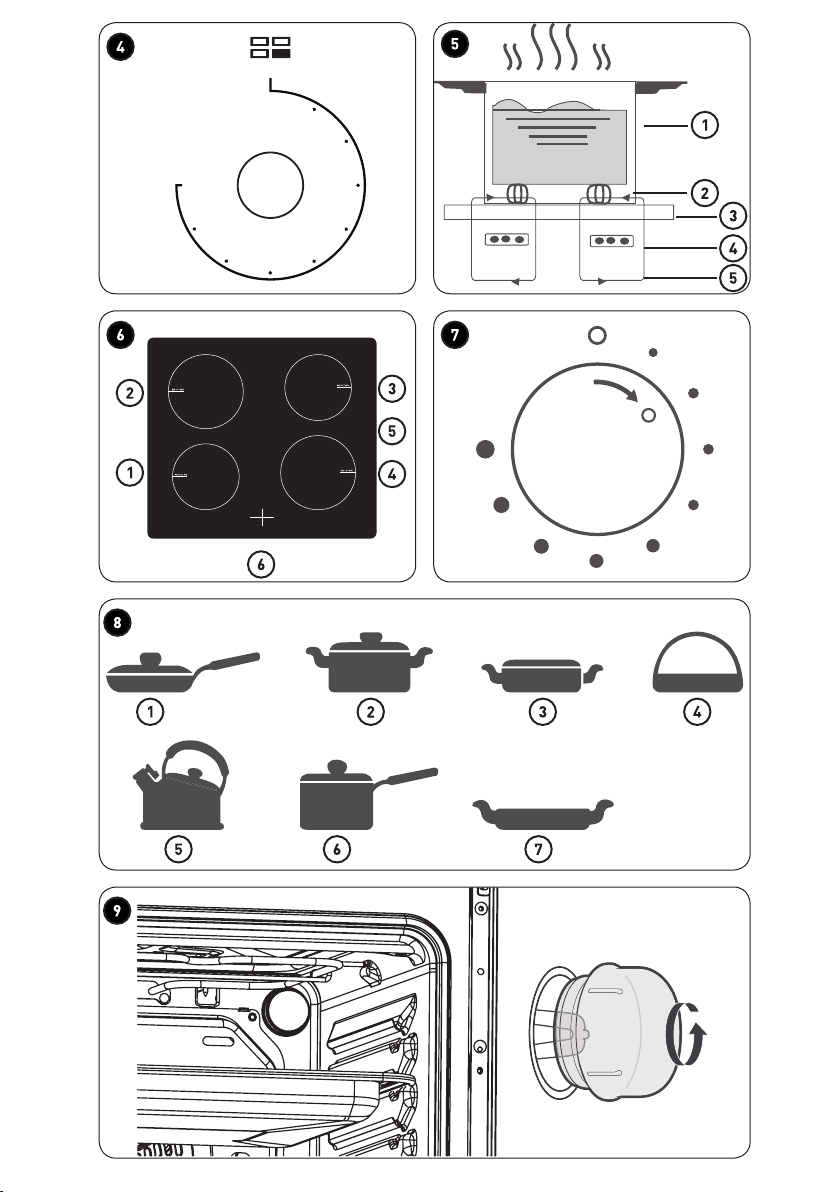
Push
fixing system/
systeme de fixation /
bevestigingssysteem /
sistema de fijación
floor cooker size /dimensions de la
cuisinière au sol /
productafmetingen op de grond /
dimensiones de la cocina en planta
well / mur / muur / pared
Après avoir fixé au sol le support anti-
basculement, poussez la cuisinière
comme indiqué ci-contre. Pour une
installation correcte, le pied arrière
droit doit être clipsé dans le support
anti-basculement.
After securing the anti-tip bracket to
the floor, push the cooker as shown
opposite. For proper installation, the
right rear leg must be clipped into the
anti-tip bracket.
Nadat u de antikantelsteun aan de vloer
hebt vastgemaakt, duwt u het fornuis
in zoals hiernaast weergegeven. Voor
een correcte montage moet de rechter
achtervoet in de antikantelbeugel
worden geklikt.
Después de fijar el soporte antivuelco
al suelo, empuje la cocina tal y como
se indica en la imagen. Para garantizar
una instalación correcta, la pata trasera
derecha debe engancharse en el soporte
antivuelco.