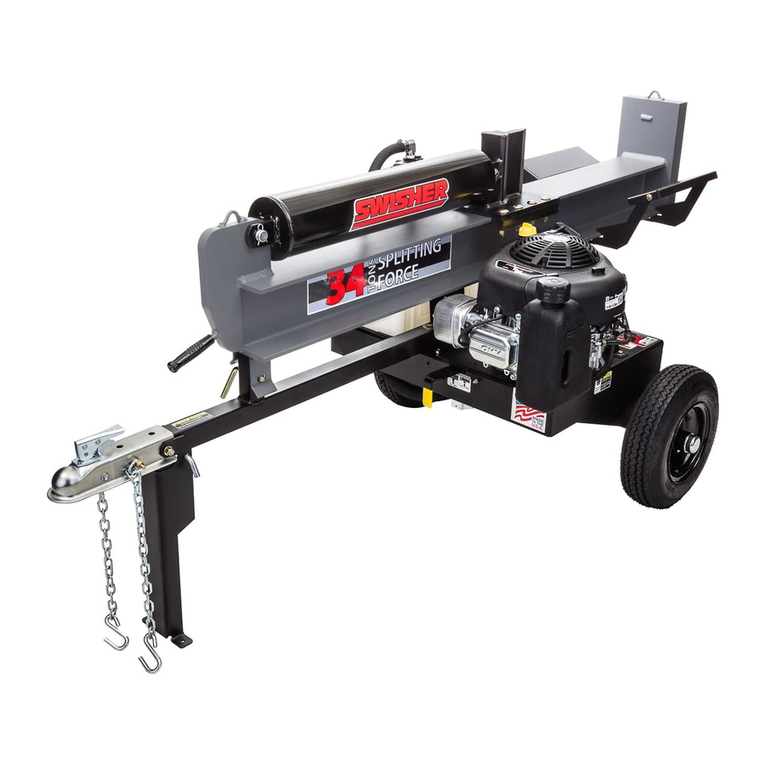
Vari 65715 User manual

FOR YOUR SAFETY
READ AND UNDERSTAND THE ENTIRE MANUAL
BEFORE OPERATING THE MACHINE
MODEL: VARI 11 TON SUPER FORCE
VARI 14 TON SUPER FORCE
SERIAL NUMBER:
Both model number and serial number may be found on the main label.
You should record both of them in a safe place for future use.
Save This Manual for Future Reference
HYDRAULIC LOG SPLITTERS
Instructions for use (Original instructions for use) 2019

2
TABLE OF CONTENTS
INTRODUCTION ........................................................................................................ 2
ENVIRONMENT ......................................................................................................... 2
SYMBOLS .................................................................................................................. 3
SAFETY...................................................................................................................... 4
SPECIFICATIONS...................................................................................................... 8
APPLICATION CONDITIONS .................................................................................... 8
ELECTRICAL REQUIREMENTS................................................................................ 8
CONTENTS SUPPLIED ............................................................................................. 9
ASSEMBLY ................................................................................................................ 9
TRANSPORT ........................................................................................................... 13
DELIVERING LOG SPLITTER TO WORK SITE ...................................................... 14
SPLITTER OPERATION .......................................................................................... 14
FREE A JAMMED LOG............................................................................................ 18
REPLACING OIL ...................................................................................................... 18
SHARPENING WEDGE ........................................................................................... 19
TROUBLESHOOTING ............................................................................................. 20
WIRING DIAGRAM .................................................................................................. 20
HYDRAULIC SYSTEM DIAGRAM ........................................................................... 20
PART LIST ............................................................................................................... 21
DISPOSAL OF PACKAGING AND MACHINE AFTER THE END OF SERVICE LIFE
................................................................................................................................. 23
INSTRUCTIONS FOR ORDERING SPARE PARTS................................................ 24
ADDRESS OF THE MANUFACTURER ................................................................... 24
ADDRESS OF THE IMPORTER AND DISTRIBUTOR ............................................ 24
EC DECLARATION OF CONFORMITY ................................................................... 25
Edition 2019. The manufacturer reserves the right to introduce technical modifications and
innovations, which do not affect the function and safety of the machine. These modifications may not
necessarily be specified in this user manual. Printing errors reserved.
INTRODUCTION
Your new log splitter will more than satisfy your expectations. It has been
manufactured under stringent quality standards to meet superior performance
criteria. You will find your new unit easy and safe to operate, and with proper care, it
will give you many years of dependable service.
Carefully read through this entire operator’s manual before using your
new log splitter. Take special care to heed the cautions and warnings.
ENVIRONMENT
Recycle unwanted materials instead of disposing of them as waste.
All tools, hoses and packaging should be resorted, taken to the local
recycling centre and disposed of in an environmentally safe way.

3
SYMBOLS
The rating plate on your machine may show symbols. These represent important
information about the product or instructions on its use.
Read these instructions in full before using the machine.
Wear safety footwear!
Wear protective gloves!
Wear eye protection!
Wear hearing protection!
Keep your work space tidy!
Untidiness may result in accidents.
Do not remove or tamper with any protection or safety devices.
Dispose of the used oil in an environment-friendly way.
Do not use in the rain.
Danger! Keep clear of moving parts!

4
Do not remove jammed logs with your hands.
Caution! Thrown objects.
Before starting any repairs, maintenance or cleaning, always
disconnect the power.
Avoid injury from the movement of the splitting blade.
Keep bystanders away from the working area.
Do not split wood when machine is transporting.
Do not split wood when machine is leaning.
SAFETY
SAFETY WARNINGS & INSTRUCTIONS
•
UNDERSTAND YOUR LOG SPLITTER
Read and understand the owner’s manual and labels affixed to the log splitter. Learn
its application and limitations as well as the specific potential hazards peculiar to it.
Be thoroughly familiar with the controls and their proper operation.
•
DRUGS, ALCOHOL AND MEDICATION
Do not operate the log splitter while under the influence of drugs, alcohol or any
medication that could affect your ability to use it properly.

5
•
PROTECT YOUR EYES AND FACE
Any log splitter may throw foreign objects into the eyes. This can cause permanent
eye damage. Always wear safety goggles. Everyday eyeglasses have only impact
resistant lenses. They are not safety glasses.
•
EXTENSION CORDS
Improper use of extension cords may cause inefficient operation of the log splitter,
which can result in overheating. Be sure the extension cord is not longer than 10 m
and its section is not less than 2,5 mm
2
to allow sufficient current flow to the motor.
Avoid use of free and inadequately insulated connections. Connections must be
made with protected material suitable for outdoor use.
•
AVOID ELECTRICAL SHOCK
Check that the electric circuit is adequately protected and that it corresponds with
the power, voltage and frequency of the motor. Check that there is a ground
connection. Ground the log splitter. Prevent body contact with grounded surfaces:
pipes, radiators, ranges, and refrigerator enclosures. Never open the switch / plug
box. Should this be necessary, contact a qualified electrician. Make sure your fingers
do not touch the plug’s metal prongs when plugging or unplugging the log splitter.
•
AVOID DANGEROUS CONDITIONS
Always operate your log splitter on dry, solid, level ground. Never operate your log
splitter on slippery, wet, muddy or icy surfaces. The location you choose should be
free from any tall grass, brush or other interferences. There should be plenty of room
for handling, and help the operator stay alert. Keep your work area clean and well
lighted. Cluttered areas invite injuries. To avoid tripping, do not leave tools, logs or
other components lying around the work area. Do not use the log splitter in wet or
damp areas or expose it to rain. Do not use it in areas where fumes from paint,
solvents or flammable liquids pose a potential hazard.
•
INSPECT YOUR LOG SPLITTER
Check your log splitter before turning it on. Keep guards in place and in working
order. Form a habit of checking to see that keys and adjusting wrenches are
removed from tool area before turning it on. Replace damaged, missing or failed
parts before using it. Make sure all nuts, bolts, screws, hydraulic fittings, hose
clamps, etc. are securely tightened. Always check the oil level in the hydraulic oil
tank. Never operate your log splitter when it is in need of repair or is in poor
mechanical condition. Before starting work, test the stopping devices to keep them in
safe working condition.
•
DRESS PROPERLY
Do not wear loose clothing, gloves, neckties or jewellery (rings, wrist watches). They
can be caught in moving parts. Protective, electrically non-conductive gloves, non-
skid footwear and hearing protection are recommended when working. Wear
protective hair covering to contain long hair, preventing it from get caught in
machinery.
6
•
PREVENT FIRES
Do not smoke or have open flames when operating or refilling the log splitter. Never
operate the log splitter near a flame or candle. Oil is flammable and can explode.
•
KEEP BYSTANDERS AWAY
Allow only one person to load and operate the log splitter. Always keep bystanders,
including visitors, children and pets away from the work area, especially when the
log splitter is under operation. Only the operator should stand near the machine and
only within the safe operating area prescribed in this manual. Never use another
people to help you with freeing jammed log. No one under the age of 16 should be
allowed to operate the log splitter. Any individual under the age of 18 should have
the necessary training, skills to perform the functions properly and safely and should
always be under the supervision of adult.
•
INSPECT YOUR LOG
Never attempt to split logs containing nails, wire or debris. Always make sure that
both ends of the log you are splitting are cut as square as possible. This will prevent
the log from sliding out of position while under pressure. Branches must be cut off
the trunk.
•
DON’T OVERREACH
Keep proper footing and balance at all times. Never stand on log splitter. Serious
injury could occur if the tool is tipped or if the cutting tool is unintentionally contacted.
Do not store anything above or near the log splitter where anyone might stand on
the tool to reach it.
•
AVOID INJURY FROM UNEXPECTED ACCIDENT
Do not straddle or reach across the splitting area when operating the log splitter.
Never pile logs to be split in a manner that will cause you to reach across the log
splitter. Only use your hands to operate the control levers. Never use your foot,
knee, a rope or any other extension device. Always pay full attention to the
movement of the wedge ram. Never attempt to load your log splitter while the ram is
in motion. Keep hands out of the way of all moving parts. Never try to split two logs
on top of each other. One of them might fly up and hit you.
•
PROTECT YOUR HANDS
Keep your hands away from splits and cracks which open in the log. They may close
suddenly and crush or amputate your hands. Do not remove jammed logs with your
hands.
•
DON’T FORCE TOOL
It will do a better and safer job at its design rate. Don’t use log splitter for a purpose
for which it was not intended. Do not alter the equipment, or use the equipment in
such a way as to circumvent its design capabilities and capacities. Never try to split
logs larger than those indicated in the specifications table.
•
DISCONNECT POWER
Unplug when not in use, before making adjustments, changing parts, cleaning or
working on the log splitter. Consult technical manual before servicing.

7
•
MAINTAIN YOUR LOG SPLITTER WITH CARE
Before cleaning, repair, inspecting or adjusting, shut off the machine and make
certain all moving parts have stopped. Always clean the unit after each use. Keep
the log splitter clean for best and safest performance. Follow instructions for
lubricating. Inspect all hydraulic seals, hoses and couplers for leaks prior to use.
Control levers and power switch must be kept clean, dry and free from oil and
grease at all times.
•
PROTECT THE ENVIRONMENT
Take used oil to an authorized collection point or follow the stipulations in the
country where the log splitter is used. Do not discharge into drains, soil or water.
•
MAKE THE WORKSHOP CHILDPROOF
Lock the shop. Store the log splitter away from children and others not qualified to
use it.
•
DEAL WITH ACCIDENT
Always have a fire extinguisher and a first aid kit available for use should the need
arise. In emergency always know the location of the nearest phone or keep a phone
on the job site. Also know the phone numbers of the nearest ambulance, doctor and
fire department. This information will be invaluable in the case of an emergency.
•
SPECIAL WARNING
•
The splitting operation of the machine is designed to be activated by one person.
While there is the possibility that additional operators could be working with the
machine (e.g. for loading and unloading), only one operator should activate
splitting operations;
•The machine shall not be used by children;
•Description of functional tests of the machine;
•The installation and maintenance requirements including a list of those devices
e.g. two-hand control device which should be verified, how frequently the
verification shall be carried out and by what method.

8
SPECIFICATIONS
Model
65710
65715
Trade Name
VARI 1
1
TON SUPER
FORCE
VARI 14 TON SUPER
FORCE
Motor (
S6 40 %
)
*
400 V 3~ 50 Hz
3300 W 5,3 A
400 V 3~ 50 Hz
3500 W 7,1 A
Log Size
Capacity
Diameter
10-30 cm
Length
56-104 cm
Maximum Force
11 t ± 10 % 14 t ± 10 %
Hydraulic Pressure
25,5 MPa 24,6 MPa
Hydraulic Oil Capacity
7,0 l 7,5 l
Ram Travel
85 cm
Speed Forward 23,2 cm/s 21,8 cm/s
4,9 cm/s 4,2 cm/s
Retract
6,1 cm/s 5,2 cm/s
Noise Pressure Level (L
pA)
≤80 dB (A)
Vibration
2,5 m/s
2
Overall
Sizes
Length
144 cm 144 cm
Width
133 cm 135 cm
Height
228 cm 228 cm
Weight
172,5 kg 184,9 kg
* S6 40%, continuous operation periodic duty: time of one load cycle is 10 minutes,
operation time at constant load is 4 minutes, operation time at no-load is 6 minutes.
APPLICATION CONDITIONS
This log splitter is designed for operating under ambient temperatures between +5°C
and +40°C and for installation at altitudes not more than 1000 m above M.S.L. The
surrounding humidity should be less than 50 % at 40°C. It can be stored or
transported under ambient temperatures between –25°C and +55°C.
ELECTRICAL REQUIREMENTS
With 3 phase 400 Volt / 50 Hz motor, the log splitter should be connected to standard
400 V ± 10 % / 50 Hz ± 1 Hz electrical supply which has protection devices of under-
voltage, over-voltage, over-current as well as a residual current device (RCD) with
maximum residual current rated at 0,03 A.
The mains connection and extension cable must have 5 wires = 3P + N + PE
(3/N/PE). The mains connection must have maximum 16 A fuse. Electrical
connection rubber cables must comply with IEC 60245, which is always marked with
symbol H 07 RN. Cables should be identified, as it is a legal requirement. The cable
is not supplied with the machine.

9
CONTENTS SUPPLIED
1. Log splitter frame & power station
2. Guard arm
3. Log lift
4. Retaining hook
5. Wheel
6. Wheel axle
7. Support wheel
8. Operator’s manual
9. Hardware bag, including
ASSEMBLY
1. Insert the wheel axle into the
holes of the mount bracket. Slide
the wheels onto the axle and
secure with Ø2x20 split pins from
outside. Attach the wheel caps.

10
2. Keeping the support stand against
the wedge, remove the R-Pin and
bolt to release cylinder. Lower
both control handles to raise the
wedge ram to the top. Insert the
bolt and R-pin to secure the
cylinder.

11
3. Release both control handles to
retract the wedge ram. Remove
the support stand.
4. Align the hole and locking pin of
the guard arm with the mount
bracket. Secure the guard arm
with an M10x30 hex bolt, a
washer and a nut from the
hardware bag.

12
5. Position the retaining hook onto
the frame and secure with two
M10x30 hex bolts and nuts.
6. Position the log lift inside the
mounting bracket and align with
mounting bracket holes. Secure
with an M16x90 hex bolt and nut.
Hook the lift chain to wedge slide
guide.

13
TRANSPORT
Pull the spring pin and slide the
square tube of the support wheel into
the holder. Loosen the spring pin to fix
it after selecting the appropriate hole.
The upper hole is for
transport and lower
hole is only for
storage. Because the
support wheel is
a universal wheel, it
is not stable enough
for transport if
mounted at the lower
hole!
The transporting handle is fixed
upright by the pin with clip for easier
delivery.
Remove the clip and pin. Lower the
handle in the direction of the arrow as
shown and secure it by fixing the pin
with clip to the outer hole.

14
DELIVERING LOG SPLITTER TO WORK SITE
The log splitter is equipped with 2
wheels for minor moving. To move the
log splitter to the work site, grip the
handle (a) to tilt the log splitter slightly
after making sure the oil tank cover is
tightened.
If a crane is used, tie
the rope at the lifting
point below the blue
bundling label, then
hoist the machine
with the crane.
SPLITTER OPERATION
Plan your work site. Work safely and save effort by planning your work beforehand.
Have your logs positioned where they can be easily reached. Have a site located to
stack the split wood or load it onto a nearby truck or another carrier. Position the log
splitter on solid level ground.
Applying a thin coat of grease to the surfaces of the ram before operation will
lengthen the durability of the ram.
Bleed the air out of the hydraulic system
before starting the log splitter. The cover of
the hydraulic oil tank should be loosened by
some rotations until air can go in and out of
the oil tank smoothly.
Air flow thru the oil tank filler should be
detectable during the operations.
Before moving the log splitter, make sure the
cover of the oil tank is tightened to avoid oil
leaking from this point.
FAILED TO LOOSEN THE OIL TANK COVER WILL KEEP THE
SEALED AIR IN HYDRAULIC SYSTEM BEING COMPRESSED
AFTER BEING DECOMPRESSED. SUCH CO
NTINUOUS AIR
COMPRESSION AND DECOMPRESSION WILL BLOW OUT
THE SEALS OF THE HYDRAULIC SYSTEM AND CAUSE
PERMANT DAMAGE TO THE LOG SPLITTER.

15
Turn the motor switch to the ON position to start the log splitter. To stop the machine,
just turn the motor switch to the OFF position.
Make sure the direction of motor
rotation is correct. Turn the motor
on; the wedge ram should rise to
the highest position automatically.
If the wedge ram is already at the
highest position when the motor
starts, grip both control levers and
lower them, the wedge ram should
start to move downward.
If no ram motion is detected after
the motor starts, power off the
motor immediately to change
motor polarity by turning the pole switching device inside the plug with a screwdriver.
400 V 3N
Never allow motor running at counter direction. This will damage
the pump and will void the warranty.
Splitting
1. Place the log vertically on the
support table, so that it lies flat on
its face. Press
the left lever to
lower the
extended log
fixing claw
against the log
to secure it. The
extended log
fixing claw can
be adjusted to fit
logs with
different heights.

16
2. Hold the left press lever.
Meanwhile,
move the
splitter wedge
down by
pressing the
right splitting
lever to the half
stroke to split
the log slowly
first and then
press it to the
end until the log is completely
split.

17
3. Return the splitter wedge to the
starting
position.
Operate the
spring-loaded
retract control
lever to lift
wedge above
the height of
log to be split.
The spring is already connected to the handle in factory.
Splitting Lever
The splitting force and speed are
governed by the splitting lever.
The first half stroke of the splitting lever
is idle speed; press the splitting lever to
the half stroke for maximum splitting
force at slower speed to split the log at
the beginning or particularly hard and
seasoned logs.
Press the splitting lever to the end for
faster speed at less splitting force to
finish the splitting or to split usual logs.
It can be shifted by simply raising and
lowering the splitting lever slightly.
Do not attempt to split green logs. Dry, seasoned logs split much
more easily, and will not jam as frequently as green wood.

18
Break log in the direction of its growing grain. Do not place log
across the log splitter for splitting. It may be dangerous and may
seriously damage the machine.
Do not remove jammed logs with your hands. Never use another
people to help you with freeing jammed log.
Stack as you work. This will provide a safer work area, by keeping it uncluttered, and
avoid the danger of tripping, or damaging the power cord.
Accumulated split wood and wood chips can create a hazardous
work environment. Never continue to work in a cluttered work
area which may cause you to slip, trip or fall.
FREE A JAMMED LOG
Do not remove jammed logs with your hands. If jammed, stop the motor and loosen
the log by a downward stroke on the log with a hammer.
REPLACING OIL
The hydraulic system is a closed system with oil tank, oil pump and control valve.
Low oil levels can damage the oil pump. Check oil level regularly with dipstick. The
oil should be completely changed once a year.
Following hydraulic oils or equivalent are recommend for the log splitter’s hydraulic
transmission system:
SHELL Tellus 22
MOBIL DTE 11
ARAL Vitam GF 22
BP Energol HLP-HM 22
Mogul/Paramo OTHP 3

19
Use a drain pan to aid in the removal of
all used oil and particles.
Remove oil drain plug to drain oil from
the hydraulic transmission system.
Examine oil for metal chips as a
precaution to future problems.
After oil has been completely drained
from the machine, reinstall drain plug.
Add the hydraulic transmission system
with recommended oil through filler plug
opening.
Read dipstick to determine
the maximum and minimum
of the oil level. Low oil can
damage the oil pump.
Overfilling can result in
excessive temperature in the
hydraulic transmission
system.
Apply sealant to filler plug and reinstall it.
Following an oil change, activate the log splitter a few times without actually splitting.
SHARPENING WEDGE
This log splitter is equipped with reinforced splitting wedge which blade is specially
treated. After long periods of operation, and when required, sharpen the wedge using
a fine-toothed file removing any burrs or flat spots on the edge.

20
TROUBLESHOOTING
PROBLEM
PROBABLE CAUSE
REMEDY SUGGESTED
Motor does not start Switch is OFF ON the switch
Incorrect motor rotation
direction Incorrect connection
Change pole switching device
in the plug with a screwdriver
Reverse polarity by
electrician
Log Splitter does not
work while motor
running
Valve is not opened owing to
the connection parts
loosening
Check and tighten the parts
Control Levers or connection
parts bent Repair the bent parts
Lower hydraulic oil level Check and refill hydraulic oil
Log Splitter works with
abnormal vibration and
noise
Lower hydraulic oil level Check and refill hydraulic oil
ATTENTION: ALL REPAIR WORK MUST BE DONE BY A
SPECIALIST FOR THIS PRODUCT.
WIRING DIAGRAM HYDRAULIC SYSTEM
DIAGRAM
This manual suits for next models
1
Table of contents