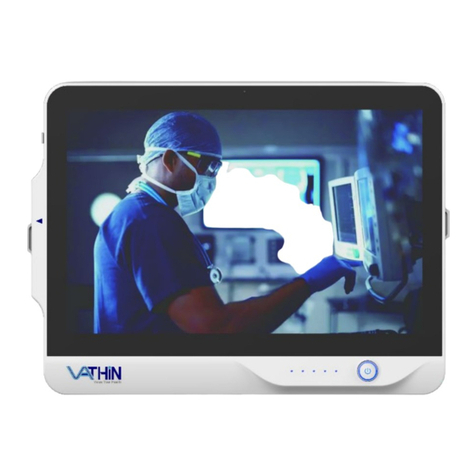
Vathin DVM-A1 User manual

Hunan Vathin Medical Instrument Co., Ltd.
User's Manual
Name
User's Manual of Digital Video Monitor
Page
0/31
No.
QP-DMR-DVM-004
Prepared By
Date
Release Date
Controlled
Status
Reviewed By
Date
Effective
Date
Approved By
Date
Competent
Department
R&D
Department
Version No.: A
Revision No.: 0
Distributed To
Release Notes
Version
No.
Modification
Date
Modification
Description
Prepared/
Modified By
A/0
2020.12.11
New Document

1
le
User's Manual
Digital Video Monitor for
Medical Endoscopes
DVM-A1
DVM-A2
Hunan Vathin Medical Instrument Co., Ltd.
Version No.: A/0
For use by trained clinicians/physicians only.
The product is designed to be used in hospitals.
Suitable for Vathin endoscope.
Always read this manual carefully before using the product.
Please keep this manual and related documents in a safe and accessible place.
Please contact Hunan Vathin Medical Instrument Co., Ltd. if you have any questions or
comments about this manual.

2
Table of Contents
IMPORTANT INFORMATION - READ BEFORE USE...............................................................................................................................3
EXPECTED PURPOSE............................................................................................................................................................................. 3
BASIC PERFORMANCE.......................................................................................................................................................................... 3
REPAIR AND REFIT................................................................................................................................................................................ 3
KEYWORDS........................................................................................................................................................................................... 4
DANGERS, WARNINGS AND CAUTIONS.............................................................................................................................................. 4
APPLICABLE STANDARDS..................................................................................................................................................................... 6
LABELS AND SYMBOLS......................................................................................................................................................................... 7
PRODUCT SPECIFICATIONS AND RECOMMENDED ACCESSORIES...................................................................................................... 8
OPERATING ENVIRONMENT................................................................................................................................................................ 8
STORAGE AND TRANSPORTATION ENVIRONMENT............................................................................................................................8
SPECIFICATIONS....................................................................................................................................................................................9
CHAPTER I PACKING LIST CHECK........................................................................................................................................................10
1.1. Packing List..............................................................................................................................................................10
1.2. Optional Accessories...............................................................................................................................................10
CHAPTER II DENOMINATION AND FUNCTION.................................................................................................................................. 12
CHAPTER III HOW TO USE THE PRODUCT..........................................................................................................................................13
3.1 Preparation, Connection and Inspection................................................................................................................. 13
3.2 Installation, Preparation and Operation of Vathin Electronic Endoscopes.............................................................15
3.3 Operating DVM-A1 Digital Video Monitor...............................................................................................................15
3.4 After Use.................................................................................................................................................................. 21
CHAPTER IV CLEANING, DISINFECTION, STORAGE AND DISPOSAL.................................................................................................. 21
4.1 Cleaning....................................................................................................................................................................21
4.2 Disinfection.............................................................................................................................................................. 22
4.3 Storage..................................................................................................................................................................... 22
4.4 Disposal.................................................................................................................................................................... 22
CHAPTER V TROUBLESHOOTING....................................................................................................................................................... 23
APPENDIX 1. ELECTROMAGNETIC COMPATIBILITY...........................................................................................................................24
APPENDIX 2. WARRANTY AND REPLACEMENT POLICIES................................................................................................................. 27
APPENDIX 3. RECOMMENDED COMBINATIONS OF EQUIPMENT.................................................................................................... 27
APPENDIX 4. INFORMATION ABOUT WIFI ……………………………………………………………………………………………………………………………29

3
Important Information - Read Before Use
Please read this manual carefully before using the Digital Video Monitor for Medical Endoscopes, especially
the safety-related instructions therein. This manual is subject to change without notice. You can request a
copy of the current version of this manual. Please note that no clinical procedure is explained or discussed in
this manual. This manual only provides the basic operations and preventive measures for the Digital Video
Monitor for Medical Endoscopes.
In this manual, the monitor whenever mentioned refers to the Vathin Digital Video Monitor for Medical
Endoscopes, and this manual only applies to the Vathin Digital Video Monitor for Medical Endoscopes. See
relevant manuals for other products from Vathin Medical. For more information, visit www.vathin.com.
The Vathin Digital Video Monitor for Medical Endoscopes is refereed to as the product in this manual.
Expected Purpose
The product is specially designed to be used with Vathin medical endoscopes and other auxiliary equipment
for the purposes of endoscopic diagnosis, treatment and video observation. Never use the product for any
purposes other than those stated in this manual.
Basic Performance
The product is designed to provide images for observation, excluding short-term automatically recoverable
reduction caused by electromagnetic interference.
Repair and Refit

4
The product does not contain any user-repairable components. Never disassemble or refit or attempt to
repair the product, which may cause injury to the patient or operator, damage to the product and/or failure
to achieve the intended purpose. The product can be repaired only by the person authorized by Hunan Vathin
Medical Instrument Co., Ltd.
Keywords
The following keywords are used throughout this manual:
Danger
Indicates an imminently hazardous situation which, if not avoided, will result in death or serious injury.
Warning
Indicates a potentially hazardous situation which, if not avoided, could result in death or serious injury.
Caution
Indicates a potentially hazardous situation which, if not avoided, could result in minor or moderate injury. It
may also be used to warn of unsafe practices or potential damage to the product.
Note
Indicates other useful information.
Dangers, Warnings and Cautions
Failure to observe these dangers, warnings or precautions may result in injury to the patient or damage to the
product. Hunan Vathin Medical Instrument Co., Ltd. shall not be responsible for any system damage or patient
injury caused by the improper use of the product.
Danger
As a BF-type application component, the endoscope connected to the product must not be directly
applied to the heart. The leakage current at the BF-type application component may be very dangerous,
and may cause ventricular fibrillation or severely affect the patient's heart function. Always observe the
following two points.
Do not apply the endoscope connected with the product onto the heart or any area near the heart.
Do not use endoscope treatment accessories or other endoscopes on or near the heart to make it
contact the endoscope connected to the product.
Do not install or use the product under the following conditions:
High oxygen concentration
Presence of oxidants (such as nitrous oxide) or flammable anesthetics in the atmosphere
. Do not use the product in an MRI environment.
. Do not use the product during the defibrillation process.

5
Warning
To avoid the risk of electric shock, do not touch the power socket, the docking connector or the bracket
of the product when using it for patients.
To minimize the risk of contamination, always clean and disinfect the product as specified in Chapter IV
after using it.
To avoid the risk of electric shock, only the appropriately approved medical electrical equipment are
allowed to be connected with the product.
In order to avoid the risk of power supply, the switching power supply with medical certification
specified in the manual should be selected.
When using the product, always protect it from being placed adjacent to or stacked with other
equipment to avoid improper operation. If you have to do so, observe the product and other
equipment first to confirm that they can operate normally.
Always observe the following precautions; or else, patients or medical personnel may be in danger.
When using the product to examine patients, always prevent the metal parts of the endoscope or its
accessories from touching any metal part of other components of the system.
Keep all the electrical equipment away from any liquid. In case of any splash onto the product, stop it
immediately and contact Vathin Medical.
Do not prepare, inspect or use the product with wet hands.
Do not use the product in case of any damage to it or any unacceptable item in the functional
inspection described in Chapter III.
When the lithium battery is replaced, it needs to be returned to the manufacturer and replaced by
professional personnel, otherwise it will cause certain risks

6
Caution
When advancing or retreating a Vathin endoscope, always watch the real-time endoscopic image on the
monitor connected to the product. You should carefully check whether the image on the screen is a
real-time image or a video record, and check that the direction of image meets the expectations.
The use of accessories other than the accessories, sensors or cables specified or provided by the
manufacturer of the product may increase the electromagnetic radiation or reduce the electromagnetic
immunity of the product, and cause improper operation.
When using any portable radio frequency communication equipment (including antenna cables, external
antennas and other peripheral equipment), such equipment should not be placed over 30 cm (12 inches)
away from any part of the product, including the cables specified by the manufacturer; or else, the
performance of such equipment may be impaired.
Do not connect or disconnect the endoscope connector when the product is started; or else, the
endoscope may be damaged.
Do not use any sharp object to operate the screen of the product; or else, the screen may be damaged.
Never apply excessive force to the connector; or else, the product may be damaged.
Always prepare an applicable and immediately available standby system to ensure that treatment
procedure can be continued in the event of equipment failure.
Always keep the product dry when preparing, using and storing it.
Always use the spare parts provided by Vathin Medical. Never refit any spare part.
Always place the power cable in the place where it is unlikely to be stepped on. Do not place any objects
on the power cable.
The real-time imaging of the product may be affected by the use of high-frequency tools inside the
connected endoscope. This phenomenon is not a malfunction. In such a case, just wait a few seconds to
reset the image.
The product is not repairable. In case that the product becomes defective, it should be discarded.
In case of any serious accident arising out of the use of the product, please report it to both the manufacturer
and the competent authority of your country.
Applicable Standards
The Vathin®Digital Video Monitor meets the following standards:
- REGULATION (EU) 2017/745 OF THE EUROPEAN PARLIAMENT AND OF THE COUNCIL of 5 April 2017 on
medical devices
- IEC 60601-1 Medical electrical equipment - Part 1: General requirements for basic safety and essential
performance
- IEC 60601-1-2 Medical Electrical Equipment - Part 1–2 General requirements for basic safety and essential
performance - Collateral Standard: Electromagnetic disturbances - Requirements and tests

7
Labels and Symbols
Symbols
Expression
Symbols
Expression
CE mark, which indicates the
product complies with the Council
Directive 93/42/EEC concerning
medical devices.
Waste bin symbol, which indicates
that the waste of electrical and
electronic equipment (WEEE) must
be disposed of according applicable
local regulations and collection
programs.
Warning
Manufacturer.
Read the user's manual.
Production date, followed by
YYYY-MM-DD.
℞only
Indicates that the product can be
used only with a prescription from a
U.S. physician as required by the
appropriate regulations of USA
Batch number
Authorized representative of the
European Community
Keep dry
Operating environment humidity
limit: 30% to 80%.
Operating environment temperature
limit: –10 °C (14 ℉) to 40 °C (104
℉)
Operating environment
atmospheric pressure limit: 86 kPa
to 106 kPa
Keep away from sun
Product number.
Indicates the manufacturer’s
catalog number for the
identification of medical device.
Electrical Safety Type BF Applied
Part.Part of the application is on
the main device
UL Recognized Component Mark
for Canada and the United States.
Input voltage: 15V DC;
Application of endoscope Ports
High definition multimedia
interface Port
Universal serial bus Ports
wireless local area networks Port

8
Indoor use only mark
Federal Communications
Commission mark
Product Specifications and Recommended Accessories
Model List
NO.
Model
Applicable data line interface
1
DVM-A1
14PIN
2
DVM-A2
16PIN
DVM - A 1
Design version
Technology platform type
DVM: Abbreviation for Digital Video Monitor
Endoscopes: BCV series bronchoscopes produced by Vathin Medical Instrument Co., Ltd..
Operating Environment
Ambient temperature: +10 °C to +40 °C (50–104 °F)
Relative humidity: 30% to 80%
Atmospheric pressure: 86 kPa to 106 kPa
Storage and Transportation Environment
Temperature: -10 °C to +40 °C (14–104 °F)
Relative humidity: 10% to 80%
Atmospheric pressure: 50 kPa to 106 kPa

9
Specifications
The product is designed as the system controller of endoscopic image observation system to display, record
and print endoscopic images. Certain functions described below can only be enabled when the necessary
equipment is connected to the product. For more details, see the user's manuals of the product and other
connected instruments.
Item
Specifications
Function
White balance
Manual
Data record
Videos (MP4)/photos (png)
Memory
64G memory
Language setting
English/ /Français/日本語/中文简体
Time setting
Manual/Internet-based self-calibration
Monitor
12.1"; 1280 × 800; touchscreen
Video output mode
HDMI
Resolution
400x400
Screen brightness
Manual adjustement
Microphone
Used for sound recording; closable
Loudspeaker
Used for sound playing
Wifi
IEEE 802.11 a/b/g/n/ac 2.4G, 5G
LAN connection
IEEE 802.11 1000base-T
USB connection
A-type
Electrical power
Power supply requirement
100–240 VAC; 47–63 Hz; 1.62–0.72 A
Input Power
15VDC,4.2A max
Protection against electric
shock
Type BF, class I
Internal battery
10.8VDC 9000mAh, over 6 h endurance
Dimensions
Length× width × thickness
310 mm × 231 mm × 39 mm
Weight
2140g

10
CHAPTER I PACKING LIST CHECK
Warning:
Check all the items in the package with the components shown below. Check each item for damage. Please
contact Vathin Medical if any component is missing or damaged.
1.1. Packing List
Items
Quantities
Pictures
DVM-A1 (or DVM-A2)Digital
Video Monitor
1 pcs
Monitor cable (HDMI-DVI)
1 pcs
Power cable
1 pcs
Power adapter
1 pcs
USB cable
1 pcs
HDMI cable
1 pcs
User's manual
1 pcs
1.2. Optional Accessories
Items
Quantities
Pictures
U Disk
1 pcs

11
pylons
1pcs
Trolley
1pcs

12
CHAPTER II DENOMINATION AND FUNCTION
1. Power button
Before use, short press the power button to turn on the product, and long press it for 3 seconds
to turn off the product.
2. Power indicator
It is normally ON when the power supply is not connected, while it flashes when the product is
being charged.
3. Microphone
It indicates the position where the sound is received, and this function can be enabled/disabled
in the setting.
4. Display screen
It is used to display the image after the endoscope is connected, and is touchable.
5. WLAM interface
It is used to receive the network cable for connecting to the wide area network.
6. HDMI interface
It is used to connect an external high-definition monitor for display expansion.
7.USB interface 3.0
It is used to connect external devices, such as U disk, scanner, keyboard and mouse.
8. Power jack
It receives 15V DC input, and provides the power supply for the entire system.

13
9. USB 2.0
It can be connected to a PC for image display.
10. Reset button
You can insert a pin into the hole and press the reset button in the hole to restore the factory
settings.*It is recommended to use a φ 1 mm and 10 mm long pin.
11. Video endoscope cable connector socket
The video endoscope cable can be inserted to this socket to connect the video endoscope and
the product.
12. Amplification sound hole
Indicates the position of sound amplification.
13. Bracket
It is used to support the product on a plane surface.
CHAPTER III HOW TO USE THE PRODUCT
3.1 Preparation, Connection and Inspection
Danger:
Connect the power plug of the power cable directly to a grounded wall outlet. Electric shock and/or fire
may be caused if the product is not properly grounded.
Warning:
Do not get the power cable wet; or else, electric shock may be caused.
Do not bend, pull or twist the power cable; or else, electric shock, equipment damage or fire may be
cause.

14
The user must provide a stable power supply for the product. In case of severe fluctuations in the power
supply, a power regulator or UPS power supply should be used for adjustment purpose.
Warning:
All the system components shall be powered off before connecting them. Only appropriate cables can be
used for the product; or else, the product may be damaged or malfunction.
The product can only be connected to a medical display screen that has been qualified as per IEC 60601-1.
The product can be operated only under the conditions that meets the requirements given in "Product
Specifications and Recommended Accessories", "Operating Environment", "Storage and Transportation
Environment" sections; or else, malfunction, impaired safety and/or equipment damage may be caused.
Do not bend, pull, twist or squeeze the cables sharply.
Do not place any equipment on top of the product; or else, the product may be damaged.
Do not install the product near any strong electromagnetic radiation source (e.g. microwave therapy
equipment, shortwave therapy equipment,and MRI); or else, the product may malfunction.
Make sure the product completely dry before connecting the endoscope connector to it; or else, electric
shock or equipment damage may be caused.
When using the product for the first time, please refer to this User's Manual and install the product
according to the following steps. See Chapter II for the positions corresponding to the numbers referenced
below:
3.1.1 Open the product packaging to ensure that all the components are provided. See Chapter I for the
attached components.
3.1.2 Carefully check the product and all the components for damage (and without wear). Never the product
in case of any damage.
3.1.3 Open the bracket (12) of the product and place it on a solid surface.
3.1.4 Connect the power supply to the power adapter and the power jack (8).
3.1.5 Insert the endoscope connector into the endoscope socket (11) properly.
3.1.6 Connect the power cable to the AC power socket.
3.1.7 Short press the power button (1) to turn on the product.
3.1.8 Set the product with reference to Section 3.3.4.
Note: Some key functions need to enter the user password when using,The initial user password of this
product is 123456, you can reset the user password according to the instructions in the manual.

15
3.2 Installation, Preparation and Operation of Vathin Electronic
Endoscopes
See the "User's Manual of Vathin Electronic Endoscopes".
3.3 Operating DVM-A1 Digital Video Monitor
The product can by operated only by a physician who has received clinical endoscopy training. Therefore, no
clinical endoscopy procedure is explained or discussed in this manual. This manual only provides the basic
operations and precautions related to the product.
Warning:
If you suspect the product malfunctions in any time, stop and inspect it immediately. Always follow the
steps given below. Using a defective digital video monitor may cause injury.
If the endoscope image disappears or the image freezes and cannot be restored, turn off the product and
wait for about 10 seconds, and then turn it on again.
If any other abnormality occurs or is suspected, stop using the product immediately, and slowly pull out
the endoscope from the patient according to the user's manual of the endoscope. Then take the remedial
measures as described in Chapter V. If the problem still exists, contact Vathin Medical.
The white balance adjustment is required to restore the original color tone. Every time you replace the
endoscope, be sure to adjust the white balance for accurate color reproduction.
When the loss of built-in power supply under normal working condition will cause the machine to fail to
work normally, the medical electrical equipment must be connected to the appropriate external power
supply.
3.3.1. Power-on: Short press the power button to turn on the product. After the boot animation is over,
the Basic Function interface will appear by default.
3.3.2. Basic function interface: This interface is used mainly for photo-shooting, video recording, white
balance adjustment, patient information editing and other operations.
If no endoscope is connected, the connection prompt animation will appear on the screen, and the function
icons below are grayed out, indicating that all are available.
Once the endoscope is connected, the real-time image will be displayed on the screen, and the icon on
the upper right corner is checked, as shown in the figure below.

16
Description of basic function icons
Icon
Name
Function
Reference
section
Basic function
Icon for the basic function interface
3.2.2
File management
Icon for the file management interface.
3.3.3
System setting
Icon for the system setting interface
3.3.4
Photo-shooting
Tap this button or the Vathin endoscope camera button to
take the image and automatically save it in the patient file.
3.2.2.3
Video recording
Tap this button to start recording video. Tap it again to stop
recording and save the recorded video in the patient file.
3.2.2.4
White balance
The white balance adjustment is required before surgery.
3.2.2.2
Patient
information
Tap it to enter the patient information mode.
3.2.2.1
Photo preview
Tap it to preview the latest images.
3.3.2.3
Microphone
Tap this button, and the microphone function will be
disabled; tap it again, and the microphone function will be
enabled again.
/
Audio volume
Tap this button, and the audio function will be disabled; tap it
again, and the audio function will be enabled again.
/
U-disk
Used to indicate the connection status of U-disk. It will not
appear if no U-disk is connected.
/

17
Memory
Used to indicate the available memory. A prompt will be given
in case of insufficient memory.
3.3.2.5
Battery capacity
Used to indicate the remaining battery capacity.
3.3.2.6
3.3.2.1. Patient information: Tap to enter the Patient Information interface; tap in the input box, and
the keyboard will appear for you to edit the patient information.
In addition to using the touch screen, you can connect an external device through the USB 3.0 interface:
1) You can connect a keyboard and a mouse to operate the product.
2) You can connect a scan head to scan the patient information QRcode/barcode for information entry.
After setting up the patient information, tap "Yes", and the the Basic Function interface will appear
automatically with the patient information displayed on the upper left corner.
3.3.2.2. White balance: If you need to use the product indoors in a hospital, turn on the lighting (with an
intensity not less than 200 lx), and aim the endoscope insertion end at the white gauze. Keep the end
of the endoscope insertion end about 10 mm away from the white gauze. Select the white balance
icon on the screen, and the screen will change accordingly.
Vathin Medical does not provide any accessories (e.g. white cap) for white balance. The physician may use the
white gauze for white balance operations.
3.3.2.3. Photoshooting: Keep the Vathin endoscope as still as possible to prevent obscure images during the
photoshooting. Tap or press the button on the handle of the endoscope for photoshooting,
and the icon will turn red and the screen will flash with a prompt "The photo has been saved
successfully". The image has been updated, and you can tap the preview icon to view it.

18
3.3.2.4. Video recording: Tap the video recording icon to start recording, and the icon will turn red
and a red signal point and the duration prompt will appear on the upper right corner of the
screen; tap again to end the video recording, and the signal point and duration prompt will
disappear from the screen with a text prompt "The video has been saved successfully.
3.3.2.5. Storage path: After photoshooting or video recording, a unique date folder named after the operation
date will be automatically generated.
3.3.2.5.1. If the patient ID is set: A folder named by the patient ID will be automatically generated in the date
folder after photoshooting or video recording. For example, if the operation date is Sept. 17, 2020,
and the patient ID is 12, the file path will be: >2020-09-17>12.
3.3.2.5.2. If the patient ID is not set: A "pictures" folder will be generated in the date folder after
photoshooting, and the file path will be: >2020-09-17>pictures, where all image files are stored in
PNG format. A "medias" folder will be generated in the date folder after video recording, and the
file path will be: >2020-09-17>medias, where all video files are stored in MP4 format.
The photo & video files are named after consecutive numbers in the order of year, month, day, hour, minute
and second.
The maximum allowable length of the video is 90 minutes (i.e. 4GB). Therefore, any video recording over 90
minutes will be automatically stored by splitting into two or more videos. When the available memory is less
than 4GB, a text prompt indicating insufficient memory will appear on the screen.
3.3.2.5. Battery capacity: The battery capacity icon in the lower left corner can display the remaining battery
capacity, which changes depending on the remaining capacity and status of the battery.
When the battery capacity is greater than 20%, this icon is green; when the battery capacity is less than 20%,
it is orange; when the battery capacity is less than 10%, it is red,and a text prompt of insufficient battery
capacity appears on the screen.and a lightning symbol appears in the icon when charging.
3.3.3. File Management interface: Tap the File Management button to enter the File Management
interface. This interface is used mainly for operations such as file viewing, folder editing & deleting, file
moving, and medical record editing, as shown in the figure below.
Description of file management-related icons
Icon
Name
Function
Reference
section

19
File
management
Icon for the file management interface.
3.2.3
File editing
You can tap the icon or long press a folder/file to enter
the selection mode, and then perform multiple selection,
editing, renaming, and deletion operations on the file or folder.
/
Medical record
Used to edit the medical records
/
Save
Used to save the current data
/
Print
Used to print the medical records, where Wifi connection is
required
/
Erase
Used to erase the current data
/
U-disk
You can select and move a file(s) or folder(s) to the U-disk.
This button stays gray if no U-disk is connected, indicating this
function is unavailable.
/
3.3.4. System setting interface: tap to enter the System Setting interface. This interface is used mainly
for setting brightness, audio volume, time, user permissions, network and language, and viewing the
equipment information.
Description of file management-related icons
Icon
Name
Function
Reference
section
This manual suits for next models
1
Table of contents
Other Vathin Medical Equipment manuals