VAUDE PRODUKTSCHULUNG/VAUDE PRODUCT TRAINING 2011 WWW.VAUDE.COM
8
DE EN
FEEDBACK
TIPPS UND TRICKS/TIPS AND TRICKS
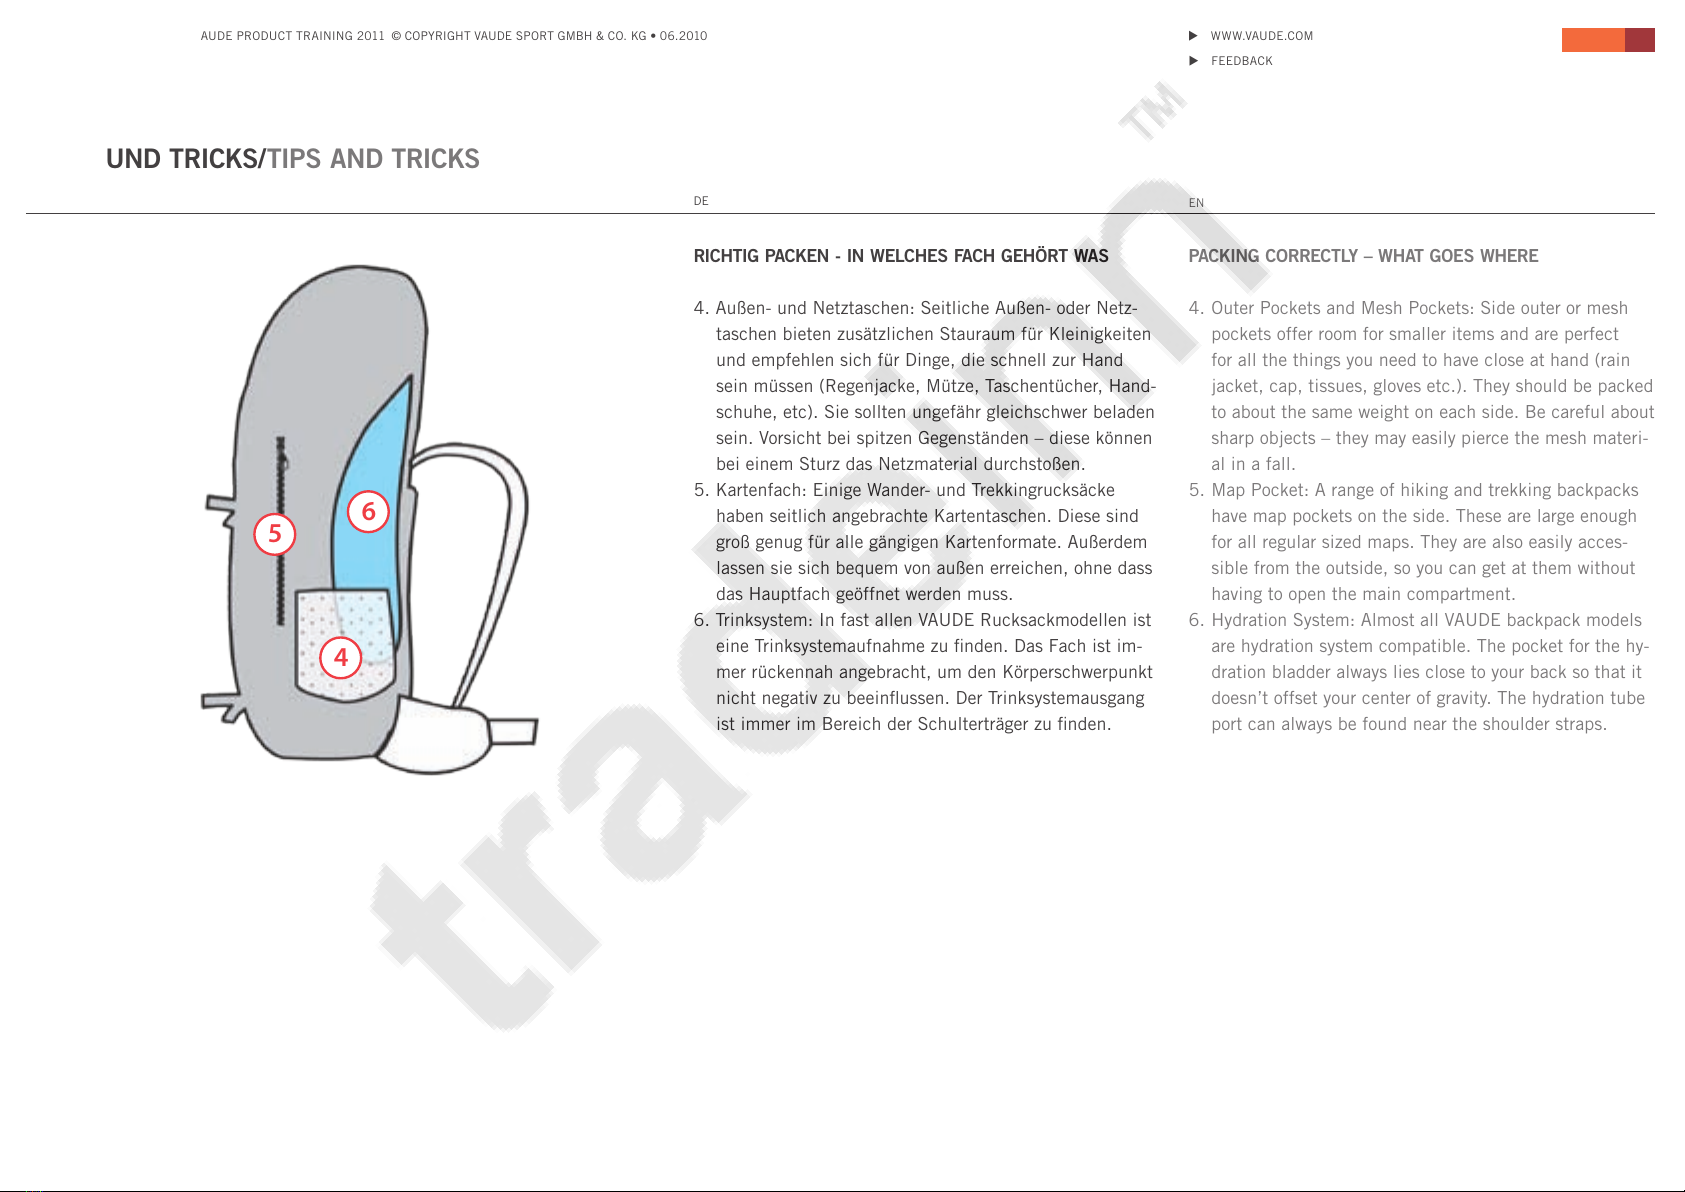
RICHTIG PACKEN - IN WELCHES FACH GEHÖRT WAS
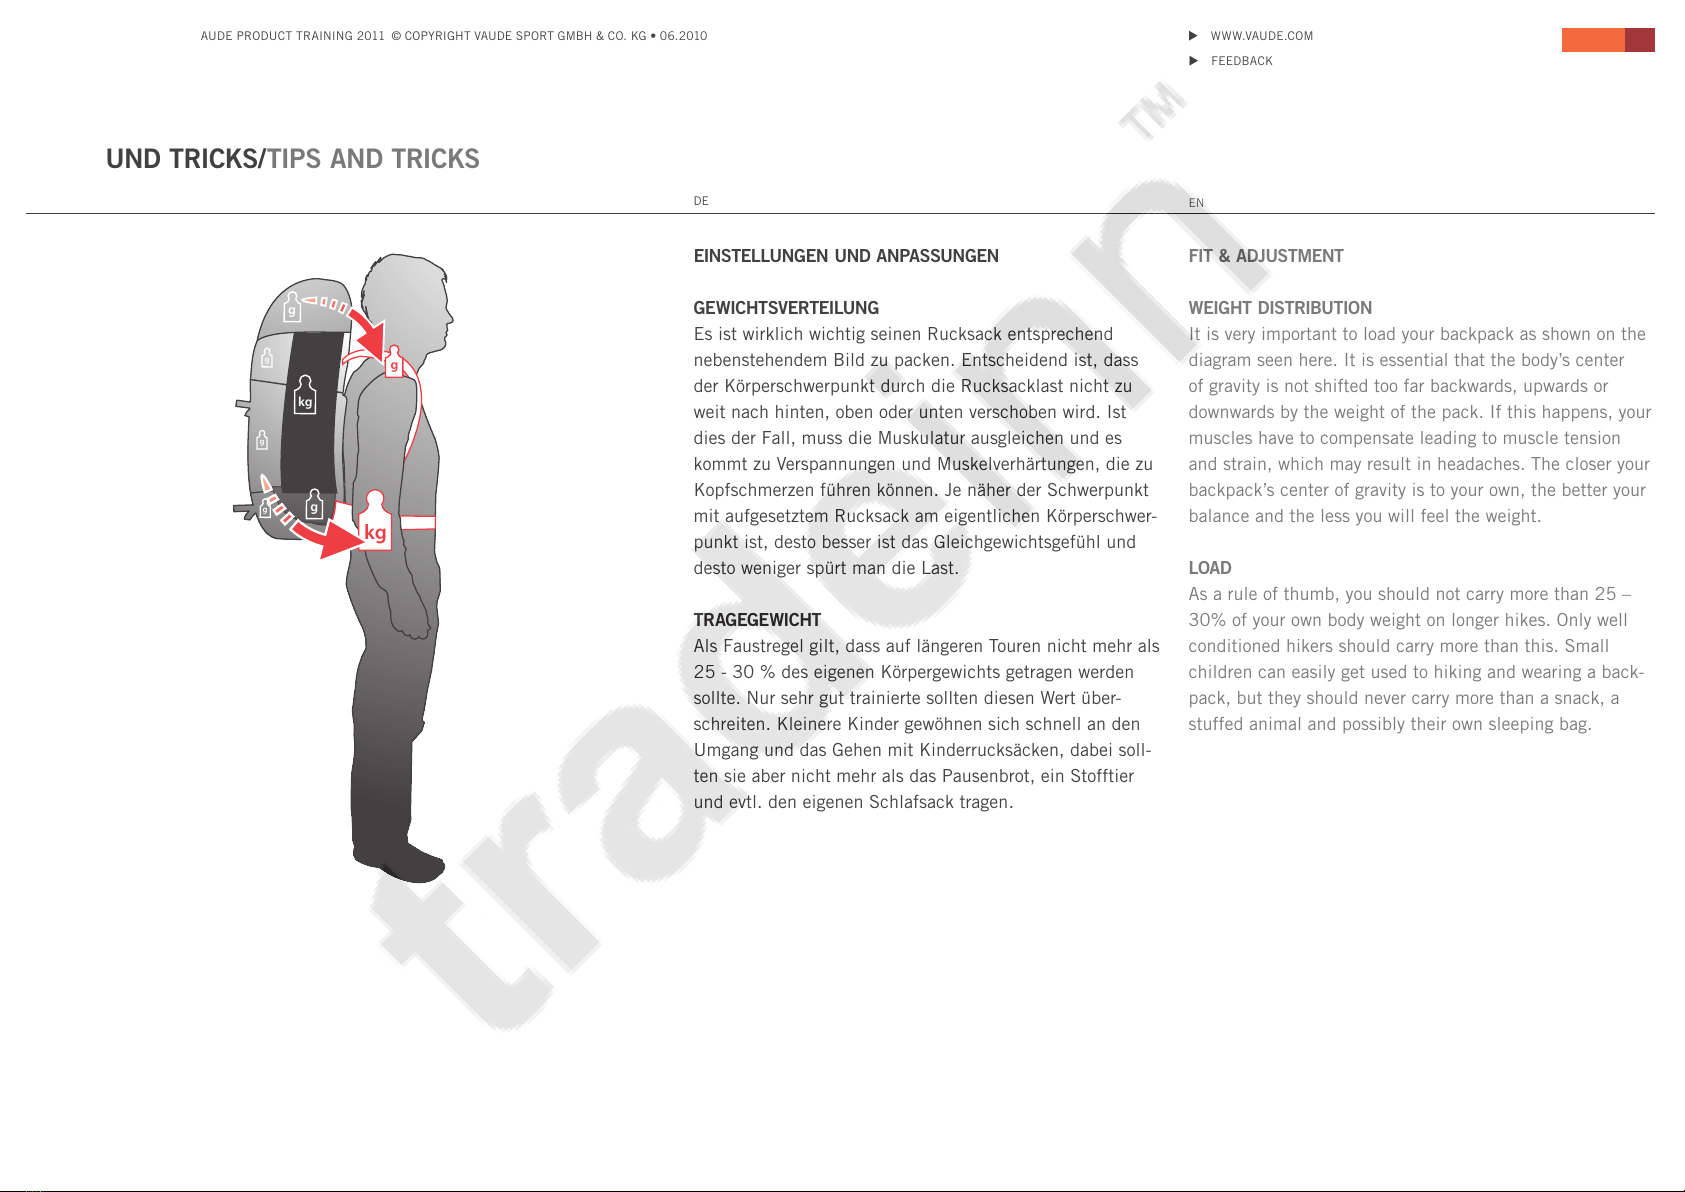
Damit der Rucksack so komfortabel wie möglich auf dem
Rücken sitzt, sollte der Schwerpunkt der Last möglichst
oberhalb des Körperschwerpunkts liegen. Der Körperschwer-
punkt liegt bei den meisten Menschen ungefähr zwischen
Bauchnabel und Hüfte. Deshalb sollten schwere Ausrüs-
tungsgegenstände möglichst nah am Rücken zwischen
Schultern und Bauchnabel transportiert werden. Je näher
der Schwerpunkt mit aufgesetztem Rucksack am eigentli-
chen Körperschwerpunkt ist, desto besser ist das Gleichge-
wichtsgefühl und desto weniger spürt man die Last.
1. Deckelfach: Ein Deckelfach ist ab einer bestimmten Grö-
ße des Rucksacks Standard. Hier gehören alle kleineren
Ausrüstungsgegenstände hinein, die griffbereit sein müs-
sen, z.B. Handy, GPS, Kompass, Taschentücher, Mütze,
Schokoriegel und Erste Hilfe Set. Auf keinen Fall sollte
man schwere, massive Gegenstände, wie etwa eine volle
Trinkflasche im Deckelfach transportieren. Zum einen
wird der Schwerpunkt verlagert, zum andern kann der
schwere Gegenstand gegen den Kopf schlagen.
2. Hauptfach: Beim Packen des Hauptfachs muss tak-
tisch vorgegangen werden: Unten, oben und an den
Seiten sollten leichtere Dinge gepackt werden, z.B.
Bekleidung. In der Mitte und nahe am Rücken sind die
schweren Gepäckstücke zu verstauen, wie z.B. Kletter-
ausrüstung (Karabiner, Keile, Expressen), Zelt, Konser-
ven oder Wasservorrat.
3. Bodenfach: Die meisten größeren Rucksäcke (ab ca. 40
Litern) haben ein vom Hauptfach getrenntes Boden-
fach. Hier können am besten leichtere und voluminöse
Gegenstände verstaut werden, die im Hauptfach zu viel
Platz einnehmen, z.B. der Schlafsack, Schuhe oder ein
Sack mit Schmutzwäsche.
PACKING CORRECTLY – WHAT GOES WHERE
In order to ensure that your backpack fits as comfortably
as possible, the loaded pack’s center of gravity should lie
directly above your own. Most people’s center of gravity
lies somewhere between their waist and hips. Heavy items
should therefore be carried in the middle of the pack, as
close in to the back as possible, and centered between
your shoulder blades. The closer your pack’s center of
gravity is to your own, the better your balance and the less
you feel the weight of the load.
1. Lid Compartment: A lid compartment is standard on
backpacks of a certain size and above. This is where
you pack all small items of gear that need to be close at
hand, e.g. mobile phone, GPS, compass, tissues, cap,
chocolate bars and first aid set. You should never put
heavy, bulky items such as a full water bottle into the
lid of your backpack. For one thing you will shift the
center of gravity up too high, and for another the heavy
object may hit you on your head.
2. Main Compartment: You should take a tactical approach
to packing the main compartment: Lighter items such
as clothing should be packed at the bottom, top and on
the sides. Heavier items such as climbing equipment
(carabiners, wedges, quickdraws), the tent, tinned food
or water supplies should be packed in the middle, close
in to your back.
3. Bottom Compartment: Most larger backpacks (approx.
40 liter or more) have a bottom compartment that is
separate from the main compartment. This is the best
place to store lightweight, bulky items that would take
up too much room in the main compartment, such as a
sleeping bag, shoes or dirty laundry bag.
1
2
3