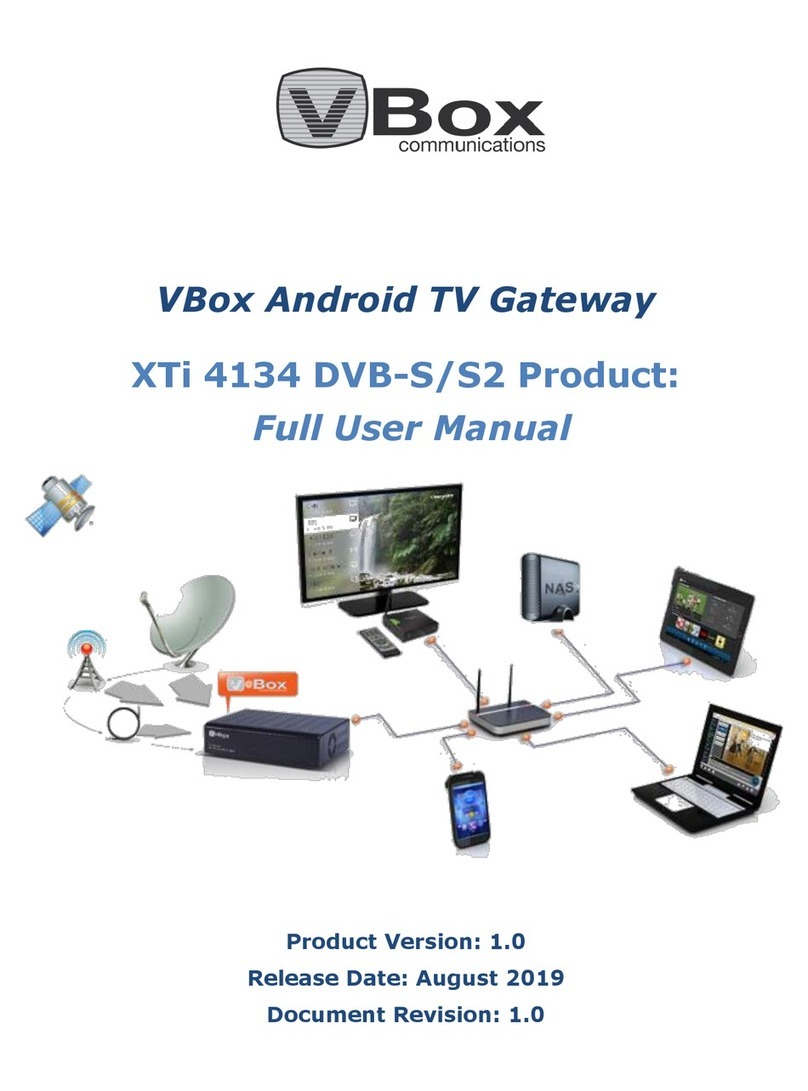
Vbox Communications XLV Ex Series User manual

Quick Guide: Installation, Tuning, and Streaming
Document Revision: 3.0
XLV Express DVB TV Gateway

- 1 -
1INTRODUCTION ..................................................................................................................... 2
2INSTALLATION AND SETUP..................................................................................................... 3
2.1 HARDWARE DESCRIPTION............................................................................................................... 3
2.2 REAR PANELS ............................................................................................................................... 3
2.3 XLV EX-4134 REAR PANEL ............................................................................................................ 4
2.4 XLV EX -4144 &4174 REAR PANEL ....................................................................................................5
3CONNECTING XLV EX TO YOUR HOME NETWORK ................................................................... 6
3.1 PACKAGE CONTENTS...................................................................................................................... 6
3.2 ADDITIONAL REQUIRED EQUIPMENT ................................................................................................6
3.3 INSTALLING THE XTV EX TV GATEWAY DEVICE .................................................................................. 6
3.4 CONFIGURING YOUR ROUTER AND PC TO USE THE UPNPPROTOCOL .................................................... 7
3.5 ACCESSING XTV EX TV GATEWAY USING “MY NETWORK PLACES”.......................................................7
3.6 CHANGING THE ETHERNET CONFIGURATION USING THE HTML INTERFACE ...........................................10
3.7 CHANGE PASSWORD....................................................................................................................13
3.8 UPGRADING THE SYSTEM ............................................................................................................. 14
3.8.1 Verifying Current System, Device and Software Status .....................................................14
3.8.2 Loading New Software........................................................................................................14
3.9 SYSTEM LOGGER .........................................................................................................................17
3.10 SYSTEM RESTORE........................................................................................................................18
3.11 SHUTTING DOWN AND RESTARTING THE SYSTEM .............................................................................18
3.12 SYSTEM RESTART ........................................................................................................................19
4CONFIGURING TUNER...........................................................................................................20
4.1 CONFIGURING THE SATELLITE TUNER DVB-S/S2.............................................................................. 20
4.2 CONFIGURING TUNER PARAMETERS FOR DVB-S2 RECEPTION............................................................23
4.3 CONFIGURING XLV EX-4143 UNICABLE MODELS .............................................................................26
4.4 DISEQCCONFIGURATION.............................................................................................................28
4.4.1 Edit an existing DiSEqC command. .....................................................................................30
4.5 CONFIGURING THE TERRESTRIAL TUNER DVB-T ..............................................................................31
4.5.1 Tuning by Physical (RF) Channel Number........................................................................... 31
4.5.2 Tuning by Center Frequency...............................................................................................34
4.5.3 Scan option.........................................................................................................................35
4.5.4 Start scanning.....................................................................................................................37
4.6 CONFIGURING THE CABLE TUNER DVB-C.......................................................................................38
5STREAMING DVB TO IP .........................................................................................................39
5.1 STREAMING TO A NETWORK .........................................................................................................39
5.1.1 Viewing Streamed TV Broadcasts.......................................................................................41
5.2 MANAGING MULTICAST DISTRIBUTION........................................................................................... 41
5.3 USING CHANNEL LIST OPERATIONS ................................................................................................42
5.4 STREAMING ON DEMAND ............................................................................................................43
5.5 WORKING WITH STREAMING CONFIGURATIONS ...............................................................................44
5.5.1 Saving the Configuration ....................................................................................................44
5.5.2 Loading the Configuration..................................................................................................45
5.5.3 Deleting the Configuration.................................................................................................46

- 2 -
1Introduction
VBox is proud to introduce you to the XLV Ex TV Gateway family. This family of products allows you
to receive DVB-S2 and DVB-T/T2/C/ISDBT/ATSC transmitted television channels and data broadcasts
and to share them with Computers, LPCs, IP-STB and any device connected to the LAN.
This Quick Guide is intended to instruct you on the basic steps required to install the device, tune it to
a DVB-S/S2 transponder or DVB-T/T2/C/ISDBT/ATSC channel, and to configure the streaming
operation. Further instructions and more detailed explanations about these and other processes are
to be found in the XLV Ex User’s Guide.
Note: The XLV Ex individual products vary with regard to the number of free-to-air (FTA) channels
that can be received simultaneously from transponders, the optional reception of restricted
(conditional-access) broadcasts, and the possibility of data casting. Throughout this document, the
term “XLV EX” will be used in general when discussing features common to all members of the XLV
EX- DVB- TV Gateway family. Specific products will be explicitly mentioned when dealing with
features particular to them. The captions used in this document are taken from the XLV EX-4134 and
XLV EX-4144/74 version of the product, which allows unlimited simultaneous access to TV channels
and includes data casting capabilities. Please make sure that the product you purchase conforms to
your needs.
This user is useful for various products from the XLV Ex Family according the following table
Product Name
Supported
Broadcasts
serve users
simultaneously
RF Connectors
XLV Ex-4134
4 Tuner
DVB-S/S2 Satellite
4
4
XLV Ex - 4144
4 Tuner
DVB-T/T2
DVB-C
ISDBT
4
1
XLV Ex - 4174
4 Tuner
ATSC
DVB-T/T2
DVB-C
ISDBT
4
1

- 3 -
2Installation and Setup
2.1 Hardware Description
XLV Ex- Front Panel
2.2 Rear Panels
This section describes the rear panel of each XLV-VBox TV Gateway product:
XLV Ex-4134 Unicable Sanrio Rear Panel
XLV Ex –4144 & XLV Ex-4174 Rear Pane
Item
Description
1
Power LED–indicates whether the system is ready:
Orange–indicates the system is connected to electricity
but is still in the process of being started.
Green–indicates the XLV device is ready for use.
2
STATE LEDs –indicate the traffic status in tuners 1-4:
Steady green light–indicates a locked frequency.
Blinking green light–indicates this tuner is transmitting data.
1 2

- 4 -
2.3 XLV Ex-4134 Unicable Sanrio Rear Panel
The XLV Ex-4134 S2 model includes 4 active RF connectors:
The 4 Tuner can be set independently or as Unicable/SCR
Each one for can be connected to independent satellite feed.
Or operating mode of Unicable/SCR when one RF connector feed for all tuners.
XLV Ex 4134 -Rear Panel
XLV Ex 4134:
Unicable
Multiswitch
Unicable
Multiswitch

- 5 -
2.4 XLV Ex -4144 & 4174 Rear Panel-
The XLV-4144/74 model includes 1 active RF connectors that feeds 4 tuners
XLV Ex-4144/74 Sanrio Rear Panel
XLV Ex-4144/74 operating when one RF connector feed for all tuners.
XLV Ex RF
ConnectorXTi
Unicable RF1
םאתומ םאה
לXLV?
Connector
Tuner
Tuner 1
DVB-S2
Tuner
Tuner 2
DVB-S2
Tuner
Tuner 3
DVB-S2
Tuner
Tuner 4
DVB-S2

- 6 -
3Connecting XLV Ex to your Home Network
3.1 Package Contents
Your package includes the following items:
The XLV VBox TV Gateway device you have chosen
Power adapter
LAN cable
HDMI cable
Bluetooth Voice Remote Control
3.2 Additional Required Equipment
To install the XLV Ex unit you need the following items in addition to the accessories provided:
Satellite dish + coaxial cable with “F” type male connector to connect the device to
the satellite
Terrestrial antenna + coaxial cable with “F” type male connector to connect the
device to the terrestrial input
Cable antenna + coaxial cable with “F” type male connector to connect the device to
the terrestrial input
Interface device: Keyboard + monitor and monitor cable or Laptop(PC station)
Ethernet cable
Unicable device: make sure you have a unicable device connected to your satelite
(see http://en.wikipedia.org/wiki/Single_cable_distribution)
3.3 Installing the XLV Ex TV Gateway Device
To install your device, take the following steps:
1. Connect the Ethernet cable to the network and to the unit’s designated connector.
2. Connect the coaxial cable running from the satellite dish to the unit’s satellite RF-In
connector.
3. Connect the coaxial cable running from the terrestrial antenna to the unit’s terrestrial RF-
In connector.
4. Connect the power adapter to the unit and to the mains. Turn on the XLV Ex unit by pressing the
Power button on its front panel. The Power LED turns green, and the LAN LED blinks
intermittently until it links to the network, upon which it also turns green. Now that the

- 7 -
hardware is ready, your next step is Configuring your Router and PC to Use the UPnP Protocol, as
explained in the following section.
3.4 Configuring your Router and PC to Use the UPnP Protocol
To configure the XLV Ex TV Gateway device using software, you are first required to enable the UPnP
protocol. UPnP automatically discovers all network devices and adds the XLV device to “My Network
Places”.
Proceed as follows:
1. On your router –make sure UPnP is enabled (this is the default setting).
2. On your PC –check if UPnP is enabled. If UPnP is disabled, enable it now as follows:
Windows Vista/7 and up –UPnP is enabled by default: Enable or disable network discovery
Once UPnP is enabled, you can access your XLV device using “My Network Places”, as explained in the
following section.
3.5 Accessing XLV Ex TV Gateway using “My Network Places”
1. Make sure your PC is connected to a router.
2. Connect the router to the XLV device using an Ethernet cable.
3. Turn on the XLV device by pressing the ON/OFF button on its back panel
4. The ON/OFF LED turns orange, indicating that the device is in the process of loading.
When the ON/OFF LED turns green, the XLV device is ready: it is automatically assigned an IP
address and is recognized by the router.
5. Access the XLV device using “My Network Places”:
Windows XP –go to My Network Places (Figure 1), display the network devices list and
click VBox XLVe TV Gateway (vbox_xxxx).
Figure 1: Windows XP –My Network Places showing VBox TV Gateway

- 8 -
Windows 7 –go to Network > Media Devices, right click VBox TV Gateway (vbox_xxxx)
and select View device webpage from the context menu.
Figure 2: Windows 7 –Network Media Devices showing VBox TV Gateway
NOTE: The XTV Ex device’s default name is VBox XLVe TV Gateway (vbox_xxxx), where “xxxx” is the
product’s number. This name appears on devices that are connected to your network and have the
UPnP Protocol enabled. as explained in the next section, you have the option to rename this device
(using the System Name property).The XLV Ex TV Gateway Web interface is displayed, showing its
Welcome page
Figure 3: VBox XLVe TV Gateway interface –Welcome page

- 9 -
6. Click Open Web page button. When prompted for the login and password, input
“webadmin” for both. The following screen displays
Figure 4. System Network Status-
It is also possible to get the XLV Ex IP-adress via the router by looking at the list of the
devices that are connect to the Router
7. Access the XLV Ex unit and set via default IP address
Connect an Ethernet cable from the XLV Ex unit direct to your PC station.
The default IP address of the XLV Ex Ethernet card is 172.16.1.1 and Subnet
Mask 255.255.255.0.
Use a like IP address for your PC station, for example 172.16.1.2 and Subnet
mask 255. 255.255.0
Open a Web browser such as MS Internet Explorer on your PC.
Input the URL as “http://172.16.1.1”.
When prompted for the login and password, input “webadmin” for both. The
following screen displays.

- 10 -
Figure 5. System Network Status
3.6 Changing the Ethernet configuration using the HTML Interface
And Incorporating the XLV Ex into your Network
To change the Ethernet interface configuration using the HTML interface:
1. Select the SYSTEM/NETWORK/Update option. The following screen displays.

- 11 -
Figure 6: System Network Update
2. If your local network administrator instructs you to use DHCP, select the ‘DHCP’ radio
button. If you have been assigned a confeger DHCP or static IP address: select the ‘Static’
or DHCP radio button and input the IP address, subnet mask and Default Gateway
(optional)
This screen is the default entry to the HTML interface.
Note that all HTML interface screens include three different levels of action:
MAJOR TABS: Refer to the row of optionsat the top of the page.
MINOR TABS: Refers to the row of options directly under the major tabs. These
options change depending on the major tab selected.
Options: Refers to the list of options on the left side of the screen. These options
change depending on the major and minor tabs selected.
In all cases, the selected option is highlighted by means of a blue box appearing
behind it. Please note that changes made to the system become effective only
after you click a command button (such as SUBMIT), and not upon mere selection
of the option.

- 12 -
Figure 7. Modify Network Configuration
3. Click the CHANGE NETWORK SETTINGS button to validate the changes. The following screen displays
Figure 8. Activate Network Settings

- 13 -
4. Select “Immediately’ radio button to activate the changes immediately.
5. Click the ‘Activate Network Setting’ button.
Now you are ready to STEP TWO and access XLV EX through your network
(if the XLV Ex will not appear restart the unit by push the power button)
3.7 Change Password
1. It is recommended that you change the system password regularly to prevent security problems.
To change the password used to access the HTML interface, proceed as follows:
2. Select the SYSTEM/MANAGE/Change Password option. The following screen displays.
Figure 9: Change Password –webadmin
3. Input the current password (initially ‘webadmin’).
4. Input the new password twice, in the middle and lower form fields. Verify that the new
password contains 4 to 8 characters.
5. Click the CHANGE PASSWORD button. The message “Successfully changed password for
webadmin” displays. Alternatively, a message indicating failure is shown.
6. Click BACK on the message screen to return to the previous window.

- 14 -
3.8 Upgrading the System
This section describes the steps to take when upgrading the system.
3.8.1 Verifying Current System, Device and Software Status
To check the updated system and software data, access the Status option screen under SYSTEM
/MANAGE
Figure 10: System, Device and Software Information
The information under the Software Versions heading indicates the software type and version
installed as well as the type of unit in use.
3.8.2 Loading New Software
1. Ensure the new software file (extension .ub) is accessible on a disk-on-key or on your
local computer.
2. Select the SYSTEM/MANAGE/Manage Files option. The following screen shows all the
filenames.

- 15 -
Figure 11: Manage Files
3. To upload a new file from your computer to the XLV Ex, input the filename in the
corresponding form field or click the Choose File button to search for the file on your
computer, and click the UPLOAD button.
4. Click the ‘Refresh Directory Listing’ link and ensure that the filename is added to the
directory listing.
5. Select the SYSTEM/MANAGE/Update Software option.The following screen displays.
Figure 12: Update Software License Agreement

- 16 -
6. Carefully read through the license agreement, and do one of the following:
Decline: If you decline to agree to the license agreement, make sure that the ‘I Decline’ radio
button is selected and click the PROCEED WITH UPDATE button. No software is updated and
you return to the SYSTEM/MANAGE/Status screen. Contact your vendor with any questions.
Accept: If you agree with the license agreement, select the ‘I Accept’ radio button and then
click the PROCEED WITH UPDATE button. The following screen displays:
Figure 13: Update Software File
7. Select the radio button for the appropriate software file under the Software Update Files
heading.
8. Click the UPDATE SOFTWARE button. A message displays on screen informing that the
update is in process. Upon successful completion of the process, the following screen
displays:
Figure 14: Successful Software Update
9. As instructed on the screen, wait approximately three minutes and then click the ‘Click
Here’ link. Wait for your browser to connect to the XLV. The SYSTEM/MANAGE/Status
screen displays

- 17 -
3.9 System Logger
1. Select the SYSTEM/MANAGE/System Logger option. The following screen displays.
Figure 15. System Logger
You can set here the Log Level Prints if necessary Debug operations.

- 18 -
3.10 System Restore
Select SYSTEM/MANAGE/System Restore option. The following screen displays.
Figure 16. System Restore
Click Restore button. All the configuration files will restore to the factory default.
3.11 Shutting Down and Restarting the System
To shut down or restart the system, select the SYSTEM/ RESTART tab. The following screen
displays and system will reboot.
Figure 17. System Restart

- 19 -
3.12 System Restart
Follow these steps to restart the system.
1. Select the Restart option. The following screen displays
Figure 18. System Restart
2. Click the RESTART SYSTEM button. The system shuts down and restarts.
3. DVB Configuration
Proper operation of the system requires it to be configured as per your DVB-S and DVB-T
provider’s instructions. To achieve a DVB-S&T connection, the device must be tuned to specific
channels using the information supplied by your DVB-S & T provider. You can tune the device
using the physical Channel Number or its Center frequency number. Follow the instructions
below to configure the device’s tuner in the manner most convenient to you.
This manual suits for next models
3
Table of contents
Other Vbox Communications Gateway manuals