Vela EMA Guide

instruction manual for user - ENGLISH
VELA
EPU
EVD
DISPLAY - ELEGANCE
EMA

142
english
Read carefully
all parts of this manual before using the product.
The espresso coffee machine that you have purchased has been designed and manufactured
with innovative methods and technology which ensure long lasting quality and reliability.
This manual will guide you in discovering the advantages of selecting this product. You will
find information on how to get the best out of your machine, how to always keep it efficient and
what to do if you should have any problems.
Keep this manual in a safe place. If you lose it, you can ask the manufacturer for another copy.
ENJOY YOUR READING … AND YOUR COFFEE
How to use this manual
The manufacturer reserves the right to make any improvements and/or modifications to the
product. We also guarantee that this manual reflects the technical state of the product at the
time it is marketed.
We would like to take this opportunity to invite customers to make any suggestions to improve
the product or the manual.
General warnings
After removing the packaging, check the condition of the appliance. If in doubt, do not use
it but contact the retailer directly.
The packaging material must not be left within the reach of children since it is a potential
source of danger. It is advisable to keep the packaging until after the guarantee has expired.
Before using the machine, make sure that the mains voltage corresponds to the information
on the data plate of the machine.
The installation must be done in accordance with the safety standards in force and by qualified
and trained personnel. Incorrect installation may be harmful to people, property or animals.
This appliance is completely safe only if it is connected to an effective grounding system,
executed as required by current safety standards. The electric system must be equipped with
a suitable differential circuit breaker. It is important to have compliance with these require-
ments checked. If in doubt, have the system carefully checked by qualified personnel. The
manufacturer cannot be considered responsible for any damage caused by an inadequate
electric system.
Upon installation of the machine, qualified personnel will be required to install a main switch
as required by current safety regulations, with a distance of contact aperture greater than
or equal to 3 mm.
It is not advisable to use extensions or electrical adaptors with multiple outlets. If their use is
indispensable, use only simple or multiple plug adaptors and extensions which are in accord-
ance with the safety standards in force. Never exceed the power value in kW indicated on the
simple adaptor and on the extensions and the maximum power value indicated on the adaptor.
The espresso coffee machine is intended for the preparation of hot beverages such as coffee,
tea or warm milk. This appliance is to be used only for its intended purpose. Any other use
is considered improper and therefore dangerous. The manufacturer cannot be responsible
for any damage caused by incorrect and unreasonable use.

ENGLISH
143
english
When using the electrical appliance, several safety standards must be observed:
- do not touch the appliance when hands or feet are wet or damp;
- do not use the appliance in bare feet;
- do not use extensions in rooms where there are showers or baths;
- do not pull on the power cord to disconnect the appliance from the power outlet;
- do not leave the appliance exposed to atmospheric agents (rain, sun, etc.);
- do not allow the appliance to be used by children or the disabled.
Make sure that the machine is used in a room that is sufficiently lit, aerated, and hygienic.
The spaces accessing the machine and the main switch must be left left clear, in order to allow
the user to intervene without any constriction and to be able to leave the area immediately
in the case of necessity.
Do not spray water on the machine to clean it. Clean daily following the instructions given
in this manual.
Before any maintenance, disconnect the appliance from the electrical mains through the
main switch.
For daily cleaning, follow the instructions in this manual.
In case of breakdowns or poor functioning, turn off the appliance and unplug it. Do not at-
tempt any repairs; call for specialised technical service.
Any repairs must be done only by the manufacturer or an authorised service centre using
original spare parts only. If this requirement is not observed, the safety of the appliance is
compromised and the guarantee becomes void.
The power cord of the appliance must not be replaced by the user. If the cord is damaged,
turn the machine off and contact professionally qualified personnel only.
Inside the device is a lithium button battery to prevent programming data loss.
If you should decide not to use the appliance any longer, unplug it and have it drained of
water by qualified personnel.
To guarantee that the machine is efficient and to keep it operating correctly, it is indispensable
to follow the manufacturer's instructions, having periodical maintenance and a check of all
the safety devices performed by qualified personnel.
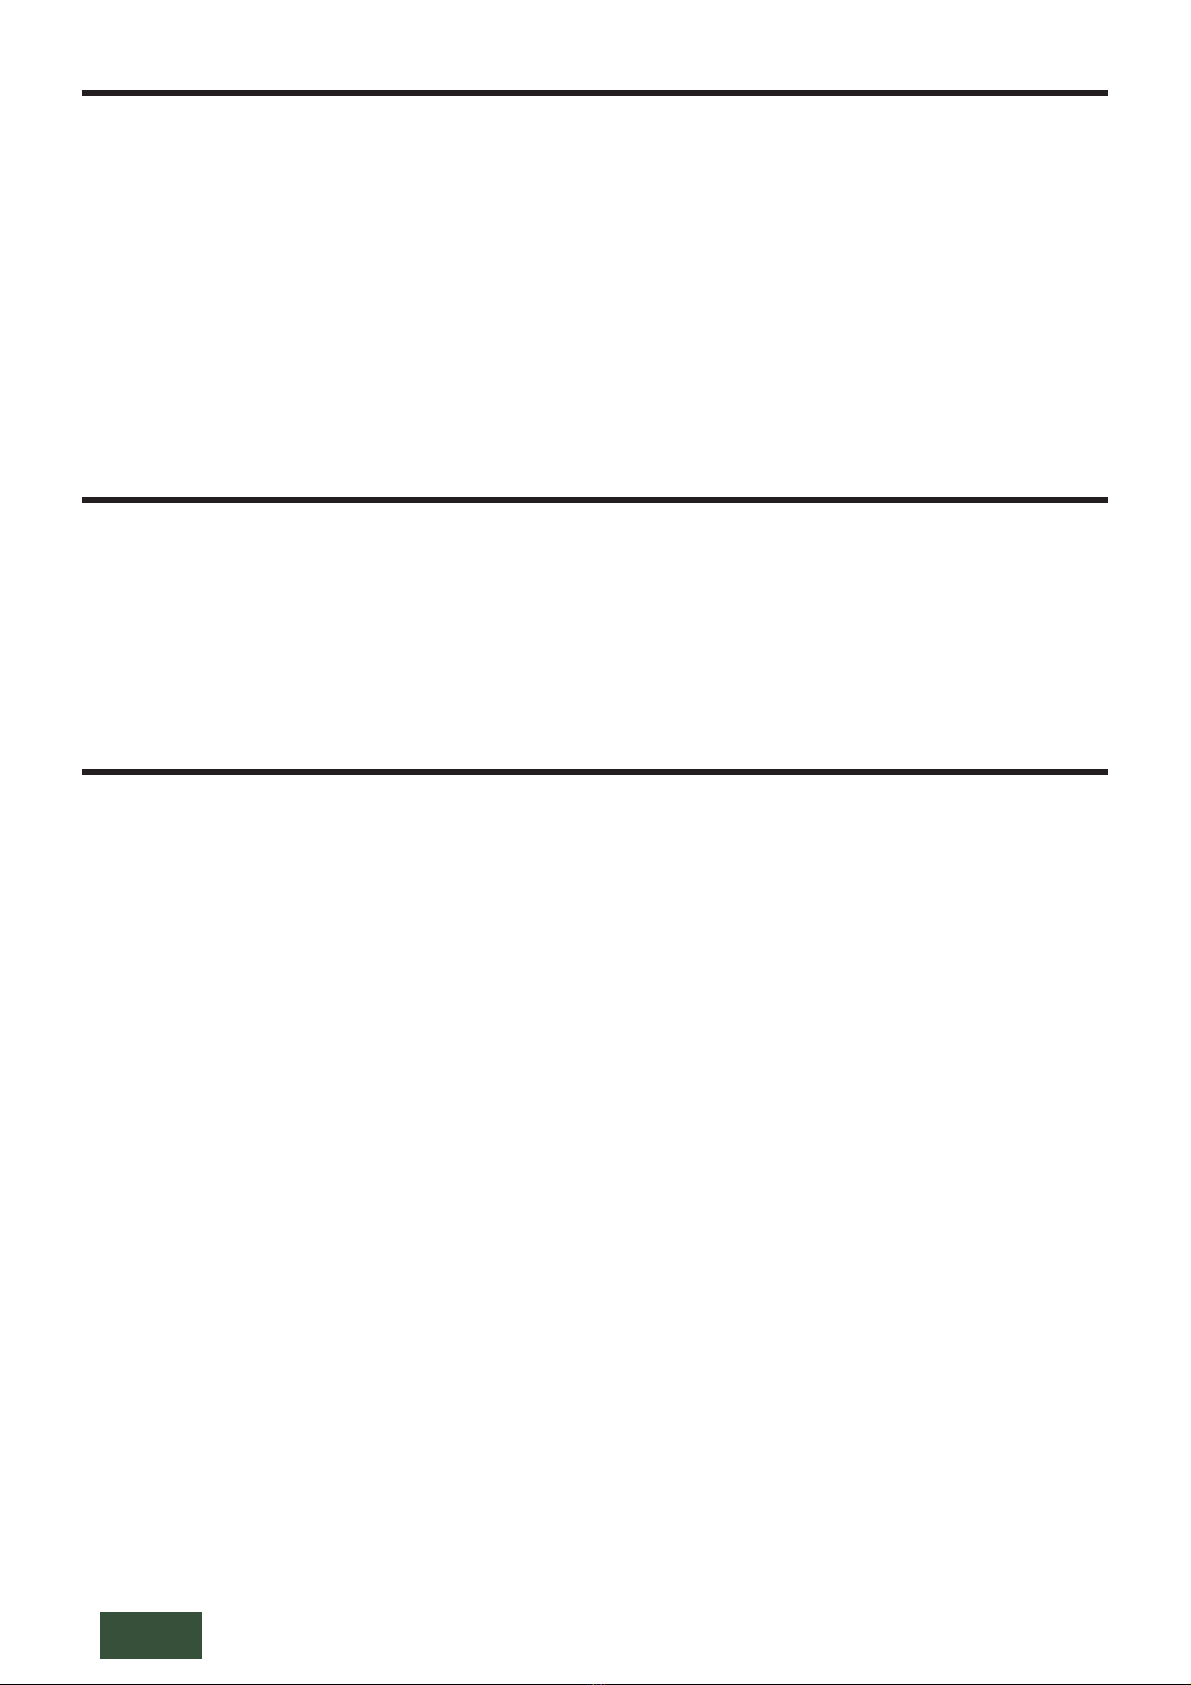
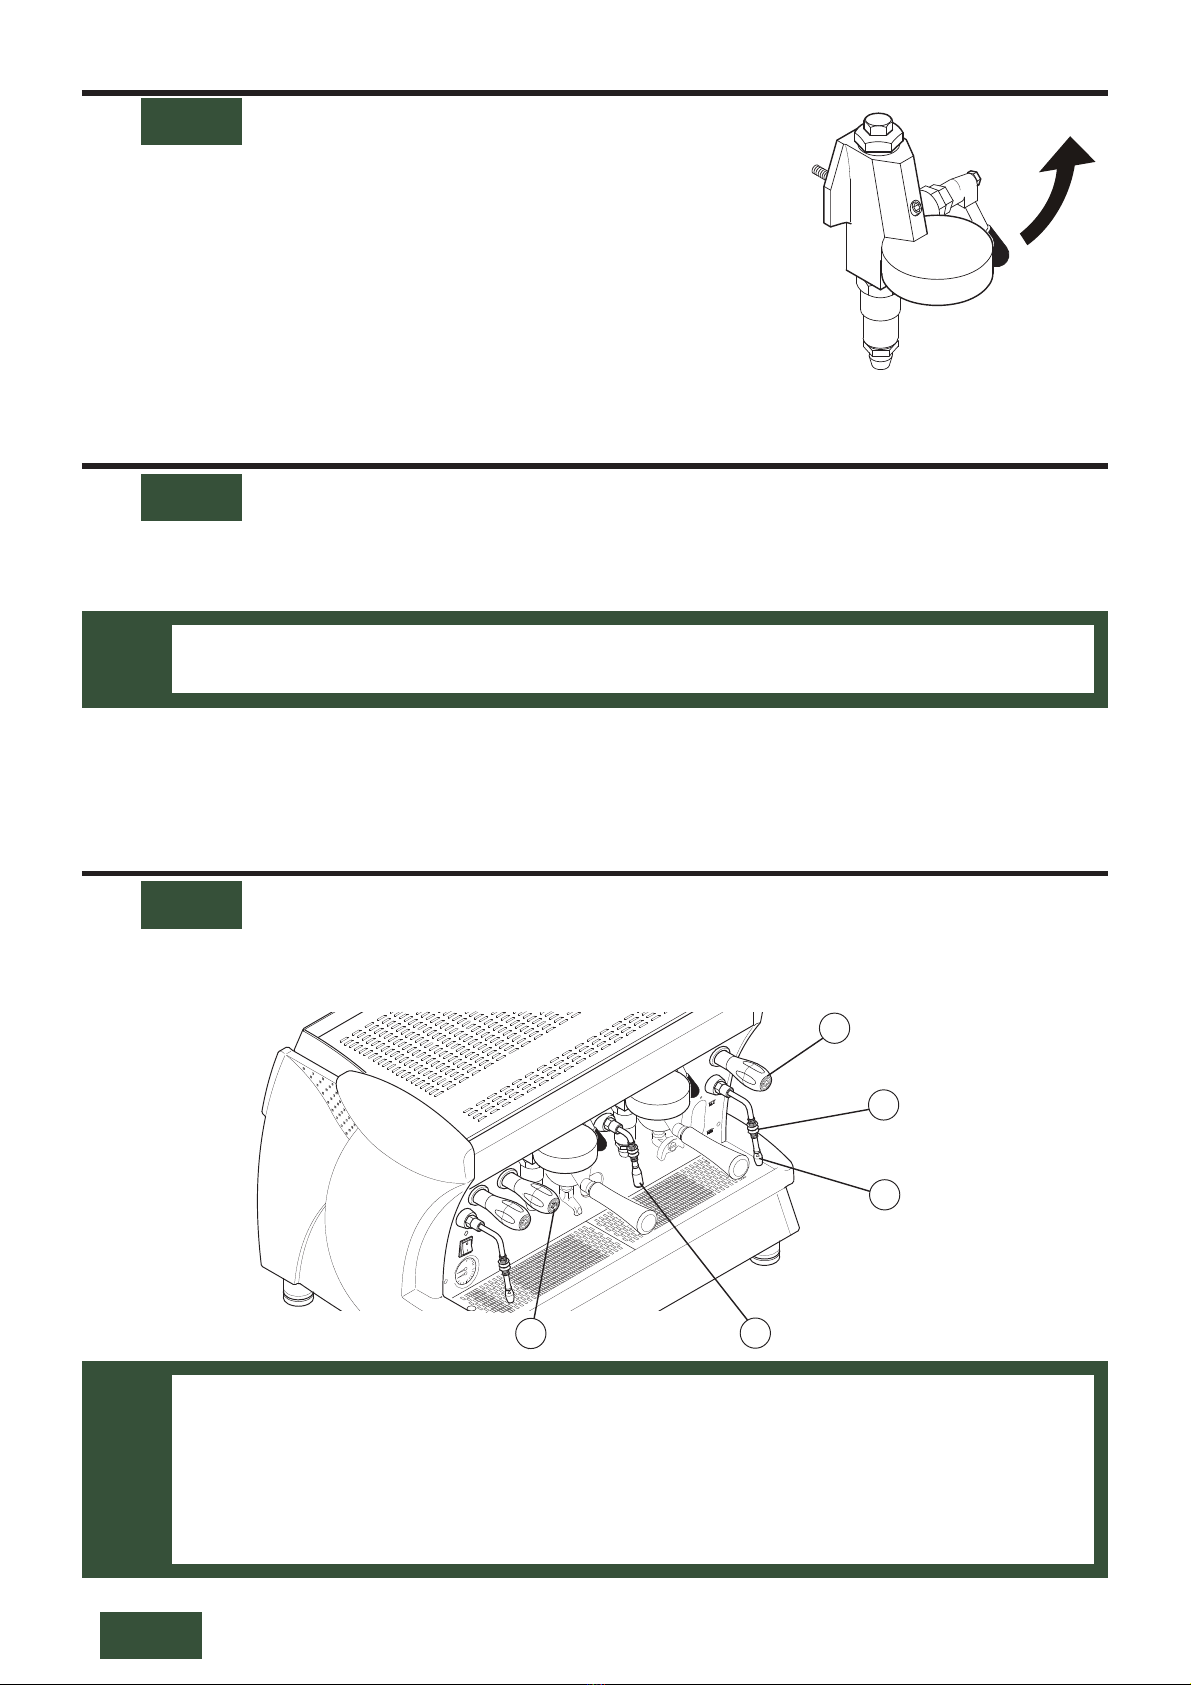
Do not expose your hands or other body parts in the direction of the coffee dispensing spouts
or in the direction of the steam and hot water dispensing terminals. The steam and the water
that exit the nozzles can cause burns.
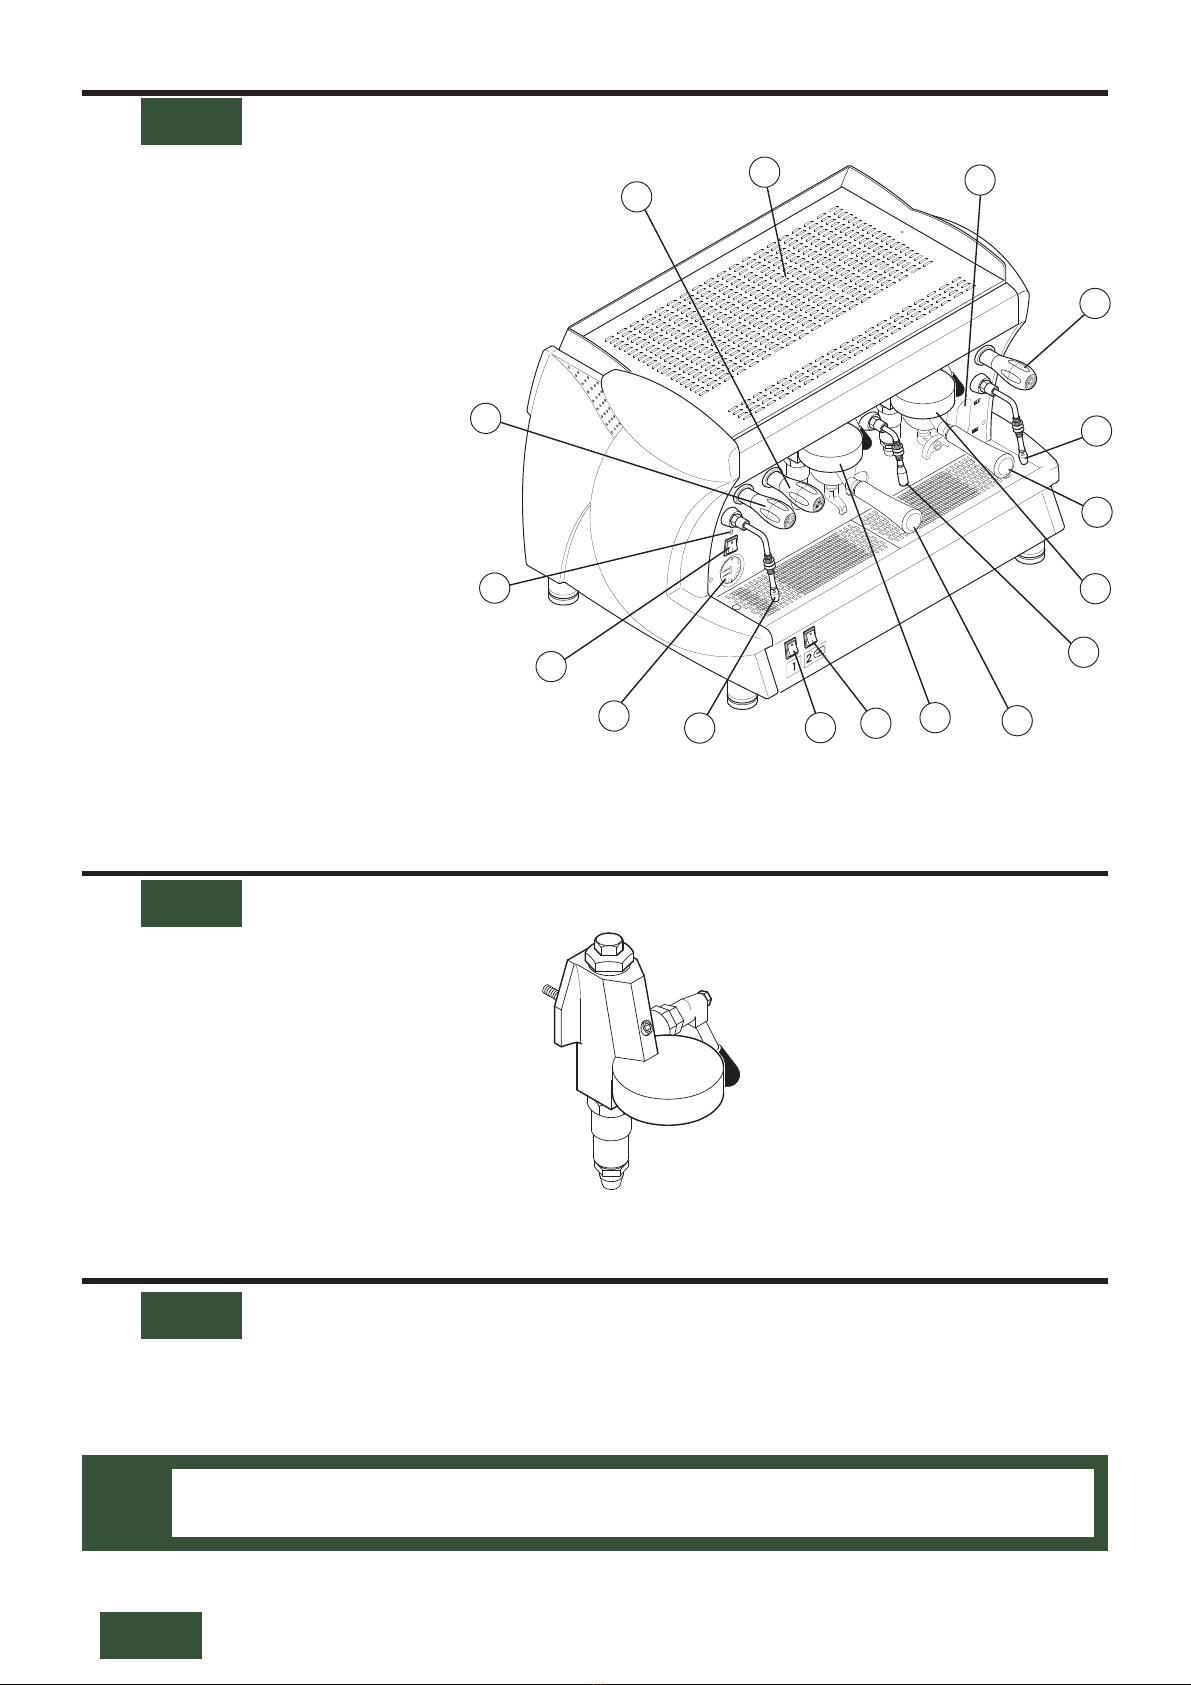
When in operation, the steam and water nozzles and the filter-holder cups are extremely hot
and should be handled with care only in the indicated parts.
Cups must be placed on the special cup-heating surface only after having been thoroughly dried.
The dishes belonging to the machine itself are to be placed on the cup-heater surface. It is
incorrect to place any other object on this surface.
The appliance must not be used by people (including children) with reduced physical, senso-
rial or mental capacities or by people without experience or knowledge, unless they can be
supervised by or receive instructions regarding appliance use from a person who is responsible
for their safety.
Children must be supervised, to make sure they do not play with the appliance.
The coffee machine must be used at a temperature between 5°C and 40°C.
Any unauthorised tampering with any parts of the machine renders any guarantee null and void.
WARNING: consuming beverages that have been prepared in this espresso machine will
expose you to lead, a chemical known to the State of California to cause birth defects or
other reproductive harm.

144
english
Presentation
This product has been manufactured in compliance with the regulations for foodstuff ma-
chinery according to par. 2.1 of Directive 2006/42/EC.
The espresso coffee machine is strictly for professional use only. It is designed for the prepara-
tion of hot drinks such as tea, cappuccinos and long, short and espresso coffee, etc.
If the model has two or more groups, it can be used by two or more people simultaneously.
This characteristic, together with the fact that the machine is able to deliver drinks continuously
without any problems, guarantees its intensive use.
The instructions for a proper use of the machine are provided below.
The user must be sufficiently informed to operate the machine correctly. It is recom-
mended not to carry out any operations on the machine which may modify or alter
its operation.
WHEN THE MACHINE IS IN OPERATION, THE BOILER CONTAINS STEAM
AND HOT WATER UNDER PRESSURE.
i
GUARANTEE
15 months on all components except electrical and electronic components and
expendable pieces.
i
Warnings for the installer
Power
The water supply of the appliance must be carried out with water which is suitable for human consumption,
in compliance with the regulations in force int the place of installation. The owner / manager of the system
must confirm to the installer that the water meets the above listed requirements.
Materials to be used
During the installation of the appliance the components and materials that were provided with the appliance
are to be used. Should the use of other components be necessary, the installer must verify their suitability to
be used in contact with water used for human consumption.

ENGLISH
145
english
After installing the machine, the installer is required to fill in the "Installation Form" that goes
with the machine.
On this form must be met the hygiene and safety requirements in force on the installation site
and must be reported any notes relating to changes or interventions necessary for the proper
functioning of the equipment.
Filled copies of the Installation form must be kept by the user and by the installer until the end
of life of the machine.
In case of withdrawal of the machine, the installer must also provide for the withdrawal of the
user's Installation form.
i
Hydraulic connections
The installer must carry out the hydraulic connections in accordance with the hygiene norms and the
hydraulic safety norms for environmental protection in force in the place of installation.
Installation report
When installation is complete, the appliance has to be started, brought to the nominal working condition
and left for 30 minutes in the "ready to operate" condition.
Afterwards, the appliance has to be turned off and emptied of the first water introduced in the whole
hydraulic circuit, to eliminate possible initial impurities.
Then the appliance must be once again loaded and brought to the nominal working conditions.
After having reached the "ready to operate" condition, the following deliveries have to be performed:
for each coffee unit, carry out a continuous delivery, in order to release at least 0.5 liters of the coffee
circuit. In the case of several dispensing points matched with the same exchanger/coffee boiler, divide the
volume on the base of the number of the dispensing points;
release the whole volume of hot water inside the boiler (3 liters for 1GR, 6 liters for 2GR, 8 liters for
3GR, 11 liters for 4GR), by performing a continuous delivery from the appropriate nozzle. In the case
of several dispensing points, divide the volume on the base of the number of the dispensing points;
Continuously release steam for at least 1 minute for each steam dispensing point;
Maintenance and repairs
After ta maintenance and/or repair intervention, the components used must ensure that the hygiene
and safety requirements initially foreseen for the appliance are still met. These are met by using original
spare parts only.
After a repair or a substitution of components related to parts in direct contact with water and food, a
washing procedure has to be carried out, as in the case of first installation.
Water renewal
In case of breaks longer than 1 week, it is necessary to perform the changing of the 100% of the water
contained in the hydraulic circuits of the machine, by using the appropriate dispensing points, as described
in the Par. "Installation report".

146
english

1. Machine description.................................................................page 148
2. Group EMA..............................................................................page 148
3. Preparation of the machine .....................................................page 148
4. Grinding and dosing coffee .....................................................page 149
5. Turning on the machine ...........................................................page 149
6. Making coffee ...........................................................................page 150
7. Hot water delivery ....................................................................page 150
8. Steam delivery...........................................................................page 150
9. Cup heater.................................................................................page 151
EMA

148
english
EMA
1. Machine description
1. Cup heater surface
2. Boiler level-check window
3. Steam knob
4. Steam nozzle
5. Filter holder
6. Hot water nozzle
7. Group EMA
8.
Heating element power supply switch
9. Service on switch
10. Boiler / pump pressure gauge
11. Cup heater switch
12. Cup heater on light
13. Hot water knob
EMA
The preparation of the machine and the installation operations must be carried out by qualified
personnel only. The installer must strictly follow the indications provided in chap. "Warnings
for the Installer".
Use of the machine without all the installation operations having been carried out
by technical personnel could damage it seriously.
i
EMA
2. Group EMA
EMA
3. Preparation of the machine
13
12
3
4
5
7
75
6
8
4
10 9
11
12
3

ENGLISH
149
english
Place the grinder-doser in a convenient place near the machine. Grinding and dosing of coffee
must take place in accordance with the instructions of the manufacturer of the grinder-doser. To
achieve good quality espresso coffee we suggest the following:
GRQRWNHHSODUJHDPRXQWVRIFRIIHHLQZKROHEHDQV2EVHUYHWKHH[SLU\GDWHLQGLFDWHGE\
the producer;
JULQGWKHYROXPHRIFRIIHHEDVHGRQXVHSODFHWKHDPRXQWWKHGRVHUFRQWDLQVDQGLISRVVLEOH
use it before the end of the day;
LISRVVLEOHQHYHUEX\FRIIHHWKDWLVDOUHDG\JURXQGDVLWH[SLUHVTXLFNO\,IQHFHVVDU\E\LW
in small vacuum-sealed packages.
Fill the filter with a dose of ground coffee (circa 6-7 go.) and press it with the press. Attach
the filter holder to the dispensing group..
To prevent the seal wearing too soon clean the edge of the filter before engaging the
filter holder on the dispensing unit. Do not excessively tighten the filter holder to the
dispensing group
.
i
EMA
GXULQJWKHPDFKLQHVZDUPXSSKDVHURXJKO\PLQXWHVWKHQHJDWLYHSUHV-
sure valve will release steam for a few seconds until the valve itself closes;
EHIRUHXVLQJWKHPDFKLQHUXQGHOLYHULHVGU\ZLWKWKHILOWHUKROGHUDWWDFKHGIRU
a few seconds to release any air which may be in the circuit, so that the delivery
groups are completely heated;
EHIRUHXVLQJWKHPDFKLQHGLVSHQVHDIHZVHUYLQJVRIFRIIHHWRWHVWWKHJULQGLQJ
and to check the operating pressure of the machine.
i
2
1
2SHQWKHZDWHUWDSRIWKHZDWHUPDLQVDQGRI
the softener;
turn ON the services on switch (1)(electrical
power supplied to the pump for automatic
boiler filling and machine services) and wait
for the boiler to be automatically filled with
water;
turn ON heating element power supply switch
(2)(full electrical power supplied, including
the heating element in the boiler) and wait
for the machine to warm up completely.
EMA
5. Turning on the machine
EMA
4. Grinding and dosing coffee

150
english
To dispense steam, turn the tap knob counter-clockwise (3): the steam coming out of the
nozzle (4) will be proportional to the opening of the tap.
EMA
To dispense hot water, turn the tap knob counter-clockwise(1): the hot water coming out of
the nozzle (2) will be proportional to the opening of the tap..
Put the coffee cup under the dispensing spout;
Praise the lever: the coffee starts pouring and can be
stopped bend the lever, when the desired amount of
coffee has been delivered.
EMA
6. Making coffee
EMA
7. Hot water delivery
EMA
8. Steam delivery
Do not touch the hot water nozzle: contact with the hot water may be harmful to
people, animals or property.
i
The use of the steam dispensing point (steam nozzle), must always be preceded by the
performance of the condensation draining operation for at least 2 seconds.
Leave the steam nozzle immerged in the milk only for the time required for heating.
Do not open the steam tap with the steam nozzle immerged in milk while the machine is off.
Carefully operate the steam nozzle using the anti-burn rubber: contact with the steam
may be harmful to people, animals or property.
i
2
1
3
4
5

ENGLISH
151
english
To activate or deactivate the cup heater, turn the cup heater switch placed above the turn
on machine switch (1) to ON.
EMA
9. Cup heater
To adjust the cup heater proceed as follows:
UHPRYHWKHFXSVXSSRUWJULOOH(2);
UHPRYHWKHGULSWUD\(3);
WXUQWKHWKHUPRVWDW(4), the temperature will be in proportion to the value indicated on the
thermostato.
1
4
3
2
0 = cup warmer off
30 = minimum temperature
60 = medium temperature
90 = maximum temperature
EMA


1. Machine description.................................................................page 154
2. Push button panel.....................................................................page 154
3. Preparation of the machine .....................................................page 154
4. Grinding and dosing coffee .....................................................page 155
5. Turning on the machine ...........................................................page 155
6. Making coffee ...........................................................................page 156
7. Hot water delivery ....................................................................page 156
8. Steam delivery...........................................................................page 156
9. Cup heater.................................................................................page 157
EPU

154
english
EPU
1. Machine description
1. Cup heater surface
2. Boiler level-check window
3. Steam knob
4. Steam nozzle
5. Filter holder
6. Hot water nozzle
7. Push button panel
8.
Heating element power supply switch
9. Service on switch
10. Boiler / pump pressure gauge
11. Cup heater switch
12. Cup heater on light
13. Hot water knob
EPU
13
12
3
4
5
6
75
7
8
4
10 9
11
12
3
EPU
2. Push button panel
The preparation of the machine and the installation operations must be carried out by qualified
personnel only. The installer must strictly follow the indications provided in chap. "Warnings
for the Installer".
Use of the machine without all the installation operations having been carried out
by technical personnel could damage it seriously.
i
EPU
3. Preparation of the machine

ENGLISH
155
english
Place the grinder-doser in a convenient place near the machine. Grinding and dosing of coffee
must take place in accordance with the instructions of the manufacturer of the grinder-doser. To
achieve good quality espresso coffee we suggest the following:
GRQRWNHHSODUJHDPRXQWVRIFRIIHHLQZKROHEHDQV2EVHUYHWKHH[SLU\GDWHLQGLFDWHGE\
the producer;
JULQGWKHYROXPHRIFRIIHHEDVHGRQXVHSODFHWKHDPRXQWWKHGRVHUFRQWDLQVDQGLISRVVLEOH
use it before the end of the day;
LISRVVLEOHQHYHUEX\FRIIHHWKDWLVDOUHDG\JURXQGDVLWH[SLUHVTXLFNO\,IQHFHVVDU\E\LW
in small vacuum-sealed packages.
Fill the filter with a dose of ground coffee (circa 6-7 go.) and press it with the press. Attach
the filter holder to the dispensing group..
To prevent the seal wearing too soon clean the edge of the filter before engaging the
filter holder on the dispensing unit. Do not excessively tighten the filter holder to the
dispensing group
.
i
EPU
GXULQJWKHPDFKLQHVZDUPXSSKDVHURXJKO\PLQXWHVWKHQHJDWLYHSUHV-
sure valve will release steam for a few seconds until the valve itself closes;
EHIRUHXVLQJWKHPDFKLQHUXQGHOLYHULHVGU\ZLWKWKHILOWHUKROGHUDWWDFKHGIRU
a few seconds to release any air which may be in the circuit, so that the delivery
groups are completely heated;
EHIRUHXVLQJWKHPDFKLQHGLVSHQVHDIHZVHUYLQJVRIFRIIHHWRWHVWWKHJULQGLQJ
and to check the operating pressure of the machine.
i
2
1
2SHQWKHZDWHUWDSRIWKHZDWHUPDLQVDQGRI
the softener;
turn ON the services on switch (1)(electrical
power supplied to the pump for automatic
boiler filling and machine services) and wait
for the boiler to be automatically filled with
water;
turn ON heating element power supply switch
(2)(full electrical power supplied, including
the heating element in the boiler) and wait
for the machine to warm up completely.
EPU
5. Turning on the machine
EPU
4. Grinding and dosing coffee

156
english
To dispense steam, turn the tap knob counter-clockwise (3): the steam coming out of the
nozzle (4) will be proportional to the opening of the tap.
EPU
To dispense hot water, turn the tap knob counter-clockwise(1): the hot water coming out of
the nozzle (2) will be proportional to the opening of the tap..
Put the coffee cup under the dispensing spout;
Press the desired delivery switch. You will have
the delivery which can be stopped by means of the
same switch once the desired amount of coffee in
the cup is obtained.
Dispensing coffee
EPU
6. Making coffee
EPU
7. Hot water delivery
EPU
8. Steam delivery
Do not touch the hot water nozzle: contact with the hot water may be harmful to
people, animals or property.
i
2
1
3
4
5
The use of the steam dispensing point (steam nozzle), must always be preceded by the
performance of the condensation draining operation for at least 2 seconds.
Leave the steam nozzle immerged in the milk only for the time required for heating.
Do not open the steam tap with the steam nozzle immerged in milk while the machine is off.
Carefully operate the steam nozzle using the anti-burn rubber: contact with the steam
may be harmful to people, animals or property.
i

ENGLISH
157
english
To activate or deactivate the cup heater, turn the cup heater switch placed above the turn
on machine switch (1) to ON.
EPU
9. Cup heater
To adjust the cup heater proceed as follows:
UHPRYHWKHFXSVXSSRUWJULOOH(2);
UHPRYHWKHGULSWUD\(3);
WXUQWKHWKHUPRVWDW(4), the temperature will be in proportion to the value indicated on the
thermostato.
1
4
3
2
0 = cup warmer off
30 = minimum temperature
60 = medium temperature
90 = maximum temperature
EPU


1. Machine description.................................................................page 160
2. Push button panel.....................................................................page 160
3. Preparation of the machine .....................................................page 161
4. Grinding and dosing coffee .....................................................page 161
5. Turning on the machine ...........................................................page 161
6. Making coffee ...........................................................................page 162
6.1 Programming coffee doses................................................page 162
6.2 Delivery of coffee doses....................................................page 162
7. Hot water delivery ....................................................................page 163
7.1 Hot water programming ..................................................page 163
7.2 Hot water delivery ............................................................page 163
8. Steam delivery...........................................................................page 164
9. Cup heater.................................................................................page 164
EVD

160
english
1
Espresso coffee
2
Espresso coffees
1
Medium coffee
2
Medium coffees
1
Long coffee
2
Long coffees
Prog / Stop
Hot water
1. Cup heater surface
2. Boiler level-check window
3. Steam knob
4. Programming key
5. Steam nozzle
6. Filter holder
7. Push button panel
8. Hot water nozzle
9. Services push button panel
10. ON switch
11. Pressure gauge
12. Cup heater switch
13. Cup heater on light
EVD
EVD
1. Machine description
EVD
2. Push button panel
12
3
4
5
6
7
8
6
9
7
10
5
11
12
13
3
This manual suits for next models
3
Table of contents
Popular Coffee Maker manuals by other brands

Silvercrest
Silvercrest SEMS 1100 A1 operating instructions

Unit
Unit UCM-870 instruction manual

BLACK DECKER
BLACK DECKER CM3005S use and care manual

Francis Francis
Francis Francis illy Y5 Milk Quick start guide and warranty

SEVERIN
SEVERIN KV 8090 operating instructions

Mr. Coffee
Mr. Coffee AR12 user manual