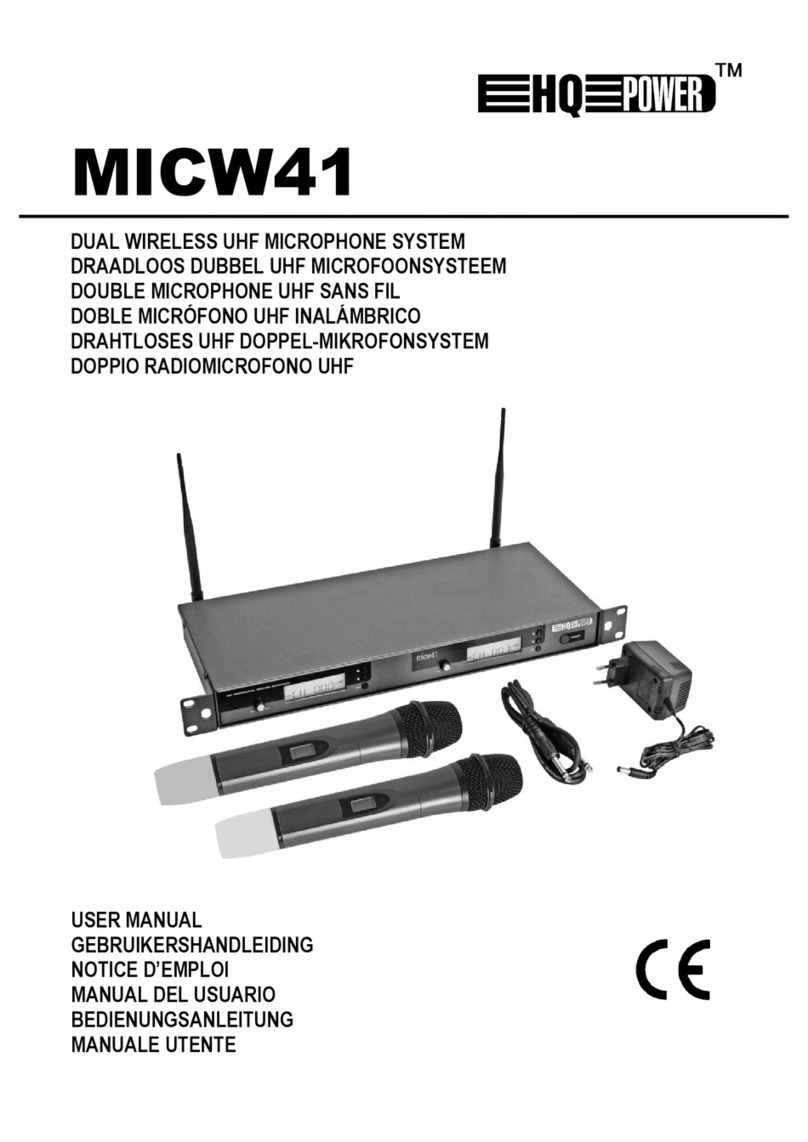
Velleman AVMOD18 User manual

AVMOD18
5.8GHz A/V WIRELESS TX/RX
DRAADLOZE A/V ZENDER/ONTVANGER 5,8 GHz
ÉMETTEUR/RÉCEPTEUR A/V SANS FIL 5,8 GHz
EMISOR-RECEPTOR A/V INALÁMBRICO DE 5.8GHz
5.8GHz A/V DRAHTLOSER SENDER/EMPFÄNGER
BEZPRZEWODOWY NADAJNIK-ODBIORNIK A/V 5,8GHz
USER MANUAL 5
GEBRUIKERSHANDLEIDING 10
NOTICE D’EMPLOI 15
MANUAL DEL USUARIO 20
BEDIENUNGSANLEITUNG 25
INSTRUKCJA OBSŁUGI 30

AVMOD18
19.02.2010 ©Velleman nv
2
1
2
3
4

AVMOD18
19.02.2010 ©Velleman nv
3
5
Transmitter -
6
Receiver -

AVMOD18
19.02.2010 ©Velleman nv
4
7
8

AVMOD18
19.02.2010 ©Velleman nv
5
USER MANUAL
1. Introduction
To all residents of the European Union
Important environmental information about this product
This symbol on the device or the package indicates that disposal of the
device after its lifecycle could harm the environment. Do not dispose
of the unit (or batteries) as unsorted municipal waste; it should be
taken to a specialized company for recycling. This device should be
returned to your distributor or to a local recycling service. Respect the
local environmental rules.
If in doubt, contact your local waste disposal authorities.
Thank you for choosing Velleman! Please read the manual thoroughly before bringing
this device into service. If the device was damaged in transit, don't install or use it
and contact your dealer.
2. Safety Instructions
Keep this device away from children and unauthorized users.
Always disconnect mains power when the device is not in use or when
servicing or maintenance activities are performed. Handle the power
cord by the plug only.
There are no user-serviceable parts inside the device. Refer to an
authorized dealer for service and/or spare parts.
3. General Guidelines
Refer to the Velleman®Service and Quality Warranty on the last pages of this
manual.
Indoor use only. Keep this device away form rain, moisture,
splashing and dripping liquids. Never put object filled with liquid on
top.
Keep this device away from dust and extreme heat. Make sure the
ventilation openings are clear at all times. For sufficient air
circulation, leave at least 1” (±2.5 cm) in front of the openings.
Protect this device from shocks and abuse. Avoid brute force
when operating the device.
•Familiarise yourself with the functions of the device before actually using it.
•All modifications of the device are forbidden for safety reasons. Damage caused
by user modifications to the device is not covered by the warranty.
•Only use the device for its intended purpose. Using the device in an unauthorised
way will void the warranty.

AVMOD18
19.02.2010 ©Velleman nv
6
•Damage caused by disregard of certain guidelines in this manual is not covered by
the warranty and the dealer will not accept responsibility for any ensuing defects
or problems
4. Features
•wireless transmission of A/V signals through walls and between rooms
•uses 5.8GHz frequency which gives less interference with other wireless
products than the 2.4GHz frequency
•3 video inputs; connect 2 A/V transmitting devices simultaneously.
•comes with: 2 x SCART to RCA A/V cable, 1x SCART to 3.5mm jack, IR
extender cable and 2 power adapters
•optional video cables: AVB020/2.0, AVB020/5.0, AVW084, AVW084G, AVW085,
AVW085
5. Overview
Refer to the illustrations on page 2 of this manual.
1 - front view
A 5.8 GHz antenna (folded upwards)
B channel selector switch
C channel indicator
D stand
E A/V input (transmitter only)
2 - rear view
F infrared remote output (transmitter only)
G S-video connector
H RCA video connector (yellow)
I RCA audio connector R (red)
J RCA audio connector L (white)
K power connector (9VDC/300mA)
3 – top view
L ON/OFF switch
4 – side view
see explanation above
6. Installation
Refer to the illustrations on pages 2, 3and 4 of this manual. Make sure all devices
are disconnected from the mains before making any connections.
Transmitter [5]
•The transmitter can be recognized easily as it has an A/V input port at the front
[E] and an IR output port [F] at the back.
•Use the SCART-to-RCA A/V cable marked with TRANSMITTER (included) or
use an appropriate S-video cable (1, not included).
Note: when using an S-video cable, the RCA connectors are disabled. Always
use an S-video cable on both transmitter and receiver.

AVMOD18
19.02.2010 ©Velleman nv
7
•Connect the RCA video connector (yellow) to the video connector [H] and
connect the audio connectors (red, white) to the audio connectors [I] resp.
[J]. When using an S-video cable, simply connect it to the S-video connector
[G].
•Connect the SCART connector to a SCART output connector or connect the free
end of the S-video cable to the S-video output port of the signal transmitting
device (e.g. satellite receiver, DVD, VCR …., not incl.),
•Connect the IR extender connector to the IR remote output port [F]. Place
either one of the IR LEDs in front of the IR receiver of the signal transmitting
device, maximum distance ±50cm (±20”), angle +/-15°.
•When desired, a second A/V device can be connected to the front input [E].
Use the included cable (2) and place the second IR LED in front of the devices’
IR receiver.
Note: the last device that was switched on will be transmitted to the receiver!
E.g. to switch from the currently transmitted A/V device to the second
A/V device, first switch off the second A/V device (stand-by) than switch
it on again.
•Plug the power plug of the included AC power adaptor into the power connector
[K]. Only use the included adaptor or one with the same specifications.
•Make sure the power switch [L] is in the OFF-position and plug the adaptor into
a suitable mains outlet.
Receiver [6]
•Use the SCART-to-RCA A/V cable marked with RECEIVER (included) or use an
appropriate S-video cable (not included).
Note: when using an S-video cable on the transmitter side, an S-video cable
must also be used on the receiver side.
•Connect the RCA video connector (yellow) to the video connector [H] and
connect the audio connectors (red, white) to the audio connectors [I] resp.
[J]. When using an S-video cable, simply connect it to the S-video connector
[G].
•Connect the SCART connector to a SCART input connector or connect the free
end of the S-video cable to the S-video output port of a TV, monitor ... (not
included).
•Plug the power plug of the included AC power adaptor into the power connector
[K]. Only use the included adaptor or one with the same specifications.
•Make sure the power switch [L] is in the OFF-position and plug the adaptor into
a suitable mains outlet.
7. Operation
•Switch on the receiver and transmitter [L].
•Fold the antennas upwards and position them in such a way that the side with
the grooves of the receiver and transmitter antennas face each other [7]. This
will guarantee best performance.
AVMOD18
19.02.2010 ©Velleman nv
8
Notes:
-The antenna does not rotate 360°. Do not force or rotate past the
protrusion or permanent damage will occur.
-Avoid obstacles between the antennas as this will decrease performance.
-Keep the distance from transmitter to receiver antenna as short as possible.
•Use the channel selector switch [B] to set the channel. Select a channel
depending on noise or interference conditions. Always set the same channel on
transmitter and receiver.
•Point the remote control towards the receiver (see [8]) to control the
transmitting device(s).
8. Troubleshooting
No picture or sound
-Make sure all connections are made properly (following this manual) and all
devices are switched on.
-Make sure the same channel is set on receiver and transmitter.
-In case of S-video, make sure the mode on the TV is set correctly (refer to the
user manual of the TV).
Interference/noise
-Adjust antenna direction of receiver and transmitter for optimal performance.
-Make sure the adaptor input voltage is > 220VAC.
-Select different channel (on both receiver and transmitter!).
-Change position of the receiver and/or transmitter.
-When transmitter and receiver are < 10m apart, do not unfold the antennas.
-Switch off microwave ovens.
Remote control doesn’t work
-Aim the remote control towards the receiver (see [8]) and press and hold the
button for ±1 second.
-Make sure the IR LEDs are pointing towards the sensor(s) of the transmitting
device(s).
-Make sure the batteries of the remote control are fully charged.
9. Maintenance
•Disconnect the devices from the mains prior to maintenance activities.
•Wipe the device regularly with a moist, lint-free cloth. Do not use alcohol or
solvents.
•Contact your dealer for spare parts if necessary.
10. Technical specifications
frequency 5.8GHz
transmission range ±50m (clear line of sight)
transmitter
frequency 5725 ~ 5875MHz
channel selection 8Ch, push buttons on front panel
type of modulation FM (video and audio)
video input level 1Vpp (RCA connector)

AVMOD18
19.02.2010 ©Velleman nv
9
audio input level 1Vpp (RCA connector)
S-video input level Y: 1Vpp ±10%, C: 288mV ±5% (SVHS connector)
video input impedance 75 ohms
audio input impedance 2k ohms
power supply DC 9V / 300mA (adaptor included)
dimensions 90x115x40mm
weight 175g
IR transmitter frequency 433.92MHz
demodulation type AM
receiver
video output level 1Vpp ± 0.3Vpp video (RCA connector)
audio output level 1Vpp ± 0.2Vpp audio (RCA connector)
S-video output level Y: 1Vpp ±20%, C: 288mV ±5% (SVHS
connector)
power supply DC 9V / 300mA (adaptor included)
dimensions 90x115x40mm
weight 175g
IR receiver built-in receiver
frequency 433.92MHz
Use this device with original accessories only. Velleman nv cannot be held
responsible in the event of damage or injury resulted from (incorrect) use
of this device. For more info concerning this product, please visit our
website www.velleman.eu. The information in this manual is subject to
change without prior notice.
© COPYRIGHT NOTICE
This manual is copyrighted. The copyright to this manual is owned by
Velleman nv. All worldwide rights reserved. No part of this manual may be
copied, reproduced, translated or reduced to any electronic medium or otherwise
without the prior written consent of the copyright holder.

AVMOD18
19.02.2010 ©Velleman nv
10
GEBRUIKERSHANDLEIDING
1. Inleiding
Aan alle ingezetenen van de Europese Unie
Belangrijke milieu-informatie betreffende dit product
Dit symbool op het toestel of de verpakking geeft aan dat, als het na
zijn levenscyclus wordt weggeworpen, dit toestel schade kan
toebrengen aan het milieu. Gooi dit toestel (en eventuele batterijen)
niet bij het gewone huishoudelijke afval; het moet bij een
gespecialiseerd bedrijf terechtkomen voor recyclage. U moet dit toestel
naar uw verdeler of naar een lokaal recyclagepunt brengen. Respecteer de
plaatselijke milieuwetgeving.
Hebt u vragen, contacteer dan de plaatselijke autoriteiten betreffende de
verwijdering.
Dank u voor uw aankoop! Lees deze handleiding grondig voor u het toestel in
gebruik neemt. Werd het toestel beschadigd tijdens het transport, installeer het
dan niet en raadpleeg uw dealer.
2. Veiligheidsinstructies
Houd buiten het bereik van kinderen en onbevoegden.
Trek de stekker uit het stopcontact (trek niet aan de kabel!) voordat
u het toestel reinigt en als u het niet gebruikt.
U mag geen onderdelen vervangen. Bestel eventuele
reserveonderdelen bij uw dealer.
3. Algemene richtlijnen
Raadpleeg de Velleman®service- en kwaliteitsgarantie achteraan de
handleiding.
Enkel voor gebruik binnenshuis. Bescherm tegen regen,
vochtigheid en opspattende vloeistoffen. Plaats geen objecten
gevuld met vloeistof op het toestel.
Bescherm tegen stof en extreme temperaturen. Zorg voor een
goede ventilatie van het toestel. Plaats het toestel op een afstand
van minstens 2,5 cm van andere objecten.
Bescherm tegen schokken en vermijd brute kracht tijdens de
installatie en de bediening van dit toestel.
•Leer eerst de functies van het toestel kennen voor u het gaat gebruiken.
•Om veiligheidsredenen mag u geen wijzigingen aanbrengen. Schade door
wijzigingen die de gebruiker heeft aangebracht valt niet onder de garantie.

AVMOD18
19.02.2010 ©Velleman nv
11
•Gebruik het toestel enkel waarvoor het gemaakt is. Andere toepassingen
kunnen leiden tot kortsluitingen, brandwonden, elektrische schokken, enz. Bij
onoordeelkundig gebruik vervalt de garantie.
•De garantie geldt niet voor schade door het negeren van bepaalde richtlijnen in
deze handleiding en uw dealer zal de verantwoordelijkheid afwijzen voor
defecten of problemen die hier rechtstreeks verband mee houden.
4. Eigenschappen
•draadloze transmissie van A/V signalen door muren en van kamer naar kamer
•de gebruikte frequentie van 5,8 GHz veroorzaakt minder storing dan de
frequentie van 2,4 GHz
•3 video-ingangen: aansluitmogelijkheid voor 2 audio-videozenders
•inhoud: 2 x scart naar RCA A/V, 1 x scart naar 3.5mm jack, infraroodmodule en
2 voedingsadapters
•optionele videokabels: AVB020/2.0, AVB020/5.0, AVW084, AVW084G, AVW085,
AVW085
5. Overzicht
Raadpleeg de figuren op pagina 2van deze handleiding.
1 – vooraanzicht
A antenne 5,8 GHz
B keuzeschakelaar kanaal
C kanaalaanduiding
D stand
E A/V ingang (enkel zender)
2 – achteraanzicht
F aansluiting infraroodoog (enkel zender)
G aansluiting S-video
H RCA videoaansluiting (geel)
I RCA audioaansluiting R (rood)
J RCA audioaansluiting L (wit)
K voedingsaansluiting (9 VDC/300 mA)
3 – bovenaanzicht
L aan-uitschakelaar
4 – zijaanzicht
zie hierboven
6. Installatie
Raadpleeg de figuren op pagina 2, 3en 4. Ontkoppel eerst alle toestellen van het
lichtnet.
Zender [5]
•De zender is uitgerust met een A/V ingang [E] op het voorpaneel en een IR-
uitgang [F] op het achterpaneel.

AVMOD18
19.02.2010 ©Velleman nv
12
•Gebruik de aansluitkabel met het opschrift TRANSMITTER (scart naar RCA)
(meegeleverd) of gebruik een aangepaste S-video-kabel (1, niet
meegeleverd).
Opmerking: Bij gebruik van een S-video-kabel zullen de RCA-aansluitingen
ontkoppeld worden. Gebruik dus een S-video-kabel voor zowel de zender
als de ontvanger.
•Sluit de gele RCA-stekker aan de videoaansluiting [H], en de rode en witte
audiostekker aan de audioaansluitingen [I] resp. [J]. Sluit een S-video-kabel
gewoonweg aan de S-video-aansluiting [G].
•Sluit de scartstekker aan de scartuitgang of sluit de vrije S-video-stekker aan
de S-video-uitgang van het zendtoestel (bv. satellietontvanger, dvd-speler...,
niet meegeleverd).
•Sluit het infraroodoog aan de aansluiting [F]. Plaats de led voor de ontvanger
van het zendtoestel, op een afstand van maximaal 50 cm, in een hoek van
± 15°.
•Sluit indien gewenst een tweede audio-videotoestel aan het frontpaneel [E].
gebruik hiervoor de meegeleverde kabel (2) en plaats de tweede led voor de
ontvanger van het tweede toestel.
Opmerking: De ontvanger ontvangt het signaal van het toestel dat als laatst
ingeschakeld werd! Voorbeeld: Schakel het tweede toestel eerst uit en
daarna opnieuw in om naar het tweede toestel over te schakelen.
•Steek de voedingsstekker van de meegeleverde adapter in de
voedingsaansluiting [K]. Gebruik enkel de meegeleverde adapter of een
adapter met dezelfde specificaties.
•Plaats de aan-uitschakelaar [L] op OFF en koppel de adapter aan het lichtnet.
Ontvanger [6]
•Gebruik de aansluitkabel met het opschrift RECEIVER (scart naar RCA)
(meegeleverd) of gebruik een aangepaste S-video-kabel (niet meegeleverd).
Opmerking: Gebruik, indien u een S-video-kabel aansluit aan de zender, ook een
S-video-kabel voor de ontvanger.
•Sluit de gele RCA-stekker (yellow) aan de videoaansluiting [H], en de rode en
witte audiostekker aan de audioaansluitingen [I] resp. [J]. Sluit een S-video-
kabel gewoonweg aan de S-video-aansluiting [G].
•Sluit de scartstekker aan de scartingang of sluit de vrije S-video-stekker aan de
S-video-ingang van een tv-toestel, monitor... (niet meegeleverd).
•Steek de voedingsstekker van de meegeleverde voedingsadapter in de
voedingsaansluiting [K]. Gebruik enkel de meegeleverde adapter of een
adapter met dezelfde specificaties.
•Plaats de aan-uitschakelaar [L] op OFF en koppel de adapter aan het lichtnet.

AVMOD18
19.02.2010 ©Velleman nv
13
7. Gebruik
•Schakel de ontvanger en de zender in [L].
•Vouw de antennes open en richt de gegroefde zijdes naar elkaar [7] voor de
beste ontvangst.
Opmerkingen:
-De antennes kunnen niet over een hoek van 360° ronddraaien. Draai de
antennes zachtjes naar elkaar toe.
-Verwijder elk object tussen de twee antennes.
-Houd de afstand tussen de twee antennes zo kort mogelijk.
•Stel het kanaal in met de keuzeschakelaar [B]. Selecteer het kanaal met de
beste ontvangst en de minste storing. Selecteer nu ook datzelfde kanaal op de
ontvanger.
•Richt de afstandsbediening naar de ontvanger (zie [8]) en bedien zo de
toestellen.
8. Problemen en oplossingen
Geen beeld, geen geluid
-Controleer alle aansluitingen en schakel alle toestellen in.
-Selecteer hetzelfde kanaal op zowel de zender als de ontvanger.
-Zorg ervoor dat u bij gebruik van S-video-kabels het tv-toestel in de correcte
modus plaatst. Raadpleeg de handleiding van uw tv-toestel.
Storing
-Verplaats de antennes van de zender en ontvanger lichtjes.
-Koppel de voedingsadapter aan een spanning van minstens 220 VAC.
-Selecteer een andere frequentie op de zender en de ontvanger.
-Verplaats de zender en/of de ontvanger.
-Vouw de antennes niet open indien de afstand tussen zender en ontvanger
kleiner is dan 10 m.
-Schakel alle magnetrons uit.
Afstandsbediening functioneert niet
-Richt de afstandsbediening naar de ontvanger (zie [8]) en houd de knop
gedurende 1 seconde ingedrukt.
-Zorg ervoor dat de infraroodogen naar de sensor gericht staan.
-Gebruik de afstandsbediening met nieuwe batterijen.
9. Onderhoud
•Ontkoppel de toestellen van het lichtnet alvorens het toestel schoon te maken.
•Maak het toestel geregeld schoon met een vochtig, niet-pluizend doek. Gebruik
geen alcohol of solventen.
10. Technische specificaties
frequentie 5,8 GHz
zendbereik ± 50 m (zonder obstakels)

AVMOD18
19.02.2010 ©Velleman nv
14
zender
frequentie 5725 ~ 5875 MHz
kanaalkeuze 8 kanalen, drukknoppen op het frontpaneel
modulatie FM (video en audio)
video-ingang 1 Vpp (RCA-aansluiting)
audio-ingang 1 Vpp (RCA-aansluiting)
S-video-ingang Y: 1 Vpp ± 10%, C: 288 mV ± 5% (SVHS-
aansluiting)
impedantie video-ingang 75 ohm
impedantie audio-ingang 2k ohm
voeding 9 VDC/300 mA (adapter meegelev.)
afmetingen 90 x 115 x 40 mm
gewicht 175 g
IR-zender frequentie 433,92 MHz
demodulatie AM
ontvanger
video-uitgang 1 Vpp ± 0,3 Vpp (RCA-aansluiting)
audio-uitgang 1 Vpp ± 0,2 Vpp (RCA-aansluiting)
S-video-uitgang Y: 1 Vpp ± 20%, C: 288 mV ± 5% (SVHS-
aansluiting)
voeding 9 VDC/300 mA (adapter meegelev.)
afmetingen 90 x 115 x 40 mm
gewicht 175 g
IR-ontvanger ingebouwde ontvanger
frequentie 433,92 MHz
Gebruik dit toestel enkel met originele accessoires. Velleman nv is niet
aansprakelijk voor schade of kwetsuren bij (verkeerd) gebruik van dit
toestel. Voor meer informatie over dit product, zie www.velleman.eu. De
informatie in deze handleiding kan te allen tijde worden gewijzigd zonder
voorafgaande kennisgeving.
© AUTEURSRECHT
Velleman nv heeft het auteursrecht voor deze handleiding.
Alle wereldwijde rechten voorbehouden. Het is niet toegestaan om deze
handleiding of gedeelten ervan over te nemen, te kopiëren, te vertalen, te
bewerken en op te slaan op een elektronisch medium zonder voorafgaande
schriftelijke toestemming van de rechthebbende.

AVMOD18
19.02.2010 ©Velleman nv
15
NOTICE D’EMPLOI
1. Introduction
Aux résidents de l'Union européenne
Des informations environnementales importantes concernant ce produit
Ce symbole sur l'appareil ou l'emballage indique que l’élimination d’un
appareil en fin de vie peut polluer l'environnement. Ne pas jeter un
appareil électrique ou électronique (et des piles éventuelles) parmi les
déchets municipaux non sujets au tri sélectif ; une déchèterie traitera
l’appareil en question. Renvoyer les équipements usagés à votre
fournisseur ou à un service de recyclage local. Il convient de respecter la
réglementation locale relative à la protection de l’environnement.
En cas de questions, contacter les autorités locales pour élimination.
Nous vous remercions de votre achat ! Lire la présente notice attentivement avant
la mise en service de l’appareil. Si l’appareil a été endommagé pendant le
transport, ne pas l’installer et consulter votre revendeur.
2. Consignes de sécurité
Garder hors de la portée des enfants et des personnes non
autorisées.
Débrancher l’appareil s’il n’est pas utilisé ou pour le nettoyer. Tirer la
fiche pour débrancher l'appareil ; non pas le câble.
Il n’y a aucune pièce maintenable par l’utilisateur. Commander des
pièces de rechange éventuelles chez votre revendeur.
3. Directives générales
Se reporter à la garantie de service et de qualité Velleman®en fin de cette notice.
Usage à l’intérieur uniquement. Protéger contre la pluie,
l’humidité et les projections d’eau. Ne jamais placer d’objet
contenant un liquide sur l’appareil.
protéger contre la poussière et la chaleur extrême. Assurer une
bonne aération de l’appareil en laissant une distance de 2,5 cm
entre les trous de ventilation et tout autre objet.
Protéger contre les chocs et le traiter avec circonspection
pendant l’installation et l’opération.
•Se familiariser avec le fonctionnement avant l’emploi.
•Toute modification est interdite pour des raisons de sécurité. Les dommages
occasionnés par des modifications par le client ne tombent pas sous la garantie.
•N’utiliser qu’à sa fonction prévue. Un usage impropre annule d'office la
garantie.

AVMOD18
19.02.2010 ©Velleman nv
16
•La garantie ne s’applique pas aux dommages survenus en négligeant certaines
directives de cette notice et votre revendeur déclinera toute responsabilité pour
les problèmes et les défauts qui en résultent.
4. Caractéristiques
•transmission sans fil de signaux A/V à travers de murs et d'une pièce à l'autre
•la fréquence utilisée de 5,8 GHz engendre moins d’interférence qu’une
fréquence de 2,4 GHz
•3 entrées vidéo : possibilité de connexion pour 2 émetteurs audio/vidé
•livré avec 2 câbles péritel vers RCA A/V, 1 câble péritel vers jack 3,5 mm,
module IR et 2 blocs secteur
•câble vidéo optionnel : AVB020/2.0, AVB020/5.0, AVW084, AVW084G,
AVW085, AVW085
5. Description
Se référer aux illustrations en page 2 de cette notice.
1 – vue de face
A antenne 5,8 GHz
B sélecteur de canal
C indicateur de canal
D socle
E entrée A/V (émetteur uniquement)
2 – vue arrière
F sortie pour œil infrarouge (émetteur uniquement)
G prise S-vidéo
H prise RCA vidéo (jaune)
I prise RCA audio R (rouge)
J prise RCA audio L (blanc)
K prise d’alimentation (9 VDC/300 mA)
3 – vue de haut
L interrupteur marche/arrêt
4 – vue latérale
voir ci-dessus
6. Installation
Se référer aux illustrations en pages 2 à 4 de cette notice. Déconnecter tous les
appareils du réseau avant de commencer la connexion.
Émetteur [5]
•L’émetteur est muni d’une prise d’entrée A/V sur le panneau frontal [E] et
d’une sortie pour œil infrarouge [F] à l’arrière.
•Utiliser le câble A/V péritel vers RCA marqué TRANSMITTER (inclus) ou
utiliser un câble S-vidéo adapté (1, non inclus).
Remarque : Les connexions RCA sont désactivées lors de l’utilisation de câbles S-
vidéo. Toujours utiliser un câble S-vidéo sur l’émetteur et le récepteur.

AVMOD18
19.02.2010 ©Velleman nv
17
•Insérer la fiche RCA jaune dans la prise vidéo [H], et insérer les fiches audio
rouge et blanche dans les prises audio [I] et [J]. Connecter un câble S-vidéo à
la prise [G].
•Insérer la fiche péritel dans la sortie péritel ou connecter la fiche S-vidéo libre à
la sortie S-vidéo de votre récepteur satellite, lecteur DVD, enregistreur... (non
inclus).
•Connecter l’œil infrarouge à la sortie IR [F]. Placer un œil à une distance
maximale de 50 cm du récepteur IR de votre appareil (dans un angle de
± 15°).
•Si nécessaire, connecter un second appareil A/V à l’entrée frontale [E]. Utiliser
le câble inclus (2) et placer le second œil IR en face du récepteur IR de
l’appareil.
Remarque : Le dernier appareil activé sera transmis vers le récepteur. Exemple :
Pour commuter du premier au second appareil A/V, éteindre d’abord le
second appareil A/V et ensuite le rallumer.
•Insérer la fiche d’alimentation du bloc secteur dans la prise d’alimentation [K].
N’utiliser que le bloc secteur inclus.
•Placer l’interrupteur d’alimentation [L] en position OFF et connecter le bloc
secteur au réseau électrique.
Récepteur [6]
•Utiliser le câble A/V péritel vers RCA marqué RECEIVER (inclus) ou utiliser un
câble S-vidéo adapté (non inclus).
Remarque : Toujours utiliser un câble S-vidéo sur l’émetteur et le récepteur.
•Insérer la fiche RCA jaune dans la prise vidéo [H], et insérer les fiches audio
rouge et blanche dans les prises audio [I] et [J]. Connecter un câble S-vidéo à
la prise [G].
•Insérer la fiche péritel dans l’entrée péritel ou connecter la fiche S-vidéo libre à
l’entrée S-vidéo de votre récepteur satellite, lecteur DVD, enregistreur... (non
inclus).
•Insérer la fiche d’alimentation du bloc secteur dans la prise d’alimentation [K].
N’utiliser que le bloc secteur inclus.
•Placer l’interrupteur d’alimentation [L] en position OFF et connecter le bloc
secteur au réseau électrique.
7. Emploi
•Allumer l’émetteur et le récepteur [L].
•Déployer les antennes et les placer comme illustré [7] afin de garantir la
meilleure réception.
Remarque:
-Les antennes ne sont pas rotatives sur 360°. Les déployer avec précaution.
-Retirer tout objet entre les deux antennes.
-Réduire la distance entre les deux antennes le plus possible.

AVMOD18
19.02.2010 ©Velleman nv
18
•Sélectionner le canal avec le sélectionneur [B]. Choisir le canal offrant la
meilleure réception. Sélectionner la même fréquence sur l’émetteur et le
récepteur.
•Pointer la télécommande vers le récepteur (voir [8]) pour pilote r l’appareil
A/V.
8. Problèmes et solutions
Pas d’image, pas de son
-Vérifier les connexions et allumer les appareils.
-Sélectionner la même fréquence sur l’émetteur et le récepteur.
-Configurer dûment le téléviseur lors de l’utilisation de câbles S-vidéo (voir la
notice du téléviseur).
Interférence
-Rediriger les antennes de l’émetteur et/ou du récepteur.
-Connecter les blocs secteur à une source électrique de minimum 220 VCA.
-Sélectionner une autre fréquence.
-Déplacer l’émetteur et/ou le récepteur.
-Ne pas déployer les antennes lorsque la distance entre l’émetteur et le récepteur
est supérieure à 10 m.
-Éteindre les fours à micro-ondes.
La télécommande ne fonctionne pas
-Pointer la télécommande vers le récepteur (voir [8]) et maintenir enfoncé le
bouton pendant 1 seconde.
-Veiller à ce que les yeux IR soient dirigés vers les récepteurs IR des appareils
A/V.
-Vérifier le niveau des piles dans la télécommande.
9. Entretien
•Déconnecter les appareils du réseau électrique avant chaque entretien.
•Essuyer les appareils régulièrement avec un chiffon humide non pelucheux.
Éviter l’usage d’alcool et de solvants.
10. Spécifications techniques
fréquence 5,8 GHz
portée de la transmission ± 50 m (sans obstacles)
émetteur
fréquence 5725 ~ 5875 MHz
sélection du canal 8 canaux, poussoirs sur panneau frontal
modulation FM (vidéo et audio)
niveau d’entrée vidéo 1 Vpp (RCA)
niveau d’entrée audio 1 Vpp (RCA)
niveau de sortie S-vidéo Y : 1 Vpp ± 10%, C : 288 mV ± 5% (SVHS)
impédance d’entrée vidéo 75 ohms
impédance d’entrée audio 2k ohms
alimentation 9 VCC/300 mA (bloc secteur incl.)

AVMOD18
19.02.2010 ©Velleman nv
19
dimensions 90 x 115 x 40 mm
poids 175 g
émetteur IR fréquence 433,92 MHz
démodulation AM
récepteur
niveau de sortie vidéo 1 Vpp ± 0,3 Vpp (RCA)
niveau de sortie audio 1 Vpp ± 0,2 Vpp (RCA)
niveau de sortie S-vidéo Y : 1 Vpp ± 20%, C : 288 mV ± 5% (SVHS)
alimentation 9 VCC/300 mA (bloc secteur incl.)
dimensions 90 x 115 x 40 mm
poids 175 g
récepteur IR récepteur intégré
fréquence 433,92 MHz
N’employer cet appareil qu’avec des accessoires d’origine. SA Velleman ne
sera aucunement responsable de dommages ou lésions survenus à un
usage (incorrect) de cet appareil. Pour plus d’information concernant cet
article, visitez notre site web www.velleman.eu. Toutes les informations
présentées dans cette notice peuvent être modifiées sans notification
préalable.
© DROITS D’AUTEUR
SA Velleman est l’ayant droit des droits d’auteur pour cette notice.
Tous droits mondiaux réservés. Toute reproduction, traduction, copie ou diffusion,
intégrale ou partielle, du contenu de cette notice par quelque procédé ou sur tout
support électronique que se soit est interdite sans l’accord préalable écrit de
l’ayant droit.

AVMOD18
19.02.2010 ©Velleman nv
20
MANUAL DEL USUARIO
1. Introduction
A los ciudadanos de la Unión Europea
Importantes informaciones sobre el medio ambiente concerniente a este
producto
Este símbolo en este aparato o el embalaje indica que, si tira las
muestras inservibles, podrían dañar el medio ambiente. No tire este
aparato (ni las pilas, si las hubiera) en la basura doméstica; debe ir a
una empresa especializada en reciclaje. Devuelva este aparato a su
distribuidor o a la unidad de reciclaje local. Respete las leyes locales en
relación con el medio ambiente.
Si tiene dudas, contacte con las autoridades locales para residuos.
Gracias por haber comprado el AVMOD18! Lea atentamente las instrucciones del
manual antes de usarlo. Si el aparato ha sufrido algún daño en el transporte no lo
instale y póngase en contacto con su distribuidor.
2. Instrucciones de seguridad
Mantenga el aparato lejos del alcance de personas no capacitadas y
niños.
Desconecte siempre el aparato si no va a usarlo durante un largo
período de tiempo o antes de limpiarlo. Tire siempre del enchufe para
desconectar el cable de red, nunca del propio cable.
El usuario no habrá de efectuar el mantenimiento de ninguna pieza.
Contacte con su distribuidor si necesita piezas de recambio.
3. Normas generales
Véase la Garantía de servicio y calidad Velleman ® al final de este manual del
usuario.
Utilice el aparato sólo en interiores.No exponga este equipo a
lluvia, humedad ni a ningún tipo de salpicadura o goteo. Nunca
ponga un objeto con líquido, p.ej. un florero, en el aparato.
No exponga este equipo a polvo. No exponga este equipo a
temperaturas extremas. Asegúrese de que los orificios de
ventilación no estén bloqueados. Deje una distancia de mín. 2,5cm
entre el aparato y cualquier otro objeto.
No agite el aparato. Evite usar excesiva fuerza durante el
manejo y la instalación.
•Familiarícese con el funcionamiento del aparato antes de utilizarlo.
•Por razones de seguridad, las modificaciones no autorizadas del aparato
están prohibidas. Los daños causados por modificaciones no autorizadas, no
están cubiertos por la garantía.
Table of contents
Languages:
Other Velleman Microphone System manuals

Velleman
Velleman HQMC10001 User manual

Velleman
Velleman HQ Power HQPA10001 User manual

Velleman
Velleman AVMOD16N User manual

Velleman
Velleman AVMOD16CCN User manual

Velleman
Velleman HQ POWER MICW31 User manual

Velleman
Velleman VMA302 User manual

Velleman
Velleman MICW41 User manual

Velleman
Velleman HQ Power MICW48 User manual