VenMill Industries VMI 2500 User manual

QUICK START
VMI 2500
QUICK START
REPLACING CONSUMABLES
MAINTENANCE
OPERATIONS
A quick reference guide for the
VMI 3500 addressing cleaning,
consumable changes, and use,
functions, and troubleshooting
Turn on power to the unit by icking the ON/OFF switch to1.
the ON position, located in the rear of the unit.
Select which type of repair mode you would like by2.
pressing either of the Scroll Buttons located on the User
Interface. (Choose either “Regular” for regular discs or
“Deep” for Blu-Ray discs.)
Spread Compound Solution evenly over the entire optical3.
surface of the disc.
Note: Avoid spreading compound on the cleaner plastic
center ring of the disc, since the machine will not touch this
area and solution will still be visible after the repair cycle.
Open the Front Cover and place the DVD/CD/Blue-Ray4.
onto the platter, with the LABEL SIDE OF THE DISC FACING
DOWN!
Close the Front Cover and press the Start Button.5.
Once the cycle has completed, open the Front Cover, and6.
remove your disc.

REPLACING CONSUMABLES
RUBBER PLATTER
How to replace the Rubber Platter:
Turn o power to the unit!1.
Locate the two side panel thumbscrews and unscrew them.2.
Lift side panel up and away from the machine.3.
Locate the Rubber Platter.4.
Peel old Rubber Platter o of the platen.5.
Note: A razor blade or a scraper can be used to do this.
Take the new Rubber Platter and remove the white backing.6.
Center and place the new Rubber Platter on the platen.7.
Make sure the Rubber Platter is fully seated on the platen.8.
Install the side panel and screw down the thumbscrews.9.
Turn on power.10.
BUFFING WHEELS
How to replace the Bung Wheels:
Turn o power to the unit.1.
Locate the two side panel thumbscrews and unscrew them.2.
Lift
side panel up and away from the machine.
Locate the Splash Guard which sits on top of the main motor3.
and above the Bung Wheel.
Pull up on the Splash Guard until it releases from the main motor.4.
Note: The Splash Guard is a snap tted piece.
Located on front of the Bung Wheel, is a washer and a Spade5.
style screw, which holds the Bung Wheel to the spindle. Hold
the Bung Wheel with one hand and turn the Spade Screw
counter clockwise with the other.
Remove the screw and the washer from the spindle and pull6.
o the old Bung Wheel.
Install the new Bung Wheel. Insert the washer and tighten7.
down the screw.
Reinstall the Splash Guard by snapping it onto the top of the8.
main motor.
Note: Pull the Splash Guard forward until it snaps into place a
second time.
Install the side panel and screw down the thumbscrews.9.
Turn on power.10.
When should I replace my rubber platter?
There is no specic time frame for how long a Rubber Platter will last, it could be one day or one year, depending on how the
machine is used and maintained. If the disc can no longer sit at on the Rubber Platter, or the imprinting on the surface is no longer
visible, then the Rubber Platter should be replaced. If there are any nicks, gouges, edges that are lifted, or tares – the Rubber Platter
should be replaced.

REPLACING CONSUMABLES ... CONTINUED
MAINTENANCE
How do I replace my C2 Chip?
Turn the machine around, so that the back of the unit is facing you.1.
Locate the C2 Chip.2.
Pull the chip out and away from the RS232 port.3.
Take the new C2 Chip and install it into the RS232 port.4.
The machine will automatically reset the counters.5.
A. How to clean out the machine.
Recommendation: Clean the machine weekly.
Turn o power to the unit!1.
Locate the two side panel thumbscrews and unscrew them.2.
Lift side panel up and away from the machine.3.
Remove any dust or debris from the machine.4.
Note: Use canned air, a vacuum, or even by hand.
With a paper towel or cloth, wipe o any Compound residue,5.
left on the side panel or internal walls.
Install the side panel and screw down the thumbscrews.6.
Turn on power.7.
B. How to clean the Splash Guard:
Recommendation: Clean the Splash Guard weekly, when the rest of
the machine is being cleaned out.
IMPORTANT:1. Turn o power to the unit.
Locate the two side panel thumbscrews and unscrew them.2.
Lift side panel up and away from the machine.3.
Locate the Splash Guard which sits on top of the main motor4.
and above the Bung Wheel.
Pull up on the Splash Guard until it releases from the main motor.5.
Note: The Splash Guard is a snap tted piece.
C2 CHIP
When should I replace my C2 Chip?
Each C2 Chip is programmed for a total of 500 minutes of operation. The amount of usage on this chip will be displayed on the front
LCD Screen. On the“Main Menu”, in the middle of the screen, this is where the total Chip count is displayed. This “Count”will decrease
the amount of minutes left on the C2 Chip as the Operator continues to use the machine. When the count drops to 10%, an asterisk
(*) will appear next to the Count display. This is to inform the Operator that supplies should be reordered. At this point, while a cycle is
running, the“Start” button will ash from Green to Blue. Then error message“Low Chip”will appear on the main menu. Once the chip
is depleted the machine will notify the Operator and no more cycles will be allowed, until a new C2 Chip is installed. Once a new C2
Chip is installed, all counts will be reset. The Operator does not need to perform a manual reset to the machine.

VenMill Industries
670 Douglas Street | Uxbridge, MA 01569
Toll Free: 866.864.0210 | Tel: 508.278.0091 | Fax: 508.278.0005
www.venmill.com
MAINTENANCE ... CONTINUED
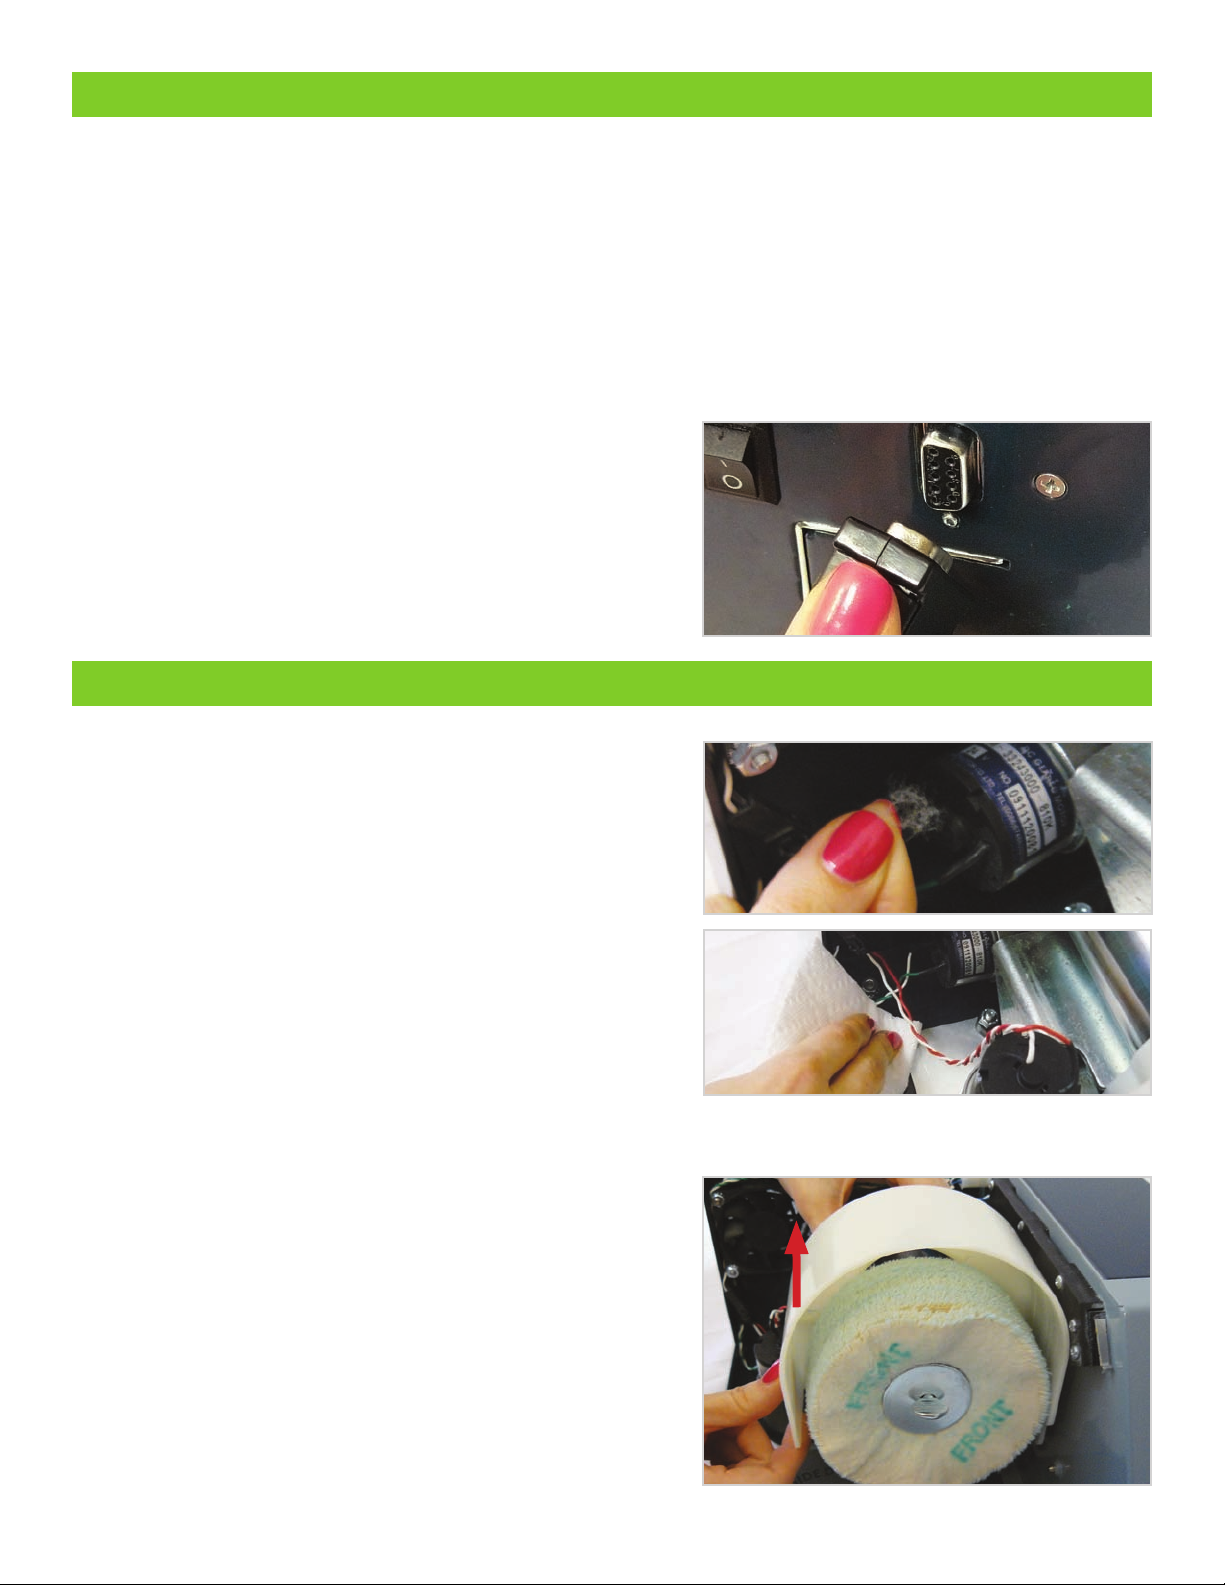
Run the Splash Guard under warm water, from any sink faucet. Wipe6.
away any left over compound residue with a paper towel or cloth.
Reinstall the Splash Guard by snapping it onto the top of the7.
main motor.
Note: Pull the Splash Guard forward until it snaps into place a
second time.
Install the side panel and screw down the thumbscrews.8.
Turn on power.9.
C. How to clean the Cleaner Disc:
The Cleaner Disc must be maintained on a regular basis. You can
identify that the Cleaner Disc needs to be cleaned by seeing a heavy
buildup on the surface.
Use a“Glass Cleaner” (such as Windex) on the surface of the1.
Cleaner Disc and let it sit for a minute.
Using a paper towel, wipe the buildup o the Cleaner Disc.2.
Start from the center and work your way out.
Make sure the Cleaner Disc is dry, before use.3.
Another option is to use a plastic style bristle brush to scrub4.
the surface.
D. How to clean the Rubber Platter and why:
From time to time the Rubber Platter may become dirty. When this
happens, dust particles can become entrapped in the top surface of
the platter. This causes the surface to become slick. When the Rubber
Platter is slick discs tend to slip on the surface. In worse case scenario,
this slipping could cause a disc to break.
Take any glass cleaner (such as Windex) and spray the Rubber1.
Platter.
Let the solution sit for about a minute.2.
Wipe the rubber platter dry with a paper towel.3.
If slippage continues, replace the Rubber Platter.4.
A. Error Codes:
ES003: Magnetic Switch Sensor is not detecting that the1.
Platter is in the home position.
EC004: Lift Cam Switch is not detecting that the Lift Cam has2.
reset back to the home position.
EMC006: The machine is not detecting the proper amount of3.
amperage on the Main Motor.
RC: Replace all consumables.4.
Emergency Stop: Emergency Shutdown Mode.5.
B. How much Compound Solution should I use?
VenMill suggests that the entire optical surface of the disc
be covered with the Compound Solution. This will ensure
optimal repair capabilities. To achieve this, place one dab
North, East, South, West and then spread around.
OPERATIONS
Popular Sander manuals by other brands

Pattfield Ergo Tools
Pattfield Ergo Tools PDS280G Original instructions

Grizzly
Grizzly G0474 owner's manual

Bosch
Bosch Professional GWX 18V-7 Original instructions

Shakti Technology
Shakti Technology DS-11 Operator's manual

wurth
wurth Master ETS 125-E Translation of the original operating instructions

Parkside
Parkside PDS 290 A1 Operation and safety notes