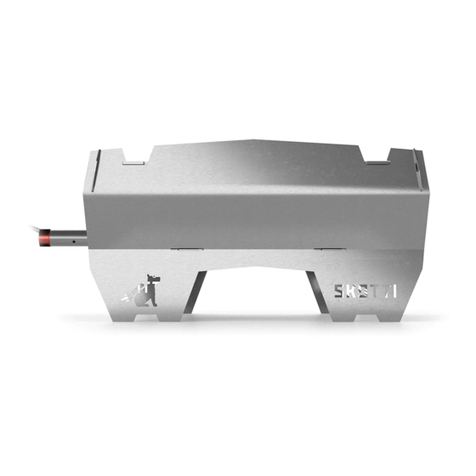
VENNSKAP Skotti User manual

GRILL
INSTR
UCTOR
USER INSTRUCTIONS FOR YOUR GAS GRILL
www.skotti-grill.eu


WARNING
IMPORTANT!

• Only use Skotti outdoors.
• Read instructions before
connecting Skotti to the
gas cartridge.
• Use Skotti with a standard
EN417 propane/butane gas
mixture only. Use approved
screwable gas cartridges
up to a maximum of 500 gr.
• Using other gas cartridges
or gas mixtures can be
very dangerous.
• Before connecting the gas
cartridge, make sure the
gaskets between the
device and the gas cartrid-
ge are in working order
and condition.

• Never use Skotti with
defective or worn out
gaskets.
• Never use Skotti if the gas
outlet is defective or faulty
or doesn’t work properly.
• Always operate Skotti on a
stable, flat surface.
• Follow the user instruc-
tions and warnings when
grilling.
• Caution!
Skotti and its individual
parts can heat up to high
temperatures.
Keep away from children,
even when Skotti is cooling
down after use.

Please read the user’s man-
ual carefully to learn about
the device before you connect
it to a gas cartridge. Keep
this manual to read again or
give to other users.
Keep this manual to read
again or give to other users.

INHALT
1. Getting started: Skotti’s parts
2. Set up: Put Skotti together in 8 easy steps
3. Packing and Storing: How to put Skotti back in its bag.
4. Safety: Read before using
• Warnings
• Grilling with liquid gas
• Safety check before lighting
5. Ignition: Lighting Skotti
6. Grilling tips: How to get perfect grill results
7. Cleaning tips: How to keep your Skotti clean
8. Troubleshooting: Check here for FAQs
9. Maintenance instructions: How to enjoy Skotti
for a long time.
10. Warranty: Your guarantee, just in case
For a demonstration of the setup procedure, please check
out our short film at www.skotti-grill.eu
• Manufacturer: Vennskap
• Device: mobile gas grill type Skotti
• Classification of nozzle: nozzle diameter 0.3 mm
• Nominal heat input: 2.3-2.5 kW, 172-187 gr/h
16
18
23
26
34
35
36
37
38
39
15

1. GETTING STARTED:
SKOTTI’S PARTS.
Skotti is packed up in its handy waterproof bag. Each part has its own
spot in the bag, saving lots of space. Your first time, put the bag on a
hard, flat surface in front of you, with the company logo and the handles
facing upwards. Open the velcro fastener carefully and unfold the bag
completely.
Presto! Skotti’s seven pieces are laid in front of you. The burner pipe and
the gas hose are cleverly waiting in the middle pockets. With those nine
parts, you can set up your Skotti in no time. Since practice makes per-
fect, you will quickly be able to do it in less than a minute.
Have fun!
1 x grill rack
1 x baffle plate
1 x burner pipe
1 x gas hose with screw-on regulator
1 x foot panel with honeycomb-shaped ignition and flame control
2 x long side panels with logo
1 x head panel with round hole
1 x bottom panel with oblong hole
1
2
3
4
5
6
7
8
6
6
7
8
1
2
3
4
5
Tip: Please check for video at www.skotti-grill.eu
16

Step 3:
• Slide the bottom panel into the
three-sided structure, pointed
side down.
• Make sure that the smooth edge
of the panel and the hooks and
tabs are at an equal height with
the slits.
Step 4:
• Take the burner pipe and hook it
into the horizontal 3 cm-long
slot (above the honeycomb-
shaped hole) at a steep angle and
with the nose facing upward.
• Carefully rest the burner pipe on
the bottom panel.
Step 1:
• Take one long side panel with
the Skotti logo on it in your left
hand. Hold it and make sure the
small triangle mark at the
connection joint faces upward.
• Take the short panel (with the
honeycomb-shaped hole) in your
right hand.
Step 2:
• Slot the other long side panel
(with the Skotti logo) onto the foot
panel at the slim slits.
2. SET UP:
PUT SKOTTI TOGETHER IN 8 EASY STEPS.
• It also has a slim connection joint on the side which is marked with a
matching small triangle.
• Slide the short panel onto the longer one at the corresponding
triangle-adjacent slits.
Slide the hooks into the slits on the left and right side panel, then the
tabs into the slits on the head panel. Push down the bottom panel as
firmly as possible.
Make sure each of the bottom panel tabs fits into its corresponding slot
on all three sides and all tabs are fixed in place.
1
2
1
1
2
1918

Step 5:
• Slide the baffle plate into the
remaining two slots above the
center hole. It should look like a
rooftop over the pipe.
• Let the baffle plate rest a little on
the bottom plate.
Step 6:
• Slide the burner pipe through
the round hole on the head panel.
The curvature of the head panel
should be on the inside of the
grill, matching the curvature of
the other parts.
• Lift the head panel and slot the
tabs on the baffle plate onto the
corresponding slits of the head
plate.
• Drop the head panel into place, with the slits fitting smoothly onto the
side panels to make it an even-sided grill.
Step 7: Insert grill rack
Place Skotti in front of you with the burner pipe pointing to the right.
• Insert the grill rack with the Skotti logo into the corresponding
slots on the right side (head panel).
• Then, let the rack slide into the slots on the left side (foot panel).
• Carefully pull the rack back, towards the rigth. Once you hear it snap,
the grill is locked and stable. 3
2
1
1
2
3
3
2120

3. PACKING AND STORING:
HOW TO PUT SKOTTI BACK IN ITS BAG.
Taking Skotti apart is even faster than setting it up. When the grill has
cooled down, you can easily stow away all the parts in the washable bag,
saving space:
1) Make sure that the gas is off. ( ). Disconnect the gas cartridge from
the gas regulator. Turn the gas nozzle counterclockwise to separate it
from the grill’s burner pipe. Put the hose back into the middle pocket of
the bag.
2) To dismantle the grill, unlock the grill rack. Put Skotti in front of you so
that the end of the burner pipe points to the right. Use both of your index
fingers to lift both tabs from the grill rack on the opposite end. Carefully
move the grill rack to the left, lifting it up a little at the same time. Remo-
ve the grill rack and put it into the bag.
3) Lift the head panel with the end of the burner pipe facing upwards and
disconnect it from the baffle plate and the burner pipe.
4) Pull the baffle plate from the slots of the foot panel.
5) Lift the burner pipe from the round end and carefully unhook it at a
steep angle from the slot in the foot panel. Put the burner pipe in the
middle pocket of the bag.
Step 8: Connect gas hose
• Connect the gas nozzle, carefully screwing it by hand clockwise onto
the burner pipe of the grill. It should be fixed firmly without applying
too much pressure.
• Next, connect the regulator end to the gas cartridge. Then, screw the
gas cartridge onto the regulator, not the other way around!
Before opening, make sure the gas is firmly closed (apply firm
pressure). ( ).
For more information, please check the safety instructions.
2322

6) Pull the bottom panel away from the foot and side panels and place the
dirty side on the grill rack. Unhook the other panels from each other.
We recommend you put the parts on top of each other in the following
order: grill rack / bottom panel (like a rooftop) / 2 side panels / head and
foot panel / baffle plate
24

4. SAFETY:
READ BEFORE USING
a) RISKS/WARNINGS
If you smell gas, close the gas intake immediately ( ). Disconnect the
hose from the gas cartridge.
• Extinguish open flames, cigarettes, etc. immediately.
• If you still smell gas, keep away from the device and the gas cartridge
and inform the gas supplier and/or the fire service.
Leaking gas is unpredictable and can explode suddenly and/or cause
fire. This can cause serious injury or death to you or others.
• Skotti is for outdoor use only.
• Do not overtighten the gas hose.
• Do not shake Skotti or the gas cartridge while in use. Liquid gas can
escape and cause darting flames.
• Never operate Skotti unattended.
• Skotti requires supervision even after grilling until the grill has
completely cooled down. In summer this may take ~ 20 mins.
• When grilling, keep a safe distance from highly flammable substances
(at least 10m).
• It is recommendable that Skotti in gas operation is not exposed to strong
winds. The ignition and flame control should always be turned away from
the wind.
• Never use the grill on flammable surfaces.
• When using Skotti with gas, you can place it on the carrying bag. It can
catch drips and be cleaned afterwards.
• Put Skotti on a flat and stable surface.
• Never insert or combine Skotti into another structure. If you ignore these
warnings, you may cause fires or explosions, significant damage, serious
injury or death.
• Keep gas cartridges/bottles away from Skotti.
• Before lighting Skotti, make sure that the gasket and the gas hose work
properly. Also verify that the burner pipe is not clogged and that there is
no leakage in the gas system (from the gas cartridge to the grill).
• Never use Skotti if it is leaking.
• Never look for gas leaks using a flame. Use a soapy water solution
to test.
• Never put flammable items onto Skotti when it is grilling or still hot.
• Butane/propane is not the same as natural gas. Manipulating Skotti to
use it with natural gas instead of butane/propane is hazardous and will
automatically void the warranty.
• Do not open the valve nozzles or burner pipe opening when cleaning the
valve.
• Dented or rusty gas cartridges can be hazardous. Have your gas supplier
check them before use.
• Even an apparently empty gas cartridge can still contain gas. Be careful
when carrying or storing the gas cartridge and take note of the warnings
on the gas cartridge.
• Connect the gas cartridge only outdoors at a safe distance from
flammable substances.
• In case of a flare up, disconnect the gas ( ) and wait until the flaring
subsides.
• When grilling, you should always have a bucket of sand nearby to
extinguish a potential fire. You can also use special dry fire extinguishers
for grill fires. Find out about them at a retailer.
2726

• Caution! Never extinguish burning fat or oil with water. Water can
cause a fat or oil fire to spread quickly and get out of control. There is
also a high risk of shooting flames or explosions. You will put yourself
and others at risk of severe burns/injuries.
In case of fire:
• Clear the area if your attempt at extinguishing is not
successful. Call your local fire department or emergency number.
• Clear the area near Skotti until firefighters arrive.
• Skotti will become very hot when in use, so you should not move it during
use. Before grilling, you should consider carefully if the grilling spot
meets the safety requirements.
• Skotti should not be used by children. Keep toddlers away from the grill
when it is being used or cooling down.
• Follow the assembly instructions. If Skotti is improperly set up, you place
yourself and others at risk.
• When the burner is off, immediately turn off the regulator screw by
twisting clockwise ( ). After a few minutes, the gas will have dispersed
completely, so you can ignite again without risk. Please keep in mind that
the grill will probably still be hot and that you should not touch the grill
when you light it (risk of burning).
• When using Skotti, do not loosen or dismantle the gas control ( ) or
other parts.
• Only use Skotti with approved gas cartridges such as EN417 butane/
propane disposable cartridges with a maximum weight of 500 gr. The
screw-on gas cartridge can be reused and must have an appropriate
thread for your gas control (7/16 x 28 UNEF thread).
• Be careful when lighting the grill. Loose hair or clothing can quickly
catch fire.
• Skotti is not for commercial use.
• If Skotti is used on sand, snow, ice or uneven surfaces and is at an angle,
put a piece of wood or a rock under the bottom to balance it.
• You can grill on your carrier bag. It is ideal for use on uneven ground,
like sand.
• Dispose of your gas cartridges in a safe and appropriate place.
• Never damage or pierce the gas cartridge.
• Do not make alterations to the gas grill. It can cause serious risks and
will void your warranty.
Using Skotti with charcoal or wood:
• You can use charcoal or wood with Skotti.
• Caution! Before grilling with charcoal or wood, take off the burner pipe
and the baffle plate.
• Never use the burner pipe to ignite charcoal or wood.
• Put the grill rack on Skotti only with a low flame.
• Never put Skotti on the carrier bag when using charcoal or wood
because those fires burn at higher temperatures!
• Beachte die allgemeinen Sicherheitshinweise.
• Follow the general safety instructions. Although other fuels can be
used, we recommend you only use gas with Skotti.
2928

b) GRILLING WITH LIQUID GAS
• Liquid gas (propane/butane) is a mineral oil product. At normal temper-
atures, it is a gas. Under pressure, it becomes a liquid. When you connect
the gas hose and open the gas valve of the burner pipe, it becomes gas
again.
• At lower temperatures, liquid gas cannot turn into gas easily, i.e. it
doesn’t burn as well. This is why we recommend using special winter gas
during the winter months.
• Liquid gas is heavier than air. Liquid gas leaks can collect around the
lower parts of the device and do not spread.
• Tighten the cartridge only by hand. If you use too much pressure, the
control connection and the cartridge valve can be damaged. This may
cause leakage or obstruct the gas flow.
• Make sure that the gas cartridge valve is intact.
c) SECURITY CHECK BEFORE IGNITION
• Skotti has different gas connections for the corresponding gaskets. Per-
form leak checks before use. Mix liquid soap and water in a spray bottle to
make a soapy water solution. Spray the solution onto the hose and connec-
tors. If there are any leaks, bubbles will appear at the leaky spots.
• Never start the burner during a leak test.
• If there is a leak in the connection, turn the regulator screw to the right
() to close it and take the gas cartridge off. Don’t operate the grill.
• Before using the grill, make sure all parts are put together properly.
• Before ignition, clean grease or other residue off the grill. Grease fires
are hazardous in general and should be avoided.
3130

5. IGNITION:
LIGHTING SKOTTI
After setting up Skotti properly, check the gas connections and gaskets
and light the grill as follows:
• Slightly unscrew the gas regulator on the gas cartridge ( ) until you
hear the gas flowing.
• After ~ 1-2 seconds, use a lighter or match to ignite the gas in the burner
pipe through the honeycomb-shaped ignition hole located on the foot
panel opposite the gas source.
• Caution! If, due to wind or other factors, you are not able to ignite the
gas in the burner pipe within 4 seconds, stop the process. Tighten the
regulator screw by turning it clockwise ( )and wait at least 1 minute,
so the gas can flow out of the grill. If you don’t, there is a risk of
EXPLOSION.
• Make sure that there is always enough space between Skotti and the
surface it is on. If Skotti starts sinking into the ground, use sticks or
rocks to dig out space underneath it. Always ensure Skotti is in a stable
and straight position. If it isn’t, unlit gas can escape through the bottom
of the grill. This can cause an explosion.
• Repeatedly check if the gas in the burner pipe is ignited by watching the
ignition and flame control.
6. GRILL TIPS:
HOW TO GET PERFECT GRILL RESULTS
• Always preheat the grill before grilling. Skotti can do that really fast.
In only 2 minutes, you can start grilling.
•Your grill doesn’t have a gas pressure reduction regulator. We delib-
erately decided not to put one. The area around the ignition and flame
control is often less hot, so you can keep grilled food warm or put food
there that needs less heat. Depending on the wind and weather condi-
tions, this area may be warmer or cooler. Give it a try. Please don’t
open the gas valve too much ( ). Just a little gas is enough. When
you open the valve, make sure that no yellow flames shoot out!
A practical example.
Please use winter or power gas at temperatures below 10 degrees
Celsius (-10 °C , 14 °F). It flows easier even at lower temperatures due
to the properties of the cartridge.
3534

7. CLEANING TIPS:
HOW TO KEEP SKOTTI CLEAN
• You can put all Skotti parts, except the burner pipe and the gas hose with
the nozzle and regulator, in the dishwasher. The Skotti bag can go in there
too. This makes cleaning fast and easy.
• Dishwasher cleaning doesn’t work well for caked-on grease or food. Soak
these parts in the sink before washing.
• To get Skotti clean again, we recommend using steel wool soap pads for
stainless steel surfaces or other grill and oven cleaners. They’ll give you
the easiest clean at the lowest price and Skotti will shine again. Please
check the cleaning detergents are appropriate for use on stainless steel
surfaces. If not, they may cause scratches.
• The burner pipe is made from stainless steel as well, which is why you
should use a copper brush to clean it gently. Afterwards, shake the tube,
allowing any bits to fall out from the open end. This prevents clogging that
can create difficulties when connecting the gas hose.
8. TROUBLESHOOTING:
CHECK HERE FOR FAQS
Gas in the burner pipe won’t ignite.
• Are you in direct wind? Skotti doesn’t work well, so get out of there!
• Is your lighter working? Try a match.
• After disconnecting the gas regulator, check if there is gas in the
cartridge. You may need new cartridge.
The temperature distribution is uneven.
• Use a windshield.
Skotti doesn’t produce the normal amount of heat.
• This can happen if the outdoor temperature is under 10 degrees Celsius
(-10 °C, 14 °F).
• For these temperatures, use winter gas or power gas (from retailer).
Yellow flames are shooting out from under the baffle plate.
• Reduce the gas by turning the regulator down, to the right ( ).
Skotti is too hot!
There are shooting flames coming off of Skotti.
• Never put aluminum foil onto the grill.
• The grill chamber might be dirty. Please clean it.
If there is a problem you can’t solve using the recommendations given
above, please contact us directly. Thank you!
3736

9. MAINTENANCE INSTRUCTIONS:
HOW TO ENJOY SKOTTI FOR A LONG TIME
In general, there are only a few things that might break down. However, you
should give Skotti special attention once in a while to keep it in top shape:
• If you frequently set up and dismantle the grill, there’s a small chance
that insects will get in the burner pipe. Check from time to time to make
sure the burner pipe is clean on the inside.
• If the burner pipe clogs a little over time at the gas valve, use a copper
brush to clean it. If necessary, you can clean the open ends with a 1-mm
rod. Make sure to remove the small pieces of dirt by letting them fall out
of the open end.
10. WARRANTY:
YOUR GUARANTEE, JUST IN CASE.
Vennskap fully guarantees Skotti for two years from the day of purchase.
This includes the gas hose, gas nozzle and regulator, burner pipe and Skot-
ti‘s bag. We are so sure of the quality of our product that we’ve even exten-
ded the warranty:
• 5 years for Skotti‘s grill chamber and grill rack
Our warranty only applies if Skotti is set up, used and maintained according
to these instructions. We will assess if the device or its individual parts are
really faulty and repair or replace the device or individual faulty parts for
free. Please get in touch with us immediately in case of complaints. Please
check www.skotti-grill.eu for the Vennskap contact details.
To file a complaint, you will need to provide proof of purchase (so please
keep the receipt!) and a written description of the problem your Skotti’s
having. If we ask you to return the faulty parts, you will cover the shipping
costs. We will send the repaired or replaced parts back to you and we’ll
cover the shipping costs.
The following restrictions apply:
• Problems, damage or defects that may arise from operation of the device
are excluded for the following reasons:
3938

• Incorrect operation and installation
• Inaccurate or poor maintenance of, for example, the burner pipe caused
by insects
• Faulty service
• Other misuse
• Modifications
• A change in the metal color after grilling is normal and not covered under
the warranty. Possible structural changes to the metal after intense heat
are also excluded from exchange.
• Accident
• Vandalism
• Misuse or abuse
• Our liability excludes special and indirect damage as well as successive
damage.
Meerbusch, 9 August 2018
Christian Battel/Individual entrepreneur
Company: Vennskap
Am Schwanenhof 15
40668 Meerbusch
Germany
www.skotti-grill.eu
40

Other manuals for Skotti
2
Table of contents
Other VENNSKAP Grill manuals
Popular Grill manuals by other brands

NEFF
NEFF N63TK00N0 instruction manual

Jackson Grills
Jackson Grills Premier JPG700 series owner's manual

Weber
Weber Summit 56216 owner's guide

George Foreman
George Foreman GR2144P use and care manual

Dyna-Glo
Dyna-Glo DGP480CSP-D User's manual and operating instructions

Brinkmann
Brinkmann 8502 Armada owner's manual