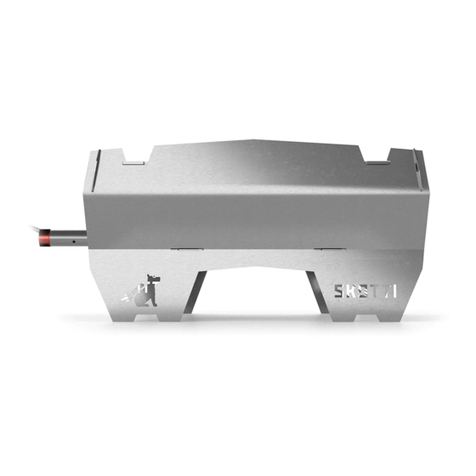
VENNSKAP Skotti User manual

JUST.GRILL.ANYWHERE.
SKOTTI
GEBRAUCHSANWEISUNG
INSTRUCTION MANUAL
BRUGSANVISNING
MANUAL DE INSTRUCCIONES
MANUEL D‘INSTRUCTIONS
MANUALE D‘ISTRUZIONI
GEBRUIKSAANWIJZING
BRUKSANVISNING
INSTRUKCJA OBSŁUGI
BRUKSANVISNING
DE
EN
DK
ES
FR
IT
NL
NO
PL
SE

2
EinführungInhalt
INHALT
Inhalt
1. Einführung
1.1 So erklären wir Dir Deinen Skotti
1.2 Hier musst Du aufpassen
2. Dein Skotti in Daten
3. Für Deine Sicherheit - das musst Du wissen
3.1 Dafür kannst Du Skotti verwenden
3.2 Das darfst Du nicht mit Skotti tun
3.3 Risiken durch heiße Oberflächen
3.4 Risiken für Kinder
3.5 Risiken durch Gas
3.6 Risiken durch Feuer
4. Das alles gehört zu Deinem Skotti
5. So baust Du Deinen Skotti auf
5.1 Wo solltest Du Deinen Skotti aufbauen?
5.2 Skotti montieren
5.3 Füllen Sie die Fettauffangschale mit Wasser
5.4 Grillrost auflegen
5.5 Mit Grillkohle bzw. Holz grillen
5.6 Gas anschließen
5.7 Gaskartusche wechseln
6. So benutzt Du Deinen Skotti
6.1 Vor dem Anzünden prüfen
6.2 Anzünden
6.3 Grill-Tipps
7 Wenn es mal nicht ganz klappt
8 So verstaust Du Deinen Skotti wieder
9 So pflegst Du Deinen Skotti
10 Unsere Garantie für Deinen Skotti
11 Entsorgung und Recycling
1 EINFÜHRUNG
Diese Gebrauchsanleitung ermöglicht den sicheren und effizienten Umgang mit
Skotti. Außerdem enthält sie wichtige Hinweise zur Pflege Deines Skotti.
Wichtig
Lies diese Gebrauchsanleitung aufmerksam durch, um dich mit Skotti ver-
traut zu machen, bevor Du ihn an die Gaskartusche oder Gasflasche anschließt.
Bewahre die Gebrauchsanleitung auf, um sie erneut zu lesen oder an andere
Nutzer weitergeben zu können.
Hersteller
Vennskap GmbH & Co. KG
In der Loh 36 c
40668 Meerbusch / DEUTSCHLAND
+49(0)2150-7076910
www.skotti-grill.eu
1.1 So erklären wir Dir Deinen Skotti
Wenn du etwas tun musst
Um eine Handlung durchzuführen, gehst Du wie folgt vor:
1. Tue dies.
2. Tue das.
➲Dieses Zwischenergebnis resultiert daraus.
3. Tue jenes.
✔ Du hast die Handlung durchgeführt.
Aufzählungen werden wie folgt dargestellt
Aufzählung 1. Ordnung
1.2 Hier musst Du aufpassen
GEFAHR
Weist auf eine gefährliche Situation hin, die zu schwerer Körper-
verletzung oder Tod führt.
▶Maßnahmen zur Vermeidung der Gefahr
Tipp
▶Anwendungstipps und nützliche Informationen
DE

3
Für Deine Sicherheit - das musst Du wissenDaten / Für Deine Sicherheit - das musst Du wissen
2 DEIN SKOTTI IN DATEN
3 FÜR DEINE SICHERHEIT DAS MUSST
DU WISSEN
3.1 Dafür kannst Du Skotti verwenden
Verwende Skotti nur für privates Grillen.
Verwende Skotti ausschließlich im Freien.
Verwende Skotti als Gasgrill ausschließlich mit einem handelsüblichen Propan
/ Butan-Gasgemisch nach EN 417. Die wiederverschließende Gaskartusche muss
ein passendes Gewinde für Deinen Gasregler haben (7/16 x 28 UNEF-Gewinde).
Benutze nur zugelassene Schraubkartuschen bis max. 500 g.
Andere Gasbehälter bzw. Gasgemische anzuschließen kann sehr gefährlich sein.
Verwende Skotti alternativ mit Grillkohle oder Holz.
3.2 Das darfst Du nicht mit Skotti tun
Verwende Skotti nicht für gewerbliches Grillen.
Verwende Skotti nie mit Erdgas.
Während Du Skotti benutzt, darfst Du den Gasregler ( ) oder andere Teile
nicht lösen oder demontieren.
Schiebe oder baue Skotti nie in eine Konstruktion ein. Es muss immer ein un-
gehinderter Luftaustausch gewährleistet sein. Sonst können Brand oder Explo-
sion verursacht werden, die schwere oder sogar tödliche Verletzungen und hohe
Sachschäden nach sich ziehen können.
Nimm nie Veränderungen oder Reparaturen an Skotti vor. Dadurch können
Gefahren entstehen und die Garantie erlischt. Lasse Skotti immer von Profis
reparieren; unsere Adresse findest du im Kapitel „1 Einführung“.
3.3 Risiken durch heiße Oberflächen
Berühre Skotti weder während der Benutzung, noch direkt nach dem Grillen.
Skotti und alle seine Einzelteile können sehr heiß werden.
Skotti muss auch nach dem Grillen beaufsichtigt werden – bis der Grill abge-
kühlt ist. Im Sommer dauert das ca. 20 Minuten. Sonst können Unfälle, Verbren-
nungen oder Brand verursacht werden.
3.4 Risiken für Kinder
Skotti darf nicht von Kindern bedient werden.
Halte Kinder von Skotti fern, auch während des Abkühlens nach dem Grillen.
3.5 Risiken durch Gas
Beachte die Hinweise auf der Gaskartusche.
Lagere nie Gaskartuschen in der Nähe von Skotti.
Transportiere und lagere Gaskartuschen immer vorsichtig. Auch in einer
scheinbar leeren Gaskartusche kann noch Gas enthalten sein.
Benutze Skotti nie, wenn die Gaszufuhr oder Dichtungen defekt oder fehler-
haft sind.
Suche nach Gaslecks nur mit einer Seifen-Wasser-Lösung, z. B. in einer
Sprühflasche. Sprühe damit die entsprechenden Teile ein und öffne den Gas-
regulator. An undichten Stellen treten kleine Blasen aus. Verwende nie eine
Flamme, um nach Gaslecks zu suchen. Es kann eine Stichflamme oder Explo-
sion geben.
Beschädige nie die Gaskartusche. Es kann eine Explosion geben.
Lasse verbeulte oder rostige Gaskartuschen vor Gebrauch von Deinem Gas-
lieferanten prüfen.
Bei niedrigen Temperaturen kann sich Flüssiggas nicht mehr so gut umwan-
deln. Das heißt: Es verbrennt schlechter. Im Winter empfehlen wir Dir deshalb,
spezielles Wintergas oder Powergas zu verwenden.
Explosionsgefahr, Feuer und tödliche Verletzungen
durch Gas möglich.
▶Sobald es nach Gas riecht: Drehe sofort den Gasregler nach rechts zu ( ).
Trenne den Schlauch von der Gaskartusche. Lösche sofort offene Flammen,
Zigaretten, etc.
▶Falls Du weiterhin Gasgeruch wahrnimmst: Halte Abstand zu Skotti und der
Gaskartusche. Informiere den Gaslieferanten und / oder die Feuerwehr.
DE
Gerätebezeichnung
Mobiler Gasgrill Typ Skotti
Maße
Grillrost (L x B)
30,4 x 21 cm
Aufgebaut (L x B x H) 33,6 x 21,9 x 17,6 cm
Gepackte Tasche (L x B x H) 45 x 30 x 3,5 cm
Leistung 2,3... 2,5 kW
172... 187 g/h
Gewicht ohne Gaskartusche 3 kg
Zulässige Gaskartusche EN 417 Schraubkartusche mit 7/16
x 28 UNEF-Gewinde (Butan / Pro-
pan Gasgemisch)
Material 1 mm Edelstahl beim Grillkörper, 3
mm Edelstahl beim
Grillrost, Planentasche
Durchmesser der Düse: 0,3 mm

4
Das alles gehört zu Deinem SkottiFür Deine Sicherheit - das musst Du wissen DE
3.6 Risiken durch Feuer
Benutze Skotti nie unbeaufsichtigt.
Benutze Skotti nie auf entzündbarem Untergrund wie einem Tuch.
Halte beim Grillen Sicherheitsabstände zu möglichen Gefahrenbereichen wie
leicht entzündlichen Stoffen: grundsätzlich min. 10 Meter.
Lege niemals entflammbare Teile auf Skotti, wenn dieser in Benutzung oder
noch heiß ist.
Lebensgefahr durch Fettbrand möglich.
▶ Falls es zu einem Fettbrand kommt: Ruhe bewahren. Stelle möglichst die
Gaszufuhr ab ( ).
▶ Verwende einen speziellen Feuerlöscher, Sand, Natron oder Backpulver zum
Löschen.
▶ Versuche nie mit Wasser oder Mehl einen Fettbrand zu löschen. Die Wahr-
scheinlichkeit einer unkontrollierbaren Stichflamme oder Explosion ist extrem
hoch.
▶ Bringe dich und andere in Sicherheit.
▶ Rufe die Feuerwehr unter der EU-weiten Nummer 112 aus dem Festnetz und
Mobilnetz. Sichere bis zum Eintreffen der Feuerwehr den Gefahrenbereich ab,
ohne Dich oder andere in Gefahr zu bringen.
4 DAS ALLES GEHÖRT ZU DEINEM SKOTTI
Pos. Bezeichnung
1 1 x Grillrost
2 1 x Abstrahlblech
3 1 x Brennerrohr
4 1 x Gasschlauch mit Schraubregulator
5 1 x Fußteil mit wabenförmigem Zünd- und Flammenkontrollloch
6 2 x lange Seitenteile mit Logo und Standfüßen
7 1 x Kopfteil mit rundem Loch
8 1 x Unterteil (Fettauffangschale)
6
6
7
8
1
2
4
3
5

5
So baust Du Deinen Skotti aufSo baust Du Deinen Skotti auf DE
5 SO BAUST DU DEINEN SKOTTI AUF
5.1 Wo solltest Du Deinen Skotti aufbauen?
Beachte folgende Punkte bei der Wahl des Grillplatzes:
Skotti und alle seine Einzelteile können sehr heiß werden, sodass Du ihn nicht
bewegen kannst. Überlege Dir vor dem Anzünden, ob der Grillplatz den Sicher-
heitsansprüchen genügt.
Stelle Skotti auf einen geraden und stabilen Untergrund und beachte, dass
Skotti min. 5 cm Freiraum zum Boden haben muss. Sonst kann ausgeströmtes
Gas, das sich nicht entzündet hat, nicht nach unten entweichen. Dadurch kann
eine Explosion ausgelöst werden.
Wenn Skotti auf Sand, Schnee, Eis oder schiefem Untergrund einsinkt oder
schief steht, nutze die Kanten in den Standflächen, um ihn mit einem Stück Holz
oder einem Stein stabil und gerade auszurichten.
Beachte immer die Montageanleitung: Bei falscher Montage von Skotti ent-
stehen unvorhersehbare Gefahren für Dich und andere.
5.2 Skotti montieren
Um Skotti-Grill zu montieren, gehst Du wie folgt vor:
5
6
1. Stecke das lange Seitenteil (6) auf der Seite mit
Skotti-Logo und das kurze Fußteil (5) mit wabenförmi-
gem Loch an der Verbindungsfuge ineinander.
Beide Teile sind an der Verbindungsfuge mit einem
kleinen Dreieck gekennzeichnet.
2. Stecke das Fußteil (5) und das zweite lange Seiten-
teil (6) an der schmalen Verbindungsfuge auf der Seite
mit Skotti-Schriftzug ineinander.
3. Lege das Bodenteil (8) mit der Wölbung nach unten
zwischen die drei aufgebauten Teile. Die glatte Kan-
te muss vorne, die Haken und Nasen auf Höhe der
Schlitze sein.
4. Füge zuerst die Haken in die Schlitze der Seitenteile
(6).
5. Füge die Nasen in die Schlitze des Fußteils (5).
6. Schiebe das Bodenteil (8) so nah an das Fußteil (5)
heran, dass die Haken seitlich Halt bekommen und die
beiden vorderen Nasen am Bodenteil in die passenden
Schlitze des Fußteils gleiten.
7. Führe das Brennerrohr (3) mit der gequetschten Seite
im steilen Winkel und mit der Nase nach oben in den
etwa 3 cm langen Schlitz über dem wabenförmigen
Loch.
8. Lege das Brennerrohr (3) ohne Kraftanwendung auf
dem Bodenteil (8) ab.
9. Lege das Abstrahlblech (2) wie ein Dach über das
Brennerrohr (3).
10. Stecke die Nasen der gelochten Seite in die zwei
schrägen Schlitze des Fußteils (5).
11. Lege auch das Abstrahlblech (2) auf dem Bodenteil
(8) ab.
12. Nimm das lose Kopfteil (7) mit rundem Loch und
stecke es auf das runde Ende des Brennerrohrs (3). Die
eingewölbte Seite muss nach innen zeigen.
13. Hebe das Kopfteil (7) nach oben an und stecke die
beiden Nasen des Abstrahlblechs (2) in die zwei schrä-
gen Schlitze des Kopfteils.
14. Platziere die Verbindungsfugen des Kopfteils (7)
direkt über denen der Seitenteile (6) und drücke das
Kopfteil nach unten.
✔Es entsteht ein seitengleicher Grillkorb.
3
6
8
6
Tipp
▶Auf www.skotti-grill.eu findest
Du dazu das passende Video.

6
So baust Du Deinen Skotti aufSo baust Du Deinen Skotti auf DE
5.3 Füllen Sie die Fettauffangschale mit Wasser.
Am besten nimmst du eine leere Flasche und füllst
sie mit Wasser. Füll den Inhalt nun in die Fettauf-
fangschale. Die Schale sollte etwa 1 cm (0,4 inch)
mit Wasser gefüllt sein.
Fülle bitte kein Wasser ein, während das Gerät
in Betrieb ist. Fülle bitte kein Wasser ein, so-
lange das Gerät noch heiß ist.
Wasser
1. Stelle Skotti so vor Dich, dass das runde Ende des
Brennerrohrs (3) nach rechts zeigt.
2. Nimm den Grillrost (1) so in die Hand, dass sich das
Skotti-Logo rechts unten befindet.
3. Lege den Grillrost (1) zuerst auf der rechten Seite in
die dafür vorgesehenen Aussparungen.
4. Lasse den Grillrost (1) links in die Aussparungen
gleiten.
5. Schiebe den Grillrost (1) an den Nasen in den Ausspa-
rungen leicht nach rechts.
✔Nach einem hörbaren Einrasten ist der Grill verrie-
gelt und stabil.
5.4 Grillrost auflegen
Um den Grillrost aufzulegen, gehst Du wie folgt vor:
5.5 Mit Grillkohle bzw. Holz grillen
Brandgefahr durch falsche Verwendung möglich.
▶Verwende das Brennerrohr nie zum Anzünden von Holzkohle oder Holz.
▶Stelle Skotti nie auf die Transporttasche, wenn Du mit Holzkohle oder Holz
grillst – es entstehen höhere Temperaturen als beim Grillen mit Gas.
Um Skotti mit Grillkohle oder Holz zu verwenden, gehst Du wie folgt vor:
1. Entferne das Brennerrohr (3) zusammen mit dem Abstrahlblech (2), bevor Du
mit Holzkohle oder Holz grillst.
2. Lege den Grillrost (1) nur zum Grillen bei kleiner Flamme auf Skotti.
✔ Nun kannst Du Skotti mit Grillkohle oder Holz verwenden.
Tipp
▶Auch wenn es möglich ist – zum Schutz der Umwelt empfehlen wir Dir:
Benutze Skotti lieber ausschließlich mit Gas.
5.6 Gas anschließen
Lebensgefahr durch falsche Verwendung von
Gaskartuschen möglich.
▶Verwende Skotti als Gasgrill ausschließlich mit einem handelsüblichen
Propan / Butan-Gasgemisch nach EN 417 mit einem maximalen Füllgewicht von
500 Gramm.
▶Die wiederverschließende Gaskartusche muss ein passendes Gewinde für
Deinen Gasregler haben (7/16 x 28 UNEF-Gewinde).
▶Überzeuge Dich vor dem Anschließen, dass die Dichtungen zwischen Skotti
und Gaskartusche vorhanden und in einwandfreiem Zustand sind. Verwende
Skotti nie mit defekten oder abgenutzten Dichtungen.
▶Schließe Gaskartuschen nur im Freien und in sicherem Abstand von Zünd-
quellen an.
▶Vermeide Drehbeanspruchungen des Gasschlauchs.
Um das Gas anzuschließen, gehst Du wie folgt vor:
1. Drehe das Ende mit der Gasdüse im Uhrzeigersinn und mit Gefühl auf das runde Bren-
nerrohrende von Skotti. Das Ende sollte fest aufsitzen, ohne viel Kraft anzuwenden.
2. Verschließe den Gashahn mit einem handfesten Zudrehen nach rechts ( ), bevor Du
die Gaskartusche anschließt.
3. Drehe die Gaskartusche auf den Gasregler und nicht umgekehrt.
✔Das Gas ist angeschlossen.
VOR DER VERWENDUNG MIT GRILLKOHLE ODER HOLZ: TROCKENEN SAND
GLEICHMÄßIG 1 CM HOCH IN DER BODENSCHALE VERTEILEN!
!

7
So benutzt Du Deinen SkottiSo baust Du Deinen Skotti auf DE
5.7 Gaskartusche wechseln
Lebensgefahr durch falsche Verwendung von
Gaskartuschen möglich.
▶Prüfe vor dem Lösen der Gaskartusche, dass der Brenner erloschen ist.
▶Prüfe vor dem Wechsel der Gaskartusche, dass diese leer ist, z. B. schütteln,
damit das Schwappen der Flüssigkeit hörbar wird.
▶Wechsele die Gaskartusche nur im Freien und mit sicherem Abstand von
Zündquellen und anderen Personen.
▶Vermeide Drehbeanspruchungen des Gasschlauchs.
Um die Gaskartusche zu wechseln, gehst Du wie folgt vor:
1.Verschließe den Gashahn mit einem handfesten
Zudrehen nach rechts ( ), bevor Du die Gaskartu-
sche löst.
2.Drehe die Gaskartusche vom Gasregler und nicht
umgekehrt.
➲Die Gaskartusche ist entfernt.
3. Überzeuge Dich vor dem Anschließen, dass die
Dichtungen zwischen Skotti und Gaskartusche vor-
handen und in einwandfreiem Zustand sind. Ver-
wende Skotti nie mit defekten oder abgenutzten
Dichtungen.
4. Drehe die neue Gaskartusche auf den Gasregler
und nicht umgekehrt.
✔Die Gaskartusche ist gewechselt.
6 SO BENUTZT DU DEINEN SKOTTI
6.1 Vor dem Anzünden prüfen
Um die Sicherheitsprüfungen vor jedem Anzünden durchzuführen, gehst Du wie
folgt vor:
1. Prüfe, ob das Brennerrohr nicht verstopft ist. Löse die Verstopfung, bevor
du Skotti verwendest.
2. Prüfe, ob die Gasdichtungen und der Gasschlauch in Ordnung sind.
3. Zünde Skotti nicht während eines Leck-Tests.
4. Für den Leck-Test eignet sich eine Seifen-Wasser-Lösung in einer Sprüh-
flasche.
5. Sprühe damit den Gasschlauch und die Verbindungen zwischen Skotti und
der Gaskartusche ein.
6. Öffne den Gasregler.
➲ Falls es undichte Stellen gibt, entstehen kleine Blasen.
7. Wenn es undichte Stellen gibt, drehe den Gasregler nach rechts ( ) und
schraube die Gaskartusche ab. Benutze Skotti nicht.
8. Stelle vor dem Zünden sicher, dass alle Teile vorschriftsmäßig montiert
sind.
9. Entferne vor dem Zünden Fett aus Skotti, das vielleicht von vorherigem
Grillen stammt. Fettbrände sind gefährlich und müssen vermieden werden.
✔ Wenn alles einwandfrei funktioniert, kannst du Skotti anzünden.
6.2 Anzünden
Lebensgefahr durch falsche Verwendung und
Unachtsamkeit möglich.
▶Skotti sollte im Betrieb nicht zu starkem Wind ausgesetzt sein. Das Zünd-
und Flammenkontrollloch sollte immer vom Wind abgewandt sein.
▶Achte beim Anzünden auf Dich und Deine Kleidung. Während des Vorheizens
oder bei starkem Schütteln von Skotti und / oder der Gaskartusche kann das
Gas flüssig austreten und zu Stichflammen führen. Beispielsweise können sich
lange umherfliegende Haare oder weite Kleidung schnell entzünden.
Um Skotti anzuzünden, gehst Du wie folgt vor:
1. Drehe den Gasregler an der Gaskartusche leicht nach links auf ( ), bis
Du das Gas strömen hörst.
2. Zünde das Gas im Brennerrohr nach ca. 1 - 2 Sekunden mit einem Feuer-
zeug oder Streichholz durch das wabenförmige Zünd- und Flammkontroll-
loch am Fußteil.
Explosionsgefahr, Feuer und tödliche Verletzungen
durch Gas möglich.
▶Wenn Du das Gas im Brennerohr nicht innerhalb von 4 Sekunden entzün-
den kannst, brich das Zünden ab, z. B. aufgrund von Wind, einem fehlerhaften
Feuerzeug, Streichholz, etc.
▶Drehe den Gasregler nach rechts zu ( ).
▶Warte mindestens 1 Minute – damit das Gas aus dem Grillkörper entweichen
kann. Sonst herrscht akute Explosionsgefahr.

8
So verstaust du Deinen Skotti wiederWenn es mal nicht ganz klappt DE
3. Kontrolliere durch das Zünd- und Flammenkontrollloch nach jedem Zünd-
versuch, ob das Gas im Brennerrohr entzündet ist.
4. Wenn die Flammen ausgehen, drehe unverzüglich den Gasregler nach
rechts zu ( ).
Verbrennungsgefahr durch heiße Oberflächen möglich.
▶Skotti ist wahrscheinlich noch stark erhitzt. Berühre keine Teile von Skotti
beim Zünden.
5. Warte mindestens 1 Minute, bevor du erneut zündest.
✔Viel Spaß beim Grillen.
6.3 Grill-Tipps
Du kannst Skotti im Gasbetrieb auf die Transporttasche stellen. Diese kann her-
unterlaufendes Fett auffangen und anschließend bequem abgewischt werden.
Heize Skotti immer etwas vor. Bei Skotti geht das sehr schnell. Bereits nach 2
Minuten kannst Du super grillen.
Skotti hat keinen Gasdruckminderer. Auf diesen haben wir bei der Entwicklung
bewusst verzichtet. Der Bereich über dem Zünd- und Flammenkontrollloch ist
oft etwas weniger heiß. So kannst Du fertiges Grillgut schön warmhalten oder
Grillgut, das weniger Hitze benötigt, dort auflegen. Je nach Wind und Wetter-
bedingungen kann dieser Bereich etwas wärmer oder kälter sein. Probier es
einfach aus.
Nutze bei Temperaturen unter 10 °C Wintergas oder Powergas. Dieses kann
auch bei niedrigeren Temperaturen durch die baulichen Eigenschaften der Kar-
tusche und Gasmischung besser ausströmen.
7 WENN ES MAL NICHT GANZ KLAPPT
Gas im Brennerrohr lässt sich nicht entzünden
Vermeide direkte Windeinwirkung.
Verwende ein funktionsfähiges Feuerzeug oder Streichholz.
Prüfe nach Zudrehen des Gasreglers, ob noch Gas in der Kartusche ist.
Hitzeverteilung ist ungleichmäßig
Stelle Skotti windgeschützt auf.
Skotti entfaltet nicht die gewohnte Hitze.
Wenn es kälter als 10 °C ist, verwende Wintergas oder Powergas (dieses bie-
ten einzelne Hersteller an).
Gelbe Flammen schießen unter Abstrahlblech hervor
Reduziere das Gas (Gasregler etwas nach rechts zudrehen).
Es gibt Stichflammen
Lege nie Alufolie in Skotti.
Möglicherweise ist die Grillkammer verschmutzt. Reinige diese.
8 SO VERSTAUST DU DEINEN SKOTTI WIEDER
Sobald Skotti abgekühlt ist, kannst Du alle Teile einfach wieder platzsparend in
der abwaschbaren Tasche verstauen.
Um Skotti abzubauen, gehst Du wie folgt vor:
1. Stelle sicher, dass der Gasregler nach rechts zugedreht ist ( ) und die
Teile nicht mehr heiß sind.
2. Drehe die Gaskartusche vom Gasregler ab.
3. Drehe das Ende mit der Gasdüse gegen den Uhrzeigersinn vom runden
Ende des Brennerrohrs (3) von Skotti ab.
4. Stelle Dich so vor Skotti, dass das runde Ende des Brennerrohrs (3) nach
rechts zeigt.
5. Hebe mit Deinen Zeigefingern die beiden Nasen am Grillrost (1) an, die in
den linken Aussparungen liegen.
6. Ziehe den Grillrost (1) etwas nach links und hebe ihn gleichzeitig etwas an.
➲Der Grill ist entriegelt.
7. Hebe das Kopfteil (7) mit dem runden Ende des Brennerrohrs (3) nach oben
an und löse es von Abstrahlblech (2) und Brennerrohr.
8. Ziehe das Abstrahlblech (2) aus den Schlitzen des Fußteils (5).
9. Hebe das Brennerrohr (3) am runden Ende etwas an und ziehe das ge-
quetschte Ende im steilen Winkel und ohne Kraftwendung aus dem Schlitz
des Fußteils (5).
10.Ziehen Sie die Bodenplatte (Fettauffangschale) (8) vorsichtig aus dem Fuß-
teil (5) und den Seitenteilen (6) heraus und entsorgen Sie das Fettwasser
aus der Fettauffangschale nach dem Abkühlen an einem geeigneten Ort.
(Erkundigen Sie sich bei Ihrem örtlichen Entsorgungsunternehmen). Schüt-
ten Sie das Fett niemals in den Abfluss. Reinigen Sie die Fettauffangschale

9
Garantie / Entsorgung und RecyclingSo pflegst Du Deinen Skotti DE
nach jedem Gebrauch, um das Risiko eines Fettbrandes oder einer Fettex-
plosion zu verringern.
11.Ziehe die beiden langen Seitenteile (6) aus dem Fußteil (5).
✔Skotti ist abgebaut.
9 SO PFLEGST DU DEINEN SKOTTI
Reinigung Deines Skotti
Du kannst alle Teile von Skotti – außer Brennerrohr und Gasschlauch mit Düse
und Gasregler – in die Spülmaschine stellen. Die Tasche von Skotti selbstver-
ständlich auch. So macht das Reinigen Spaß und kostet nur wenig Zeit.
Überprüfe vor dem Reinigen, ob die Reinigungsmittel für eine Edelstahlober-
fläche geeignet sind. Ansonsten können Kratzer entstehen.
Für stark Eingebranntes reicht eine Reinigung in der Spülmaschine nicht.
Lass diese Teile zuerst gründlich in Spülwasser einweichen.
Damit Skotti wieder richtig sauber wird, empfehlen wir Dir Seifenpads aus
Stahlwolle für Edelstahloberflächen oder andere Grill- bzw. Backofenreiniger.
Diese lösen mit wenig Aufwand und zum kleinen Preis auch Eingebranntes –
und Skotti erstrahlt wieder in neuem Glanz.
„Weite“ beim Reinigen des Ventils oder Brennerrohrs nicht die Ventildüsen
oder das runde Ende des Brennerrohrs.
Reinige das Brennerrohr nur, wenn der Gasschlauch abgeschraubt ist, da
sonst die Gasdüse verstopfen könnte.
Wenn sich die Düsenlöcher des Brennerrohrs mit der Zeit verschließen, bürs-
te diese mit einer Kupferbürste sanft ab und schüttle das Rohr mit der Öffnung
nach unten aus.
Wartung Deines Skotti
Alle 3 Monate musst Du Dich um Deinen Skotti kümmern, damit er in
optimalem Zustand bleibt:
Prüfe das Brennerrohr innen und reinige dies bei Verschmutzung oder Ver-
stopfung.
Prüfe den Gasschlauch und ersetze diese bei Beschädigung oder Undichtig-
keit.
Prüfe die Dichtungen und ersetze diese bei Beschädigung oder Verschleiß.
10 UNSERE GARANTIE FÜR DEINEN SKOTTI
Bei Vennskap geben wir Dir für Deinen Skotti ab dem Kaufdatum eine zweijährige
Garantie für alle Teile. Das gilt für:
Gasschlauch mit Gasdüse und Gasregler
Brennerrohr
Skotti-Tasche
Da wir von unserem Gerät aber mehr als überzeugt sind, erweitern wir unsere
Garantie sogar noch. Wir geben Dir:
5 Jahre Garantie für den Skotti-Grillkörper mit Grillrost
Unsere Garantie gilt nur, wenn Skotti gemäß dieser Gebrauchsanleitung auf-
gebaut, benutzt und gepflegt wird und wir nach unserer Prüfung feststellen,
dass das Gerät oder einzelne Teile wirklich fehlerhaft sind. Wir reparieren oder
ersetzen dann kostenlos das ganze Gerät oder fehlerhafte Einzelteile. Nimm
bitte im Reklamationsfall immer direkt Kontakt mit uns auf.
Für eine Reklamation musst Du das Kaufdatum nachweisen (also: Rechnung
bitte aufbewahren!) und eine Beschreibung des Fehlers / Problems in Schrift-
form hinzufügen. Wenn wir Dich auffordern, die fehlerhaften Teile einzusen-
den, übernimmst Du die Versandkosten. Wir senden Dir dann reparierte oder
ersetzte Teile zurück und übernehmen dafür die Versandkosten.
Weitere Informationen findest du auch auf unserer Webseite:
www.skotti-grill.eu
11 ENTSORGUNG UND RECYCLING
Entsorge verbrauchte Gaskartuschen, bei der Reinigung anfallende Flüssig-
keiten und Skotti selbst mit Rücksicht auf unsere Umwelt entsprechend den
örtlichen Entsorgungsvorschriften und Umweltgesetzen.
Hinweise dazu kann Dir Dein Gashändler und die örtliche Kommunalbehörde
geben.

10
EN
IntroductionContent
CONTENT
1. Introduction
1.1 This is where we explain your Skotti to you
1.2 Here is where you need to be careful
2. Your Skotti’s details
3. For your safety - This is what you need to know
3.1 This is what you can use Skotti for
3.2 This is what you should not do with Skotti
3.3 Risks from hot surfaces
3.4 Risks for children
3.5 Risks from gas
3.6 Risk of fire
4. All of this comes with your Skotti
5. This is how you set up your Skotti
5.1 Where to set up your Skotti?
5.2 Setting up Skotti
5.3 Fill the grease drip tray with water
5.4 Inserting the grill rack
5.5 Grilling with charcoal or wood
5.6 Connecting the gas
5.7 Changing the gas cartridge
6. This is how you use your Skotti
6.1 Check before Ignition
6.2 Ignition
6.3 Grill tips
7 If things don’t happen as they should
8 Here’s how to pack away your Skotti
9 Here’s how to look after your Skotti
10 Our guarantee for your Skotti
11 Disposal and recycling
1 INTRODUCTION
These user instructions will make sure that you use Skotti safely and efficiently.
It also contains important information on the maintenance of your Skotti.
Important information
Please read the user instructions carefully and completely to familiarize your-
self with Skotti before connecting it to the gas cartridge or bottle. Keep the user
instructions, so you can read them again or pass them on to other users.
Manufacturer
Vennskap GmbH & Co. KG
In der Loh 36 c
40668 Meerbusch / GERMANY
+49(0)2150-7076910
www.skotti-grill.eu
1.1 This is where we explain your Skotti to you
When you need to do something
To perform an action, do the following:
1. Do this.
2. Do that.
➲This is the immediate result.
3. Do that.
✔ You have performed the action.
Information is listed as follows:
List information
1.2 Here is where you need to be careful
D A N G E R
Indicates a dangerous situation resulting in serious
injury or death
▶Measures to avoid the danger
Tip
▶Tips for use and helpful information

11
2 YOUR SKOTTI’S DETAILS
EN
For your saftey - this is what you need to knowDetails / For your saftey
Device
Mobile gas grill, type Skotti
Dimensions
Grill rack (length x width)
30,4 x 21 cm
Set-up (length x width x height)
33,6 x 21,9 x 17,6 cm
Packed up in bag
(length x width x height)
45 x 30 x 3,5 cm
Power
2,3 ... 2,5 kW
172 ... 187 g/h
Weight without gas cartridge
3 kg
Approved gas cartridge
EN 417 screwable cartridge with
7/16 x 28 UNEF thread (butane/pro-
pane gas mixture)
Material 1 mm stainless steel grill corpus,
3 mm stainless steel grill rack,
canvas bag
3 FOR YOUR SAFTEY THIS IS WHAT YOU
NEED TO KNOW
3.1 This is what you can use Skotti for
Skotti is for private use only.
Only use Skotti outdoors.
Use Skotti in gas operation with a standard EN 417 propane / butane gas mix-
ture only. The resealable gas cartridge must have an appropriate thread for your
gas regulator (7/16 x 28 UNEF thread).
Only use approved screwable cartridges up to a maximum of 500 g.
Connecting other gas cartridges or gas mixtures can be very dangerous.
You can use Skotti with charcoal or wood.
3.2 This is what you should not do with Skotti
Skotti is not for commercial use.
Do not operate Skotti with natural gas.
When using Skotti, do not loosen or disassemble the gas regulator ( ) or
other parts.
Never insert or combine Skotti into another structure. Unrestricted air flow
must always be verified. Otherwise, fire or explosion may be caused, resulting in
serious or even deadly injuries and high property damage.
Never repair or make alterations to Skotti. This can cause serious risks and
will void your warranty. Always have Skotti repaired by professionals. Please
check for our address in Chapter “1 Introduction”.
3.3 Risks from hot surfaces
Do not touch Skotti when it is in use or directly after grilling. Skotti and its
individual parts can heat up to very high temperatures.
Skotti requires supervision even after grilling until it has completely cooled
down. In summer, this may take approximately 20 minutes. Otherwise, acci-
dents, burns or fire can be caused.
3.4 Risks for children
Skotti must not be operated by children.
Keep away from children, even when it is cooling down after grilling.
3.5 Risks from gas
Take note of the instructions on the gas cartridge.
Never store gas cartridges near Skotti.
Always transport and store gas cartridges carefully. Even an apparently empty
gas cartridge can still contain gas.
Never use Skotti if the gas supply or gaskets are defective or faulty.
Search for gas leaks with a soapy water solution only, e.g. in a spray bottle.
Spray the solution onto the corresponding parts and open the gas regulator.
Small bubbles will appear at leaking spots.
Never look for gas leaks using a flame. This may cause shooting flames or
explosions.
Never damage the gas cartridge. This may cause an explosion.
Have dented or rusty gas cartridges checked by your gas supplier before use.
At lower temperatures, liquid gas cannot convert into gas easily, i.e. it does
not burn as well. In winter, we therefore recommend using special winter gas or
power gas.
Possible risk of explosion, fire and deadly injuries due to gas
▶If you smell gas, immediately turn the regulator screw to the right ( ).
Disconnect the hose from the gas cartridge. Extinguish open flames, cigarettes,
etc. immediately.
▶If you still smell gas, keep away from Skotti and the gas cartridge. Inform the
gas supplier and/or the fire service.
3.6 Risk of fire
Never operate Skotti unattended.
Never use Skotti on flammable surfaces such as cloth.

12
All of this comes with your SkottiFor your saftey - this is what you need to know
When grilling, keep a safe distance from potential danger areas and highly
flammable substances, generally at least 10 meters.
Never place flammable items onto Skotti when it is grilling or still hot.
Possible danger to life due to grease fires.
▶ If a grease fire occurs, remain calm. If possible, turn off the gas supply ( ).
▶ Use a special fire extinguisher, sand, baking soda or baking powder to extin-
guish a potential fire.
▶ Never try to extinguish grease fires with water or flour. The probability of
uncontrolled shooting flames or explosions is extremely high.
▶ Get yourself and others to safety.
▶ Call the fire service on the EU-wide number 112 from landlines and mobiles.
▶ Until the firefighters arrive, secure the danger area without putting yourself or
others in danger.
4 ALL OF THIS COMES WITH YOUR SKOTTI
EN
Pos. Device
1 1 x grill rack
2 1 x baffle plate
3 1 x burner pipe
4 1 x gas hose with screw-on regulator
5 1 x foot panel with honeycomb-shaped ignition and flame control
6 2 x long side panels with logo and feet
7 1 x head panel with round hole
8 1 x lower part (grease drip tray)
6
6
7
8
1
2
4
3
5

13
This is how you set up your SkottiThis is how you set up your Skotti
5 THIS IS HOW YOU SET UP YOUR SKOTTI
5.1 Where to set up your Skotti?
Note the following when choosing a grilling spot:
Skotti and its individual parts can heat up to very high temperatures, so you
should not move the grill during use. Before lighting the grill, you should consid-
er carefully if the grilling spot meets the safety requirements.
Put Skotti on a flat and stable surface and make sure that there is enough
space (at least 5 cm) between Skotti and the surface it is on. Otherwise, unlit gas
can escape through the bottom of the grill. This can cause an explosion.
If Skotti is sinking or leaning on sand, snow, ice, or uneven surfaces, put a
piece of wood or rock under the edges in the stands to balance it.
Follow the assembly instructions. If Skotti is improperly set up, you place
yourself and others at an unpredictable risk.
5.2 Setting up Skotti
To set up Skotti, proceed as follows:
1. Insert the long side part (6) on the side with the Skotti
logo and the short foot part (5) with the honeycomb hole
in the connecting joint.
Both parts are marked with a small triangle at the con-
nection joint.
2. Plug the foot part (5) and the second long side part (6)
into one another at the narrow connecting joint on the
side with the Skotti lettering.
3. Slide the bottom panel (8) into the three-sided struc-
ture, pointed side down. Make sure that the hooks and
tabs are at an equal height with the slits and the smooth
edge of the panel is facing you.
4. Slide the hooks into the slits on the side panels (6).
5. Slide the tabs into the slits on the food panel (5).
6. Hold the bottom panel (8) close to the foot panel (5) to
support the hooks on the side and slide both tabs at the
front of the bottom panel into the cor- responding slits
of the foot panel.
7. Take the burner pipe (3) at the squeezed end and hook
it into the horizontal 3 cm-long slot above the honey-
comb-shaped hole at a steep angle and with the tab
facing upward.
8. Place the burner tube (3) on the bottom part (8) with-
out exerting any force.
9. Place the radiating plates (2) over the respective
burner tube (3) to create a roof.
10. Slide the tabs of the perforated side into the two
slanted slits of the foot panel (5).
11. Let the baffle plate (2) rest a little on the bottom
panel (8)
12. Take the head panel (7) and slide the round end of
the burner pipe (3) through the round hole of the head
panel (7). The curvature of the head panel should be on
the inside of the grill.
13. Lift the head panel (7) and slot the two tabs on the
baffle plate (2) onto the corresponding slanted slits of
the head panel.
14. Drop the head panel (7) into place, with the slits
fitting smoothly onto the side panels (6).
✔This produces a grill basket with equal sides.
Tip
▶You can find the relevant video on
www.skotti-grill.com
EN
5
6
3
6
8
6

14
This is how you set up your SkottiThis is how you set up your Skotti
5.3 Fill the grease drip tray with water.
It is best to take an empty bottle and fill it with wa-
ter. Now fill the water into the grease drip tray. The
bowl should be about 1 cm (0.4 inch) full of water.
Do not fill with water while the appliance is in
operation. Do not add water while the appliance
is still hot.
Water
1. Place Skotti in front of you, with the round end of the
burner pipe (3) pointing to the right.
2. Take the grill rack (1) with the Skotti logo on the bot-
tom right.
3. Insert the grill rack (1) into the corresponding slots on
the right side.
4. Let the rack (1) slide into the slots on the left side.
5. Carefully pull the grill rack (1) back at the tabs, to-
wards the right.
✔When you hear an audible click, the grill is locked
and stable.
5.4 Placing of the grill grate
To place the grill grate, proceed as follows:
5.5 Grilling with charcoal or wood
Possible risk of fire due to incorrect use.
▶Never use the burner pipe to ignite charcoal or wood.
▶Never put Skotti on the carrier bag when using charcoal or wood because
those fires burn at higher temperatures.
To operate Skotti with charcoal or wood, proceed as follows:
1. Before grilling with charcoal or wood, take off the burner pipe (3) and the
baffle plate (2).
2. Put the grill rack (1) on Skotti only with a low flame.
✔ You can now operate Skotti with charcoal or wood.
Tip
▶To protect the environment, we recommend that you operate Skotti exclusive-
ly with gas.
5.6 Connecting the gas
Possible danger to life due to incorrect use of gas cartridges
▶Use Skotti in gas operation with a standard EN417 propane/butane gas mix-
ture only, using approved cartridges up to a maximum of 500g.
▶The resealable gas cartridge must have an appropriate thread for your gas
regulator (7/16 x 28 UNEF thread).
▶Before connecting the gas cartridge, make sure the gaskets between the de-
vice and the gas cartridge are in working order and condition. Never use Skotti
with defective or worn out gaskets.
▶Connect the gas cartridge outdoors only. Keep a safe distance from ignition
sources and other people.
▶Avoid twisting the gas hose.
To connect the gas, proceed as follows:
1. Turn the end with the gas nozzle (4) clockwise gently onto the round end of the Skotti
burner tube. The end should fit snugly without using much force.
2. Close the gas tap with a hand-tight turn to the right ( ), before you connect the appro-
priate gas cartridge.
3. Twist the gas cartridge onto the gas regulators and not the other way around
✔The gas is connected.
EN
BEFORE USING WITH GRILL CHARCOAL OR WOOD: SPREAD DRY SAND
EVENLY 1 CM HIGH IN THE BOTTOM TRAY!
!

15
This is how you use your SkottiThis is how you set up your Skotti
5.7 Changing the gas cartridges
Possible Danger to life due to incorrect usage of gas cartridges.
▶Before loosening the gas cartridge, check that the burner are no longer lit.
▶Before changing the gas cartridge, check that it is empty, e.g. by shaking so
that any sloshing of liquid can be heard.
▶Only change the gas cartridge outdoors and at a safe distance from sources
of ignition and other people.
▶Avoid twisting the gas hoses.
To change the gas cartridge, proceed as follows:
1. Close the gas tap with a hand-tight turn to the
right ( ), before you release the gas cartridge.
2. Twist the gas cartridge off the gas regulator, not
the other way around.
➲The gas cartridges have now been removed.
3. Before connecting, make sure that the seal
between the Skotti and the gas cartridges are in
place and in faultless condition. Never use your
Skotti with defective or worn seal.
4. Twist the new gas cartridge onto the gas regu-
lator and not the other way round.
✔The gas cartridge have now been exchanged.
6 THIS IS HOW YOU USE YOUR SKOTTI
6.1 Check before Ignition
To carry out safety checks each time before lighting , proceed as follows:
1. Check that the burner tube are not blocked. Loosen the blockage before
using the Skotti.
2. Check whether the gas seal and hose are OK.
3. Do not light the Skotti during a leak test.
4. A soap and water solution in a spray bottle can be used to check for leaks.
5. Use it to spray the gas hoses and the connections between the Skotti and
the gas cartridges.
6. Open the gas regulator.
➲ If there should be any leaks, small bubbles will appear.
7. If there are leaks, turn the gas regulator clockwise ( ) and unscrew the
gas canisters.
Do not use the Skotti.
8. Before lighting, make sure that all parts are correctly assembled.
9. Before lighting, remove any fat or grease from the Skotti that may have re-
mained from previous grilling. Fat fires are dangerous and must be avoid-
ed.
✔ If everything is working properly, you can then light the Skotti.
6.2 Ignition
Possible Danger to life due to incorrect usage
and inattentiveness.
▶The Skotti should not be exposed to any strong winds when in operation. The
ignition and flame control hole should always face away from the wind.
▶Take care of yourself and your clothing when lighting. During preheating or if
the Skotti and/or the gas cartridge is shaken vigorously, gas can escape in liquid
form and cause flashes. Just as one example, long hair or loose clothing can
quickly burst into flame.
To ignite the Skotti, proceed as follows:
1. Turn the gas regulator on the gas cartridge a little to the left ( ), until you
hear the gas flowing.
2. After about 1–2 seconds, ignite the gas in the burner tube with a lighter or
a match through the honeycomb ignition and flame control hole on the foot
part.
Possible Risk of explosion, fire, and fatal injuries from gas.
▶If you cannot ignite the gas in the burner tube within 4 seconds, e.g. due to
wind, a faulty lighter or match, etc., stop trying.
▶Immediately turn the gas regulator to the right ( ).
▶Wait at least 5 minute so that the gas can escape from the grill body. Other-
wise, there is an acute risk of explosion.
3. Check through the ignition and flame control hole after each attempt to
light it whether the gas in the burner tube has ignited.
4. If the flames go out, immediately turn the gas regulator to the right ( ).
EN

16
Here’s how to pack away your SkottiIf things don’t happen as they should
Risk of burns from hot surfaces.
▶The Skotti is probably still very hot.
Do not touch any part of the Skotti when lighting it.
5. Wait at least 5 minute before re-lighting.
✔Have fun with your barbecue.
6.3. Grill tips
You can place the Skotti in gas mode on the transport bag. This can catch any
grease that may run off so that it can then be easily wiped off.
Always preheat your Skotti. This happens very quickly with the Skotti.
After just 2 minutes you can start grilling.
The Skotti does not feature a gas pressure reducer. We deliberately avoided this
when developing it. The areas above the ignition and flame control hole are often
a little less hot. Using this area, you can keep the finished grilled food nice and
warm or place grilled food requiring less heat there. Depending on the wind and
weather conditions, this area can be a little warmer or colder. Just try it out.
Use winter gas or power gas at temperatures below 10 ° C. This can flow out
better even at lower temperatures because of the structural properties of the
cartridge and gas mixture.
7 IF THINGS DON’T HAPPEN AS THEY SHOULD
The gas in the burner tube won’t light
Avoid direct exposure to the wind.
Use a working lighter or match.
After turning the gas regulator off, check whether there is still gas in the
cartridge.
Heat distribution is uneven
Place the Skotti out of the wind. Always let the wind blow against the top part
(7).
The Skotti does not produce its usual level of heat
If it is colder than 10 °C, use winter gas or power gas (as offered by different
manufacturers).
Yellow flames shoot out from under the radiating plate
Reduce the gas flow (turn the gas regulator a little to the right).
Fire flashes are produced
Never put aluminium foil in the Skotti.
The grill chamber may be dirty. Clean it.
8 HERE’S HOW TO PACK AWAY YOUR SKOTTI
As soon as your Skotti has cooled down, you can simply stow all the parts back
into the washable bag to save space.
To dismantle the Skotti, proceed as follows:
1. Make sure that the gas regulator are turned to the right ( ) and that all
parts are no longer hot.
2. Twist off the gas cartridge from the gas regulator.
3. Twist the end with the gas nozzle anticlockwise from the round end of the
Skotti burner tube (3).
4. Place the Skotti in front of you so that the round end of the burner tube (3)
point to the right.
5. Use both of your index fingers to lift both tabs (those in the left slits) from
the grill rack (1).
6. Carefully move the grill rack (1) to the left and lift it up a little at the same
time.
➲The grill is then unlocked.
7. Lift the top part (7) with the round end of the burner tube (3) and detach it
from the radiating plate (2) and the burner tube by pulling it out to the right.
8. Pull the radiating plate (2) out of the left slot in the foot part (5).
9. Raise the burner tube (3) a little at the round end and pull the pinched end
out of the slot in the foot section (5) at a steep angle and without using any
force.
10.Pull the bottom plate (grease drip tray) (8) carefully out of the foot part (5)
and side parts (6) and dispose of the grease water from the grease drip tray
in a suitable place after it has cooled down. (Check with your local waste
disposal company). Never pour the grease down the drain. Clean the grease
tray after each use to reduce the risk of grease fire or grease explosion.
11.Pull the two long side parts (6) out of the foot part (5).
✔The Skotti is dismantled.
EN

17
Our guarantee for your Skotti / Disposal and recyclingHere’s how to look after your Skotti
Fire flashes are produced
Never put aluminium foil in the Skotti.
The grill chamber may be dirty. Clean it.
8 HERE’S HOW TO PACK AWAY YOUR SKOTTI
As soon as your Skotti has cooled down, you can simply stow all the parts back
into the washable bag to save space.
To dismantle the Skotti, proceed as follows:
1. Make sure that the gas regulator are turned to the right ( ) and that all
parts are no longer hot.
2. Twist off the gas cartridge from the gas regulator.
3. Twist the end with the gas nozzle anticlockwise from the round end of the
Skotti burner tube (3).
4. Place the Skotti in front of you so that the round end of the burner tube (3)
point to the right.
5. Use both of your index fingers to lift both tabs (those in the left slits) from
the grill rack (1).
6. Carefully move the grill rack (1) to the left and lift it up a little at the same
time.
➲The grill is then unlocked.
7. Lift the top part (7) with the round end of the burner tube (3) and detach it
from the radiating plate (2) and the burner tube by pulling it out to the right.
8. Pull the radiating plate (2) out of the left slot in the foot part (5).
9. Raise the burner tube (3) a little at the round end and pull the pinched end
out of the slot in the foot section (5) at a steep angle and without using any
force.
10.Pull the bottom plate (grease drip tray) (8) carefully out of the foot part (5)
and side parts (6) and dispose of the grease water from the grease drip tray
in a suitable place after it has cooled down. (Check with your local waste
disposal company). Never pour the grease down the drain. Clean the grease
tray after each use to reduce the risk of grease fire or grease explosion.
11.Pull the two long side parts (6) out of the foot part (5).
✔The Skotti is dismantled.
9 HERE’S HOW TO LOOK AFTER YOUR SKOTTI
Cleaning your Skotti
You can put all the parts of your Skotti, except the burner tube and gas hose with
the nozzle and the gas regulator, into a dishwasher. The Skotti bag can also be
put into a dishwasher of course. This makes cleaning fun and only takes a little
time.
Before cleaning, check whether the cleaning agents are suitable for stain-
less-steel surfaces. Otherwise, scratching may occur.
Cleaning in the dishwasher will not be enough for heavily burnt-on items.
First soak these parts thoroughly in soapy water.
To make your Skotti really clean again, we recommend soap pads made of
steel wool for stainless-steel surfaces or other grill or oven cleaners.
These will remove burnt-on items with little effort and economically, making
your Skotti shine once again in its full glory.
When cleaning the valves or the burner tube, do not „widen“ the valve nozzles
or the round end of the burner tube.
Only clean the burner tubes when the gas hose are unscrewed, otherwise, the
gas nozzles might clog up.
If the nozzle hole of the burner tube become occluded over time, gently brush
them off with a copper brush and shake the tube with the opening facing down-
wards.
Maintaining your Skotti
Every 3 months you should take care of your Skotti to keep it in optimal condi-
tion:
Check the insides of the burner tube and clean them if they are dirty or
clogged.
Check the gas hose and replace it if it is damaged or leaking.
Check the seal and replace it if it is damaged or worn
10 OUR GUARANTEE FOR YOUR SKOTTI
Vennskap fully guarantees Skotti for two years from the day of purchase. This
includes the following devices:
Gas hose with gas nozzle and gas regulator
Burner tube
The Skotti bag
We are so sure of the quality of our product that we’ve even extended the war-
ranty:
5 years for Skotti’s grill chamber and grill rack
Our warranty only applies if Skotti is set up, used and maintained according to
these instructions, and if, after our assessment, we find out that the device or
its individual parts are really faulty. We will then repair or replace the device or
individual faulty parts for free. Please get in touch with us immediately in case of
complaints.
To file a complaint, you will need to provide proof of purchase (so please keep
the receipt!) and a written description of the problem your Skotti is having. If we
ask you to return the faulty parts, you will cover the shipping costs. We will send
the repaired or replaced parts back to you and we will cover the shipping costs.
You can find more information about this on our website:
www.skotti-grill.eu
11 DISPOSAL AND RECYCLING
Dispose of used gas cartridges, liquids generated during cleaning, and Skotti
itself with respect for our environment in accordance with the local disposal
regulations and environmental laws. Your gas retailer and the local municipal
authorities can give you advice on this.
EN

18
DK
IndledningIndhold
INDHOLD
1. Indledning
1.1 Sådan forklarer vi dig din Skotti
1.2 Her skal du passe på
2. Data om din Skotti
3. Angående din sikkerhed – dette skal du vide
3.1 Dette kan du bruge Skotti til
3.2 Dette må du ikke bruge Skotti til
3.3 Risici fra varme overflader
3.4 Risici for børn
3.5 Risici ved gas
3.6 Risiko for brand
4. Alt dette hører til din Skotti
5. Sådan samler du din Skotti
5.1 Hvor skal du stille din Skotti?
5.2 Montering af Skotti
5.3 Fyld fedtdrypbakken med vand
5.4 Placering af grillrist
5.5 Grill med grillkul eller træ
5.6 Tilslutning af gas
5.7 Skift gaspatron
6. Sådan bruger du din Skotti
6.1 Før antændelse skal du undersøge den
6.2 Tænding
6.3 Grill-tips
7 Hvis det ikke helt går, som det skal
8 Sådan opbevarer du din Skotti
9 Sådan plejer du din Skotti
10 VoresgarantipådinSkotti
11 Bortskaffelse og genanvendelse
1 INDLEDNING
Denne brugsanvisning muliggør en sikker og effektiv håndtering af Skotti. Des-
uden indeholder den vigtige anvisninger om pleje af din Skotti.
Vigtigt
Læs denne brugsanvisning grundigt igennem, for at lære din Skotti at kende før
du tilslutter den til gaspatronen eller gasflasken. Gem brugsan- visningen, så du
kan læse den igen eller give den videre til andre brugere.
Producent
Vennskap GmbH & Co. KG
In der Loh 36 c
40668 Meerbusch / GERMANY
+49(0)2150-7076910
www.skotti-grill.eu
1.1 Sådan forklarer vi dig din Skotti
Når du skal gøre noget
For at gennemføre en handling, skal du bruge følgende fremgangsmåde:
1. Gør ditten.
2. Gør datten.
➲Dette mellemresultat skyldes dette.
3. Gør ditten.
✔ Du har gennemført handlingen.
Klassificeringen beskrives på følgende måde
Klassificering 1. rangorden
1.2 Her skal du passe på
FARE
Henviser til en farlig situation, som kan føre til alvorlige
personskader eller død.
▶Foranstaltninger til afværgelse af faren
Tip
▶Anvendelsestips og nyttige informationer

19
2 DATA OM DIN SKOTTI
DK
3 ANGÅENDE DIN SIKKERHED DETTE SKAL DU VIDE
3.1 Dette kan du bruge Skotti til
Brug kun Skotti til privat grilning.
Brug kun Skotti udendørs.
Brug kun Skotti som gasgrill med en gængs propan/butan gasblanding jf. EN
417. Den genlukkelige gaspatron skal have et gevind, som passer til din gasre-
gulator (7/16 x 28 UNEF-gevind).
Benyt kun tilladte skruepatroner op til maks. 500 g.
Tilslutning af andre gasbeholdere eller gasblandinger kan være meget farligt.
Som alternativ kan Skotti bruges med grillkul eller træ.
3.2 Dette må du ikke bruge Skotti til
Brug ikke Skotti til erhvervsmæssig grilning.
Brug aldrig Skotti med naturgas.
Mens du bruger Skotti, må du ikke løsne eller afmontere gasregulatoren ( )
eller andre dele.
Skub eller indbyg aldrig Skotti ind i en konstruktion. Der skal altid sørges for
en uhindret luftudskiftning. Ellers kan der opstå brand eller eksplosion, som kan
medføre alvorlige personskader endog dødsulykker og store materielle skader.
Fortag aldrig ændringer eller reparationer af Skotti. Derigennem kan der op-
stå risici, og garantien bliver ugyldig. Få altid Skotti repareret af professionelle,
vores adresse finder du i kapitel ”1 Indledning”.
3.3 Risici fra varme overflader
Rør ikke ved Skotti under anvendelsen og lige efter grilning. Skotti og alle
dens enkeltdele kan blive meget varme.
Skotti skal også holdes under opsyn efter grilning – indtil grillen er afkølet.
Om sommeren tager det ca. 20 minutter. Ellers kan der opstå ulykker, forbræn-
dinger eller brand.
3.4 Risici for børn
Skotti må ikke betjenes af børn.
Hold børn langt væk fra Skotti, også under afkølingen efter grilning.g.
3.5 Risici ved gas
Overhold anvisningerne på gaspatronen.
Opbevar aldrig gaspatronen i nærheden af Skotti.
Transporter og opbevar altid gaspatroner forsigtigt.
Selv en tilsyneladende tom gaspatron kan stadig indeholde gas.
Brug aldrig Skotti, hvis gastilførslen eller pakninger er defekte eller beskadi-
gede.
Led efter gaslækager med en vand/sæbe opløsning, f.eks. i en spray- flaske.
Spray de pågældende dele med denne, og åbn gasregulatoren.
På utætte steder fremkommer der små bobler.
Brug aldrig ild til at lede efter gaslækager. Det kan medføre en stik- flamme
eller en eksplosion.
Gaspatronen må aldrig beskadiges. Det kan medføre en eksplosion.
Få bulede eller rustne gaspatroner afprøvet af din gasleverandør før brug.
Ved lave temperaturer kan flydende gas ikke længere omdannes så godt. Det
betyder: Det brænder dårligere. Derfor anbefaler vi, at du bruger specielt vinter-
gas eller Powergas om vinteren.
Gas kan medføre eksplosionsfare, brand og dødsulykker.
▶Så snart der lugter af gas: Drej straks gasregulatoren til højre ( ).
Adskil slangen fra gaspatronen. Sluk straks åben ild, cigaretter mv.
▶Hvis du stadig fornemmer gaslugt: Hold afstand til Skotti og gaspatronen.
Informer gasleverandøren og/eller brandvæsenet.
3.6 Risiko for brand
Brug aldrig Skotti uden opsyn.
Brug aldrig Skotti på et antændeligt underlag som f.eks. et tæppe.
Ved grilning holdes en sikkerhedsafstand til mulige risici i form af let an-
Angående din sikkerhed – dette skal du videData / Angående din sikkerhed – dette skal du vide
Apparatbetegnelse
Mobil gasgrill af typen Skotti
Mål
Grillrist (L x B)
30,4 x 21 cm
Samlet (L x B x H)
33,6 x 21,9 x 17,6 cm
Pakket i taske (L x B x H)
45 x 30 x 3,5 cm
Ydelse
2,3... 2,5 kW
172... 187 g/h
Vægt uden gaspatron
3 kg
Tilladt gaspatron
EN 417 skruepatron med 7/16 x
28 UNEF-gevind (butan / propan
gasblanding)
Materiale Grilllegeme, 1 mm rustfrit stål,
grillrist, 3 mm rustfrit stål, taske af
presenning
Dysens diamete: 0,3 mm

20
Alt dette hører til din SkottiAngående din sikkerhed – dette skal du vide
tændelige materialer: Grundlæggende min. 10 meter.
Læg aldrig brændbare dele på Skotti, når den er i brug eller stadig er varm.
Fedtbrande kan være livsfarlige.
▶ Hvis der opstår en fedtbrand: Bevar roen. Sluk så vidt muligt for gastilførslen
( ).
▶ Brug en speciel brandslukker, sand, natron eller bagepulver til sluk- ning.
▶ Prøv aldrig at slukke en fedtbrand med vand eller mel. Sandsynligheden for
en ukontrollerbar stikflamme eller eksplosion er ekstremt høj.
▶ Bring dig selv og andre i sikkerhed.
▶ Ring til brandvæsenet på 112 i hele EU fra fastnet og mobilnet. Det farlige
område skal afsikres indtil brandvæsenet ankommer uden at bringe dig selv
eller andre i fare.
4 ALT DETTE HØRER TIL DIN SKOTTI
DK
Pos. Betegnelse
1 1 x grillrist
2 1 x afbøjningsplade
3 1 x brænderrør
4 1 x gasslange med skrueregulator
5 1 x fodstykke med femkantet tændings- og flammekontrolhul
6 2 x lange sidestykker med logo og ståfødder
7 1 x gavl med rundt hul
8 1 x underdel (fedtdrypbakke)
6
6
7
8
1
2
4
3
5
Other manuals for Skotti
2
Table of contents
Languages:
Other VENNSKAP Grill manuals
Popular Grill manuals by other brands

Jata electro
Jata electro GR264 Instructions of use

NXR
NXR 780-0832C Manual for installation, care & maintenance

cecotec
cecotec PerfectSteak 4200 Way instruction manual

Weber
Weber PERFORMER 53546 Assembly guide

Rommelsbacher
Rommelsbacher Ceran CG 2303/E instruction manual

George Foreman
George Foreman GR20BWI owner's manual