HFp Antenna User’s Guide
Page 3
The HFp Antenna
The HFp design provides a highly efficient vertically polarized antenna design in an extremely
portable package — the entire kit weighs a little over 2 pounds (1 kg). The antenna is highly
configurable, and covers all the Amateur bands from 7 MHz to 54 MHz (as well as most of the
frequencies in between). An optional coil is available for 80 Meters, which also provides
operation on 75 and 0 Meters. Typical setup time is about 5 minutes.
In this User’s Guide, you will find setup configurations for each Ham band from 40 Meters
through Six Meters, for the antenna sitting on the ground. If the antenna is on a balcony, or
mounted with the optional BackPack Mount Kit, you can use the configuration table as a starting
point, but you will need to experiment to get the setup right with the different mounting. There
is also a laminated card in the antenna bag, with the Ham Band configuration tables on it. The
card makes it easy to take the setup information with you on your portable operation trips.
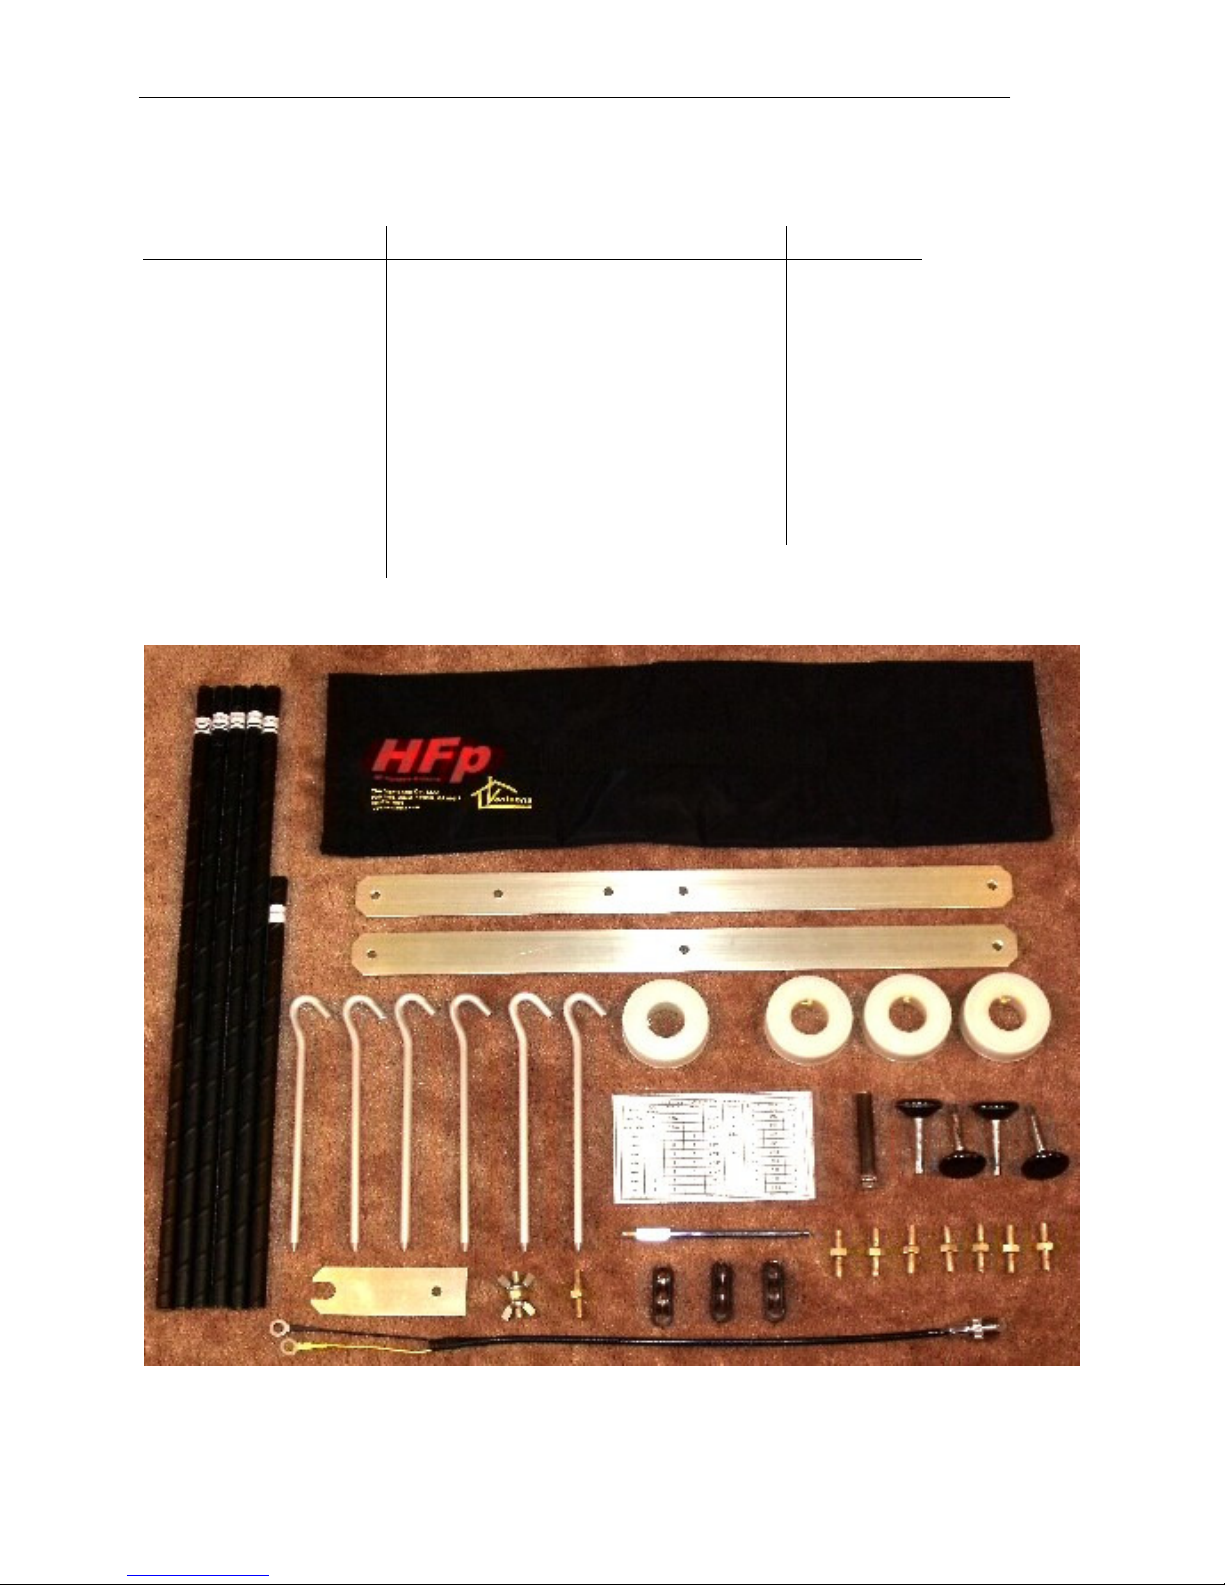
The antenna is configured for different bands by the selection and orientation of the seven
elements that are included in the kit. Four of the elements are marked with a single stripe and
contain no loading coil. One element is marked with two stripes and contains a small inductive
load. One element is marked with three stripes and contains a larger inductive load. And one
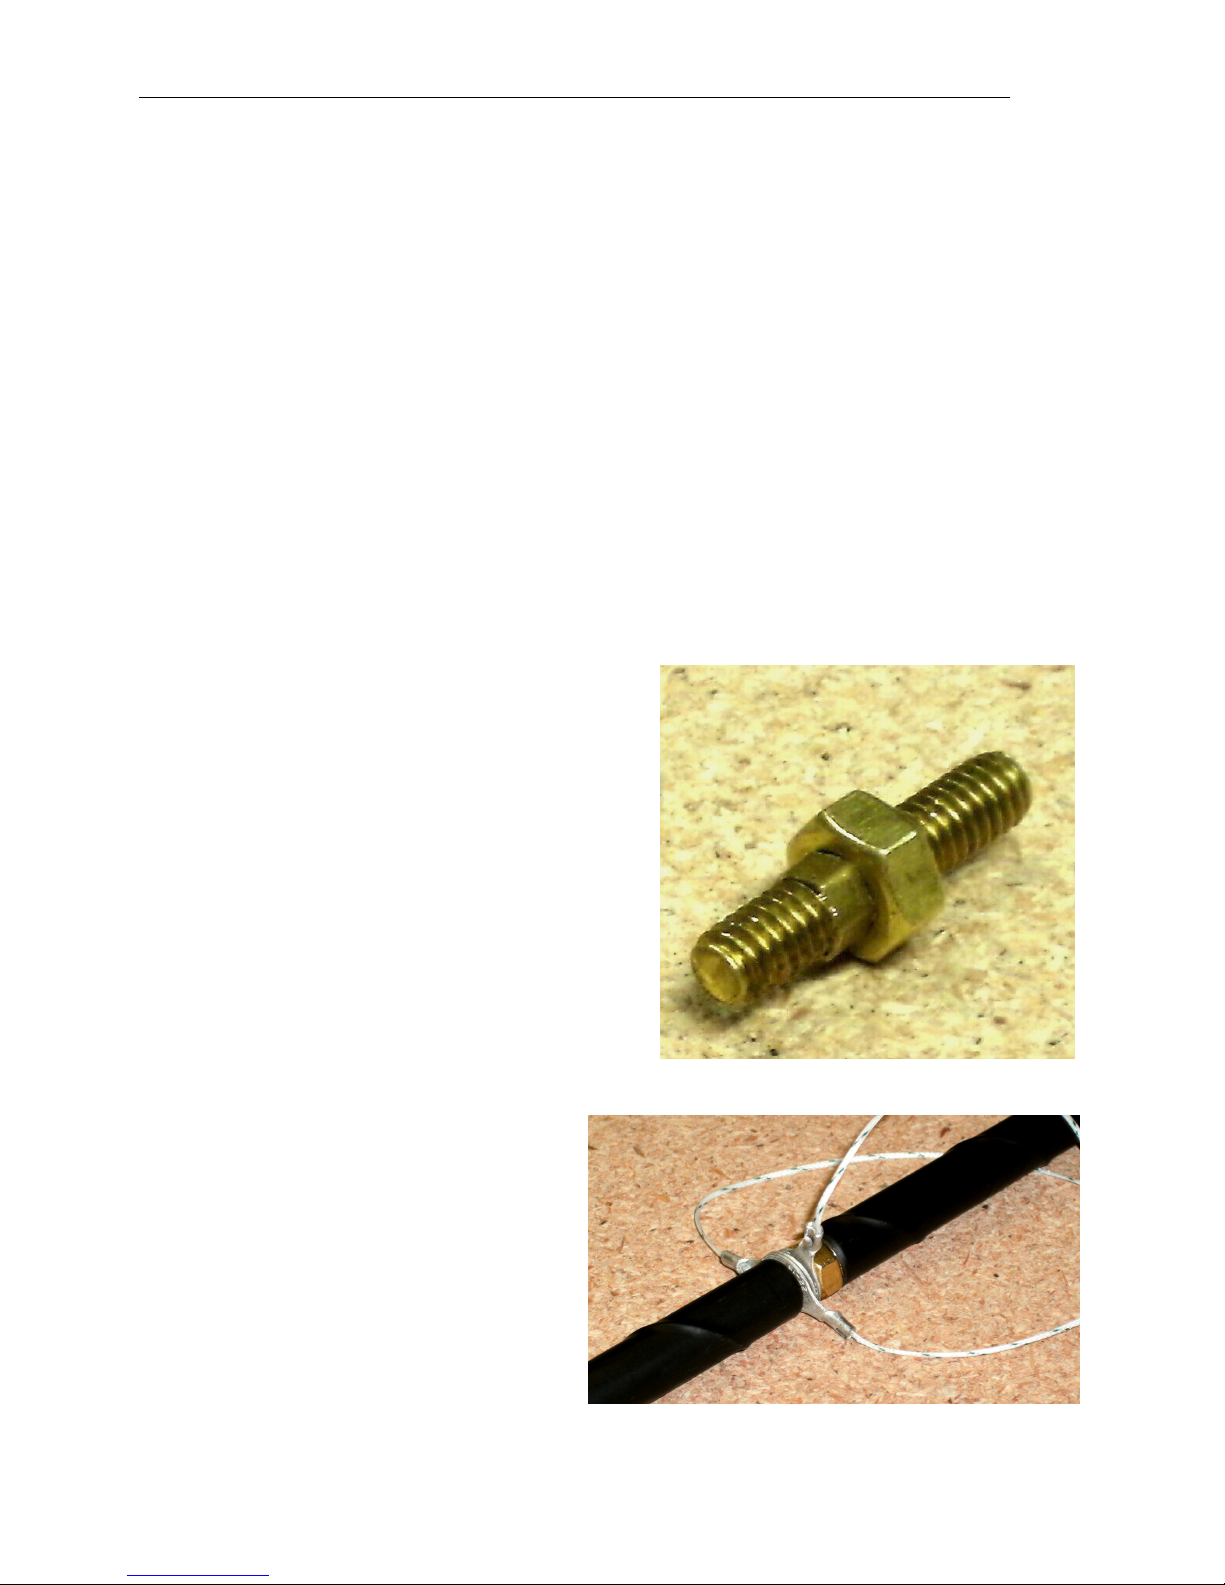
element is about 2/3 the length of the others, and has no stripe. The elements are coupled
together by means of threaded Inter-Element Connectors (IECs).
In addition to using combinations of elements, the orientation of the loaded elements (the two
and three stripe elements) either UP or DOWN determines the operating frequency. In the
configuration table later in the User’s Guide as well as on the laminated configuration card, you
will see elements marked, for example, “2-stripe up”. If you assemb e these e ements in the
wrong orientation, the antenna wi not tune to the desired frequency. The one-stripe and
zero-stripe elements have no orientation, and may be assembled into the antenna either “up” or
“down”.
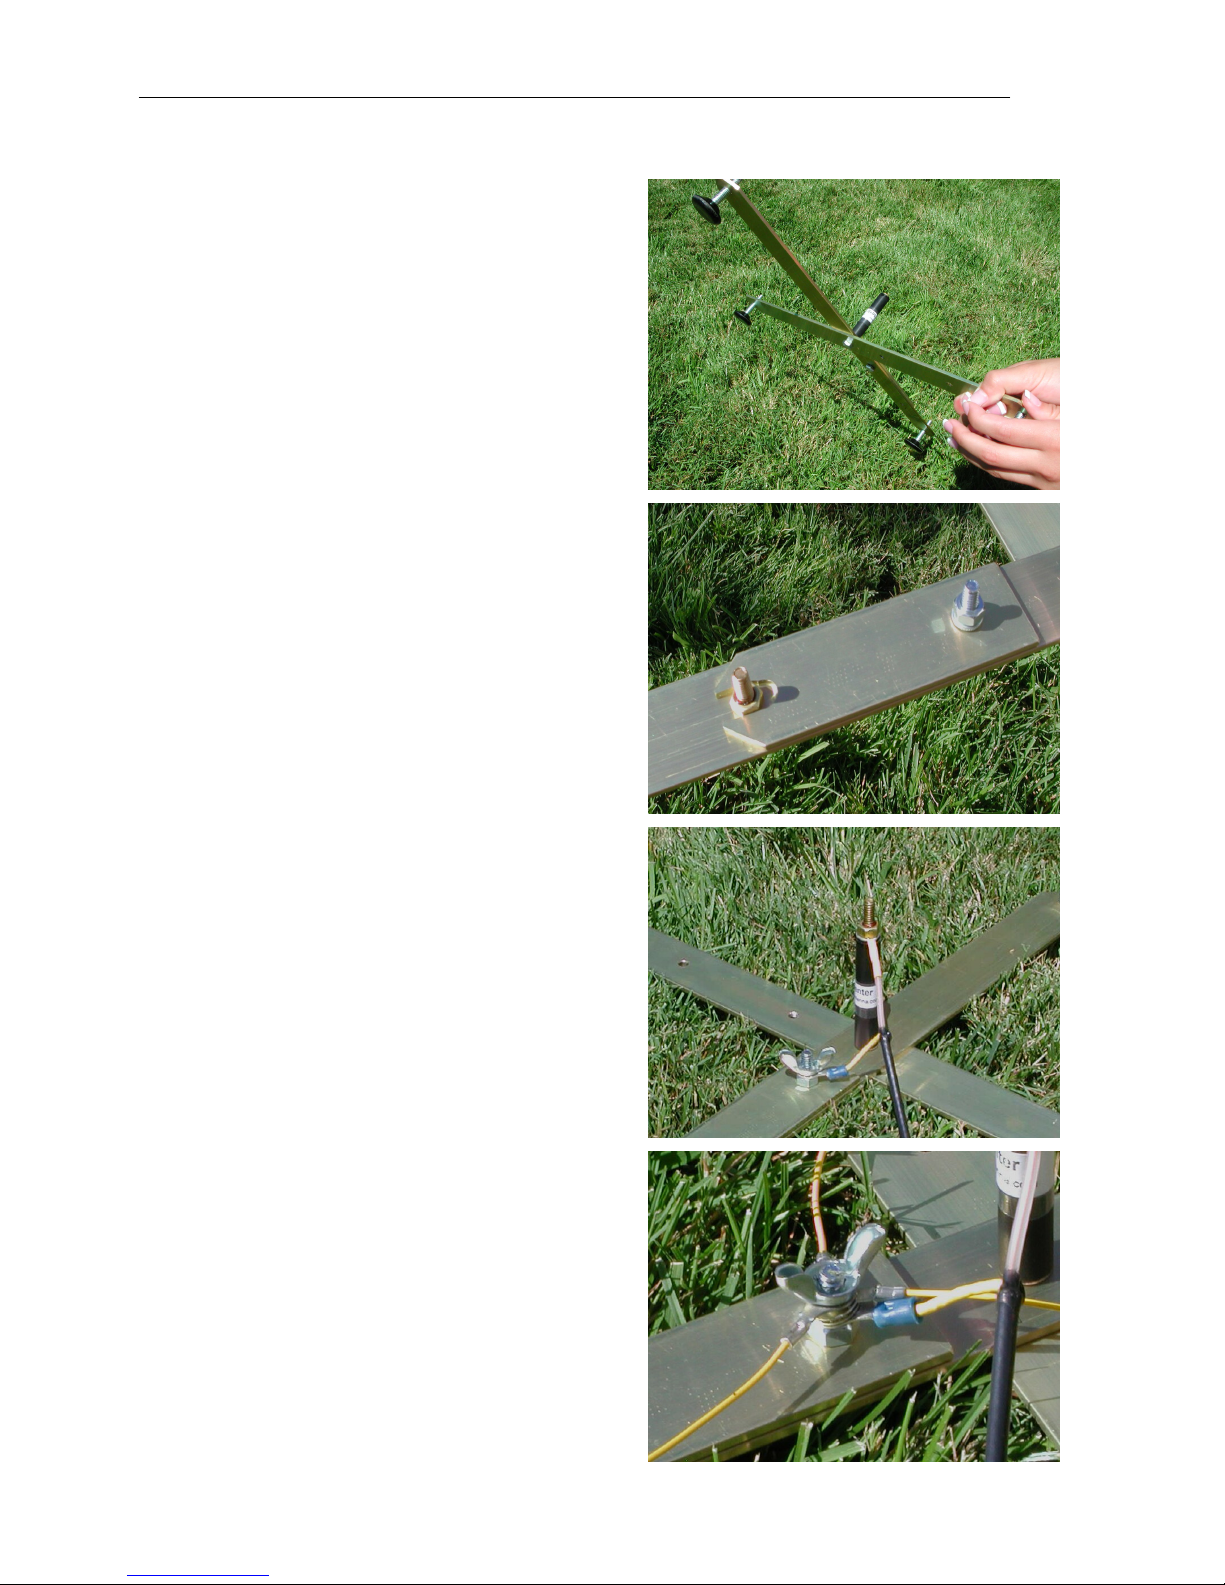
The HFp is designed to operate optimally with three tuned radia wires. We have found, after
much testing, that less that three reduces the antenna's effectivity, and more than three doesn't
seem to add much. This is true for ground mounted operation as well as elevated operation. The
antenna will certainly radiate with one or two radials, but unless you are hanging from a cliff, it
is worth the time to set up all three. The radial wires are coiled on plastic spools, and are marked
in several places along their length. In use, the ring terminal is attached to the antenna base, and
the wire is un-spooled to the correct mark for the band in use, as indicated in the Configuration
Chart. This length is the correct “tuned length” for the radial wire, not the quarter-wave length,
and will be different for ground-mount or elevated mount locations.
Guy lines are included with the HFp for use when it is windy, or when the antenna will be left up
for some time. It is recommended that the guys always be used for the 40 meter configuration.
The guy lines have lug rings which are placed between two of the upright elements (typically
between the fourth and fifth elements from the bottom), using a special IEC. The lines are then
run out to their full length and secured with the aluminum stakes provided, or tied to a handy
rock. Some small flag material attached to the guys will help prevent people from walking into
them. If the guys are run in the same direction as the radial wires, they will help protect the
radials from being tripped upon, as well. The Guy Line Sliders make adjusting the guy lines
very easy.