07-02083A 200-230V, 200H-230V, 500-230V, 500H-230V, 1200-230V 3 VersaClean
IMPORTANT: Take care to control foaming in the
vacuum system. Excessive foam can allow moisture,
carpet fiber and other debris to be drawn through the
vacuum cutoff valve and cause damage to the vacuum
motors. Damage caused by moisture or debris will void
the product warranty. To help reduce foaming, use a
low-foam detergent. Foaming may also occur because of
residues left from previous cleanings. If this happens,
use a defoamer additive. Follow defoamer manufacturer
instructions for proper application.
2. Connect vacuum and solution hoses to machine and
attach to extraction wand or hand tool.
3. Plug power cord into a 3-pin grounded circuit. Keep
cords clear of your cleaning path. IMPORTANT:
Heated units have two cords and should be plugged
into separate 3-pin grounded circuits.
4. Switch on vacuum.
5. Switch on solution pump.
6. For heated solution (Heated units only).
7. Begin cleaning. Refer to industry-approved
procedures.
8. If equipped, solution pressure may be adjusted with
the pressure regulator knob (Fig. 2, G). Monitor the
pressure gauge to ensure pressure is adequate.
CAUTION: When the recovery tank reaches capacity,
an automatic float valve blocks vacuum intake (see
Fig. 7) and the vacuum motors will make a high
pitched noise. When this occurs, switch the machine
off immediately to prevent damage to the vacuum
motors.
9. When cleaning is completed, rinse solution tank with
clear water to ensure no detergents or rinse agents
remain in the tank.
10. Empty and rinse the waste tank thoroughly. This will
help to prevent the formation of damaging deposits
and reduce the growth of odor-causing bacteria.
11. Turn on vacuum motor and allow it to run for 15
minutes to help remove any moisture from the
vacuum motors and assure long vacuum life.
For maintenance instructions, see “Maintenance,” p. 3.
MAINTENANCE (ALL UNITS)
WARNING: Unplug machine before servicing.
Possibility of electrical shock.
WARNING: Interior components may be hot after
operation. Let unit cool completely before servicing.
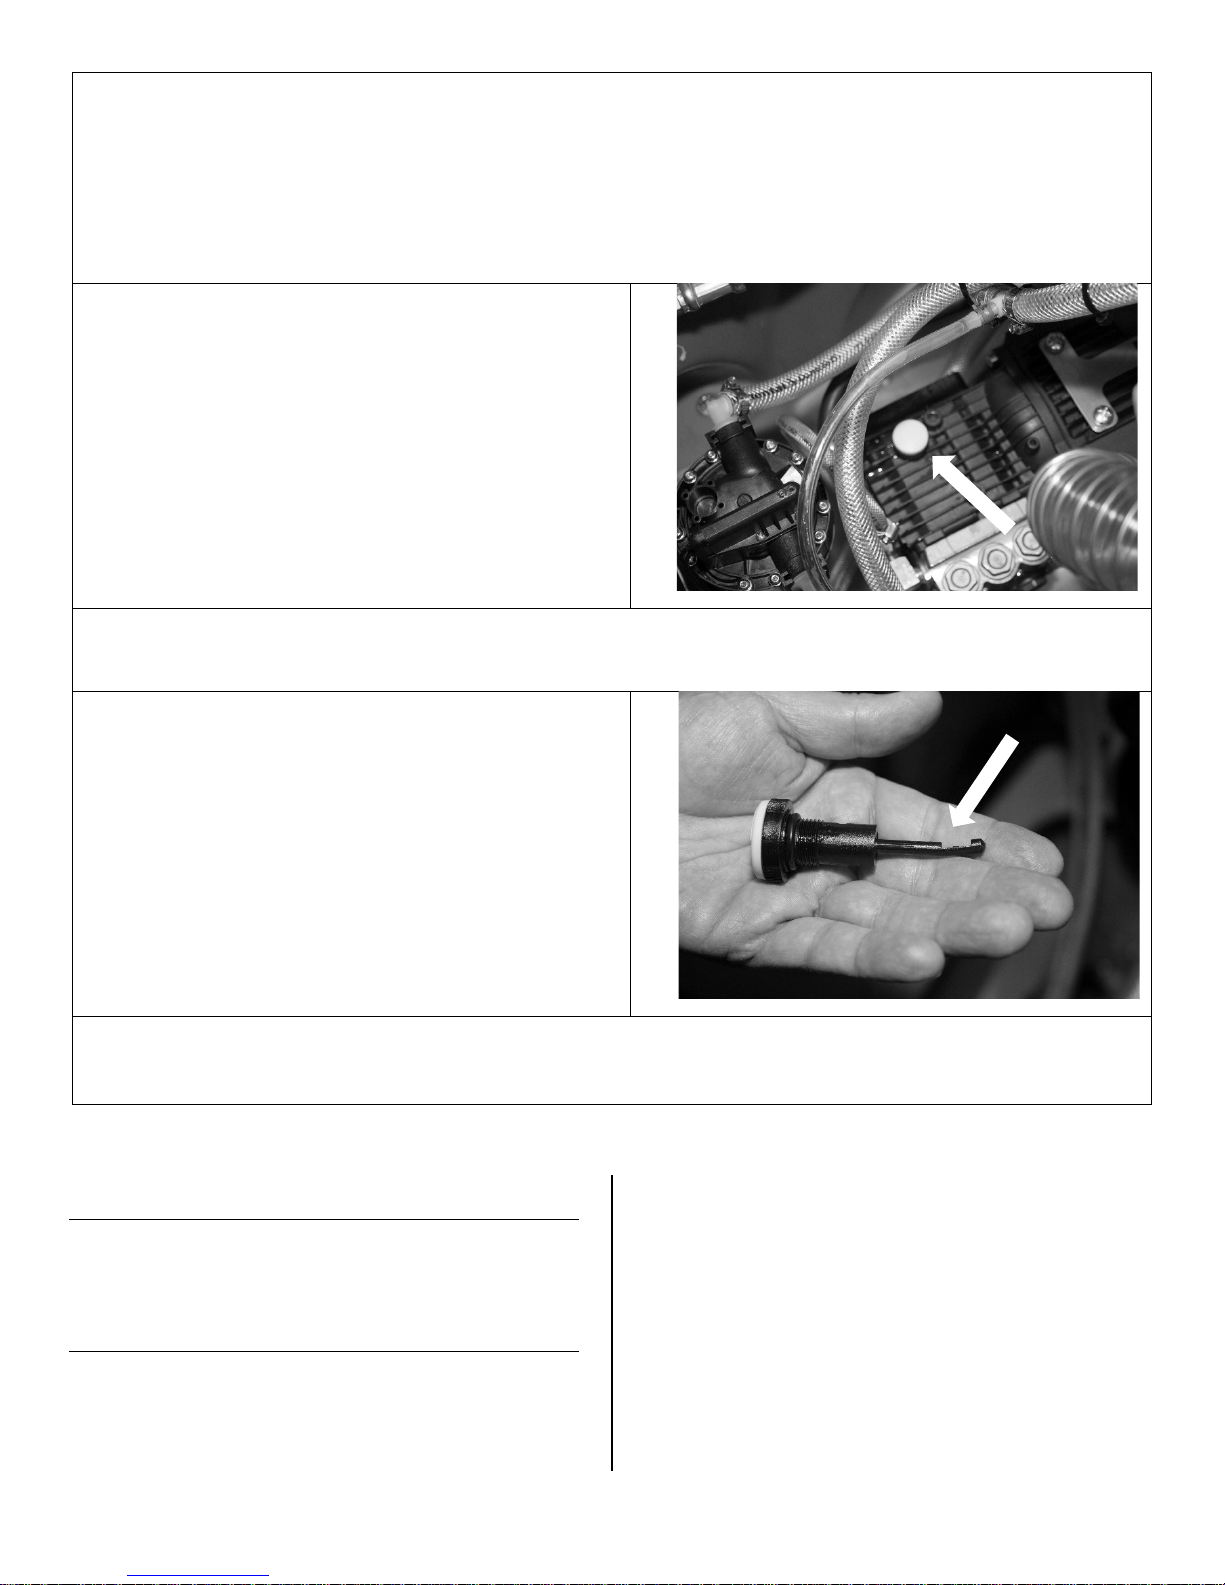
FIG. 4: Solution inlet filter cleaning
9/16 in.
nut with
wrench
and lift
open top.
filter
cap and
rinse
Power ON/OFF
Solution pressure pump ON/OFF
Solution heater ON/OFF (select models)
Pumpout ON/OFF (select models)