www.hfelectronics.be
MONITOR
Press (or Press and hold in for one second) the PF key
assigned to “Monitor” to cancel CTCSS and DCS squelch
decoding, so as to enable reception of signals present
on the channel that do not contain a matching CTCSS
tone or DCS code.
MONITOR M
This function provides to “Monitor” to cancel CTCSS
and DCS squelch decoding, so long as the PF key as-
signed to “Monitor M” is pressed and held in.
MULTI TONE
Press (or Press and hold in for one second) the PF key
assigned to “Multi Tone” to switch the Tone Table be-
tween “Main” and “Sub.”
PANEL INDICATOR
Press (or Press and hold in for one second) the PF key
assigned to “Panel Indicator” to turn the Front Panel’s
Illumination “On” or “Off” (toggle).
REMOTE
Press (or Press and hold in for one second) the PF key
assigned to “Remote” to toggle the operating mode be-
tween the “Remote” mode and “Local” mode.
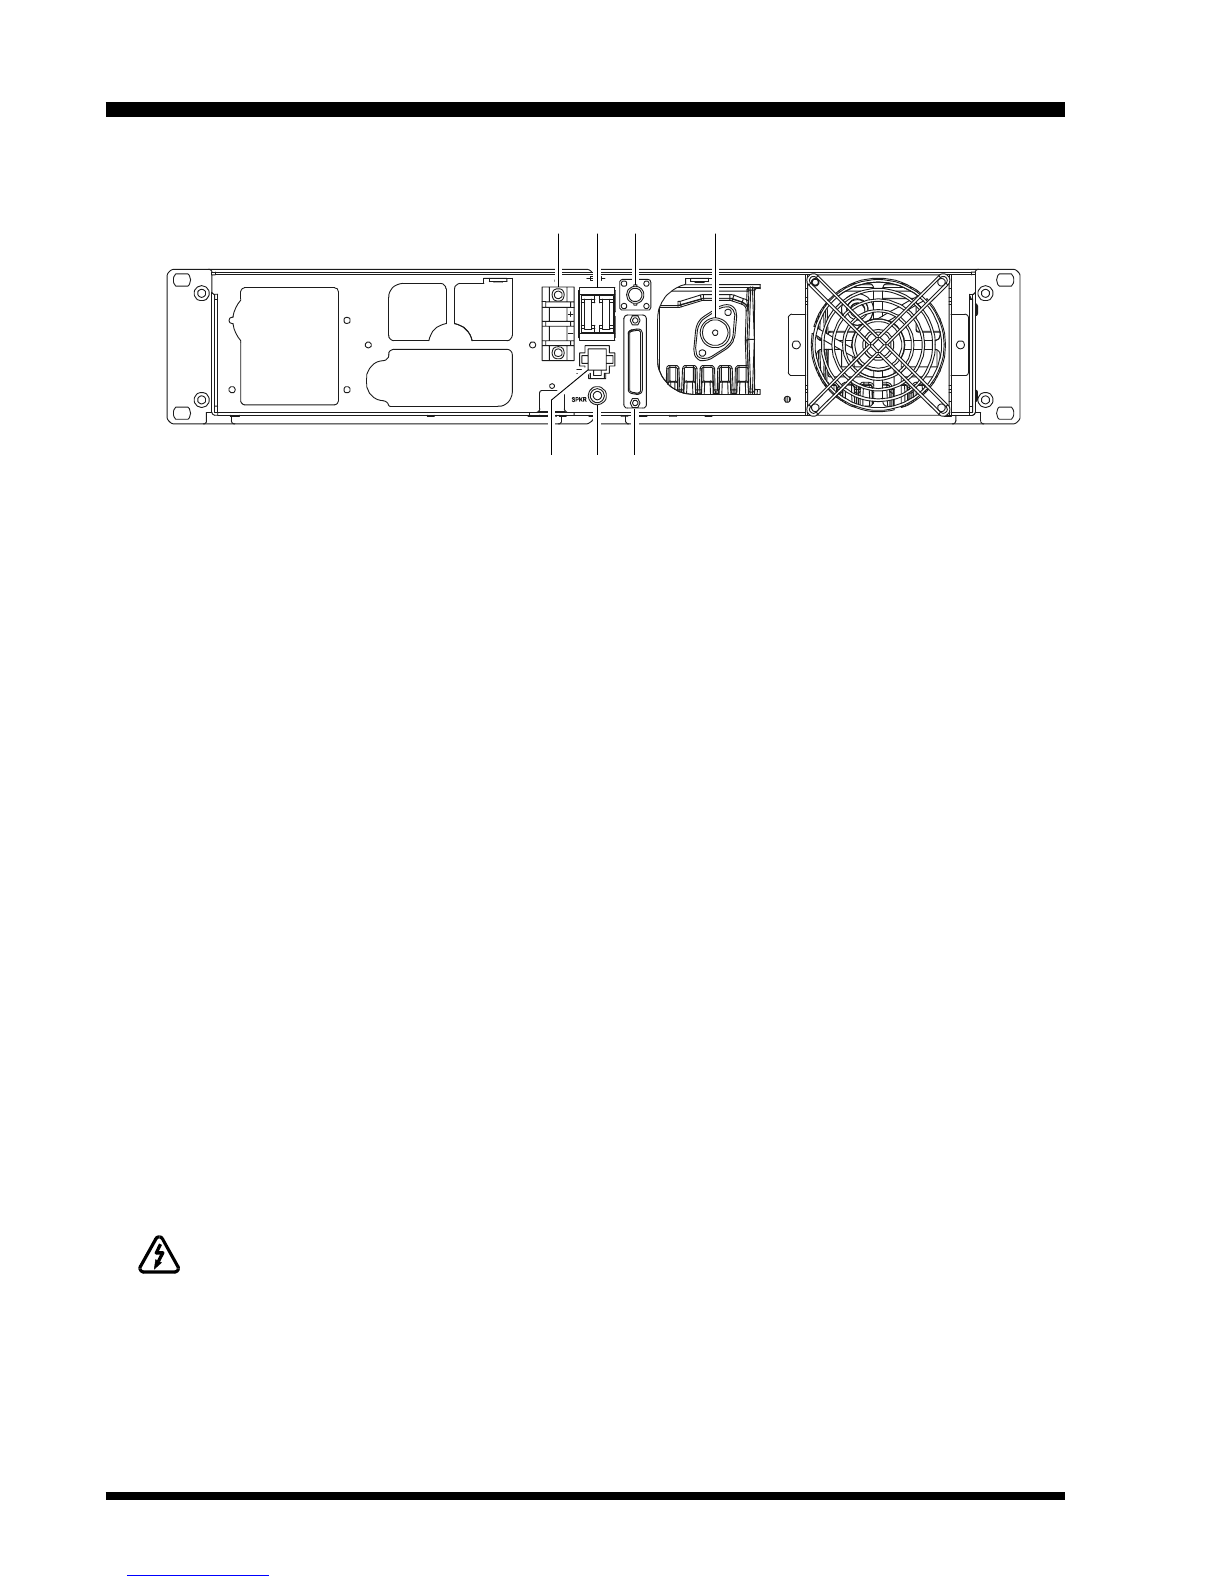
When the “Remote” mode is selected, the repeater op-
erates according to the control instructions received from
the external device (connected to the ACC jack on the
rear panel). While in the “Local” mode, the repeater op-
erates from the front panel’s PF keys.
REPEAT
Press (or Press and hold in for one second) the PF key
assigned to “Repeat” to toggle the operating mode be-
tween the “Repeater” mode and “Base Transceiver”
mode.
For normal operation, set this key to the “Repeat” mode.
When the “Base Transceiver” mode is selected, you can
speak into the microphone to use this repeater as a trans-
ceiver.
RESET
Press (or Press and hold in for one second) the PF key
assigned to “Reset” to reset (same function as the
POWER switch “off” and “on”) the repeater.
TWO TONE DEC
Press (or Press and hold in for one second) the PF key
assigned to “Two Tone Dec” to turn the 2-Tone Decoder
“On” or “Off” (toggle).
CW ID SINGLE
Press (or Press and hold in for one second) the PF key
assigned to “CW ID Single” to send the station callsign,
via Morse Code, once. Programming of the callsign is
performed by your VERTEX STANDARD dealer.
CW MESSAGE 1 - CW MESSAGE 8
Press (or press and hold in for one second) the PF key
assigned to “CW Message 1 - 8” to send a pre-pro-
grammed Morse Code message on the transmitted sig-
nal. Programming of the message(s) is performed by
your VERTEX STANDARD dealer.
DC POWER SAVE
Press (or Press and hold in for one second) the PF key
assigned to “DC Power Save” to turn the DC Power Save
feature “On” or “Off” (toggle).
When DC Power Save feature is set to “ON,” activate
the various power save feature (determined from your
VERTEX STANDARD dealer) while the repeater oper-
ates from the Backup Power Source.
ENCRYPTION
Press (or Press and hold in for one second) the assigned
PF key of the “Encryption” to turn off the Optional En-
cryption Unit temporarily.
ENCRYPTION CODE
Press (or Press and hold in for one second) the assigned
PF key of the “Encryption Code” to select the Encryp-
tion Code (determined from your VERTEX STANDARD
dealer; require the FVP-35 Rolling Code Encryption
Unit).
KEY LOCK
Press (or Press and hold in for one second) the PF key
assigned to “Key Lock” to lock the repeater’s front panel
keys (except “Key Lock” key); this feature can be en-
abled to prevent repeater settings from being disturbed.
LOCAL PTT
Press (or Press and hold in for one second) the PF key
assigned to “Local PTT” to enable (“On”) or disable
(“Off”) operation using a PTT switch connected to the
front panel’s Microphone Jack.
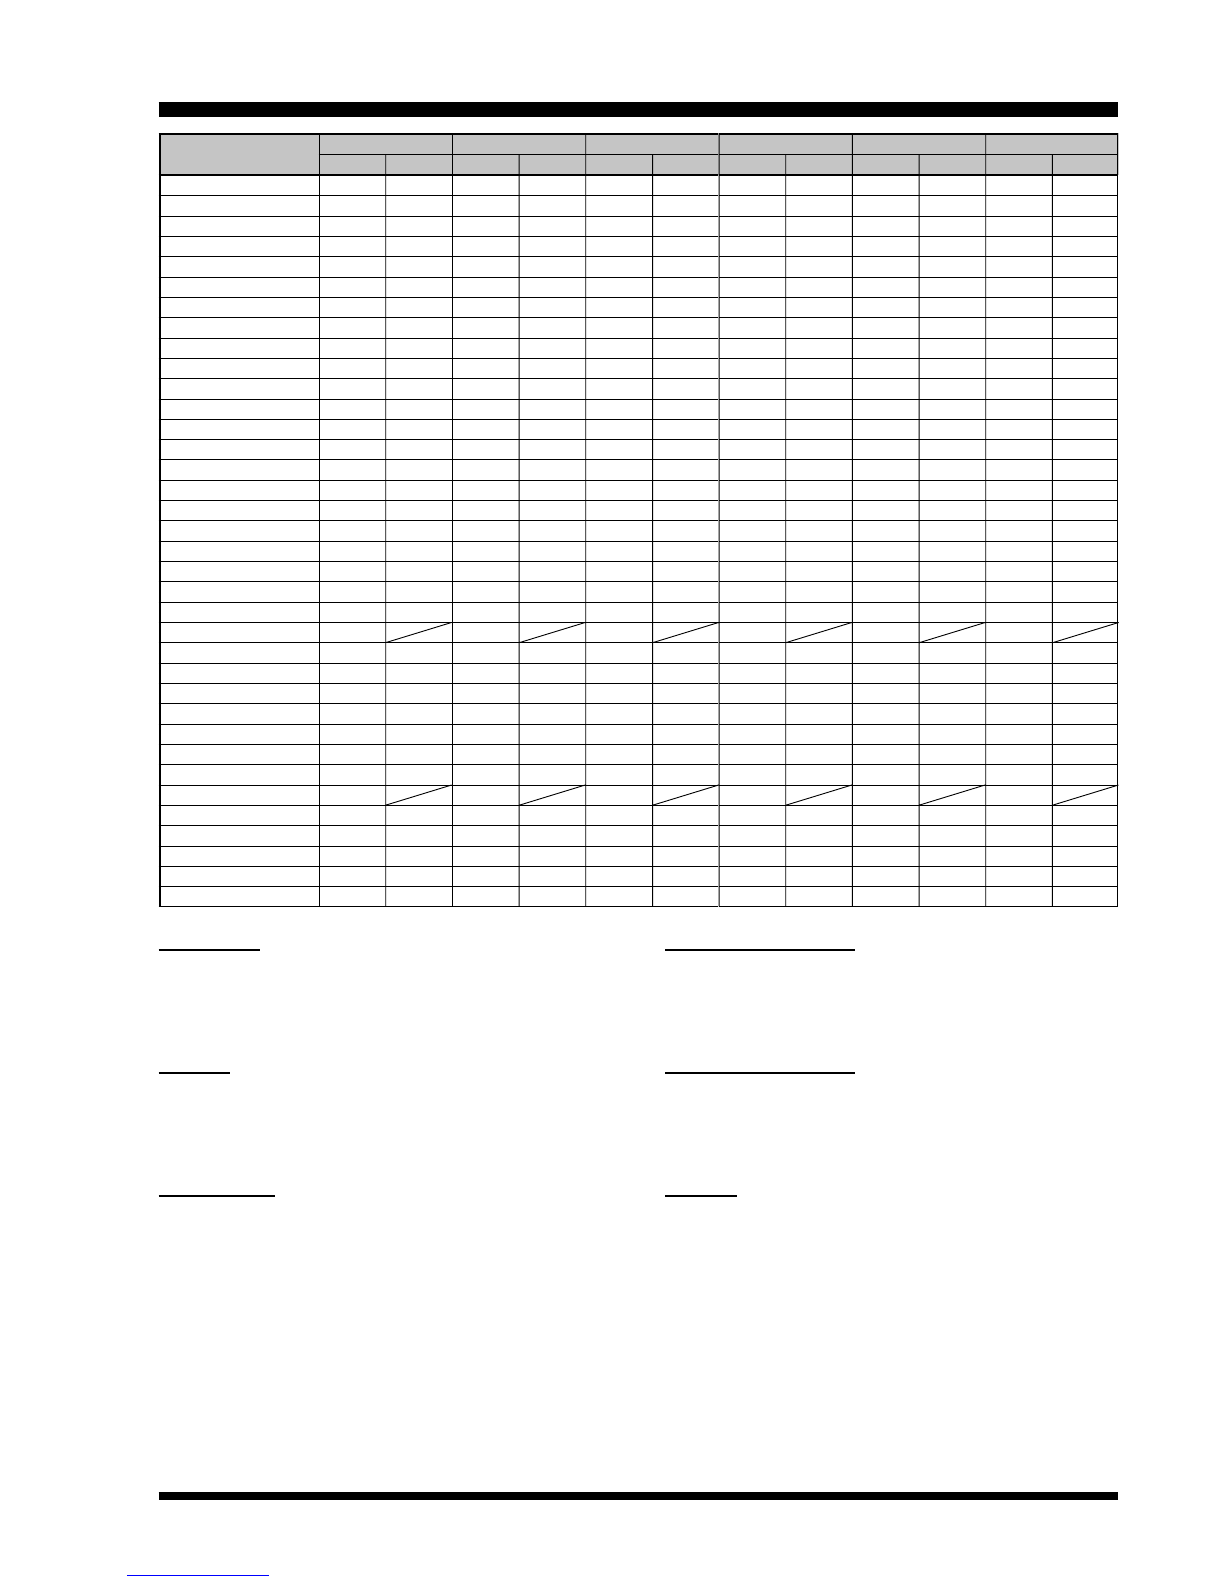
PROGRAMMABLE FUNCTION (PF)KEY DETAILS
VXR-9000E RACK MOUNT REPEATER OPERATING MANUAL4