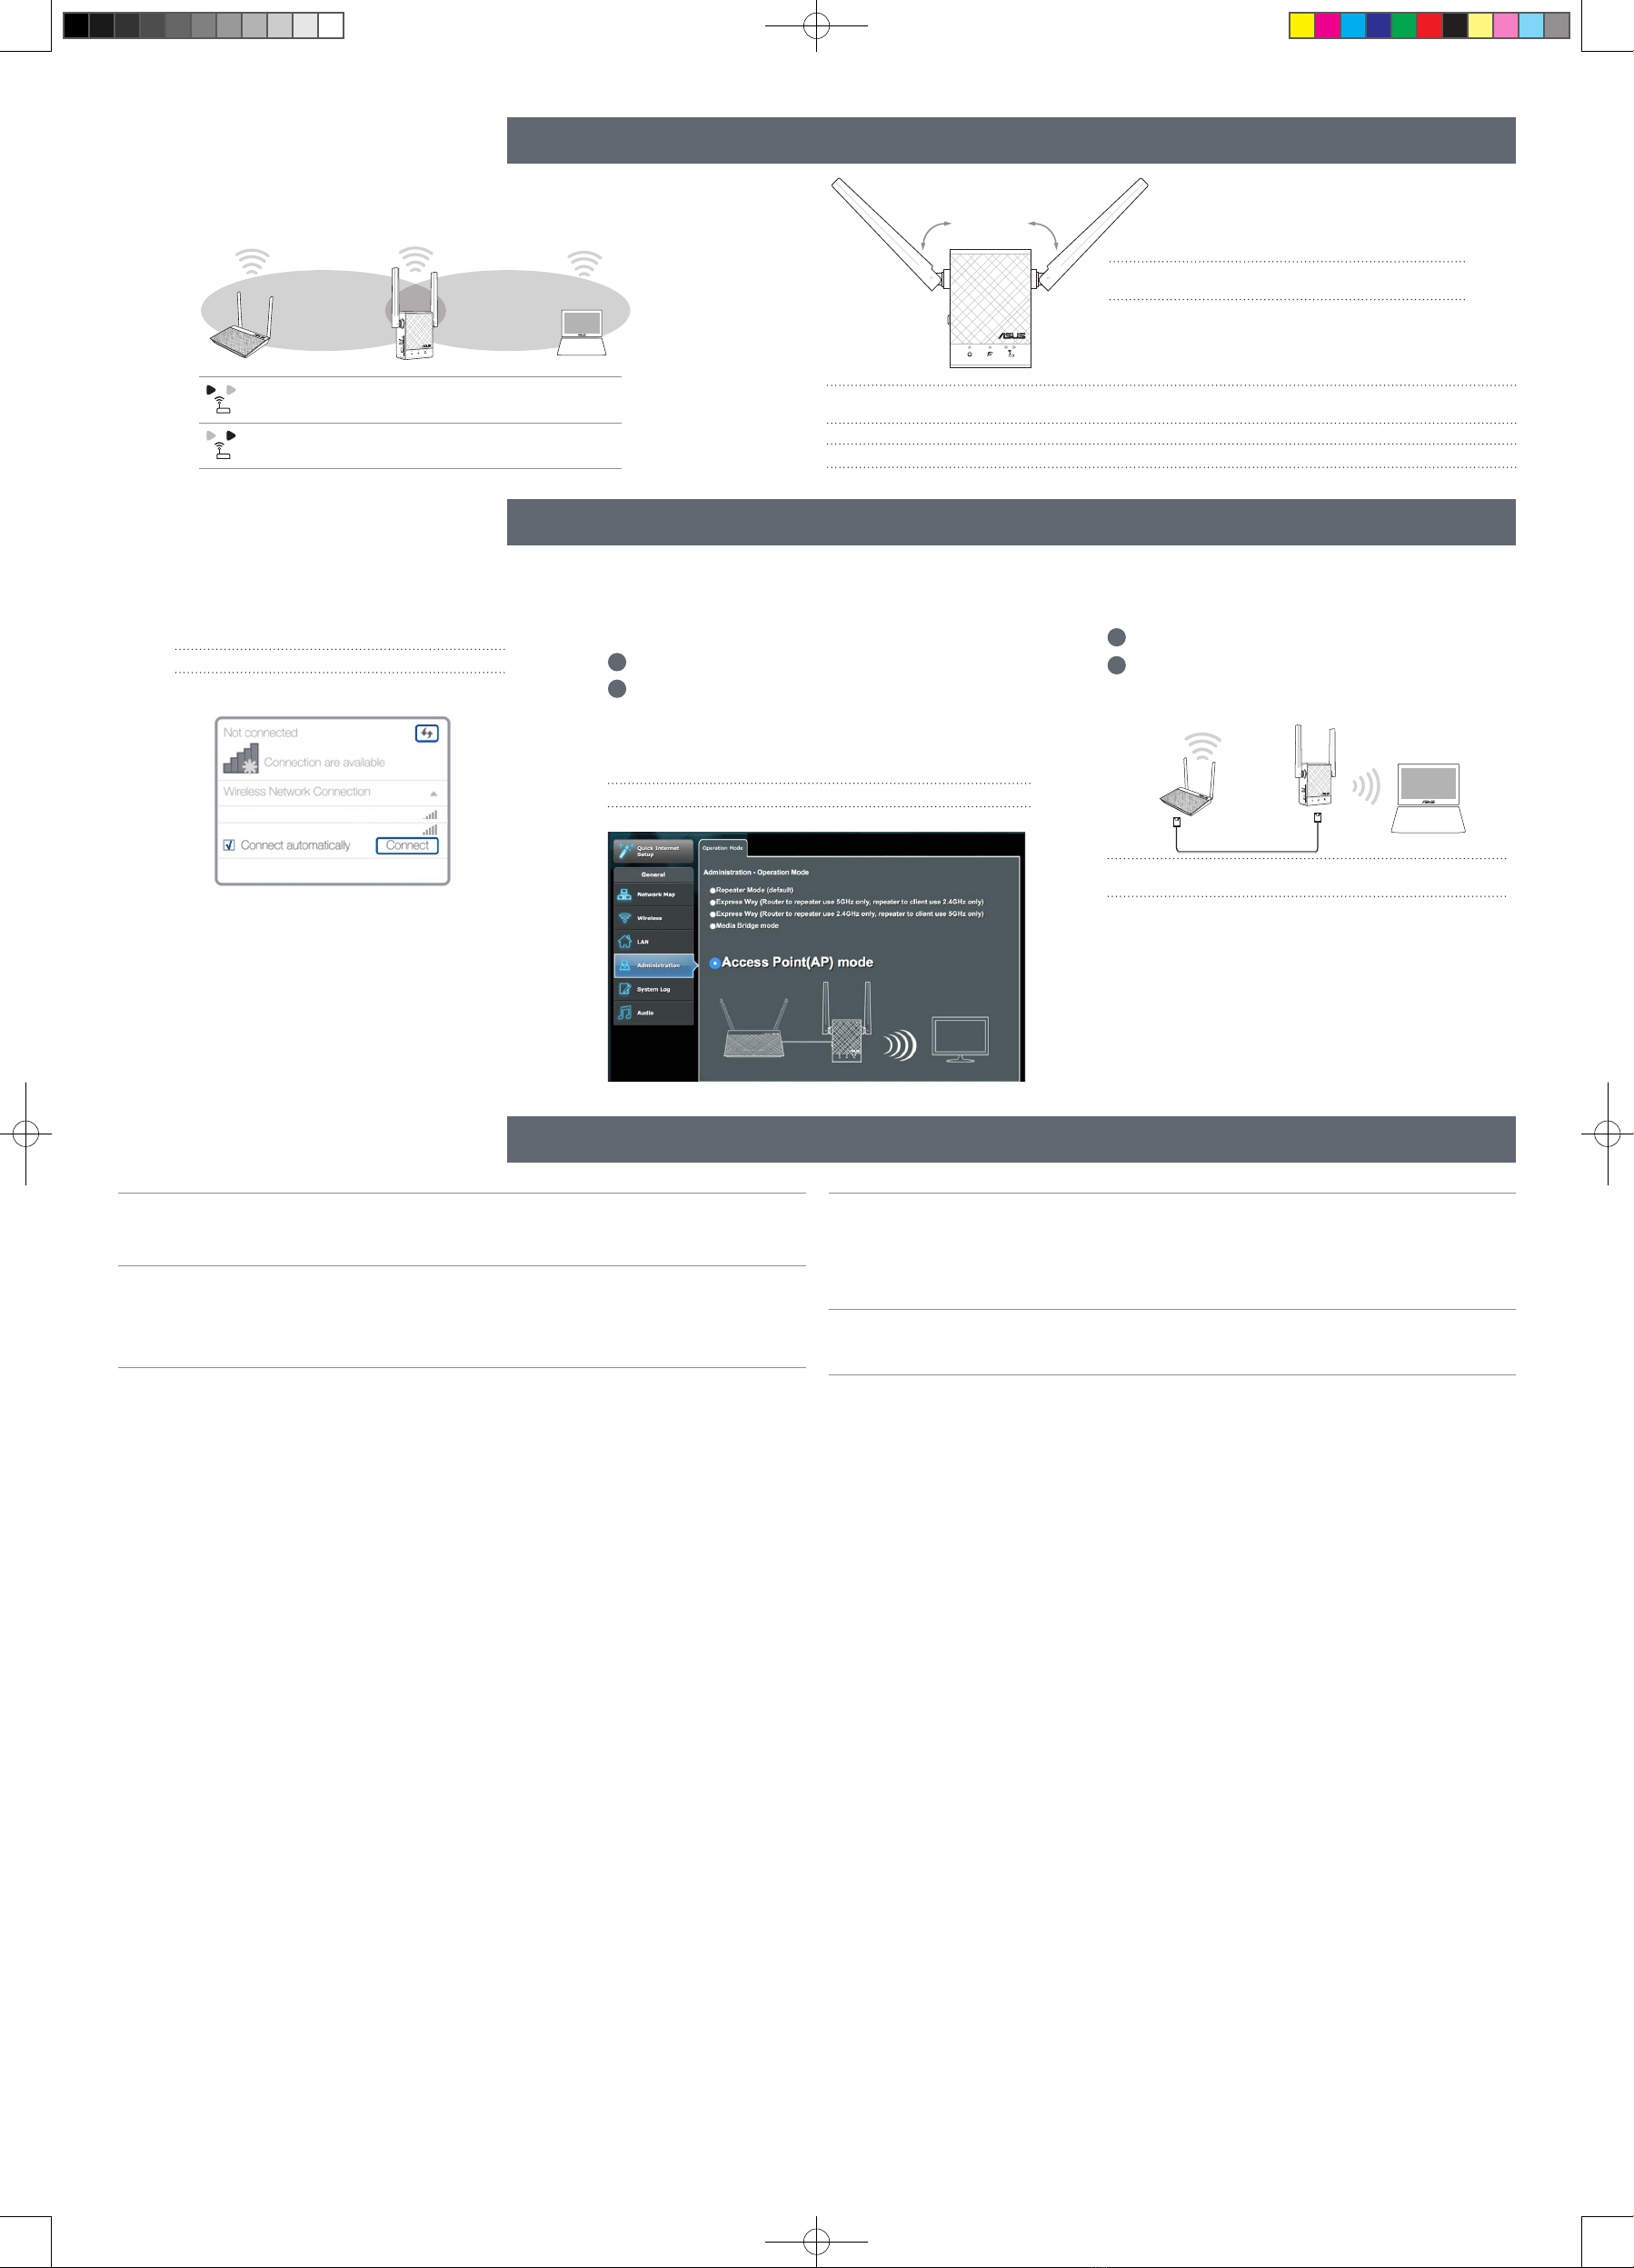
AP MODE AP MODE SETUP
Disconnect your Ethernet (wired) connection from your computer. Click
the Wi-Fi icon on the taskbar and connect to RP-AC51’s network:
ASUS_RPAC51 or ASUS_RPAC51_5G.
NOTE: The screenshot below is from a desktop PC.
ASUS_RPAC51
ASUS_RPAC51_5G
1Enter your login account and password.
2From your RP-AC51’s web interface, click Adminis-
tration, and select Access Point mode.
NOTE: You can also change to different modes from this page.
1Set up the network name (SSID) and click Apply.
2After your RP-AC51 has rebooted, connect your RP-
AC51 and router/AP using an Ethernet cable.
Ethernet connection
After a successful setup
Place your RP-AC51 between your router/AP and wireless device to get the best performance.
NOTE: To minimize maintenance, keep your RP-AC51 away from devices such as cordless phones, Blue-
tooth devices, and microwave ovens.
IMPORTANT! We recommend that you place your RP-AC51 in open or spacious location.
Q3 Why is it that I cannot see the login page after entering http://repeater.asus.com in
the browser?
A: Ensure that your computer is connected to your RP-AC51 network only, and set your
computer to Obtain an IP address automatically. If you still cannot find the login page, please
download the ASUS Device Discovery utility.
Q4 How do I reset RP-AC51?
A: Press the RESET button on the side of RP-AC51 for about two (2) seconds. Wait for
about five (5) seconds until the existing network LED blinks slowly.
MOVE CLOSER
Need to move RP-AC51 closer to the router/AP.
MOVE AWAY SLIGHTLY
Need to move RP-AC51 slightly away from the router/AP.
45°45°
RELOCATION FIND THE BEST PLACE
FAQ FREQUENTLY ASKED QUESTIONS
Q1 What should I do if my router does not support WPS?
A: You can use Method One or Method Three to set up your RP-AC51.
Q2 Why is it that the LED indicator for the current network does not light up after the
Wi-Fi setup is complete?
A: You may have entered the wrong password for the router/AP. Please restart your RP-
AC51, enter the correct password, and try to set up your RP-AC51 again.
NOTE: Orient the two antennas at 45oangle for the
best performance.
Connect
01 Log in
02 Setup
03
NOTE: We recommend that you use Cat 5 or higher Ethernet
cable.
Federal Communication Commission Interference Statement
This device complies with Part 15 of the FCC Rules. Operation is subject to the following two
conditions: (1) This device may not cause harmful interference, and (2) this device must accept any
interference received, including interference that may cause undesired operation.
This equipment has been tested and found to comply with the limits for a Class B digital device,
pursuant to Part 15 of the FCC Rules. These limits are designed to provide reasonable protection
against harmful interference in a residential installation. This equipment generates, uses and can
radiate radio frequency energy and, if not installed and used in accordance with the instructions, may
cause harmful interference to radio communications. However, there is no guarantee that interfer-
ence will not occur in a particular installation. If this equipment does cause harmful interference to
radio or television reception, which can be determined by turning the equipment o and on, the user
is encouraged to try to correct the interference by one of the following measures:
- Reorient or relocate the receiving antenna.
- Increase the separation between the equipment and receiver.
- Connect the equipment into an outlet on a circuit dierent from that to which the receiver is
connected.
- Consult the dealer or an experienced radio/TV technician for help.
FCC Caution
Any changes or modications not expressly approved by the party responsible for compliance
could void the user’s authority to operate this equipment.
This transmitter must not be co-located or operating in conjunction with any other antenna or
transmitter.
Radiation Exposure Statement
This equipment complies with FCC radiation exposure limits set forth for an uncontrolled environ-
ment. This equipment should be installed and operated with minimum distance 20cm between the
radiator & your body.
Operations in the 5.15-5.25GHz band are restricted to indoor usage only.
Industry Canada statement
This device complies with ISED’s licence-exempt RSSs. Operation is subject to the following two
conditions: (1) This device may not cause harmful interference, and (2) this device must accept any
interference received, including interference that may cause undesired operation.
Le présent appareil est conforme aux CNR d’ ISED applicables aux appareils radio exempts de
licence. L’exploitation est autorisée aux deux conditions suivantes : (1) le dispositif ne doit pas pro-
duire de brouillage préjudiciable, et (2) ce dispositif doit accepter tout brouillage reçu, y compris un
brouillage susceptible de provoquer un fonctionnement indésirable.
Caution :
(i) the device for operation in the band 5150-5250 MHz is only for indoor use to reduce the potential
for harmful interference to co-channel mobile satellite systems;
(ii) where applicable, antenna type(s), antenna models(s), and worst-case tilt angle(s) necessary to
remain compliant with the e.i.r.p. elevation mask requirement set forth in section 6.2.2.3 shall be
clearly indicated.
Avertissement:
(i) les dispositifs fonctionnant dans la bande 5150-5250 MHz sont réservés uniquement pour une
utilisation à l’intérieur an de réduire les risques de brouillage préjudiciable aux systèmes de satel-
lites mobiles utilisant les mêmes canaux;
(ii) lorsqu’il y a lieu, les types d’antennes (s’il y en a plusieurs), les numéros de modèle de l’antenne et
les pires angles d’inclinaison nécessaires pour rester conforme à l’exigence de la p.i.r.e. applicable
au masque d’élévation, énoncée à la section 6.2.2.3, doivent être clairement indiqués.
Radiation Exposure Statement:
This equipment complies with ISED radiation exposure limits set forth for an uncontrolled en-
vironment. This equipment should be installed and operated with greater than 20cm between the
radiator & your body.
Déclaration d’exposition aux radiations:
Cet équipement est conforme aux limites d’exposition aux rayonnements ISED établies pour un
environnement non contrôlé. Cet équipement doit être installé et utilisé à plus de 20 cm entre le radiateur et votre corps.
E16302_RP-AC51_QSG_Special_A3_V3.indd 2 2020/1/9 16:25:25


