Vessel GT-CD60-34 User manual

For Safe Use
0

For Safe Use
1
Thank you very much for having purchased the "VESSEL Air Corner Drill
GT-CD60-34 / CD60-34L.”
Please read this manual carefully and understand its contents for the safe
and correct use of the air tool.
Warning: Read these instructions carefully before operating,
maintaining or servicing this tool.
■ The following icons represent the degree of danger that can be induced by
user’s action or environment. Please observe all the instructions presented
in this manual as they are important for personal and public safety.
Warning Indicates possibility of serious or
fatal injuries when
instructions are not followed.
Caution
Indicates possibility of injuries or property damage when
instructions are not followed.
※Depending on circumstances, failure t
o follow the instructions
given in the "Caution" section could lead to serious
consequences.
■Please keep this manual for your ready reference.
■In case this manual or any of the warning labels attached to the unit are lost
or damaged, contact us or the local distributor for replacement.
■Please make sure this manual be kept with the unit when it is handed over or
lent out to a third party.
If you have any inquiries about this product or manual, please contact us
or your local distributor.
Warning
Please read this manual carefully and understand the
contents fully before use.
Warning
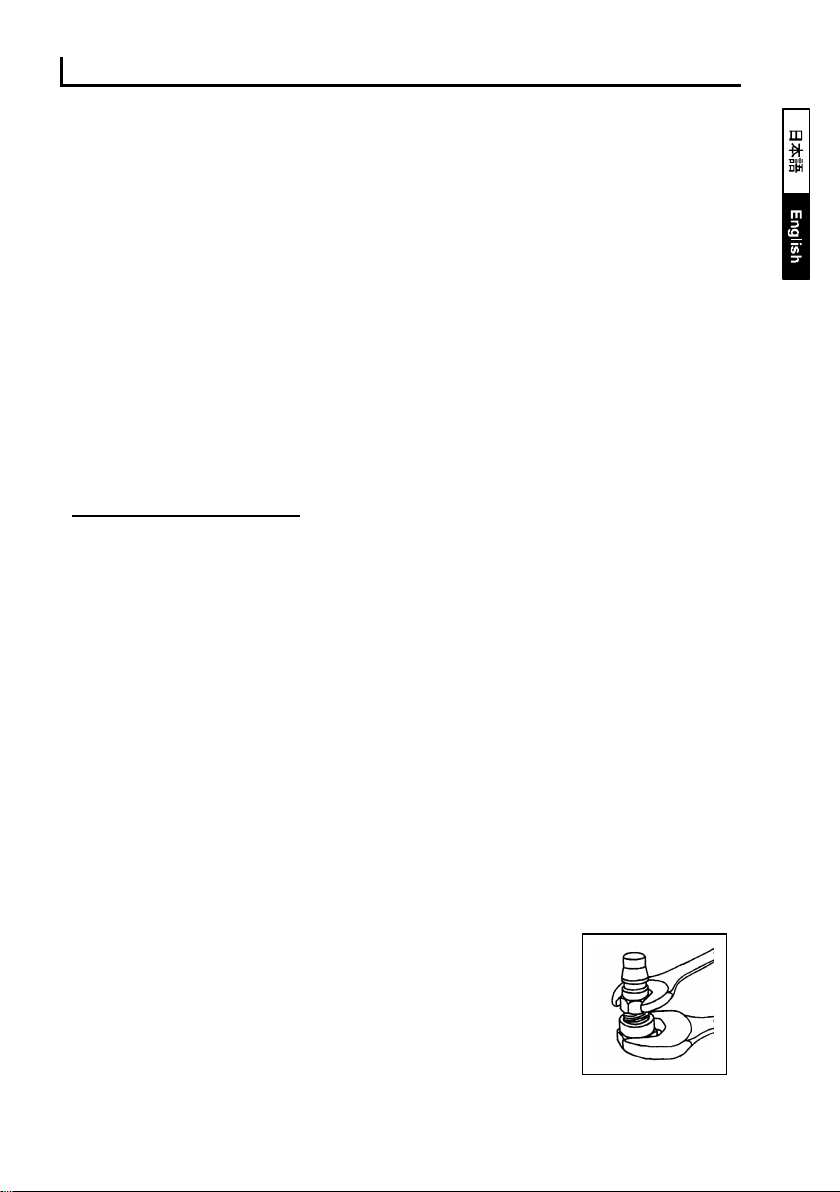
■Compressed air management
●Specified air pressure should be applied.
Excessive air pressure may lead to serious accidents or
property damages. Install proper
equipment including a
pressure gauge and a reduction valve in order to keep the
dynamic pressure at the tool end within the specified range.
●Only compressed air should be applied.

For Safe Use
2
The air impact wrench is a tool driven by normal
compressed air. There w
ill be a risk of explosion if other
high-
pressure gases like oxygen, acetylene, and propane
are used for the tool.
●Choose the appropriate air hose.
Use oil- and abrasion-resistant air hoses
for the required air
pressure and of the recommended inner di
ameter. Avoid
using deteriorated or excessively long hoses.
●Prevent air leakage.
Make sure that air plugs be firmly attached to the air hose. If
the air hose comes off due to loose connection, it will
bounce around by the force of compressed air and ma
y
cause personal injuries or property damages.
Warning
■Work environment
●Keep the work area clean and bright.
Dark or cluttered work environment leads to accidents.
Keep the area tidy and well-lit.
●Do not use the air tool in explosive atmosphere.
This unit may create sparks, which may cause explosion.
Warning
■Work clothes
●Wear appropriate work clothes.
Do not wear baggy clothes, accessories, etc, which might
be caught in revolving parts. Long hair should be tucked
under a cap to keep it away from the tool.
●Wear protective gears.
Wear protective gears suitable for the task, including a
helmet, protective goggles, earplugs, a dust mask,
anti-vibration gloves and safety shoes, etc.
Warning
■General precautions
●Handle the unit with care.
Do not throw or drop the unit as it will damage the parts and
lead to accidents and malfunction.
●Beware of moving parts.
Keep your hands and cloth away from the moving parts as
they may be caught in them.

For Safe Use
3
●Keep a good posture while working.
Keep a good posture and hold the tool firmly in case of an
unexpected situation.
●Avoid accidental start-up.
Make sure the trigger is released before connecting the air
hose to the unit. Be careful not to press the trigger when
carrying the air tool.
●Keep the tool away from electricity.
The air tool is not insulated against electricity.
●Stop using the tool if you notice any abnormalities.
If you notice any abnormalities, stop using the tool
immediately and contact us or your local distr
ibutor for
maintenance, inspection, and repair.
●Fix the object steady.
Please fix the object steady when you work. It will damage
drill or drill bit if the object is not fixed well.
●Do not put excessive force on drill bit.
Drill bit will be damaged
when it is put excessive force or
used by unproper angle.
Please stop air supply and take out the tool when the drill
get jammed.
●Use proper drill bit.
●Do not touch drill bit until the rotation stop after use.
●Do not make tool idle running.
Do not make tool idle running with drill bit.
Warning
■Miscellaneous
●Use the tool only for its intended applications.
It may lead to an unexpected accident if the tool is used for
purposes other than those specified in the manual.
●Do not attempt any modification.
Do not modify the unit. Any modification will void the
warranty and may cause a hazardous situation.
●Do not remove any parts.
Also, do not use the tool if any of its parts or screws has
been removed or missing. It may result in a hazardo
us

For Safe Use
4
situation.
●S
hut off the air supply and detach the air hose from the
tool;
・ when the tool is not in use
・ when the tool is kept in storage
・ when maintenance is performed
・ when the tool tip (bits / sockets) is replaced
・ when there is any sign of danger or malfunction
Caution
■Basic precautions for operating air tools
●Pay attention.
Stay alert while using the air tool and do not act
thoughtlessly. Also, avoid using the tool when you are tired
or under the influence of drug, alcohol, or medication.
●Keep bystanders away.
Do not let bystanders get close to your operation.
Especially, children should be kept away.
●Do not overload the air tool.
If the tool is operated beyond the specified output range, it
will damage the tool and lead to malfunction.
●Pay attention on back action.
Pay attention on back action during drilling work.
●Pay attention not to injured by sharp drilled hole.
●Beware of the exhaust port.
Direct the exhaust air away from your eyes and ears.
Otherwise, it can c
ause accidents or diseases as it contains
oil and it may blow grit or other debris in your face.
●Handle the tool with care.
Do not throw or drop the tool.
It may lead to damage or
malfunction if it is handled roughly or forcefully.
●Keep bystanders away.
Do not let bystanders get close to your operation.
Especially, children should be kept away.
●Do not abuse the air hose.
Do not carry, raise or lower the tool by the air hose.
Damaged hoses increase the risk of accidents.

For Safe Use
5
●Do not drop the tool from a high place.
Equipment like a safety strap should be used to prevent the
tool from falling when working at high places.
●Store the tool in a safe place.
If the tool is not to be used for a period of time, conduct
maintenance and keep it in a safe
, dry place. It should be
kept out of the reach of children.
●Be aware of laws.
There are laws and regulations that may regulate or limit the
use of this product. Please make sure that the use of this
product does not violate any laws and regulations.
●Take breaks.
Continuous work without taking appropriate breaks could
lead to illness, take breaks as required. If you feel
abnormalities, such as pain, immediately stop using the tool
and consult a physician.
Caution ■Maintenance, inspections and repairs
●Check before use.
Make sure the unit has no loose screws/bolts and fittings
and no damaged parts. If the unit is operated despite such
problems, it could lead to a hazardous situation as well as
decrease the performance.
●Conduct inspection and maintenance regularly.
Regular inspection and maintenance are necessary for safe
and efficient performance of the tool.
●Please contact us or the local distributor for repair or
parts replacement.
Never disassemble the unit or replace parts by yourself.
W
arranty on any of our products shall be void if defect is
caused by abuse, neglect, improper repair, improper fit, or
any use unintended by the manufacturer.
Prior to Use
・Open the package and check if all the parts are inside without shortage
and damage.

For Safe Use
6
・Be sure to read and understand this manual thoroughly before handling
this product.
・Keep the instruction manual in hand and refer to it whenever needed.
・Store the instruction manual in a safe place. If the manual is lost or
damaged, contact us or your local distributor for a new copy.
Applications
*This product is pneumatic drill powered by compressed air and not to
be use in following conditions and applications.
* if the application is outside the specified operating range.
* if any part of it has been modified or altered.
* if normal compressed air is not available. Never use other power
sources, such as oxygen, acetylene, and propane, etc.
* near water or in ignitable environments.
* in any way unintended by the manufacturer.
Icons for safety instructions
This unit may
cause vibration.
Wear
protective
goggles.
Wear earplugs.
Read the manual
before use.

How to Use
7
PIPING MODEL
SPECIFICATIONS
GT-CD60-34 / CD60-34L
Sound Level
PA
L〔dB〕82.8
WA
L〔dB〕93.8
Vibrations Level 〔m/s²〕
5.51
Uncertainty K 〔m/s²〕
1.8
VESSEL CO.,INC. FUKAEKITA2-17-25,HIGASINARIKU,OSAKA,
JAPAN
PRODUCT: Air Corner Drill
MODEL: GT-CD60-34 / CD60-34L
DIRECTIVE: 2006/42/EC(98/37/EC) , EN 792
STANDARDS: ISO 20643,ISO 28927-5
ISO 15744
declared vibration value in accordance with EN 12096
DATE: August 3th, 2015
APPROVED BY Yasushi Shiomi
・For operating the tool, make sure to follow the procedures described
in this instruction manual.
Air Tool
Oiler Filter
Air Compressor
Regulator
Drain Tap

How to Use
8
・Do not use the tool:
* if the accessories has not been mounted properly.
* if the any accessories have not been attached properly.
* if the work environment does not allow you to keep a stable posture,
secure a firm grip on the tool or to operate the tool properly.
* if the floor is slippery or not level.
* if the attached blade or other accessories are not intended for the use or
application.
* if it has been modified or has any parts missing or lost.
* if the input air pressure is higher than the specified value.
* if more than the specified working torque is required.
・When the tool is not in use or left unattended, shut off the air supply
and detach the air hose from it.
Preparations before use
●Check the air pressure
The specified air pressure for this air tool is 0.6 MPa. If the input air
pressure surpasses this specified level, it will cause damage on the unit or
individual parts.
●Remove the drain
When moisture or impurities like rust in the pipe get into the mechanism, it
may cause malfunction. Remove accumulated drain in the compressor
before use. To secure dry air supply, install an air filter in order to prevent
moisture and any impurities.
●Use an appropriate air hoses
Please refer to Specifications for choosing an air hose of the appropriate
size for the applied air supply. If the internal diameter of the air hose is too
small, sufficient power may not be obtained as air pressure cannot
increase efficiently. It also happens when the hose is too long.
●Install the plug
・GT-CD60-34
Use a spanner of No.17 to hold Air Inlet Bushing
and fasten the plug.
・GT-CD60-34L
Use a spanner of No.19 to hold Air Inlet Bushing
and fasten the plug.

How to Use
9
●Air coupling
When using the air coupling included in the package, purchase a
compatible connector. When connecting a hose directly to this product,
purchase a hose connection coupling. In both cases, check the size of
the connected hoses.
●Initial start up.
Please blow of dusts in the pipe work when you start up our product first
time And please make idle running for few seconds without attaching
drill bit to blow off oil inside of the product.
●Before use.
Please confirm condition of the product and drill bit before in use.
Please do not attach drill bit when you confirm the rotation speed.
●Lubrication
Lubricate the unit regularly for smooth operation of the motor part and to
remove impurities. If you install a lubricator, it will lubricate the tool
automatically. Or, you can lubricate manually from the air supply port
before or after use. (ISO VG10 or equivalent hydraulic oil.)
●Handling of the unit
Do not drop the unit or subject it to shock as it may cause damage. Also
it must be kept away from any organic solvents as it may cause
deformation.
●In cold areas
Moisture inside the tool may freeze in winter. Be sure to lubricate the tool
to remove the moisture after use.
How to Use
●Installation of drill bit.
Please shut off air supply to the
product when you remove or attach
drill bit.
1. Fix corner head using handle.
2. Attach drill bit.
3. Fix drill bit using wrench attached.

How to Use
10
●Start up
GT-CD60-34
1. Connect air consent.
2. Supply air from air compressor.
3. Is start rotate when throttle button is
pressed.
4. To lock the throttle button to be
pressed, press the throttle button and
turn right.
5. Rotation stops when the throttle
button is released. To unlock the
throttle button, turn left.
GT-CD60-34L
1. Connecting air coupling.
2. Supply air from air compressor.
3. Press the throttle lever to start the unit.
4. Release the throttle lever to stop the
unit.
About handling
*Please aware drilled hole sharp.
*Do not free rotate product with drill bit.
*Drill bit and Air supply disconnected when the product is not in use or during
repair.
* Do not direct the exhaust air towards people or fire. The exhaust is dangerous
as it contains oil.
* Do not touch the application and work piece during and after operation because
they become very hot due to heat caused by friction.
* When you notice any abnormalities, stop working and turn off the air supply.

Maintenance/Repairs
11
・We recommend periodic inspections for safe, worry-free use. If
inspections are neglected, it may affect the performance, lifespan and
safety of the product.
・Inspection (maintenance) should be conducted only by those who
carefully read and fully understood the instruction manual for this product.
・Contact the local distributor for repairs. Do not repair the unit by yourself.
Points of regular maintenance
When conducting maintenance, be sure to remove the hose coupling and
do not supply any air.
●Drill bit
Abrasion…Drill bit should be replaced or re-sharpen when it is worn out.
Deformation or crack…Deformation or cracked accessories might break
suddenly and. Stop using such damaged accessories
and replace them.
●Hose couplings
Loose screws… Tighten them since it is dangerous if the hose comes
off.
Worn out……… Replace with new parts since the coupling may come
off if the connection is loose.
●Throttle button / ●Throttle lever
Return condition…Confirm whether the lever returns properly. It is very
dangerous to use the tool continuously if the lever
does not return properly because the tool will start
suddenly after connected. If the lever does not return,
please request repairs.
●Parts looseness
Parts Looseness cause air leak or failure of product so please
ask for repair when the parts loose.
●Surface damage
Cracks …………. Stop using and request repairs.

T
roubleshooting
12
Troubleshooting
Trouble
Cause
Action
1. No rotation
Air is not provided. Turn on the air.
The hose is twisted. Straighten the hose.
Air pressure is low. Adjust the air
pressure.
Parts are rusted due to a lack
of lubrication. Lubricate the unit.
Dirt contamination. Request overhaul
Malfunction (worn out /
damaged, etc.) on motor
and Gear.
Request for parts
replacement
2. Rotation is
uneven.
Rate of air flow is
inadequate. Confirm air flow rate.
Air pressure is low. Adjust air pressure.
Parts are rusted due to a lack
of lubrication. Lubricate the unit.
Damage of gear or bearing Replacement
3.Rotation does
not stop.
Change of shape of the
Throttle Valve.
Request for parts
replacement
Contamination by a foreign
substance in the throttle
valve.
Request overhaul
4.Drill bit cannot be
fixed.
Screw of attachment part is
damaged. Replacement
5. Air leakage
Problem of throttle part. Ex.
O-ling, Throttle spring ,
rusting, cracking
Request for parts
replacement
6.Abnormal noise
Spare parts came loose. Request overhaul
Worn out and damaged
bearings.
Request for parts
replacement
Gear part problem.
Request for parts
replacement
Worn out and damaged rotor
blade.
Request for parts
replacement

T
roubleshooting
13
The rotor blade does not
come out at rotating.
Request for parts
replacement
Run out of lubrication and oil.
Lubricate the unit.
7.Water comes out.
The drain is clogged. Clean the drain.
Request repairs immediately when the tool is in a defective and abnormal
condition, etc., since it could lead to a product malfunction and accident.
Please contact our distributor for repairs.
Storage
Please store the air tool in a safe location and be aware of dust, humidity,
dew and freezing.

Exploded d
iagram drawing & Parts list
14
Specifications
Specification
Unit
GT
-
CD60
-
34
GT
-
CD60
-
34
L
Cutting Capacity mm 6
Weight g820 840
Overall Length mm 250 251
Free Load rpm 3400
Working Air Pressure MPa 0.6
Air Consumption ㎥/min
0.42
Air Compressor kw 0.75 or bigger
Air Hose Inner Dia. mm 6.35
Air Coupling Rc 1/4
Accessories
● VESSELAir Coupling (BPB-2)
● Lock Handle
● Double Ring Wrench
1PC
1PC
1PC
Description / Dimensions
GT-CD60-34
GT-CD60-34L

Exploded d
iagram drawing & Parts list
15

Exploded d
iagram drawing & Parts list
16
● GT-CD60-34 / CD60-34L
Index
No. EDP No.
Description Size
Number
Required
Per Unit
1 846201 Setting Nut 1
2 846202 Setting Nut Bearing ※678 2
3 846203 Drive Gear 2 1
〈4〉846204 Corner Head, Bearing ※685(Installed No.6)1
〈5〉846205 Washer, Bearing (Installed No.6)1
6 846206 Corner Head Complete 1
7 846207 Ring 1
8 846208 Drive Gear 1 1
9 846209 Lock Pin For Needle Roller Bearing. ※SP2×12 1
10 846210 Needle Roller Bearing ※HK0910 1
11 846211 Washer, Adjustment ForAdjustment -
12 846212 Drive Gear 1 Bearing ※697 1
13 846213 Holder For Bearing 1
14 846214 Lock Nut 1
15 846215 Grip 1
16 846216 Screw Joint 1
17 846217 Screw Joint, Bearing ※6901 1
18 846218 Needle Roller ※φ4×17.8 2
19 846219 Planetary Gear 2
20 846220 Frame, Gear 1
21 846221 Internal Gear 1
〈22〉
846222 Frame, Gear Bearing ※R8(Installed No.21)1
〈23〉
846223 Bearing ※608(Installed No.24)1
24 846224 Endplate Complete, Front 1
25 846225 Rotor 1
26 846226 Blade, Rotor 5
27 846227 Cylinder Complete 1
〈28〉
846228 Pin, Cylinder ※SP2×20(Installed No.27)2
29 846229 Endplate Complete, Rear 1
〈30〉
846230 Bearing ※606(Installed No.29)1
35 846235 O-ring, Throttle Valve ※P3 1
37 846337 Spring, Throttle Pin 1

Exploded d
iagram drawing & Parts list
17
38 846238 O-ring, Plug Cap ※S10 1
39 846239 Plug Cap 1
〈40〉
846240 Locating pin, Exhaust Cover ※SP2.5×8(Installed No.31,50)1
44 846244 Ring Alignment 1
● GT-CD60-34
Index
No. EDP No. Description Size
Number
Required
Per Unit
31 846231 Motor Case, Complete 1
32 846232 Throttle Button 1
33 846233 Pin, Throttle ※SP1.5×8 1
〈34〉
846234 Busch, Throttle (Installed No.31)1
36 846236 Valve, Throttle 1
41 846241 Exhaust Cover 1
42 846242 O-ring, Air Inlet Bushing ※S10 1
43 846243 Bushing,Air Inlet 1
● GT-CD60-34L
Index
No. EDP No. Description Size
Number
Required
Per Unit
50 846250 Motor Case , Complete 1
51 846251 Throttle Lever 1
52 846252 Pin, Throttle ※SP3×22 1
〈53〉
846253 Busch, Throttle (Installed No.50)1
54 846254 Valve, Throttle 1
55 846255 Exhaust Cover 1
56 846256 Snap Ring ※ISTW-11 1
57 846257 O-ring, Air Inlet Nut ※S12.5 1
58 846258 Nut, Air Inlet 1
59 846259 O-ring, Air Inlet Bushing ※S11.2 1
60 846260 Bushing,Air Inlet 1
Parts with < > marked shall not be supplied individually even if ordered since it is an integrated
component.
●The contents of this manual are subject to be changed without notice.


This manual suits for next models
1
Table of contents