VEVOR SKF-B40F User manual

Technical Support and E-Warranty Certificate www.vevor.com/support
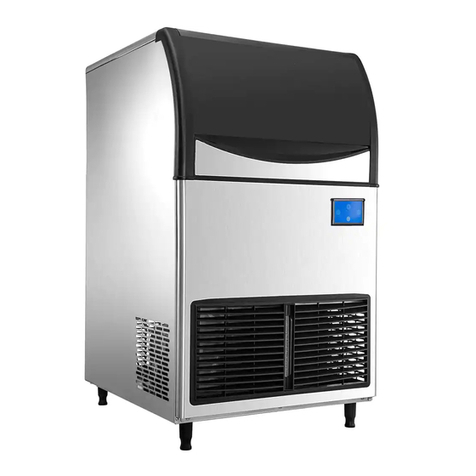
Commercial Ice Machine
Model: SKF-B40F SKF-B45F
SKF-C50F SKF-C55F
We continue to be committed to provide you tools with competitive price.
"Save Half", "Half Price" or any other similar expressions used by us only represents an
estimate of savings you might benefit from buying certain tools with us compared to the major
top brands and does not necessarily mean to cover all categories of tools offered by us. You
are kindly reminded to verify carefully when you are placing an order with us if you are
actually saving half in comparison with the top major brands.

- 1 -
MODEL: SKF-B40F SKF-B45F SKF-C50F SKF-C55F
Have product questions? Need technical support? Please feel free to
contact us:
Technical Support and E-Warranty Certificate
www.vevor.com/support
NEED HELP? CONTACT US!
This is the original instruction, please read all manual instructions
carefully before operating. VEVOR reserves a clear interpretation of our
user manual. The appearance of the product shall be subject to the
product you received. Please forgive us that we won't inform you again if
there are any technology or software updates on our product.
Commercial Ice
Machine

- 2 -
It is important that you read these instructions carefully and keep it for
future reference.
Warning-To reduce the risk of injury, user must read
instructions manual carefully.
This device complies with Part 15 of the FCC Rules. Operation
is subject to the following two conditions:(1)This device may
not cause harmful interference, and (2)this device must accept
any interference received, including interference that may
cause undesired operation.
This product is subject to the provision of European Directive
2012/19/EC. The symbol showing a wheelie bin crossed
through indicates that the product requires separate refuse
collection in the European Union. This applies to the product
and all accessories marked with this symbol. Products marked
as such may not be discarded with normal domestic waste, but
must be taken to a collection point for recycling electrical and
electronic devices
IMPORTANT SAFETY INSTRUCTIONS
When using electrical appliances, basic safety precautions should be
followed to reduce the risk of fire, electric shock , and injury to persons
or property. Read all instructions before operating the machine for the first
time.
CAUTION: ICE CAN’T BE STORED IN THE ICE BIN DURING
NIGHT-TIME, IT’S NOT FRIDGE, ICE WILL BE MELTED TO WATER AND
FLOW OUT OF THE MACHINE.
1.If connect with water supply, CAUTION: must connect the potable water
supply;
2.The machine is intended to be used in household and similar

- 3 -
applications such as:
-staff kitchen areas in shops, offices, and other working environments;
-farmhouses
-by clients in hotels, motels, and other residential type environments;
-Catering industry and similar industries.
3.The machine should be used indoors and without obstacles surrounded
good ventilation place. There is must be 50cm at least between the four
sides of the machine with the wall.
4.When using electrical appliances, basic safety precautions should be
followed to reduce the risk of fire, electric shock , and injury to persons or
property. Read all instructions before using any appliance.
5.Don’t operate this or any other appliance with a damaged cord.
6.Connect to properly polarized outlets only. No other appliance should be
plugged into the same outlet. Be sure that the plug is fully inserted into the
socket.
7.Don’t place the machine and power cord near flammable material. Do not
cover the cord. Do not submerge it in water.
8.We do not recommend the use of an extension cord, as it may overheat
and become a risk of fire.
9.Unplug the ice maker before cleaning or making any repairs or servicing.
10.Exercise caution and supervision when the appliance is used near
children.
11.Don’t use your ice maker outdoors. Avoid direct sunlight and make sure
that there is at least 5 inches of space between the back and sides of
your unit and the wall.
12.Don’t use any liquid other than water in the unit to make the ice.
13.Do not clean your ice maker with flammable detergents.The fumes can
create a fire hazard or explosion.
14.Do not tip the machine over.
15.If the ice maker is brought indoors from outdoors during the wintertime,
give it a few hours to warm up to room temperature before plugging into the
power source.
16.This unit should be properly grounded for your safety. The power cord is

- 4 -
equipped with a three-prong plug mated with standard three-prong wall
outlets to minimize the possibility of electric shock.
17.Plug your appliance into a dedicated, properly installed, and grounded
wall outlet. Do not, under any circumstance power and /or grounding
should be directed toward a certified electrician.
18.The foaming materials inside are combustible which must be kept away
from fire.
19.It’s forbidden to pull the cable to unplug the plug, pull the plug is a must.
IMPORTANCE: To avoid hazards due to instability,the unit must be placed
on an even and flat surface.
IMPORTANCE: To avoid hazards due to instability,the unit must be placed
on an even and flat surface.
WARNING: This appliance must be grounded.
1)The fuse on the PCB is 15A,if change,must be operated by a technician.
2)voltage fluctuation can’t be exceeded ±10% than the rated voltage,or a
Voltage stabilizer is needed.
IMPORTANCE: To avoid hazards due to instability, the unit must be
placed on an even and flat surface.
OPERATING PROCEDURES
UNPACKING YOUR ICE MAKER
1.Remove all exterior and interior packaging materials. Check whether all
the below accessories are included or not. If any parts are missing, please
contact our customer service. After you unpack the machine, we
recommend you to leaving it for 24 hours before turning it on.
2.Clean the interior with lukewarm water and a soft cloth or clean the unit
using the Self-Clean function.
3.Find a location for your ice maker where it’s protected from direct sunlight
and other sources of heat (i.e. stove, furnace, radiator). Place the ice
maker on a level surface. Make sure that there is at least 5 inches of space
between the back and sides of your ice maker and the wall.
4.Allow one hour for the refrigerant to settle before plugging the unit for

- 5 -
initial use.
5.The appliance must be positioned where the plug is accessible.
Package Contents
Ice maker machine x 1
Warm Tips: Check whether all below accessories are included.
Accessories list
NO
Description
Picture
Usage
QTY
1
Manual
Operation manual
1PC
2
Filter
Filter water
1PC
3
Drainage
pipe
Drain
1PC
4
Ice spoon
Take ice cubes
1PC
5
nylon cable
ties
Fix pipe if needed
2PCS
6
Jump ring
fasten the outlet and
the drainage pipe
together if needed
1PC

- 6 -
7
Seal ring
Do put it in the faucet
of the intake pipe.The
other one is spare.
2PCS
8
Spare blue
clip
Spare blue clip if
needed.
2PCS
9
Spare plug
Spare plug which
plug the tank if
needed.
1PC
CONNECTING YOUR ICE MAKER WTTH OTHER PARTS
Please connect your ice maker with other parts by referring the diagram
below.

- 7 -
Connect drainage pipe and water intake pipe
Warning:1)The machine can only connect with drinking water sources,and
must meet local drinking water standards
2)The water pressure must be in 0.1-0.4Mpa,if exceed 0.4Mpa,a pressure
reducing valve must be connected.
3)Drainage: The outlet of the drainage pipe must be lower than the outlet
on the machine
Drain.
Warning: Because the ice in the inner tank will melt, drain pipe must be
connected before using, and insert the drain pipe into a container or into
the sewer.
Note: Connect one end of the drain pipe to the machine, and the other end
to a container or sewer. The other port of the drain pipe must be lower than
the drain port of the machine.

- 8 -
USING BARRELED WATER AS WATER SOURCE
You can use barreled water as water source. Please remember to
replenish water regularly. Besides, please rotate the blue control switch
vertical and turn off the pipe water supply.
1.If you use water faucet as water source, please ensure that the water
faucet is open for continuous water supply. If water runs out, the “add
water” indicator will light on.
2.If you use barreled water as water source. Please remember to replenish
water regularly or the “stoppage” indicator will light on.
3.When you use water faucet as water source, please rotate the blue
control switch in the machine horizontal. On the other hand, if you use
barreled water as water source, please rotate the blue control switch
vertical. Please refer to the picture below.
MACHINE OPERATIONS

- 9 -
Operation Panel
Ice making operation:
1.Connect the machine to the power and press the “ON/OFF” button. The
“ice making” indicator will light on.
Through “+”/”-” to increase or decrease ice making time ,which will be
effected at the current cycle .
Press “+” button,if the screen display “1”,means ice making time will be
added 1 min,max time can be added 8min. If press “-” button and display
“-1”,means ice making time will be decreased 1min,the max time is 5
min. That means the time can be adjusted from -5 to 8 min.
2.When the countdown of time is finished, the “melting” indicator will light
on. The ice cubes will come off the freezing panel later.
3.After the ice cubes come off. The machine will enter another loop of ice
making automatically.
Auto Turning On/Off:
1.When the machine is turned off while connected to the power, press the
“Reservation/Clean” button and the “+”/“-” button to set the auto-turning-on
time (in
hours). The machine will automatically turns on after the countdown
isfinished.
When the machine is at the middle of ice making, press the
“Reservation/Clean” buttonandthe“+”/“-”buttontosettheauto-turning-off
time(inhours).Themachine will automatically turns off after the countdown is

- 10 -
finished.
Self-cleaning:
1. When the machine is turned off while connected to the power, press the
“Reservation/Clean” button and hold it for a while. The machine will
automatically enter self-clean program.
Notes:
1)If you change the countdown time during the middle of the ice making
procedure, it will take effect at the next loop. You can long press the “HOT”
button during the ice making to unload the ice cubes ahead of time.
2)The surrounding environmental temperature will influence the time
needed for ice making.
CLEANING & MAINTENANCE
Please thoroughly clean your ice maker before initial use.
Exterior: the outside of the ice maker should be cleaned regularly with a
mild detergent and warm water. Always use a soft cloth to avoid scratching
or damaging the housing.
INTERIOR: please use the following Self-Clean function:
1.Add water and vinegar or lemon juice mix (1:1 ratio)
2.Plug in unit,press and hold the CLEAN button for approximately 3
seconds,then release.The unit will automatically enter Self-clean program.
This process takes about 5-6 minutes.When the Self-Clean program is
finished,unit will automatically power off.
3.The fan blade will be rotating.This process rinses the inside parts several
times.
4.After the Self-Clean program is completed,unplug the power cord and
drain out the water by unplugging the drain cap on the side.Replace drain
cap.
5.Add fresh water to the water reservoir,up to the water level mark.
6.Plug the unit and repeat the Self-Clean process by repeating steps 3 to 5.
This will rinse out the vinegar/lemon residue.
7.After draining the water,replace and tighten drain cap.
8.Dry the interior and exterior with a clean,soft cloth.

- 11 -
NOTE: It is strongly recommended to clean the unit before initial use or
after the unit has not been in use for a long period of time.
NOTE
1.As the production of ice cubes increases, the plastic panel inside the m
achine (shown above) might be pressed down by the ice cubes. When
the plastic panel is pressed
down, the machine will stop producing ice cubes automatically and the
“stoppage”
indicator will light on. Please clean out the ice cubes regularly for
continuation of ice
making.
Common malfunction analysis
E1
No ice deflector
detected
The ice guide plate
came off
Reinstall the ice guide

- 12 -
Magnetic sensitive
switch damaged
Replace the magnetic
sensitive switch
The ice guide plate is
not reset
Reset ice guide plate
E2
Ice making is
normal
The fourth ice cycle
stops
Replace the magnetic sensitive
switch
There is no
water in the
water-box
The drain plug is not
installed correctly
Install drain plug correctly
External water supply
Check the water supply
The water tank
overflowed into
the refrigerator
External water supply
The water valve above the tank
does not rotate horizontally
Use tap water as a
source of water
The external water pressure is
too high to cause the float valve
to work, reduce the water
pressure or change a new valve
There is water in
the water box
There is no water, nor
does the shower pipe
run
The pump is seriously blocked,
should be replaced or cleaned
The shower pipe is blocked.
Clean it up
Just running
water, not
cooling or a little
cold
There is thin ice on the
ice mold
Increase manufacturing time by
pressing the "+" button on the
operating panel
There is thick ice on the
ice mold
Reduce manufacturing time by
pressing the "-" button on the
operating panel
Some water splashed
into the refrigerator
Rotate and adjust the shower
pipe
The back of the water
box is leaking into the
Adjust the installation position of
the water box

- 13 -
refrigerator
The water is not
cold
The main board is not
powering the
compressor
Replace the mainboard
Compressor failure
Replace compressor
Compressor high
temperature
Replace compressor
Compressor working,
not cooling
Refrigerant leak, need repair
E3
High
temperature
alarm
condensation
temperature sensor is
damage
Replacement
The cooling fan is
blocked by foreign
matter
Remove the barricade
Damage to cooling fan
Replacement
E4
Abnormal
condensation
temperature
sensor
Condensation
temperature sensor
short circuit or open
circuit
Replacement
E5
Abnormal
ambient
temperature
sensor
Ambient temperature
sensor short circuit or
open circuit
Replacement
E6
Lack of water
Interruption of external
water supply
Restore water supply
Water intake solenoid
valve damaged
Replacement

- 14 -
Circuit Diagram
Made In China

- 2 -
Technique Assistance et certificat de garantie électronique
www.vevor.com/support
Machine à glace commerciale
Modèle: SKF-B40F SKF-B45F
SKF-C50F SKF-C55F
We continue to be committed to provide you tools with competitive price.
"Save Half", "Half Price" or any other similar expressions used by us only represents an
estimate of savings you might benefit from buying certain tools with us compared to the major
top brands and does not necessarily mean to cover all categories of tools offered by us. You
are kindly reminded to verify carefully when you are placing an order with us if you are
actually saving half in comparison with the top major brands.

- 3 -

- 1 -
MODÈLE: SKF-B40F SKF-B45F SKF-C50F SKF-C55F
Have product questions? Need technical support? Please feel free to
contact us:
Technical Support and E-Warranty Certificate
www.vevor.com/support
NEED HELP? CONTACT US!
This is the original instruction, please read all manual instructions
carefully before operating. VEVOR reserves a clear interpretation of our
user manual. The appearance of the product shall be subject to the
product you received. Please forgive us that we won't inform you again if
there are any technology or software updates on our product.
Commercial Ice
Machine

- 2 -
Il est important de lire attentivement ces instructions et de les conserver
pour référence future.
Avertissement : Pour réduire le risque de blessure, l'utilisateur
doit lire attentivement le manuel d'instructions.
Cet appareil est conforme à la partie 15 des règles FCC. Son
fonctionnement est soumis aux deux conditions suivantes : (1)
Cet appareil ne doit pas provoquer d'interférences nuisibles et
(2) cet appareil doit accepter toute interférence reçue, y
compris les interférences susceptibles de provoquer un
fonctionnement indésirable.
Ce produit est soumis aux dispositions de la directive
européenne 2012/19/CE. Le symbole représentant une
poubelle barrée indique que le produit nécessite une collecte
sélective des déchets dans l'Union européenne. Ceci
s'applique au produit et à tous les accessoires marqués de ce
symbole. Les produits marqués comme tels ne peuvent pas
être jetés avec les ordures ménagères normales, mais doivent
être déposés dans un point de collecte pour le recyclage des
appareils électriques et électroniques.
CONSIGNES DE SÉCURITÉ IMPORTANTES
Lors de l'utilisation d'appareils électriques, des précautions de sécurité de
base doivent être suivies pour réduire le risque d'incendie, de choc
électrique et de blessure. à des personnes ou des biens. Lisez toutes les
instructions avant d'utiliser la machine pour la première fois.
ATTENTION : LA GLACE NE PEUT PAS ÊTRE STOCKÉE DANS LE BAC
À GLACE PENDANT LA NUIT , Ce n'est pas un réfrigérateur. LA GLACE
SERA FONDÉE EN EAU ET S'ÉCOULERA DE LA MACHINE.
1. En cas de raccordement à l'alimentation en eau, ATTENTION : doit être
This manual suits for next models
3
Table of contents
Languages:
Other VEVOR Ice Maker manuals

VEVOR
VEVOR LB360TA Installation and operating instructions

VEVOR
VEVOR SSX80 User manual

VEVOR
VEVOR LB175A User manual

VEVOR
VEVOR BY-300XTD-S User manual

VEVOR
VEVOR HZB-18F/L User manual

VEVOR
VEVOR IM1102-UL User manual

VEVOR
VEVOR IMN1000-UL User manual

VEVOR
VEVOR ICM-150P User manual

VEVOR
VEVOR BY-288G User manual

VEVOR
VEVOR SKF-S25J User manual