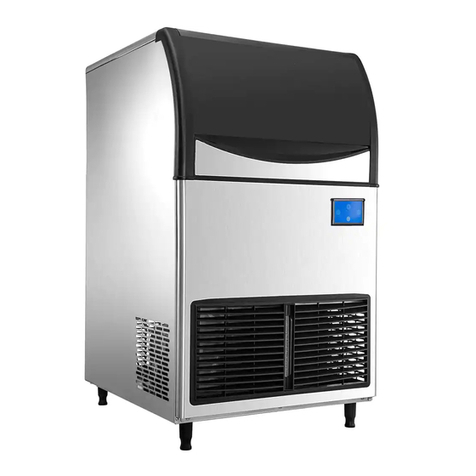
VEVOR LB360TA Installation and operating instructions

Technical Support and E-Warranty Certificate www.vevor.com/support
ICE-MAKING MACHINE
INSTALLATION MAINTENANCE
INSTRUCTIONS
MODEL:LB360TA/LB400TA/LB440TA/LB550TA
We continue to be committed to provide you tools with competitive price.
"Save Half", "Half Price" or any other similar expressions used by us only represents an
estimate of savings you might benefit from buying certain tools with us compared to the major
top brands and doses not necessarily mean to cover all categories of tools offered by us. You
are kindly reminded to verify carefully when you are placing an order with us if you are
actually saving half in comparison with the top major brands.

- 1 -
MODEL:LB360TA/LB400TA/LB440TA/LB550TA
Have product questions? Need technical support? Please feel free to
contact us:
Technical Support and E-Warranty Certificate
www.vevor.com/support
NEED HELP? CONTACT US!
This is the original instruction, please read all manual instructions
carefully before operating. VEVOR reserves a clear interpretation of our
user manual. The appearance of the product shall be subject to the
product you received. Please forgive us that we won't inform you again if
there are any technology or software updates on our product.
ICE-MAKING MACHINE

- 2 -
SAFETY PRECAUTION
Before the appliance is used, please read the manual carefully. To
reduce the risk of fire, electrical shock or injury when using the
appliance, follow basic precaution, including the following:
DANGER:
Read all instructions before using the ice-making machine.
Plug into a grounded 3-prong outlet, do not remove grounding prong, do not
use an adapter, and do not use an extension cord.
It is recommended that a separate circuit, serving only your appliance be
provided. Use an outlet that cannot be turned off by a switch.
Never clean appliance parts with flammable fluids. These fumes can create a
fire hazard or explosion. And do not store or use gasoline or other flammable
vapours and liquids in the vicinity of this or any other appliance. The fumes
can create a fire hazard or explosion.
Before proceeding with cleaning and maintenance operations, make sure the
power line of the unit is disconnected.
Do not connect or disconnect the electric plug when your hands are wet.
Unplug the appliance or disconnect power before cleaning or servicing.
Failure to do so can result in electrical shock or death.
Do not attempt to repair or replace any part of your appliance unless it is
specifically recommended in this material. All other servicing should be
referred to a qualified technician.
To prevent a child from being entrapped, Keep out of reach of children and

- 3 -
not in the vicinity of ice-making machine.
Before you throw away your old ice-making machine, take off the door but
leave the shelves in place so that children may not easily climb inside.
Never allow children to operate, play with, or crawl inside the appliance.
Warning:
This machine should be operated by professionals or trained personnel;
Make sure the machine is reliably connected to the ground to keep safe
Use the power consistent with the one in the nameplate, and the bias voltage
is less than ± 10% of the rated voltage. The professionals must do the wiring;
If the supply cord is damaged, it must be replaced by the manufacturer, its
service agent or similarly qualified persons in order to avoid a hazard.;
Before maintaining the machine, make sure you have cut off the power;
Don’t wet or sprinkle the liquid onto the plugs, motors, or other electrical parts
to avoid electric shock;
This appliance can be used by children aged from 8 years and above and
persons with reduced physical, sensory or mental capabilities or lack of
experience and knowledge if they have been given supervision or instruction
concerning use of the appliance in a safe way and understand the hazards
involved. Children shall not play with the appliance. Cleaning and user
maintenance shall not be made by children without supervision.
FLAMMABLE REFRIGERANT
For your safety observe the following recommendations.

- 4 -
This appliance contains a small quantity of R290/R600a ice-making machine
which is environmentally friendly, but flammable. It does not damage the
ozone layer, nor does it increase the greenhouse effect.
During transportation and installation, ensure that the tubing of the refrigerant
circuit is not damaged.
when handling, moving and use of the refrigerator or freezer to avoid either
damaging the refrigerant tubing or increasing the risk of a leak.
Avoid using or manipulating sharp objects near by the appliances.
Leaking refrigerant can ignite and may damage the eyes.
In the event any damage does occur, avoid exposure to open fires and any
device which creates a spark. Disconnect the appliance from the mains
power.
Thoroughly ventilate the room in which the appliance is located for several
minutes.
Notify Customer Service for necessary action and advice.
The ice-making machine quantity contained in this appliance is listed above in
grams; it is also noted on the Rating Plate of the appliance.
WARNING: During using, service and disposal the
appliance, please pay attention to symbol similar as
left side, which is located on rear of appliance (rear
panel or compressor) and with yellow or orange color. It’s risk of fire
warning symbol. There are flammable materials in refrigerant pipes and

- 5 -
compressor. Please be far away fire source during using, service and
disposal.
Note:
Please keep the water or other conductive liquids away from the machine;
Don’t stick clubs into the machine;
During the movement of the machine, it should be carefully carried at an
angle of less than 45 degrees.
Prohibit water discharge pipe or water supply pipe from being bent so that the
pipes are damaged and water leaks out from the pipes.
The distance between the air outlets and the wall should be over 20 cm.
Besides, keep good ventilation and ensure the machine is dry and clean.
FCC STATEMENT: This device complies with Part 15 of the FCC Rules.
Operation is subject to the following two conditions:(1)This device may not
cause harmful interference, and (2)this device must accept any interference
received, including interference that may cause undesired operation.
SAVE THESE INSTRUCTIONS

- 6 -
BASIC PARAMETER
Model
LB360TA
LB400TA
LB440TA
LB550TA
Power
700W
800W
1000W
1000W
Max ice
production
capacity
≥360
≥400
≥440
≥500
Number of ice
cells
12*13=156
PCS
12*13=156
PCS
13*14=182
PCS
13*14=182
PCS
Input
AC115V 60Hz
Ice size
22*22*22mm
Ice storage
capacity
Theoretical ice storage: 150Kg;
Automatic ice filling: 100Kg
Operator
schema
Touch Screen
Screen size
3.5-inch resistive display
Climate type
SN、N、ST

- 7 -
A
B
C
D
E
F
G
LB360TA
560
585
910
100
1570
615
837
LB400TA
560
585
910
100
1570
615
837
LB440TA
560
585
910
100
1570
615
837
LB550TA
560
585
910
100
1570
615
837
BASIC STRUCTURE
Split type
No.
Name
No.
Name
1
Top panel
8
Ventilation window
2
Water pump
9
Water supply valve
3
Water level sensor
10
Condenser
4
Front panel
11
Fan motor
5
Control panel
12
Compressor
6
Evaporator
13
Deicing solenoid valve
7
Right panel
14
Water storage tank

- 8 -
INSTALLATION
Open the case, move the machine to a appropriate location. Check the packing list
and the contents, if they are different, please inquire your dealer.
2. Operating environment
A. Environment temperature:SN、N:10℃~38℃
Environment humidity: relative humidity ≤90%

- 9 -
The distance between the air outlets and the wall should be over 20 cm. Besides,
keep good ventilation and ensure the machine is dry and clean. The position to
place the ice maker must be far away from the heat source, such as a bake oven、
electric cooker, etc.
B. Water source is suitable for the sanitary standards, the water temperature
and pressure is suitable. For getting the biggest efficiency, the inlet water
temperature value should be 0.6~32℃, and the pressure should be 0.138~
0.552MPa.
C. There should be a sewer. While working, some of the water will be
discharged, so the sewer is necessary. Furthermore, the sewer must be kept
unblocked.

- 10 -
POWER SUPPLY
a、Select the proper power supply according to the voltage and power on the
nameplate.
b、Connect the power wire and supply, ensuring the yellow and green wires were
connected with the ground wire firmly.
Caution:
a.For safety, ensure the ground connection is in good condition.
b.All the exterior wires and other appliances must confirm with
national standard.
c、If the voltage fluctuation range is extensive (± 10% over the rated voltage), it will
cause many faults, such as the machine can’t be started, the electronic control
board is damaged, or the compressor being damaged. Therefore, you must use a
suitable automatic voltage regulator.
For the LB360T,LB440T,LB400TA, LB550TA,you must remove the decorative
panel so as to turn on the power.
4. Connect the water supply pipe

- 11 -
Take out the water supply pipe from accessory bag, connect pipe’s double ends to
the water supply valve and water faucet. First, sleeve the connector 1 to the water
faucet, then join one end of water supply pipe which has steel balls to the
connector 1(hang on this water supply pipe’s end, loose it after being connected to
the connector 1), and connect the other end which is attached with a screw to the
water supply valve, the valve also has a screw in its end, screw down the valve in
clockwise. Once finished installation, check the connect part if it is leaks or not.
you should connect the water pipes according to the diagram on the rear panel.
The flow rate of condensate water is adjustable according to customers’ need.
(Condensate flow relates to the speed of making ice)
Warning:The water used to make edible ice block must be
drinking water, furthermore, water’s temperature must be
among 0.6~32℃and the pressure among 0.138~0.552Mpa.
5. Connect the water discharge pipe
The water discharge pipe is situated at the back of the machine, extended pipe’s
end to the sewer.
Attention:In order to keep the water discharged smoothly,
discharge pipe’s lowest point must be above the highest point of
the sewer, so to prevent the discharge water to flow back.
6. Keep the main body in level situation
Please keep the main body level to ensure the ice maker
usually works. First, screw down the two adjustable legs into
the machine’s nuts. You can adjust the two legs properly if the
main body is not level.

- 12 -
SERVICE INSTRUCTION
1.Operation process
First, turn on the water faucet, power, and water supply valve, then fill the sink with
water, and turn off the faucet when the sink is filled with appropriate water.
2. Ice-make process
After several minutes, the water pump starts work, and the water will be pumped
and flowed through the ice model evenly. At last, the ice is formed in the model.
When the ice thickness sensor detects the regulated thickness of ice, the ice starts
to drop.
3. Ice-drop process
The water pump stops working, the water supply valve will be opened, and water
go into the sink. The heating valve will be turned on, and the refrigerant gas is led
into the ice model; the ice root will be melted, and after about 2 minutes, the ice
block drop into the ice cabinet. The falling ice block hit the retaining board (the
inductive switch, which is fixed on the right side of the retaining board, till now, one
circle is over, and the new ice-make circle will start.
4. Auto-stop
When the ice cabinet is filled with ice blocks, the continuing falling ice block will be
locked between the retained board and evaporator; the retained board would be
opened continually and couldn’t return to the original position. After several
seconds, the ice maker will stop working automatically. Once the ice block locked
between the retained board and evaporator is taken away, the retained board will
return to the its original position, and the ice maker will restart to make ice.
5. Running check
A、When the ice maker is in the working process, a sudden interruption of water
supply can lead to the sink not being filled with appropriate water. The ice maker
will turn into standby condition and not make ice as usual. After the water supply
becomes normal and restart the machine, it can work normally.

- 13 -
B、The fan motor for condenser is controlled by temperature, when condenser’s
surface temperature is lower, the fan motor will stop, so as to save power; when
surface temperature rises up, the fan motor will work again, so fan motor work
intermittently during the ice-make process.
C、When a commercial ice maker works at a lower ambient temperature, the
ice-drop process will be later than usual. If it occurs three times continuously, the
machine will stop automatically, and the red light in the electrical box alternately
flickers with the other four lights. After restarting the machine, it will become
normal. Therefore, we suggest the user not use the machine at a low ambient
temperature.
LCD FULL PAGE DISPLAY
7. Buttons on display board
Boot / shutdown:
press 3 seconds to turn off the machine under turn on status

- 14 -
press on/off button to turn on the machine under turn off status press the on/off
button to exit setting under ice thickness setting and filling water adjust status
Mode button:
Switch the ice making program
Clean / Set Button:
Press to clean status under machine turn off status
+/reservation button:
press to ice thickness adjust under pressure equilibrium、making ice、unload ice、
ice full status
click to increase 1, long press the button to increase continuously under ice
thickness adjust status
click to reservation time setting status under turn off status
-/light button:
click to decrease 1,long press the button to decrease continuously under ice
thickness adjust status
8.Fault codes
E-01.ice full button falut, skate board not back in position properly or ice full button
damage
E-02.making ice over time,can’t detect ice thickness 5 times continuously
E-03.unload ice over time,can’t detect ice full button action within 6mintues unload
ice 3times continuously
E-04.high temperature fault,condensation temperature higher than setting
temperature
E-05.lack of water
E-06.high pressure
E-07.condensation sensor fault
Instruction: when the machine is in the “lack-water protection” condition, it can
restart automatically after the sink is filled with appropriate water. If other faults
cause the machine to stop, press the start button or supply power again after

- 15 -
forty-five minutes, and the machine will start again.
DAILY CLEANING AND MAINTENANCE
Clearance of side panels and inner container
A、Before cleaning and sanitizing the ice maker, clean up the
ice blocks in the cabinet and ensure the power source and
water source has been cut off.
B、Cleaning the side panels and inner container with clean
water (you can join some neutral detergent in water), and
then wipe the machine with a soft towel.
Attention:Do not spray water to machine
directly. Alkaline detergent, perfumed soap,
lapping powder, boiling water, bananas oil,
tolperison and most of the other organic
solvents can’t be used to clean the machine.
2. Dust removal of the condensor
To use the machine well, please clean the dust covering the
condenser's fins once every three months. Open the
ventilation fence in front of the machine (grasp the frame of the
ventilation fence by hand, pull it out carefully), and use a dust
collector or brush to clean the dust. Sharp iron tools must not
be used to clean the condenser and must not damage the
radiating fins.

- 16 -
3. Cleaning the spray water pipe
A、Cleaning the ice maker:
The spray water pipe must be cleaned once per half
a year. When you clean it, firstly open the front cover,
take out the spray pipe, and then scour off the scum
till the every hole is unblocked. Reinstalled it after
finish cleaning.
C、After finishing washing,screw out the cap of
the drain-valve and drain out all the dirty water,
then tighten the cap。
C、After finishing washing,screw out the cap of the drain-valve and drain out
all the dirty water, then tighten the cap.
4. Automatically cleaning of the ice maker
Automatically cleaning the ice maker: when the machine is making ice, softly push
the “clean” key on the electrical box, which is on the rear panel, the refrigeration
system will stop working, and the machine turn into an auto-wash process. The
wash process is divided into three steps: wash, potch, and drain. It will cost bout
30 minutes. To improve the cleaning effect, the user can add a little neutral
detergent, and after finishing washing, the machine turns into ice-make condition
automatically.
5. Clean the split type commercial ice maker and auto-clean series ice maker.
Button “AN(MODE)” on the PC board: After pressing the button “AN(MODE)”, the
machine will stop current working process and turns into next.
Working process: power supply——filling
water——balance——pre-cooling——refrigerating——collecting ice——ice is full
Switch on the power source and clean
A、Usually, the machine is connected to the power source continually. When you
connect the machine to the power source firstly, there is a clean process after the
water in the sink is full: water supply——water pump works ——water pump works
and drain-valve opens——water supply——water pump works——water pump
works and drain-valve opens——pressure balances. This process will take about 5
minutes(once every 30 ice-make cycles). In addition, after every four ice-make
cycles, there is a draining process, draining out the water in the sink.

- 17 -
B、After finishing washing, confirm the place of the float ball: If the float ball is on
the bottom and the machine is on, this condition is normal, the program will turn
into pressure balance process, the water level will be controlled automatically; If
the float ball is on the upper position and the machine stops, it means that there
are some problems with the water level sensor, water pump or drain valve.
Point:the water-filter core is consumable, it is not in the guaranteed scope. If you
need it, please contact with our marketing department and buy it.
Please according to the following steps if you haven’t used the machine for a long
time.Turn off the power switch, remove the machine's plug, then cut off the power
supply and water supply.
B、Take out the ice block from the cabinet, wipe out the water on the inner of the
cabinet.
C、Wipe out the water on the cabinet, then open the door and dry the cabinet.
TROUBLE SHOOTING
Fault
Analysis
Solution
Do not make ice
The electric wire didn’t
connect well.
Check the wire.
The retained board was
pinned by ice block.
Take out the ice block so
as to let the retained board
return to the original
situation.
The connecting wire of
compressor’s starter is loose
Check and fasten it
The starting capacitor of
compressor is broken
replace it
PC board is broken
replace it
Water level sensor is broken
replace it
Water pump is broken
replace it
The sink is
Water supply solenoid valve is
replace it

- 18 -
TECHNICAL PARAMETER AND WIRING DIAGRAM
A、Technology parameters are on the nameplate.
B、The electrical schematic diagram is on the inner side of the board .
overflow.
broken
Water level sensor is broken
replace it
No water flowing
on to the ice
model
Water pump is broken
replace it
PC board is broken
replace it
The ice block is
thin
The surface of condenser is
covered with dust.
clean it
The ambient temperature is
too high
You should use the
machine in allowable
ambient temperature
The refrigerant leak
check and recharge the
refrigerant
Fan motor is broken
replace it
Spray tube is blocked
clean it
The ice thickness sensor is
too close to the ice model.
Adjust the screw of
sensor(turn right)
The ice can not
drop off.
The ice thickness sensor is
broken
replace it
The solenoid valve is not open
check the electric wire if it
is connected well or not.
Or replace the solenoid
valve
The ambient temperature is
too low
you should use machine in
allowable ambient
temperature
This manual suits for next models
3
Table of contents
Other VEVOR Ice Maker manuals

VEVOR
VEVOR SSX80 User manual

VEVOR
VEVOR SKF-B40F User manual

VEVOR
VEVOR HZB-18F/L User manual

VEVOR
VEVOR LB175A User manual

VEVOR
VEVOR BY-300XTD-S User manual

VEVOR
VEVOR IMN1000-UL User manual

VEVOR
VEVOR SKF-S25J User manual

VEVOR
VEVOR IM1102-UL User manual

VEVOR
VEVOR ICM-150P User manual

VEVOR
VEVOR BY-288G User manual
Popular Ice Maker manuals by other brands

ITV ICE MAKERS
ITV ICE MAKERS MS Series maintenance

Manitowoc
Manitowoc S3000 Installation, operation and maintenance manual

Free Village
Free Village HZB-12/C user manual

Follett
Follett Horizon Elite 710 Series installation instructions

Manitowoc
Manitowoc I1406 Series Replacement manual

Ice-O-Matic
Ice-O-Matic CIM 300 Installation guide and owner's manual