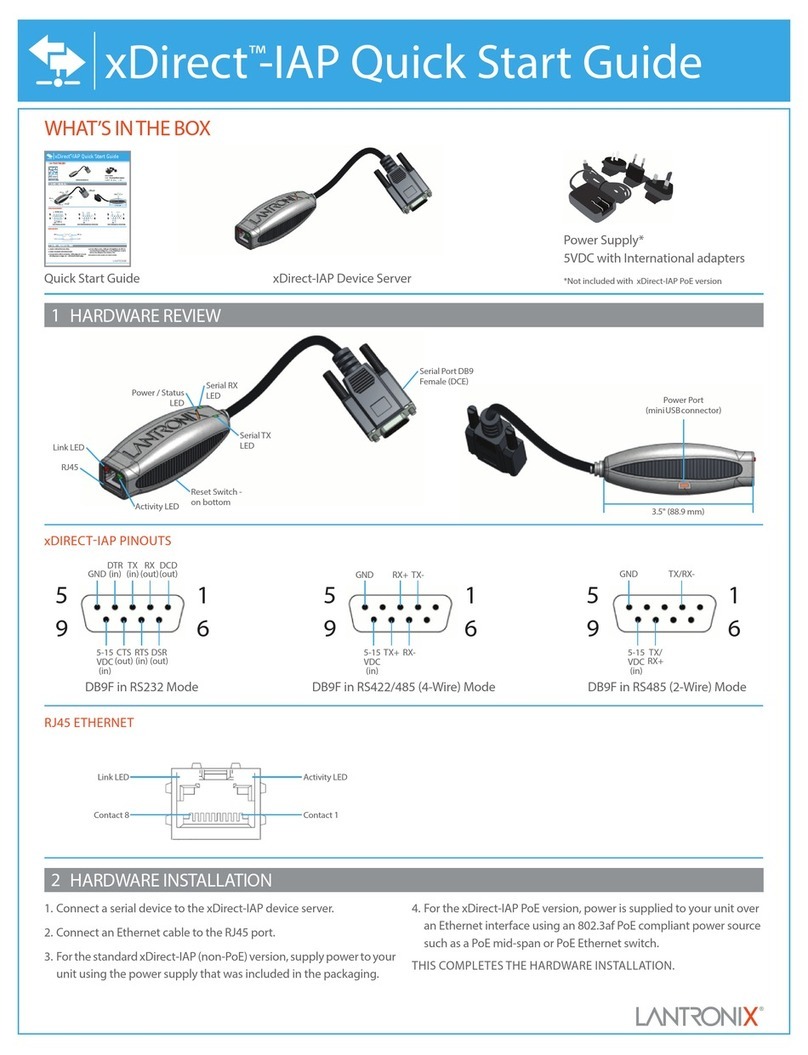
VIA Technologies VDLM-100-S/X User manual

USER MANUAL
VIA VDLM-100-S/X
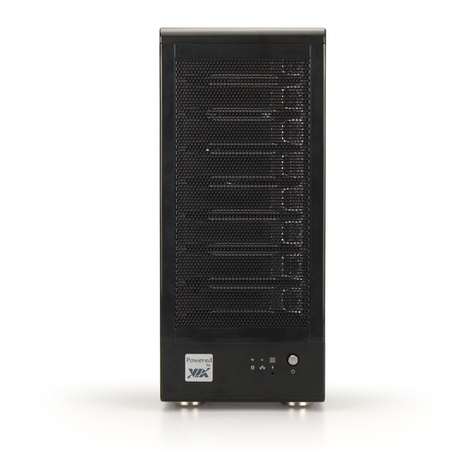
Deep Learning Machine
For 8 x GPU Cards
1.00-03032020-155700

Copyright
Copyright © 2020 VIA Technologies Incorporated. All rights reserved.
No part of this document may be reproduced, transmied, transcribed, stored in a retrieval system, or translated into any language, in any
form or by any means, electronic, mechanical, magnec, opcal, chemical, manual or otherwise without the prior wrien permission of
VIA Technologies, Incorporated.
Trademarks
All trademarks are the property of their respecve holders.
Disclaimer
No license is granted, implied or otherwise, under any patent or patent rights of VIA Technologies. VIA Technologies makes no warranes,
implied or otherwise, in regard to this document and to the products described in this document. The informaon provided in this
document is believed to be accurate and reliable as of the publicaon date of this document. However, VIA Technologies assumes no
responsibility for the use or misuse of the informaon (including use or connecon of extra device/equipment/add-on card) in this
document and for any patent infringements that may arise from the use of this document. The informaon and product specicaons
within this document are subject to change at any me, without noce and without obligaon to nofy any person of such change.
VIA Technologies, Inc. reserves the right the make changes to the products described in this manual at any me without prior noce.
Regulatory Compliance
FCC-A Radio Frequency Interference Statement
This equipment has been tested and found to comply with the limits for a class A digital device, pursuant to part 15 of the FCC rules.
These limits are designed to provide reasonable protecon against harmful interference when the equipment is operated in a commercial
environment. This equipment generates, uses, and can radiate radio frequency energy and, if not installed and used in accordance with the
instrucon manual, may cause harmful interference to radio communicaons. Operaon of this equipment in a residenal area is likely to
cause harmful interference, in which case the user will be required to correct the interference at his personal expense.
Noce 1
The changes or modicaons not expressly approved by the party responsible for compliance could void the user's authority to operate
the equipment.
Noce 2
Shielded interface cables and A.C. power cord, if any, must be used in order to comply with the emission limits.
Noce 3
The product described in this document is designed for general use, VIA Technologies assumes no responsibility for the conicts or
damages arising from incompability of the product. Check compability issue with your local sales representaves before placing an
order.

Nocaon
In the EU, this symbol means that this product must not be disposed of with household waste.
It is your responsibility to bring it to a designated collecon point for the recycling of waste
electrical and electronic equipment. For more informaon, please contact your local waste
collecon center or your point of purchase.

VIA VDLM-100-S/X User Manual
Table of Contents
1. Product Overview .............................................................................................................. 1
1.1 System Layout ...................................................................................................................................... 1
1.2 ProductSpecicaons ......................................................................................................................... 3
1.3 System Front Panel............................................................................................................................... 6
1.4 System Back Panel ............................................................................................................................... 7
1.5 FrontControlPanelBuonsandLEDs.................................................................................................. 8
1.5.1 PowerBuon ................................................................................................................................. 8
1.5.2 IDBuon........................................................................................................................................ 8
1.5.3 NMI(Non-maskableInterrupt)Buon .......................................................................................... 8
1.5.4 SystemResetBuon ...................................................................................................................... 9
1.5.5 StatusLEDDenions.................................................................................................................... 9
1.6 PSULED .............................................................................................................................................. 10
1.7 DriveTrayLEDs ................................................................................................................................... 11
1.7.1 StatusLEDDenions.................................................................................................................. 11
1.8 FanFailedLED..................................................................................................................................... 12
2. HardwareInstallaonandMaintenance ......................................................................... 13
2.1 Installing the Server Top Covers ......................................................................................................... 13
2.2 HardDrive .......................................................................................................................................... 15
2.2.1 InstallingaHardDiskDriveinto2.5"HardDriveTray .................................................................. 15
2.2.2 Removing2.5"HardDriveTraysfromtheChassis ....................................................................... 15
2.2.3 Installinga2.5"HardDrivetotheHardDriveTray ...................................................................... 15
2.3 Power Supply...................................................................................................................................... 17
2.3.1 Installing and Removing the Power Supply.................................................................................. 17
2.3.2 Installing the Power Supply Unit.................................................................................................. 17
2.3.3 Removing the Power Supply Unit ................................................................................................ 18
2.4 Installing and Removing the Server in a Rack..................................................................................... 19
2.4.1 Installing the Server in a Rack...................................................................................................... 19
2.4.2 Removing the Chassis Rail from the Slide Rail Assembly ............................................................. 19
2.4.3 AachingtheChassisRailstotheServer ..................................................................................... 20
2.4.4 AachingtheSlideRailAssembliestotheRack .......................................................................... 20
2.4.5 Sliding the Server into the Rack................................................................................................... 23
2.4.6 Installing and Removing the Server in a Rack .............................................................................. 25
3. Mainboard ....................................................................................................................... 26
3.1 Specicaons...................................................................................................................................... 26
3.2 I/O Panel............................................................................................................................................. 27
3.2.1 LANPortLEDIndicaons.............................................................................................................. 27
4. BIOSSeng ..................................................................................................................... 29
4.1 Main Screen........................................................................................................................................ 29
4.2 Advanced Screen ................................................................................................................................ 29
4.2.1 CPUConguraon....................................................................................................................... 30
4.3 ExitScreen.......................................................................................................................................... 31
iv

VIA VDLM-100-S/X User Manual
List of Figures
Figure1: VIAVDLM-100-S/Xlayoutdiagramfrontview ..................................................................................... 1
Figure2: VIAVDLM-100-S/Xlayoutdiagramisometricview .............................................................................. 1
Figure3: VIAVDLM-100S/Xlayoutdiagramtopview ........................................................................................ 2
Figure4: VIAVDLM-100S/Xlayoutdiagramrearview....................................................................................... 2
Figure5: SystemfrontpaneloftheVIAVDLM-100-S/X...................................................................................... 6
Figure6: SystembackpaneloftheVIAVDLM-100-S/X ...................................................................................... 7
Figure7: FrontcontrolpanelbuonsandLEDsoftheVIAVDLM-100-S/X........................................................ 8
Figure8: PSULEDdiagram ............................................................................................................................... 10
Figure9: DrivetrayLEDsdiagram ..................................................................................................................... 11
Figure10: FanFailedLEDdiagram ...................................................................................................................... 12
Figure 11: Installing top rear cover .................................................................................................................... 13
Figure 12: Secure the top middle cover on the chassis....................................................................................... 13
Figure 13: 4U top front cover.............................................................................................................................. 14
Figure 14: Secure the top front cover with the screws ....................................................................................... 14
Figure15: Removing2.5"harddrivetraysfromthechassis............................................................................... 15
Figure16: Installinga2.5"harddrivetotheharddrivetray .............................................................................. 15
Figure17: PushinthelockinglevertolocktheHDDtrayintoplace .................................................................. 16
Figure 18: Installing the power supply unit......................................................................................................... 17
Figure 19: Removing the power supply unit ....................................................................................................... 18
Figure 20: Slide and chassis rails ......................................................................................................................... 19
Figure 21: Removing the chassis rail from the slide rail assembly ...................................................................... 19
Figure22: Aachingthechassisrailstotheserver............................................................................................. 20
Figure23: Aachingthecagenutsintothemounngholes .............................................................................. 21
Figure 24: Front and rear adjustable brackets on the slide ................................................................................ 21
Figure25: Adjusngthebracketstoaccommodatethedepthoftherack......................................................... 22
Figure 26: Securing the slide rails to the rack ..................................................................................................... 22
Figure 27: Tighten the lock nuts on the rear bracket .......................................................................................... 23
Figure28: Extendingthesliderails ..................................................................................................................... 23
Figure 29: Sliding the server into the rack .......................................................................................................... 24
Figure 30: Securing the server onto the rack ...................................................................................................... 24
Figure 31: I/O panel diagram ............................................................................................................................. 27
Figure32: LANportLEDindicaons.................................................................................................................... 27
Figure33: LANport(LAN1,LAN2)LEDindicaonsdiagram............................................................................... 28
Figure 34: Main Screen diagram ........................................................................................................................ 29
Figure 35: Advanced Screen diagram ................................................................................................................. 29
Figure36: CPUConguraonScreendiagram .................................................................................................... 30
Figure37: ExitScreendiagram............................................................................................................................ 31
v

VIA VDLM-100-S/X User Manual
List of Tables
Table1: Systemfrontpaneldescripon ............................................................................................................ 6
Table2: Systembackpaneldescripon............................................................................................................. 7
Table3: FrontcontrolpanelbuonsandLEDsdescripon............................................................................... 8
Table4: StatusLEDdenionstable.................................................................................................................. 9
Table5: PSULEDDescripon.......................................................................................................................... 10
Table6: DrivetrayLEDsdescripon ................................................................................................................ 11
Table7: HDDPowerLEDdescripon .............................................................................................................. 11
Table8: HDDAcvityLEDdescripon ............................................................................................................ 11
Table9: FanLEDdescripon............................................................................................................................ 12
Table 10: Rail assembly kit ................................................................................................................................ 25
Table11: I/Opaneldescripon ......................................................................................................................... 27
Table12: IPMILANportLEDindicaonstables................................................................................................. 27
Table13: LANport(LAN1,LAN2)LEDindicaonstables ................................................................................... 28
vi

VIA VDLM-100-S/X User Manual
1
1. Product Overview
TheVIAVDLM-100-S/Xisapowerfulserverwith8-cores/16-coreCPUdesignedfordeeplearningmachine.It
supports 4-tray/8-tray PCIe GPU or double-width GPGPU cards. As a powerful deep learning server, it delivers
excellentperformancewithrobustdesignconformingtoVIA’scommitmenttoqualityandendurance.
1.1 System Layout
Figure 1:VIAVDLM-100-S/Xlayoutdiagramfrontview
Figure 2:VIAVDLM-100-S/Xlayoutdiagramisometricview

VIA VDLM-100-S/X User Manual
2
Figure 3:VIAVDLM-100S/Xlayoutdiagramtopview
Figure 4:VIAVDLM-100S/Xlayoutdiagramrearview

VIA VDLM-100-S/X User Manual
3
1.2 ProductSpecicaons
System
Form Factor -3URackmountwith4UTopFrontCover(oponal)
Dimensions -722.3mmx430mmx170.35mm
Front Panel
Buons -Powerbuon
-UIDbuon
-Resetbuon
-NMIbuon
LEDs -2LANLEDs(L1,L2LED)
-2FrontLEDs
-HDDLED
-SystemeventLED
I/O Ports - 2 USB 2.0 ports
- 1 VGA port
MB Tray
Slimline CONN -4(for2LowProlePCIEcard(onex8,anotherx16))
USB 2.0 - 2
USB 3.0 - 2
Serial Port - 1
VGA -1D-Sub
LAN Port - 2 (GLAN by Intel i350) + 1 (IPMI) LAN port (RJ-45)
-LANPortswithLED(ACT/LINKLEDandSPEEDLED)
External Drive Bay
FrontSideDriveBay - 6 2.5"SATAHDD(6Gb/s)Bayor6xSAS*(12Gb/s)
*NeedaddaPCIERAIDcardforSASsupport.
Power Supply
Type - 4 (3+1), Redundant
OutputWas -1200W,Planum
System Fan
Fan - 8 80mmx38mm
FailLED -Abnormal(DCon):LEDON(SolidRed)
-Normal:LEDOFF(FortheFANinthecenter)
System Switch Board
Switch IC -PLX8747
Supports GPU Card - 8 GPGPU card or 8 GPGPU/MIC
GPGPU Card
GPGPUWas -Max.300Wpercard
Supports GPGPU - 8 GPGPU card or 8 GPGPU/MIC
MB Physical Status
Form Factor -SSICEB
Dimensions -12''x10.5''(30.5cmx26.7cm)

VIA VDLM-100-S/X User Manual
4
Processor System
CPU -SupportsIntelXeonScalableProcessors
Socket -DualSocketP
Chipset - C621
System Memory
Capacity -16DIMMslots
Type -6ChannelDDR4memorytechnology2666/2400/2133RDIMM/LR
DIMM
Voltage - 1.2V
Storage
SATA Controller - PCH: 8 SATA3 + 1 M.2
Ethernet
Interface - 1000Mbps/100Mbps/10Mbps
LAN Controller - 2 RJ-45 GLAN by Intel i350
Management
BMC Controller -ASPEEDAST2500
IPMIDedicatedGLAN -1RealtekRTL8211EfordedicatedmanagementGLAN
Features - Watchdog
- NMI
Graphics
Controller -ASPEEDAST2500
VRAM -DDR44GB
Rear Panel I/O
VGA Port -1D-Sub
USB 3.1 Gen1 Port - 2
LAN Port - 1 (IPMI) LAN port (RJ-45)
-LANportswithLED(ACT/LINKLEDandSPEEDLED)
UIDBuon/UIDLED - 1
Internal Connector
M.2 - 1 (up to 2280)
AuxiliaryPanelHeader -1(includeschassisintrusion,locaonbuon&LED,frontLANLED)
TPM Header - 1
Fan Header - 2 CPU Fan, 2 System Fan (6-pin)
ATXPower - 1 (24-pin) + 2 (8-pin)
Front Panel - 1
System BIOS
BIOS Type -256MbAMIUEFILegalBIOS
BIOS Features - Plug and Play (PnP)
-ACPI2.0ComplianceWakeUpEvents
- SMBIOS 2.8 Support
Table of contents
Other VIA Technologies Server manuals
