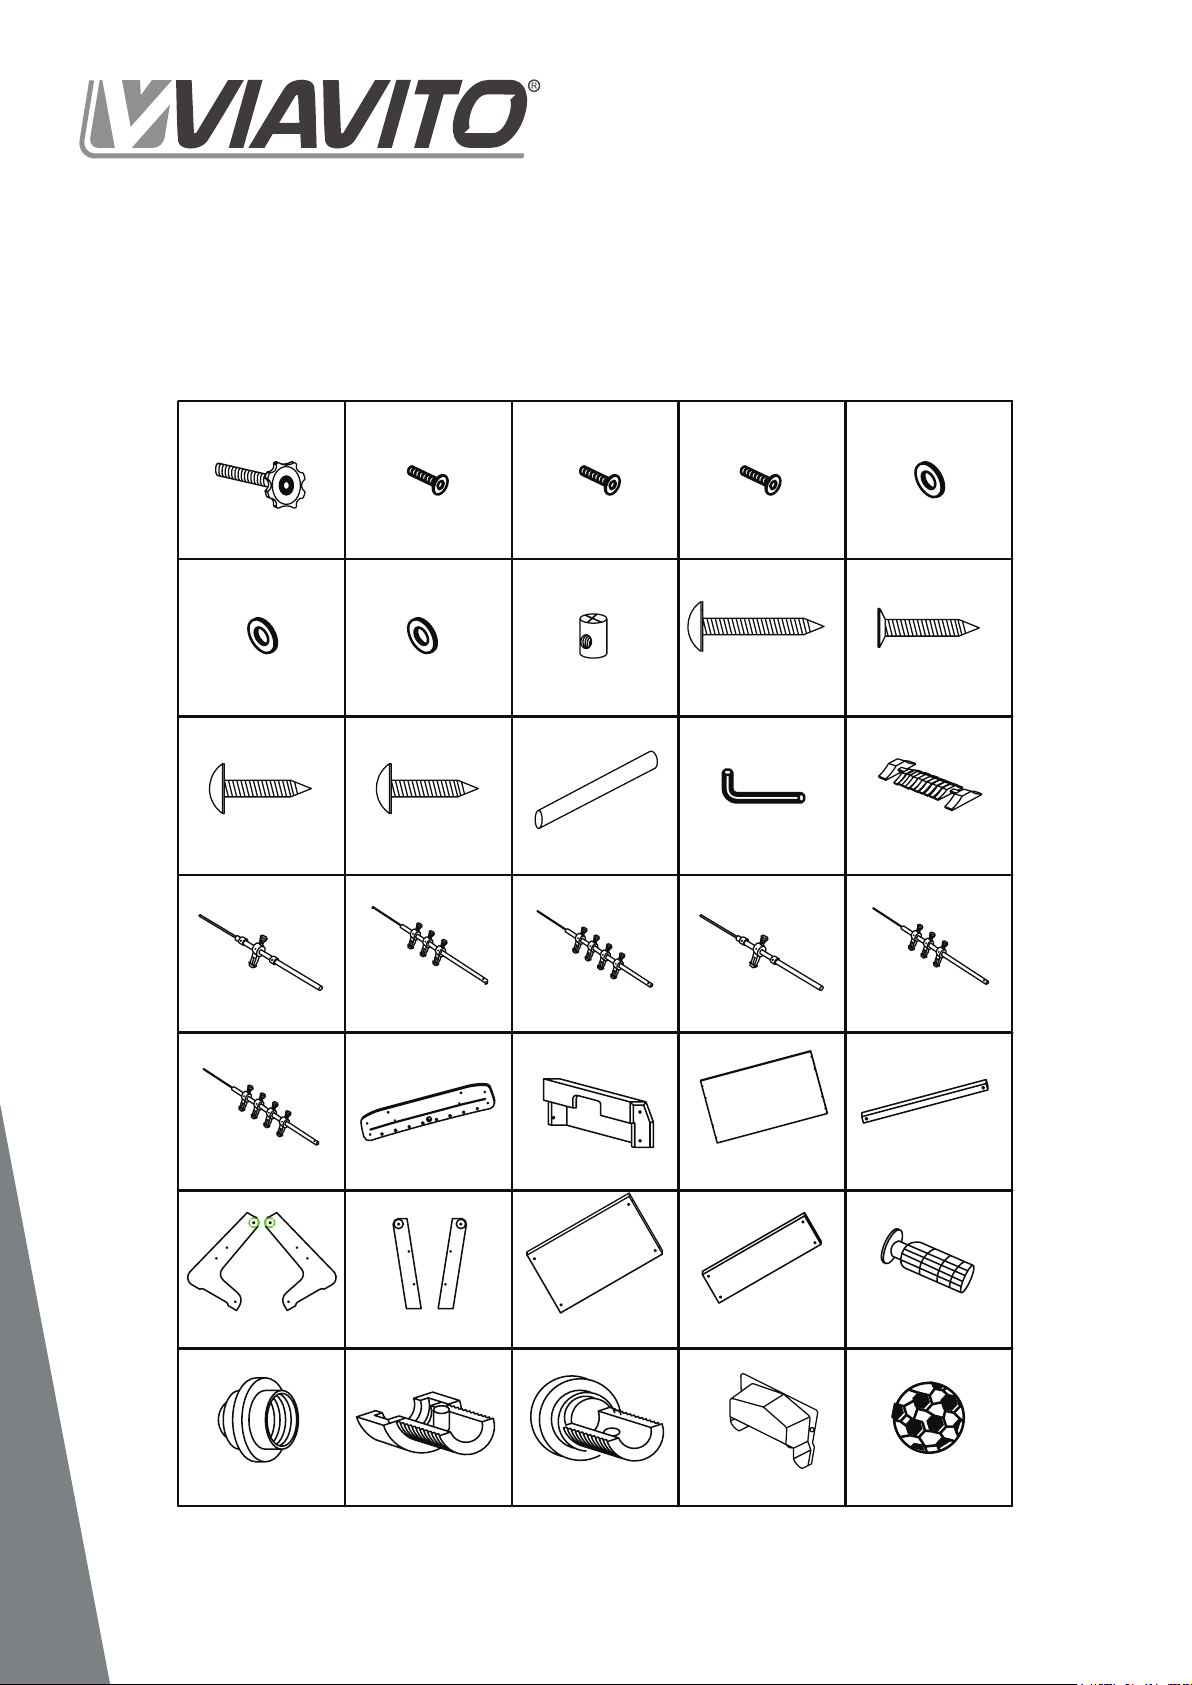
#16 #17 #18 #20#19
1 home players rod
1 pc
3 home players rod
2 pcs
4 home players rod
1 pc
1 away players rod
1 pc
3 away players rod
2 pcs
4 away players rod
1 pc
#21 #31 #32 #33
8 pcs 8 pcs 8 pcs
10 www.viavito.com
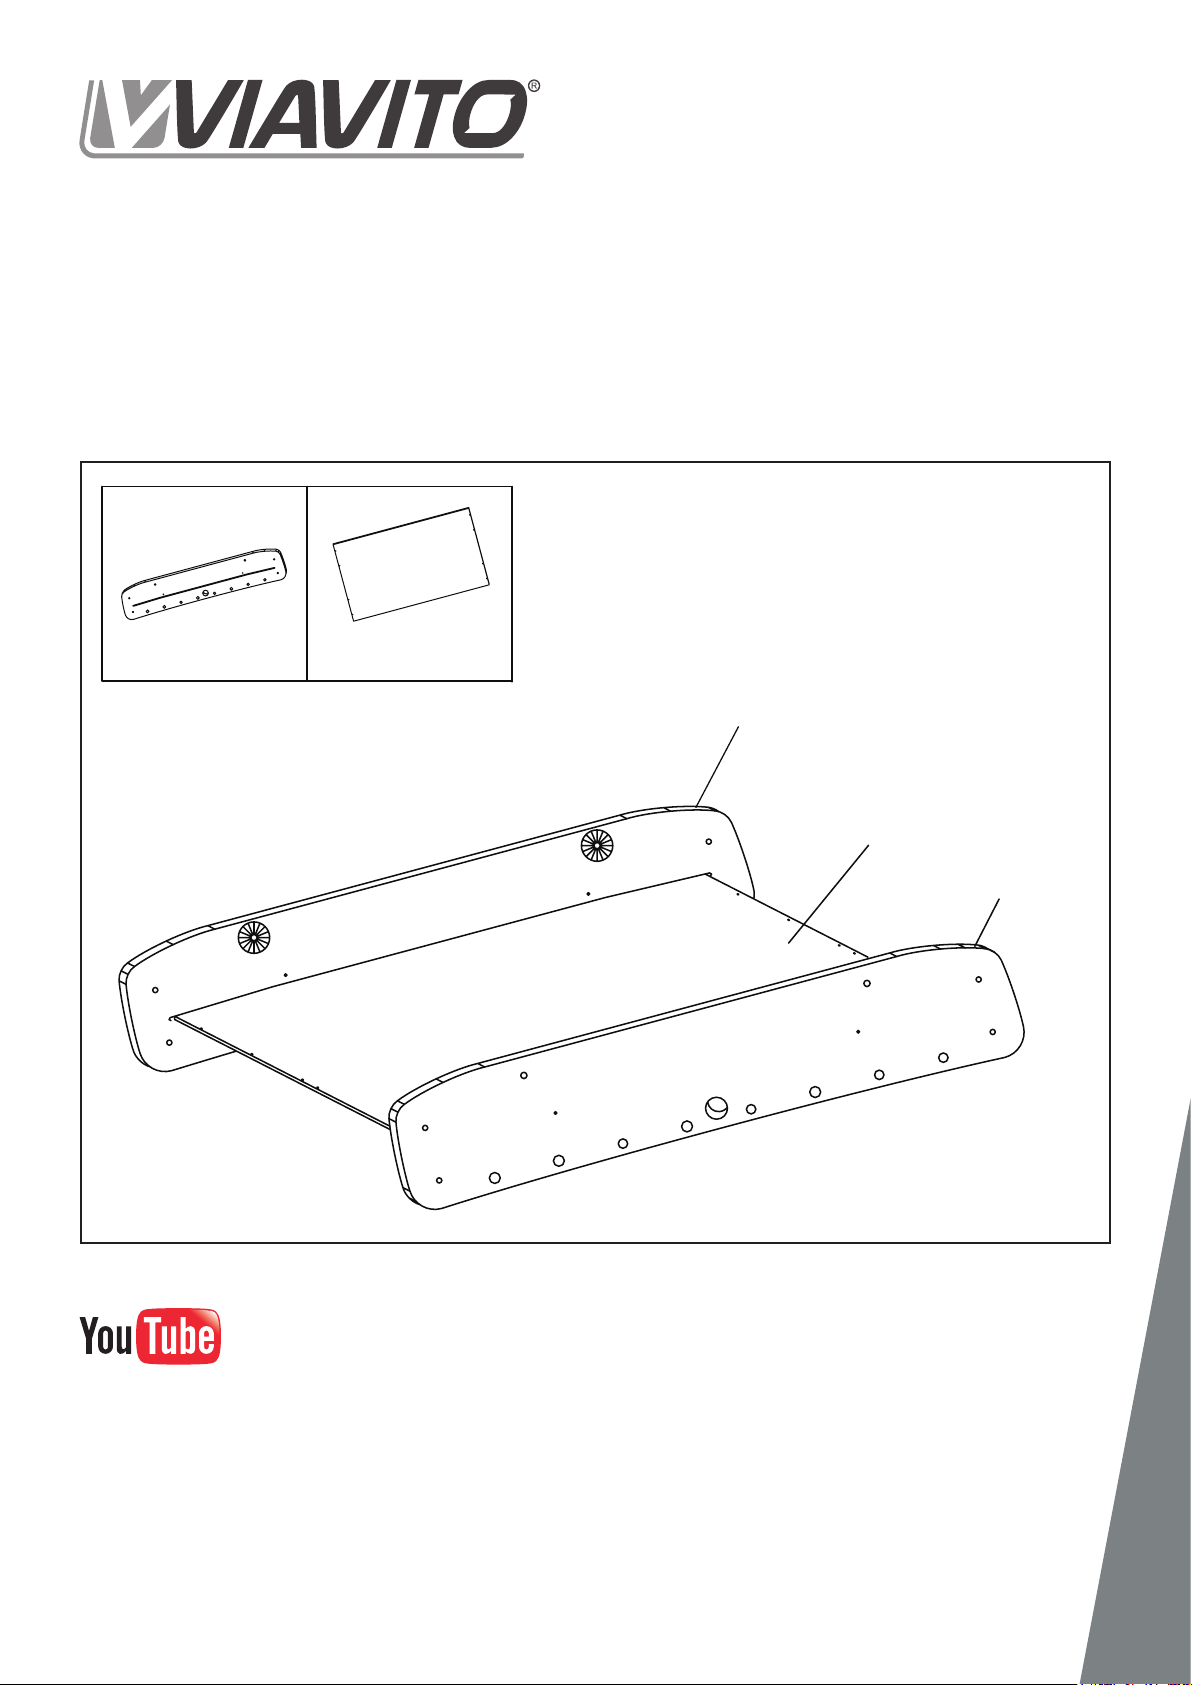
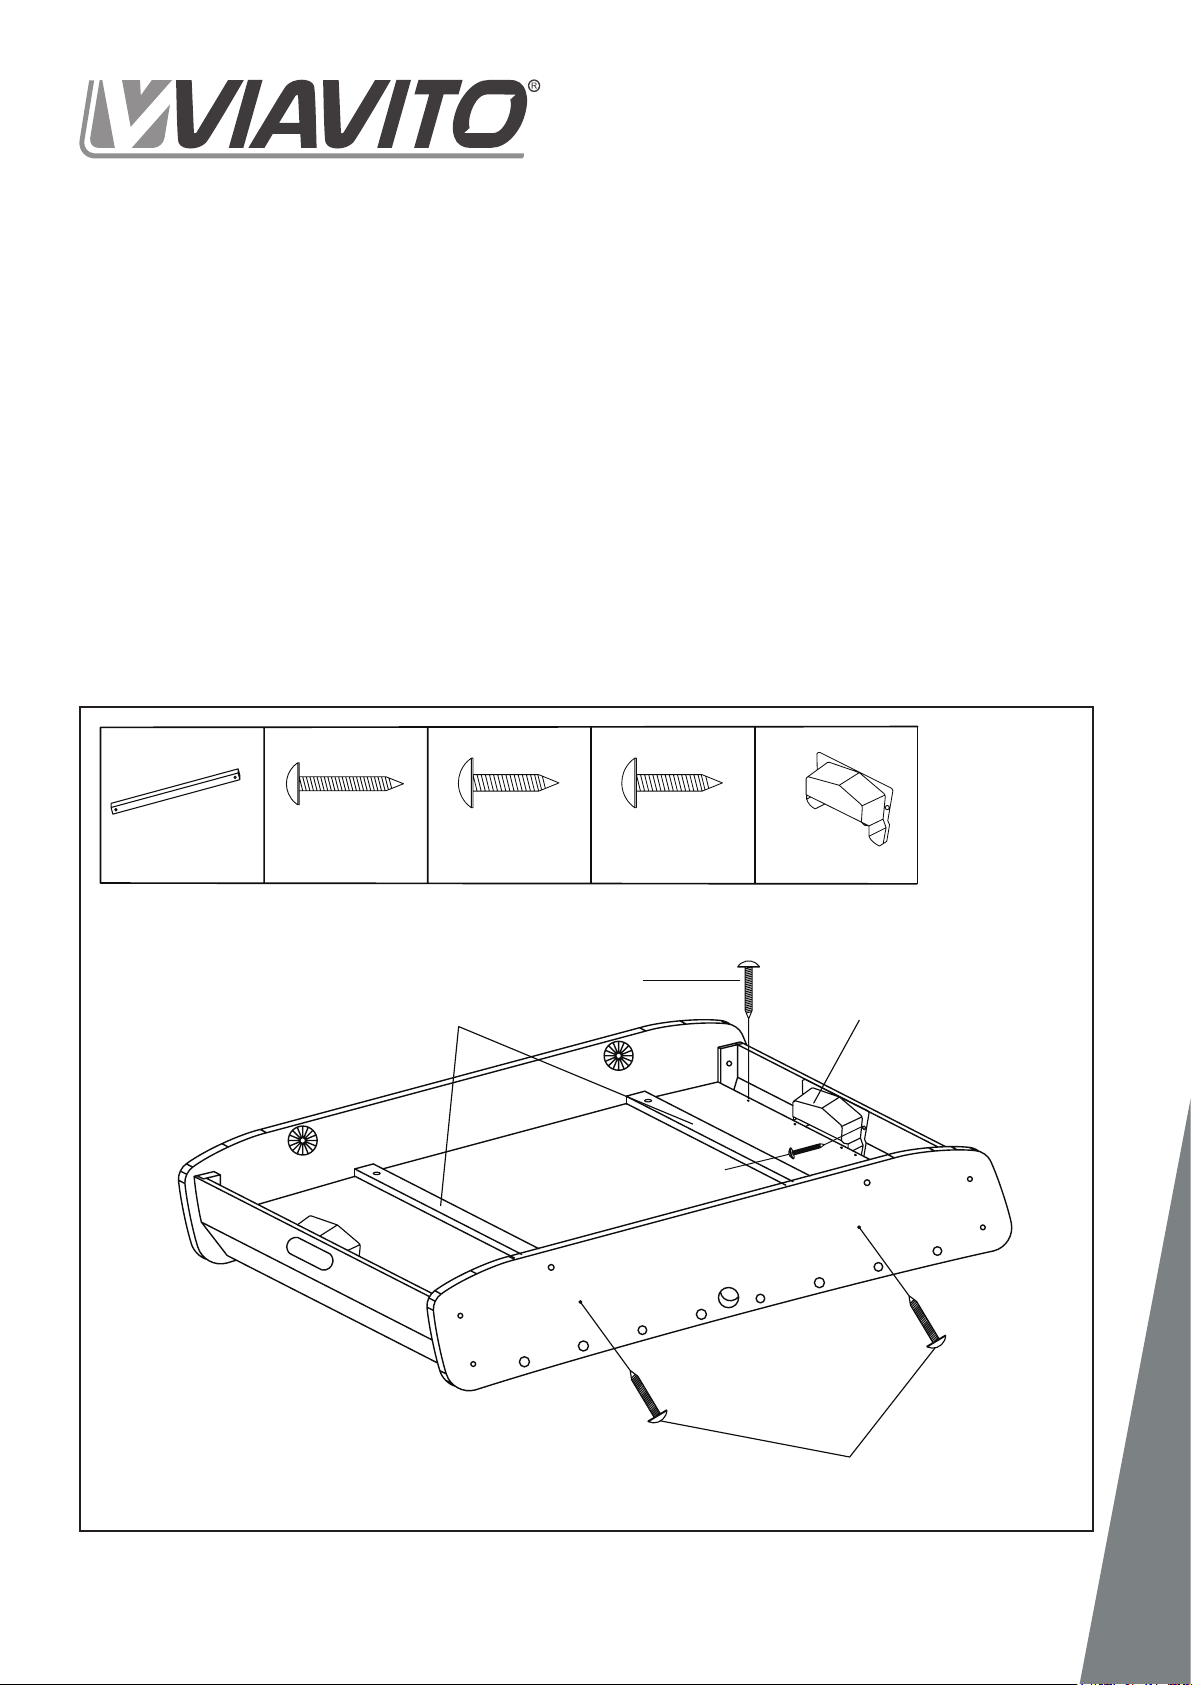
Step Five.
01 Each side has 4 player rods to be set in
a 1-3-4-3 formation. The correct layout
starting at either end is 1 home player,
3 home players, 3 away players, 4 home
players, 4 away players, 3 home players,
3 away players, 1 away player.
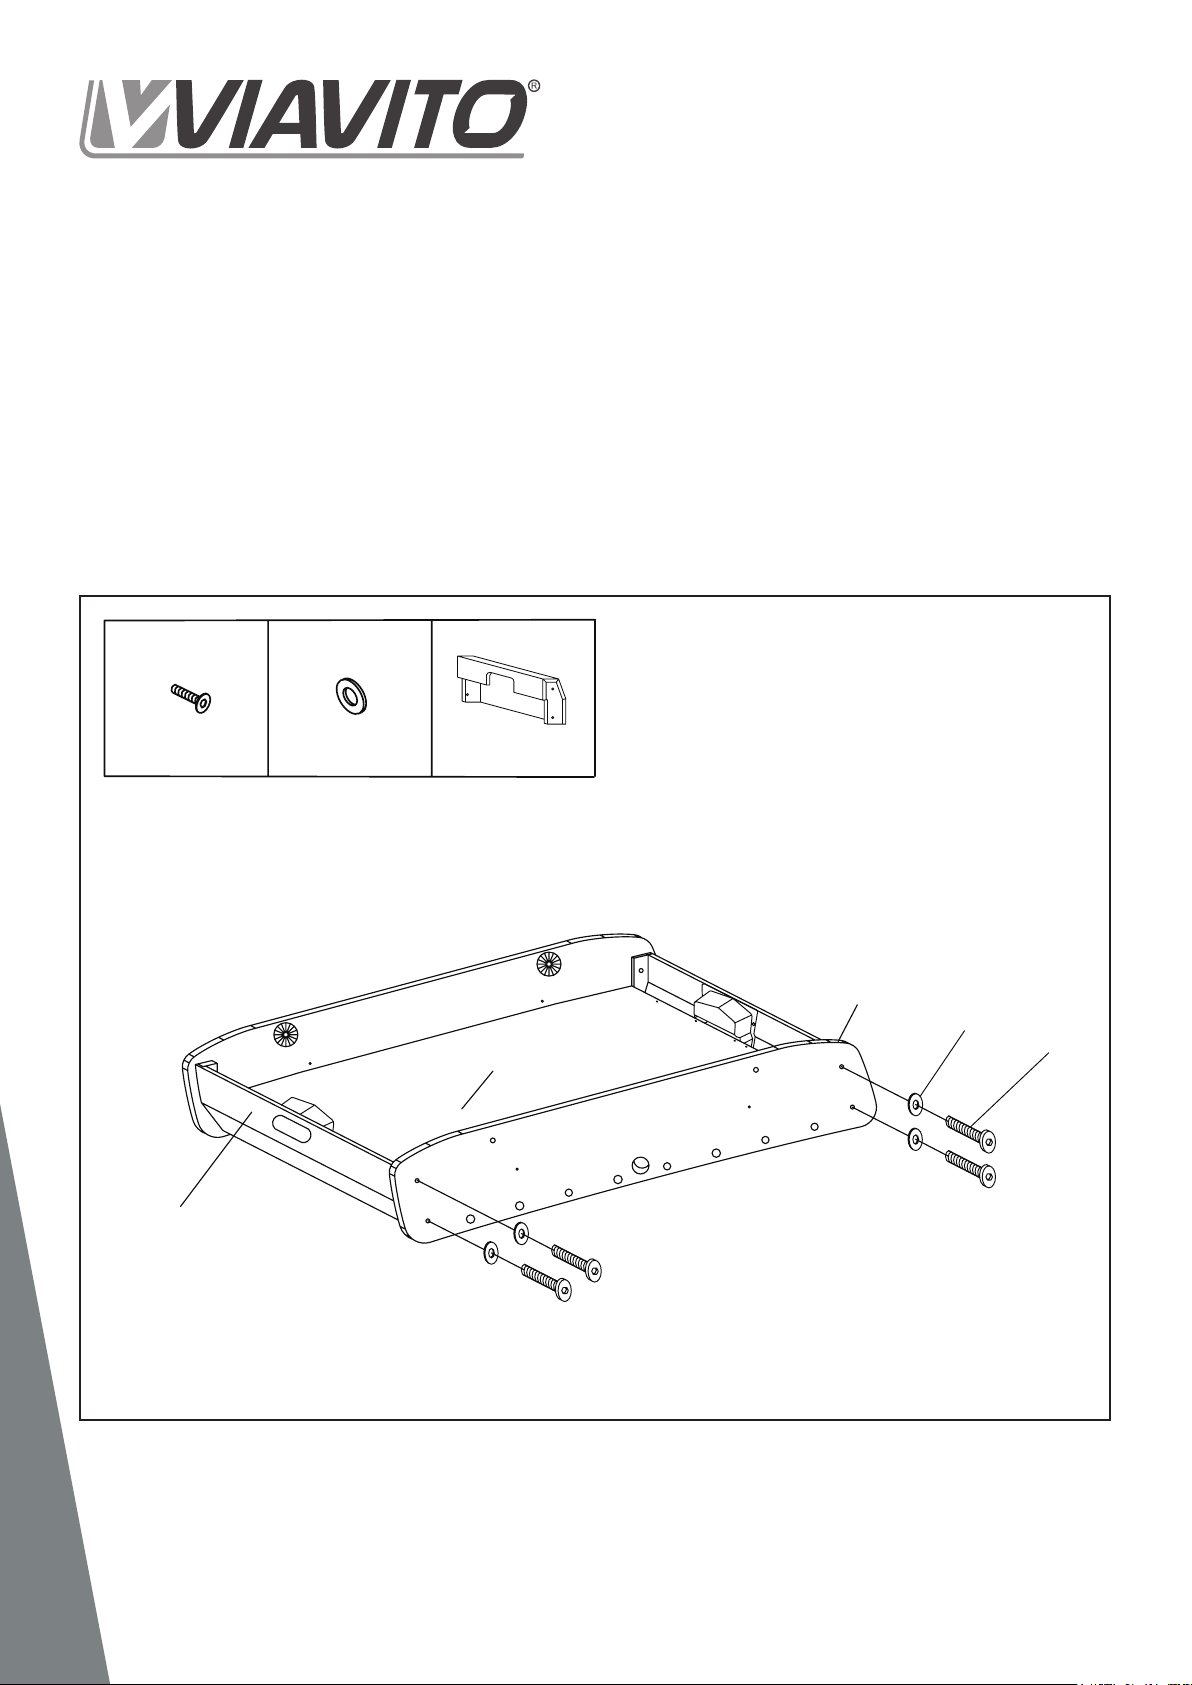
02 Insert the player rod into the
corresponding hole with a plastic loop in
the side panel. Insert it from the inside
through the hole ensuring the players
face forward. Then take a metal rod,
inserting it through the outside of the
matching hole on the other side panel,
with the at end which has a hole in it
on the outside of the table. Slide a foam
circle and then a plastic washer onto
the inner end of the metal rod and then
thread it into the player rod. Leave it
resting as it is and repeat this process
for all player rods for both teams.
03 To x the rods in place, take the metal
rod out of the hole and bring it into the
table. Place the rod bushing (#33) onto
the metal rod, aligning it with the at
end, and then x it in place with the
other bushing with the pin (#32). Push
the rod back into the hole in the side
panel and screw in the square head
bushing (#31). Repeat this process for
all the rods.