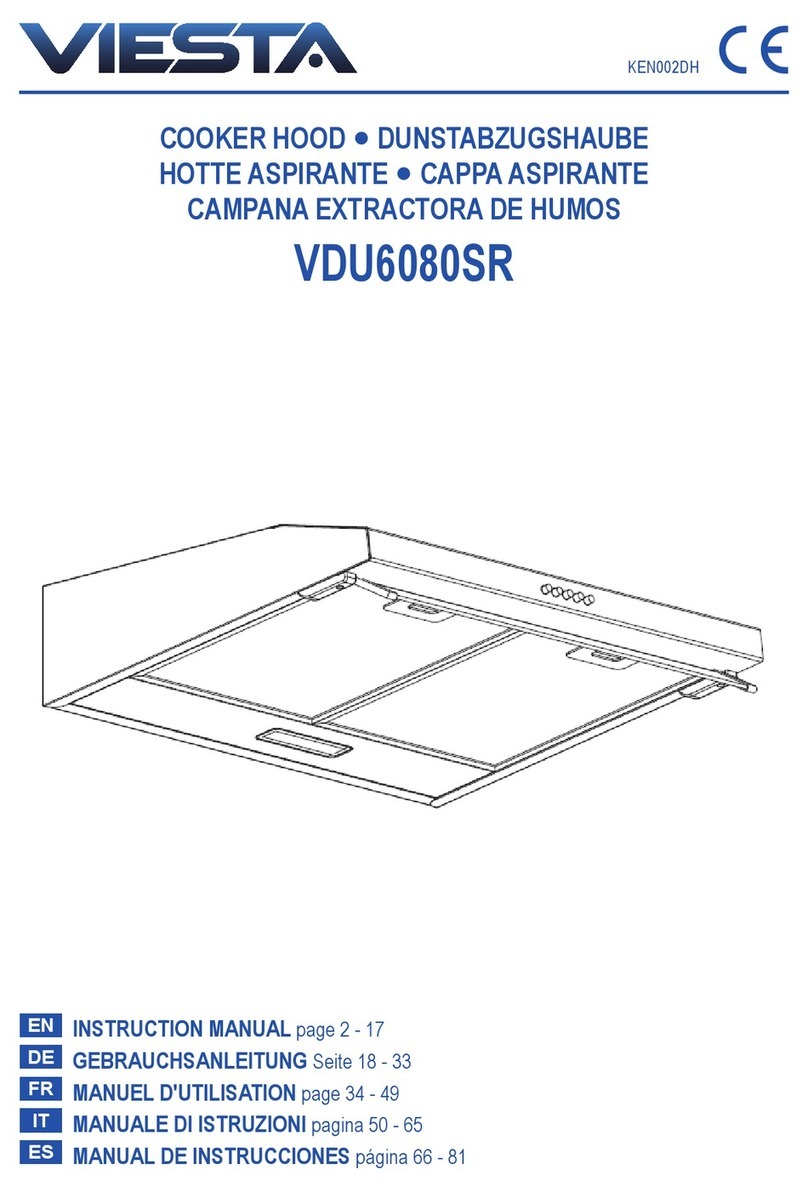
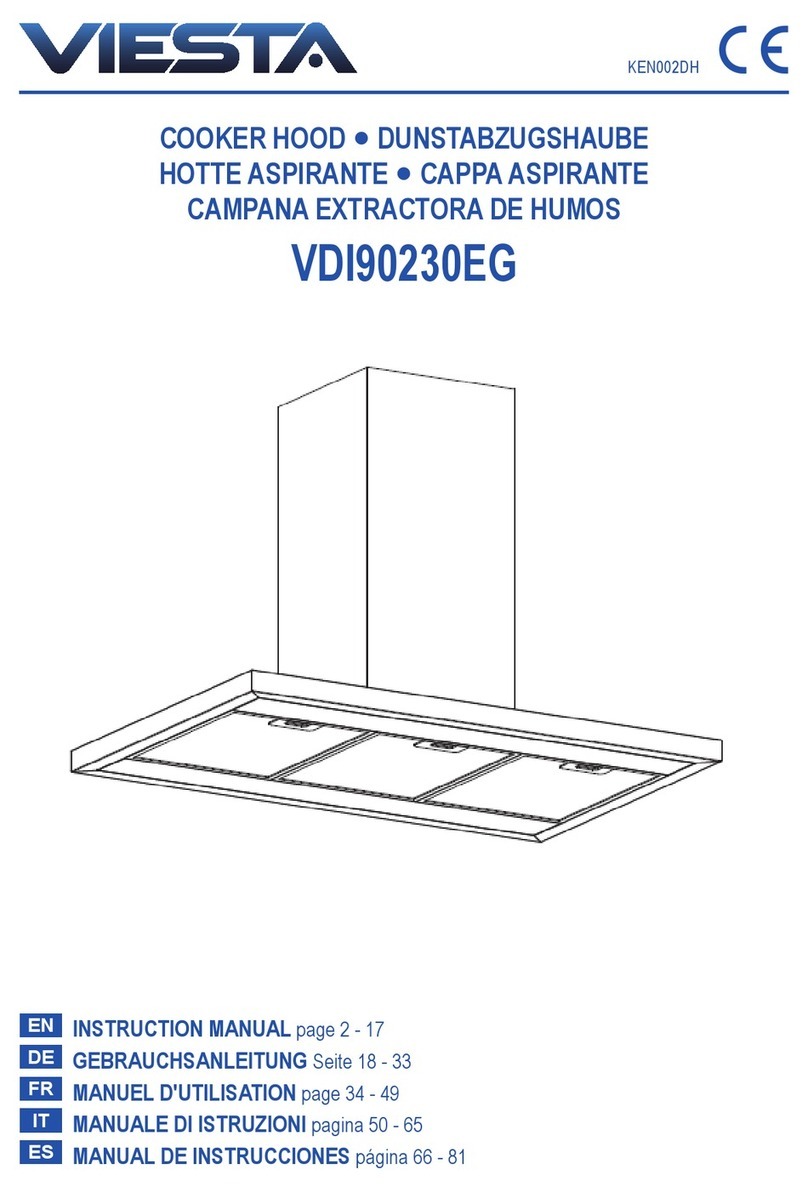
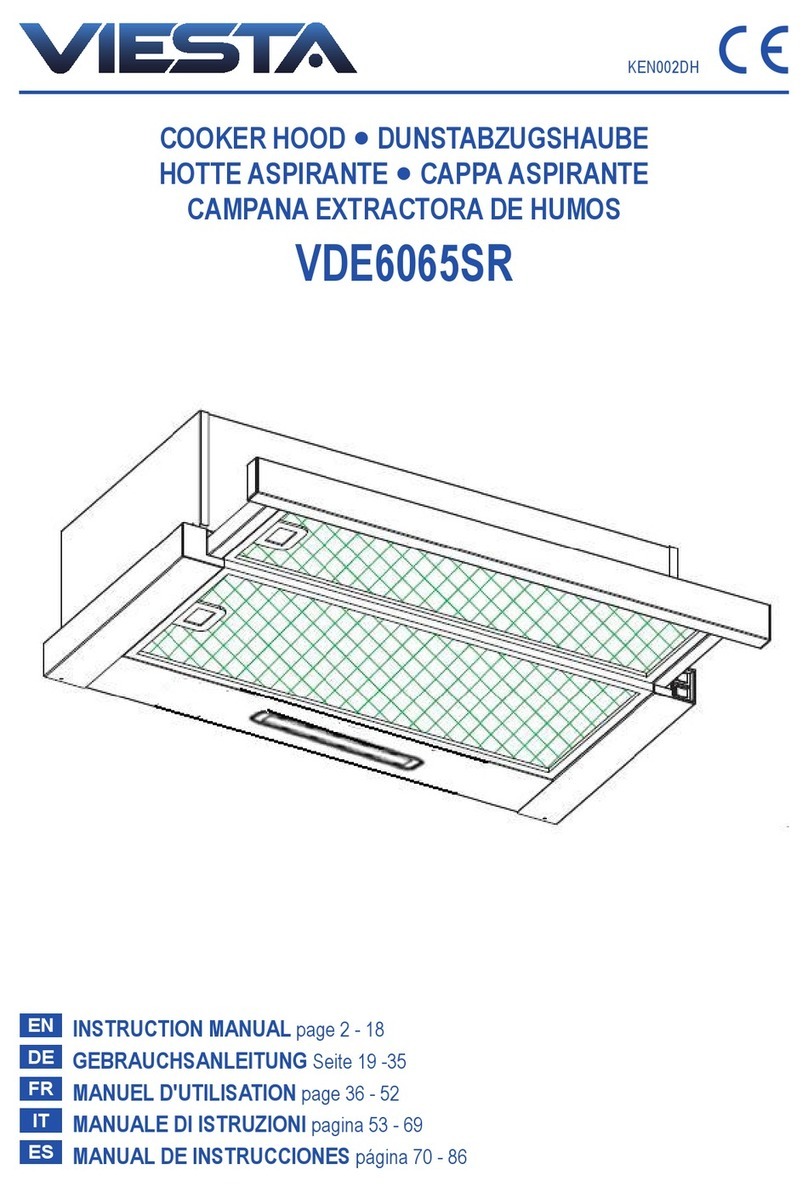
Viesta DH600-XA User manual

KEN002DH
COOKER HOOD ●DUNSTABZUGSHAUBE
HOTTE ASPIRANTE ●CAPPA ASPIRANTE
CAMPANA EXTRACTORA DE HUMOS
DH600-XA / DH600-XC / DH600-XD / DH600-XE / DH900-XE
EN INSTRUCTION MANUAL page 2 - 20
DE GEBRAUCHSANLEITUNG Seite 21 - 39
FR MANUEL D'UTILISATION page 40 - 58
IT MANUALE DI ISTRUZIONI pagina 59 - 77
ES MANUAL DE INSTRUCCIONES página 78 - 96

Version: 4.0
KEN002DH 23.02.2021
[ EN ● 2]
IMPORTANT SAFETY INSTRUCTIONS
When using electrical appliances, basic safety precaution should always be followed, including the
following:
●Theseinstructionsareforyoursafety.Pleasereadthroughthemthoroughlypriortoinstallation.
●Thisappliancehasbeendesignedforuseasanexhausting(airevacuationtotheoutside)orfiltering
(indoorairre-cycling)hood.
●Allinstallationworkmustbecarriedoutbyacompetentpersonorqualifiedelectrician.
●Thisappliancemustbeinstalledcorrectlybyasuitablyqualifiedperson,strictlyfollowingthemanufacturer’s
instructions.
●CAUTION:Accessiblepartsmaybecomehotduringuse.
●Youngchildrenshouldbekeptaway.Avoidtouchingtheappliance.
●Themanufacturerhighlyrecommendsthatthisappliancebekeptoutofthereachofbabiesandsmallchildren.
●Thisappliancecanbeusedbychildrenagedfrom8yearsandaboveandpersonswithreducedphysical,
sensoryormentalcapabilitiesorlackofexperienceandknowledgeundersupervisionoriftheyhavebeen
giveninstructionconcerningtheuseoftheapplianceinasafewayandunderstandthehazardsinvolved.
Childrenshallnotplaywiththeappliance.
Cleaningandmaintenanceshallnotbemadebychildrenwithoutsupervision.
●Keeptheapplianceanditscordoutofreachofchildrenlessthan8yearsofage.
●Meansfordisconnectionmustbeincorporatedinthefixedwiringinaccordancewiththewiringrules.
Anall-poledisconnectionswitchhavingacontactseparationofatleast3mminallpolesshouldbe
connectedinfixedwiring.
●Regularlycheckthepowerplugandpowercordfordamage.
Ifthesupplycordisdamaged,itmustbereplacedbythemanufacturer,itsserviceagentorsimilarlyqualified
personsinordertoavoiddanger.
●Donotallowtheelectriccablestotouchthehotpartsoftheappliance.
●Makesurethatthepowercordisnotcaughtunderorintheapplianceandavoiddamagetothepowercable.
●Donotinstalltheapplianceoutdoors,indampsurroundingsorinanareawhichmaybepronetowaterleaks
suchasunderornearasinkunit.
Intheeventofawaterleakallowthemachinetodrynaturally.
●Donotuseflammablespraysinclosetotheappliance.
●Pleasedisposeofthepackingmaterialcarefully.
●Werecommendthatgreatcarebetakenduringuseandcleaning.
Readthecleaningandmaintenancesectionsforthisappliancecarefully.
●Asteamcleanerisnottobeused.
●Theapplianceisnotintendedtobeoperatedwithanexternaltimerorremote-controlsystem.
IMPORTANT
THIS PRODUCT IS FOR HOUSEHOLD USE ONLY!
Please read these instructions carefully before the rst use of this product and save this manual for
your future reference.
NOTICE
Beforeusingtheapplianceforthersttime,removeallpackagingandprotectivepolythenelm.

Version: 4.0
KEN002DH 23.02.2021
[ EN ● 3]
WARNING
Consultlocalregulationsregardingfumeoutlets.Donotconnectthehoodtoafumeventilationorhot
airduct.Conrmthatroomventilationisappropriatewiththelocalauthorities.
Makesurethemaximumairextractionowratefortheappliancesintheroomdoesnotexceed4Pa
(0.04mbar).
Theroommusthaveadequateventilationifanextractorhoodisusedsimultaneouslywithappliances
thatrunongasorotherfuels.
Theairmustnotbedischargedintoauethatisusedforexhaustingfumesfromappliancesburning
gasorotherfuels.
Airextractionregulationsmustbecompliedwith.
WARNING
Beforeconnectingthehood:switchofftheelectricitysupplyandcheckthatthesuppliedvoltageand
frequencycoincidewiththatindicatedontheappliancenameplate.
WARNING
Forsafetyreason,pleaseuseonlythesamesizeofxingormountingscrewsthatarerecommended
inthisinstructionmanual.
WARNING
Failuretoinstallthescrewsorxingdeviceinaccordancewiththeseinstructionsmayresultin
electricalhazards.
ELECTRICAL SHOCK HAZARD
Onlyplugthisunitintoaproperlyearthedoutlet.Ifindoubt,seekadvicefromasuitablyqualiedengineer.
Failuretofollowtheseinstructionscanresultindeath,re,orelectricalshock.
WARNING
Thereisariskofelectricshockandreifcleaningisnotcarriedoutinaccordancewiththeinstructions.
WARNING
Thehoodmaystopworkingduringanelectrostaticdischarge(e.g.lightning).Thisinvolvesnoriskof
damage.Switchofftheelectricitysupplytothehoodandreconnectafteroneminute.
- Toavoidtheriskofre,cleanthemetallterregularlyandbeawarewhenusingpanscontaining
hotoil.
- Donotusethehoodifitshowssignsofdamageorimperfection.Contactcustomerservices.
- Flambécookingmustnotbecarriedoutunderneaththisappliance.
- Wheninstallingtheappliance,makesurethatthefollowingdistancesbetweenthetopofcookeror
hobandthelowestpartofthecookerhoodmustbeobserved:
Gashobs:>750mm.
Electrichobs:>650mm.
Coaloroilcookers>750mm

Version: 4.0
KEN002DH 23.02.2021
[ EN ● 4]
NEVER TO DO
• Donottrytousethecookerhoodwithoutthegreaseltersoriftheltersareexcessivelygreasy!
• Donotinstallaboveacookerwithahighlevelgrill.
• Donotleavefryingpansunattendedduringusebecauseoverheatedfatsoroilsmightcatchre.
• Neverleavenakedamesunderthecookerhood.
• Ifthecookerhoodisdamaged,donotattempttouse.
ALWAYS TO DO
• Important!Alwaysswitchofftheelectricitysupplyatthemainsduringinstallationandmaintenancesuch
aslightbulbreplacement.
• Pleasedisposeofthepackingmaterialcarefully.Childrenarevulnerabletoit.
• Payattentiontothesharpedgesinsidethecookerhoodespeciallyduringinstallationandcleaning.
• Makesuretheductinghasnobendssharperthan90degreesasthiswillreducetheefciencyofthe
cookerhood.
• Warning:Beforeobtainingaccesstoterminals,allsupplycircuitsmustbedisconnected.
• Alwaysputlidsonpotsandpanswhencookingonagascooker.
• Wheninextractionmode,airintheroomisbeingremovedbythecookerhood.Pleasemakesurethat
properventilationmeasuresarebeingobserved.Thecookerhoodremovesodoursfromroombutnot
steam.
• Cookerhoodisfordomesticuseonly.
• Ifthesupplycordisdamaged,itmustbereplacedbythemanufacturer,itsserviceagentorsimilarly
qualiedpersonsinordertoavoidahazard.
• Caution:Theapplianceanditsaccessiblepartscanbecomehotduringoperation.Becarefultoavoid
touchingtheheatingelements.Childrenyoungerthan8yearsoldshouldstayawayunlesstheyare
underpermanentsupervision
• Thereshallbeadequateventilationoftheroomwhenthecookerhoodisusedatthesametimeas
appliancesburninggasorotherfuels.
• Thereisareriskifcleaningisnotcarriedoutinaccordancewiththeinstructions
• Regulationsconcerningthedischargeofairhavetobefullled.
• CleanyourapplianceperiodicallybyfollowingthemethodgiveninthechapterMAINTENANCE.
• Regardingthedetailsaboutthemethodandfrequencyofcleaning,pleaserefertomaintenanceand
cleaningsectionintheinstructionmanual.
• Cleaningandusermaintenanceshallnotbemadebychildrenwithoutsupervision.
• WARNING:Dangerofre:donotstoreitemsonthecookingsurfaces.
• Asteamcleanerisnottobeused.
• NEVERtrytoextinguisharewithwater,butswitchofftheapplianceandthencoveramee.g.withalid
orareblanket.

Version: 4.0
KEN002DH 23.02.2021
[ EN ● 5]
INSTALLATION
Illustration Description Quantity(pcs)
Cookerhood 1
Insidechimney 1
Outsidechimney 1
Outsidechimneybracket 1
Insidechimneybracket 1
Wallplug 8
Screw(ST4×40mm) 4
Screw(ST4×30mm) 4
Screw(ST4×8mm) 6
Expansionpipe 1
Cabletie 1
V-ap 2
Materials reguired for assembly

Version: 4.0
KEN002DH 23.02.2021
[ EN ● 6]
INSTALLATION (VENT OUTSIDE)
Installation
Ifyouhaveanoutlettotheoutside,yourcookerhoodcanbeconnectedas
shownbelow,bymeansofanextractionduct(enamel,aluminium,exible
pipeornotinammablematerialwithaninteriordiameterof150mm).
1.Beforeinstallation,turntheunitoffandunplugitfromtheoutlet.
2.Thecookerhoodmustbeplacedatadistanceof65~75cm(25.6-29.5inch)
abovethecookingplaneforbesteffect.
Mounting of the V-FLAP:
IfthecookerhooddoesnothaveanassembledV-ap1,youshouldmountthehalf-partstoitsbody.
TheimagesonlyshowanexampleofhowtomounttheV-ap,theoutletmaybevariousaccordingto
differentmodelsandconguration.
TomounttheV-ap1youshould:
•Mounttwohalf-parts2intothebody6
•apin3shouldbetoporiented;
•theaxis4shouldbeinsertedintheholes5onbody;
•repeatalltheoperationsforthe2ndhalf-part
Pic. 1

Version: 4.0
KEN002DH 23.02.2021
[ EN ● 7]
The parts required for step 3
8pcswallplugs 2pcsscrews(ST4x30mm)
3.Usingadrillbitwithan8mmdiameter,make8holesinthewallatthepositionthatyoureserveforinstalling
thechimneyandcookerhoodbody.SeePic2.
Pic. 2
1
2
3
4
1-holeforinsidechimney
2-holeforoutsidechimney
3-holeforhoodbody
4-safetyhole
2pcswallplugs
2wallplugs+screws
(ST4x30mm)
2pcswallplugs
The parts required for step 4
1pcscookerhood 2pcsscrews(ST4x30mm)
4 Insertwallplugsintotheholesforhoodbodythatyouhavedrilledonthewall.Andfasten2pcsscrews
(ST4×30mm)inthehole,leavingthem2mmoutofthewall.SeePic2.
5 Hangthecookerhoodontothescrewsoftheholeforhoodbody.Seepic3.

Version: 4.0
KEN002DH 23.02.2021
[ EN ● 8]
expansionpipe cabletie
Pic. 3
2screws
(ST4x30mm)
6 Inserttwoscrew(ST4×30mm)intothesafetyholes
andfullyfastenittoensurethecookerhoodiswellxed.
Note:Thetwosafetyventsarepositionedontheback
housing,withdiameterof6mm..
The parts required for step 7
1pcsexpansionpipe 1pcscabletie
7 Attachtheexpansionpipeontheoutletasshownbelow.Fixtheexpansionpipeontheoutletbycabletie.
Liftupexpansionpipetillitoutofthewallthroughtheholeonthewall.Seepic4.
Pic. 4
The parts required for step 8
2pcsscrew(ST4×40mm) 1pcsinsidechimneybracket

Version: 4.0
KEN002DH 23.02.2021
[ EN ● 9]
8.Installtheinsidechimneybracket:Usetwoscrews(ST4×40mm)toinstalltheinsidechimneybracketonto
thewall.SeePic5.
insidechimney
bracket
Pic. 5
2screws
(ST4x40mm)
The parts required for step 9
1pcsoutsidechimneybracket 2pcsscrews(ST4×8mm)
1pcsinsidechimney 1pcsoutsidechimney
9.Slidetheinsidechimneyintotheoutsidechimney.
Attachetheoutsidechimneybracketontheoutsidechimneyandinsidechimneyby2pcsscrews
(ST4×8mm),seePic6.

Version: 4.0
KEN002DH 23.02.2021
[ EN ● 10 ]
Insidechimney
Outsidechimney
bracket
Outsidechimney
2screws
(ST4x8mm)
10.Fixthechimneysontothecookerhood:Use2pcsscrews(ST4×8mm)toxtheoutsidechimneyontothe
cookerhood,thenxtheoutsidechimneybracketonthewallbytwoscrews(ST4×40mm).SeePic7.
The parts required for step 10
2pcsscrews(ST4×8mm) 2pcsscrew(ST4×40mm)
2screws
(ST4x40mm)
2screws
(ST4x8mm)
Pic. 7
The parts required for step 11
2pcsscrews(ST4×8mm)
11.Adjusttheheightoftheinsidechimneytothepositionoftheinsidechimneybracketandxonitby2pcs
screws(ST4×8mm).SeePic8.
Pic. 6

Version: 4.0
KEN002DH 23.02.2021
[ EN ● 11 ]
HINTS FOR EXHAUST DUCT INSTALLATION
Thefollowingrulesmustbestrictlyfollowedtoobtainoptimalairextraction:
• Keepexhaustductshortandstraight
• Donotreducethesizeorrestrictexhaustduct
• Whenusingexibleductalwaysinstalltheductpulledtauttominimizepressureloss
• Failuretoobservethesebasicinstructionswillreducetheperformanceandincreasenoiselevelsof
thecookerhood.
• Anyinstallationworkmustbecarriedoutbyaqualiedelectricianorcompetentperson.
• Donotconnecttheductingsystemofthehoodtoanyexistingventilationsystemwhichisbeing
usedforanyotherappliance,suchaswarmertube,gastube,hotwindtube.
• Theangleofthebendoftheventilationpipeshouldnotbelessthan120º;youmustdirectthepipe
horizontally,or,alternatively,thepipeshouldgoupfromtheinitialpointandshouldbeledtoan
outerwall.
• Aftertheinstallation,makesurethatthecookerhoodisleveltoavoidgreasecollectionatonend.
Ensuretheexhaustductingselectedforinstallationcomplieswithrelevantstandardsandisreretardant..
right wrong
WARNING
• For safety reason, please use only the same size of xing or mounting screw which
are recommended in this instruction manual.
• Failure to install the screws or xing device in accordance with these instructions
may result in electrical hazards.
Pic. 8
2screws
(ST4x8mm)

Version: 4.0
KEN002DH 23.02.2021
[ EN ● 12 ]
OPERATION FOR DH600-XA, DH600-XC, DH600-XD
Timer Lamp Speed Power
1. Pressthe“Power”button,thebuttoncontrolthe“on”&“off”ofthehood.
2. Pressthebutton“Speed”timeaftertime,themotorrunsaslow/mid/high/low/mid…,thespeed
runscircularly;andtheLEDdisplaywillindicateas1-2-3-1-2…circularly.
Pressspeed“3”isworkingonboostersetting,itworking7minsandthenturntospeed“2”auto-
maticlly
3. Press“Light”button,thelightison,pressthisbuttonagain,thelightisoff.PleasenotetheLampis
notundercontroloftheon/offbutton.
4. Whenthehoodisworking,ifpressthe“Timer”button,thehoodwillgointothestatusofacquiescent
working(acquiescenttimeis9mins),andthen,LEDdisplaywillbeshown9.8.7.6...decreasingby
1,whentimeisup,thehoodwillbeoffautomaticallyandthelampwillextinguish.Ifpressing“Timer”
button,thehoodwillgoinorgoout“Timer”function.
OPERATION FOR DH600-XE, DH900-XE
Timer
Lamp Speed Power
Plugonthehood;LCDwilldisplay24-hoursystemwithbluebacklight.Backlightwillbeextinguishedafter15
secondswithoutanyoperation.
Press“”buttononce;lightswillbeonandLCDwillshow“”.Press“”buttonagain;lightswill
beoffand“”onLCDwilldisappear.
Press“”buttononce;thehoodworksatLOWspeedandLCDwillshow“”and“”buttonwill
beon.Press“”buttonagain;thehoodworksatMEDIUMspeed.Press“”buttononemoretime;the
hoodworksatHIGHspeed.Press“”buttonagain;thehoodworksatLOWspeedagainanditrepeat.
Thehighestspeedsisboosterfunctionsetting,Thecookerhoodonboosterfunctionisworking7mins
andthenturntothelowerspeedautomaticlly
Whilepressing“”button;the“”buttonisalwayson.Ifyouwanttostopthehoodnow;press
the“”buttononce.

Version: 4.0
KEN002DH 23.02.2021
[ EN ● 13 ]
GENERAL
Cleaningandmaintenanceshouldbecarriedoutwiththeappliancecoldespeciallywhencleaning.Avoid
leavingalkalineoracidsubstances(lemonjuice,vinegaretc.)onthesurfaces.
STAINLESS STEEL
Thestainlesssteelmustbecleanedregularly(e.g.weekly)toensurelonglifeexpectancy.Drywithaclean
softcloth.Aspecializedstainlesssteelcleaninguidmaybeused.
NOTE:
Ensurethatwipingisdonealongwiththegrainofthestainlesssteeltopreventanyunsightlycrisscross
scratchingpatternsfromappearing.
CONTROL PANEL SURFACE
Theinlaycontrolpanelcanbecleanedusingwarmsoapywater.Ensuretheclothiscleanandwellwrung
beforecleaning.Useadrysoftclothtoremoveanyexcessmoistureleftaftercleaning.
IMPORTANT
Usingneutraldetergentsandavoidusingharshcleaningchemicals,stronghouseholddetergentsor
productscontainingabrasives,asthiswillaffecttheapplianceappearanceandpotentiallyremoveany
printingofartworkonthecontrolpanelandwillvoidmanufactureswarrantee
ALUMINIUM FILTERS
Thealuminiumlterscanbecleanedbyhand.Soakthemforabout3minuteinwaterwithagrease-loo-
seningdetergentthenbrushitgentlywithasoftbrush.Pleasedonotapplytoomuchpressure,avoidto
damageit.(Leavetodrynaturallyoutofdirectsunlight)
Filtersshouldbewashedseparatelytocrockeryandkitchenutensils.itisadvisablenottouserinseaid.
MAINTENANCE AND CLEANING
CAUTION
Beforemaintenanceorcleaningiscarriedout,thecookerhoodshouldbedisconnectedfromthe
mainpowersupply.Ensurethatthecookerhoodisswitchedoffatthewallsocketandtheplug
removed.
Externalsurfacesaresusceptibletoscratchesandabrasions,sopleasefollowthecleaninginstruc-
tionstoensurethebestpossibleresultisachievedwithoutdamage.

Version: 4.0
KEN002DH 23.02.2021
[ EN ● 14 ]
Whenthehoodisnotworking;press“”buttononce.Thehoodwillworkatthespeeditworkslasttime
andLCDwillshow“”.Press“”buttonagain;thehoodstopworkingand“”willdisappearfrom
LCD.
Whenboth“”buttonand“”buttondon’twork;“”buttonisusedfortime-setting.Press
“”buttonfor2to3seconds;willbeshownonLCDandashes;whichrepresents
hour.Press“”buttononcethenumberaddsby01.Continuepressing“”button;itwilldisplay
from13;14…until23.WhenLCDshows23;itdoesn’tworkbypressing“”button.Press“”
buttononce;thenumberreducesby01.WhenLCDshows00;itdoesn’tworkbypressing“”button.
Aftersettinghour;youcanstartsettingminutebypressing“”buttonagain.onLCDashes;
whichrepresentsminutes.Press“”buttononcethenumberaddsby01.Continuepressing“”
button;itwilldisplayfrom01;02…until59.WhenLCDshows59;itdoesn’tworkbypressing“”
button.Press“”buttononce;thenumberreducesby01.WhenLCDshows00;itdoesn’tworkby
pressing“”button.Aftersettinghourandminute;press“”toconrm.
When“”buttondoesn’twork;“”buttonisusedfordelaytimerfunction.Delaytimerfunction
allowsyoutosetthehoodsautomaticallypoweroffaccordingtothedelaytimeryousetfrom1minuteto
60minutes.Press“”buttononce;itentersfordelaytimersettingandLCDshows.
Press“”buttononcethenumberaddsby01.Continuepressing“”button;itwilldisplayfrom
;;untilPress“”buttononce;
thenumberreducesby01.Aftersettingdelaytimeryouwant;press“”buttontoconrm.Ifyouset
delaytimeras05:00;theLCDdisplaywillshowfrom05:00;04:59…until00:0100:00.WhenLCDshows
00:00;thehoodwillautomaticallypoweroffandLCDdisplaywillonlyshow24-hoursystemwithblue
backlight.After30secondswithoutoperation;bluebacklightwilldisappear.ButpleasenotetheLampis
notundercontrolofdelaytimer.Nexttime;ifyouwanttousedelaytimerfunctionandyoupress“”
buttonwithoutanychangeontime.Thehoodwillautomaticallycounttimedownfromyourprevious
settingafter5seconds.

Version: 4.0
KEN002DH 23.02.2021
[ EN ● 15 ]
CARBON FILTER
Activatedcarbonltercanbeusedtotrapodors.Normallytheactivatedcarbonltershouldbechanged
atthreeorsixmonthsaccordingtoyourcookinghabit.Theinstallationprocedureofactivatedcarbon
lterisasbelow.
Inordertoinstalltheactivatedcarbonlter,thealuminiumltershouldbedetachedrst.Firstlyopen
carefullytheglasspanel,thenpressthelockofaluminiumlterandremoveit.
NOTE:
• Makesurethecarbonlterissecurelylocked.Otherwise,itwouldloosenandcausedangerous.
• Whenactivatedcarbonlterattached,thesuctionpowerwillbelowered.
INSTALLING ALUMINIUM FILTERS
Toinstallltersforthefollowingfoursteps(Seepic
beside):
-Anglethelterintoslotsatthebackofthehood.
-Pushthebuttononhandleofthelter.
-Releasethehandleoncetheltertsintoaresting
position.
-Repeattoinstallalllters.
open
open
close

Version: 4.0
KEN002DH 23.02.2021
[ EN ● 16 ]
LED LIGHT REPLACEMENT
IMPORTANT
• Thelightmustbereplacedbythemanufacturer,oritsserviceagentorsimilarlyqualied
persons.
• Alwaysswitchofftheelectricitysupplybeforecarryingoutanyoperationsontheappliance.
Whenhandlinglight,makesureitiscompletelycooldownbeforeanydirectcontactto
hands.
• Whenhandlingglobesholdwithaclothorglovestoensureperspirationdoesnotcomein
contactwiththeglobeasthiscanreducethelifeoftheglobe.
LED LIGHTS
• Switchtheunitoffandpullouttheplugrst.
• Waituntilthelightbulbiscooleddownbeforereplacement.
• Opencarefullytheglasspanel,andtakeofferthealuminiumlter
• PullouttheLEDlightcarefullyandreplacewiththesametypeandratedLEDlight(2*1.5WLED
light)
• ILCOSDcodeforthislampis:
DSR-1.5/65-S-64
• LEDmodules,
self-ballasted-roundlamp
• Maxwattage:1.5W
• Voltagerange:DC12V
• Dimensions:(mm)

Version: 4.0
KEN002DH 23.02.2021
[ EN ● 17 ]
TROUBLESHOOTING
Fault Cause Solution
Lighton,butmotordoesnotwork.
Fanswitchturnedoff. Selectafanswitchposition.
Fanswitchfailed. Contactservicecenter.
Motorfailed. Contactservicecenter.
Lighton,butfandoesnotwork
Thefanbladeisjammed. Switchoftheunitandrepairby
qualiedservicepersonnelonly.
Themotorisdamaged.
Bothlightandfandonotwork Lightbulbburnt. Replacethebulbwithcorrect
rating.
Powercordloose. Plugintothepowersupplyagain.
Lightdoesnotwork,motordoes
notwork
Housefusesblown. Reset/Replacefuses.
Powercordlooseordisconnected Retcordtopoweroutlet.
Switchpoweroutleton.
Oilleakage
Onewayvalveandtheoutletare
nottightlysealed
Takedowntheonewayvalveand
sealwithsealant
Leakagefromtheconnectionof
chimneyandcover Takechimneydownandseal.
Strongvibrationoftheunit
Thefanbladeisdamaged. Switchoftheunitandrepairby
qualiedservicepersonnelonly.
Thefanmotorisnotxedtightly. Switchtheunitoffandrepairby
qualiedservicepersonnelonly.
Theunitisnothungproperlyonto
thebracket.
Takedowntheunitandcheckif
thebracketisinproperlocation.
Suctionperformancenotgood Distancetoolargebetweenthe
unitandthecookinghob
Readjustthedistanceto
65-75cm(25.6-29.5inch)
TheCookerhoodinclines Thexingscrewnottightenough Tightenthehangingscrewand
makeithorizontal.
NOTE:
Anyelectricalrepairstothisappliancemustconformtoyourlocal,stateandfederallaws.
Pleasecontacttheservicecentreifinanydoubtbeforeundertakinganyoftheabove.Always
disconnecttheunitfromthepowersourcewhenopeningtheunit..

Version: 4.0
KEN002DH 23.02.2021
[ EN ● 18 ]
TECHNICAL SPECIFICATIONS
Theabovetableindicatestheinformationforthecookerhood.
Product che prepared in accordance with the Commission Delegated Regulation (EU) No 65/2014
DH600-XA DH600-XC DH600-XD DH600-XE DH900-XE
Length 29.92-44.88inch 30.32-45.28inch 29.92-44.88inch 30.32-45.28inch 30.32-45.28inch
Width 23.62inch 23.62inch 23.62inch 23.62inch 35.43inch
Height 16.93inch 14.76inch 16.93inch 14.76inch 14.76inch
Weight 15kg 13.5kg 14.5kg 13.5kg 16kg
Trademark: Viesta
Modelidentier: DH600-XA DH600-XC DH600-XD DH600-XE DH900-XE
Annualenergyconsumption(AEC(hood)) 42.4 58.2 42.4 58.2 58.2 kWh/a
Energyefciencyclass AAAAA
Fluiddynamicefciency(FDEhood) 30.9 29.5 30.9 29.5 29.5
Fluiddynamicefciencyclass AAAAA
Lightingefciency(LEhood) 29.8 31.1 29,8 31.1 28.2 lx/W
Lightingefciencyclass AAAAA
Greaselteringefciency(GFEhood) 48.6 57.6 48.6 57.6 57.6 %
Greaselteringefciencyclass F E F E E
Airowrateatmin.speedinnormaluse 201.5 220.6 201.5 220.6 220.6 m3/h
Airowrateatmax.speedinnormaluse 335.8 305.2 335.8 305.2 305.2 m3/h
Airowrateatintensiveorboostsetting 600.1 708.5 600.1 708.5 708.5 m3/h
Noiselevelatmin.speedinnormaluse 61 53 61 53 53 dB
Noiselevelatmax.speedinnormaluse 64 60 64 60 60 dB
Noiselevelatmin/maxspeed(atintensive
orboostsetting) 72 75 72 75 75 dB
Powerconsumptionintheoff-mode(Po) 0.48 0.45 0.48 0.48 0.48 W
Powerconsumptioninstandbymode(Ps)-----W
To determine the results, and in accordance with the requirements in relation to the labelling of energyrelated
products and with regard to ecodesign requirements, the following calculation and measurement methods were
applied: Directive of the European Parliament and of the Council 2010/30/EU; REGULATION NO 65/2014 and Directi-
ve of the European Parliament and of the Council 2009/125/EC; REGULATION NO 66/2014.
EN 50564:2011-Electricalandelectronichouseholdandofceequipment-Measurementoflowpowerconsumption.
EN 60704-2-13-Householdandsimilarelectricalappliances-Testcodeforthedeterminationofairborneacousticalnoise-
Particularrequirementsforrangehoods.
EN 61591-Householdrangehoodsandothercookingfumeextractors-Methodsformeasuringperformance

Version: 4.0
KEN002DH 23.02.2021
[ EN ● 19 ]
Trademark: Viesta
Modelidentier: DH600-XA DH600-XC DH600-XD DH600-XE DH900-XE
Annualenergyconsumption(AEChood) 42.4 58.2 42.4 58.2 58.2 kWh/a
Timeincreasefactor(f) 0.9 0.9 0.9 0.9 0.9
FluidDynamicEfciency(FDEhood) 30.9 29.5 30.9 29.5 29.5
EnergyEfciencyIndex(EEIhood)51 53.1 51 53.1 53,1
Measuredairowrateatbestefciency
point(QBEP)286.6 421.6 286.6 421.6 421.6 m3/h
Measuredairpressureatbestefciency
point(P
BEP
)
460 421 460 421 421 Pa
Maximumairow(Qmax) 335.8 305.2 335.8 305.2 305.2 m3/h
Measuredelectricpowerinputatbest
efciencypoint(WBEP)118.4 167.2 118.4 167.2 167.2 W
Nominalpowerofthelightingsystem(W
L
)
4.8 4.5 4.8 4.5 4.5 W
Averageilluminationofthelighting
systemonthecookingsurface(Emiddle)138 140 138 140 127 lux
Measuredpowerconsumptioninstandby
mode(P
s
)
-----
Measuredpowerconsumptionoffmode
(Po)0.48 0.45 0.48 0.48 0.48 W
Soundpowerlevel(LWA)64 60 64 60 60 dB
To determine the results, and in accordance with the requirements in relation to the labelling of energyrelated
products and with regard to ecodesign requirements, the following calculation and measurement methods were
applied: Directive of the European Parliament and of the Council 2010/30/EU; REGULATION NO 65/2014 and
Directive of the European Parliament and of the Council 2009/125/EC; REGULATION NO 66/2014.
EN 50564:2011-Electricalandelectronichouseholdandofceequipment-Measurementoflowpowerconsumption.
EN 60704-2-13-Householdandsimilarelectricalappliances-Testcodeforthedeterminationofairborneacoustical
noise-Particularrequirementsforrangehoods.
EN 61591-Householdrangehoodsandothercookingfumeextractors-Methodsformeasuringperformance
Information to reduce the environmental impact (e.g. energy consumption) of cooking according to Annex I, point 2
of Regulation (EU) No 66/2014 with regard to the setting of ecodesign requirements for household ovens, hobs and
cooker hoods.
• Onlyusepotsandpanswithatbottomsforcooking.Unevenoorsincreaseenergyconsumption.
• Alwaysclosepotswithasuitablelid.Whencookingwithoutalid,youneedfourtimesmoreenergy.Usingaglasslid
cansaveenergyagainbecauseyoucanseethecontentswithouthavingtoopenthelid.
• Adjustthepotsizetothediameterofthecookingzoneused.Pansandpotsthataretoosmallonthehobwillleadto
energylosses.
• Useasmallpotforsmallquantities.Alargepotthatisonlyslightlylledrequiresmuchmoreenergy
• Useaslittlewateraspossible.Thissavesenergy.Vegetablesretaintheirvitamins.
• Aftercookingorfrying,switchdownthecookingzonestoalowerpowerlevelingoodtime.
• Switchoffthecookerhoodaftercookingorusethedelayedswitch-offfunction(onsomemodels)
• Turnoffthecookerhoodlightingaftercooking.
• Adjustthefanlevelstotheintensityofthecookingfumes.
• Usetheappliance'shighestmotorspeedonlywhenthereisahighconcentrationofcookingfumes..
• Cleanandreplacethegreaseltersregularlybecausethecleanltersincreasetheefciencyoftheappliance.
• Ensurethatthereissufcientsupplyairwhenoperatingthecookerhood.

Version: 4.0
KEN002DH 23.02.2021
[ EN ● 20 ]
Uselamptype(oralternativetype)DSR-1.5/65-S-64
(CodeILCOSDinaccordancewithIEC61231).
Fluorescentreectorlamp-Integralinductiontypeballast
- Maximumpower:1.5W
- Voltagerange:12V
- Dimensions:diameter64mm
LAMP
We decline liability for any damage or accident from any use of this product
which is not in conformity with the instructions contained in this booklet.
AlleFulllmentGmbHproductsmeettheConformitéEuropéenne(CE)standard.
TheCEsymbolindicatesthataproductcomplieswiththeapplicableruleswithintheEuropeanUnion.
ADeclarationofConformitycanbefoundhere: www.efulllment-online.com
ENVIRONMENTALPROTECTION:
Thisproductismarkedwiththesymbolontheselectivesortingofwasteofelectronic
equipment.Thismeansthatthisproductmustnotbedisposedofwithhousehold
wastebutmustbesupportedbyasystemofselectivecollectioninaccordancewith
Directive2012/19/EU.Itwillthenberecycledordismantledtominimizeimpactson
theenvironment.Electricalandelectronicproductsarepotentiallydangerousforthe
environmentandhumanhealthduetothepresenceofhazardoussubstances.
Formoreinformation,pleasecontactyourlocalorregionalauthorities.
Information to professional users for dismantling according to Annex I, No. 2 of Regulation
(EU) No. 66/2014
Information on non-destructive dismantling for maintenance purposes.
Remove the lters and illuminants as described in the operating instructions.
Further disassembly for maintenance purposes is not planned.
For repair and replacement of defective parts, please contact customer service.
Batteries are not included.
Disassembly information related to recycling, recovery and disposal at the end of the equip-
ment's life.
Disconnect the equipment from the power supply. Remove all lters from the cooker hood. Disassem-
ble the chimney shaft for chimney hoods. When disassembling the extractor hood, always loosen the
lower and then the upper fastening screws rst.
Disassembly of devices with electrical connection should be carried out by a licensed electrician.
For recycling and recovery of resources, specify the unit:
- a municipal collection point for public waste management authorities
- a manufacturer's own waste disposal company that oers a take-back system
- a local electrical retailer who voluntarily takes back electrical equipment
This manual suits for next models
4
Table of contents
Languages:
Other Viesta Ventilation Hood manuals
Popular Ventilation Hood manuals by other brands

ROBLIN
ROBLIN VIZIO FX 900 - DIMENSIONS 1 Dimensions

Smeg
Smeg KR37XE user manual

Zephyr
Zephyr Cypress AK7836CS Use, care and installation guide

Maytag
Maytag UXT5536AAS Installation instructions and use and care guide

JUNO
JUNO JDA 5330 Instruction on mounting and use

Electrolux
Electrolux RH36WC55GS Brochure & specs