manuals.online logo
Brands
  1. Home
  2. •
  3. Brands
  4. •
  5. Viking
  6. •
  7. Dishwasher
  8. •
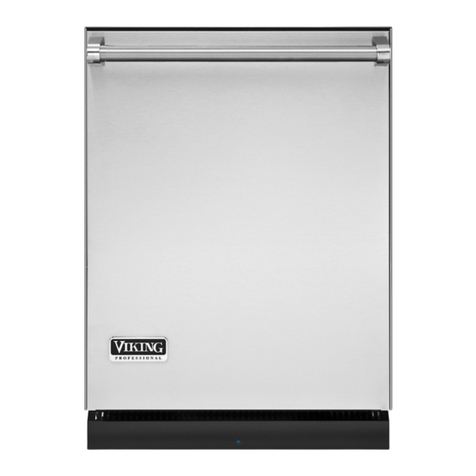
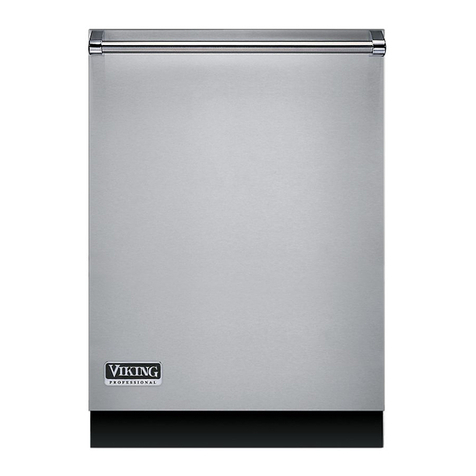
  9. Viking RDDB301SS User manual

Viking RDDB301SS User manual

201/301 S ri s
Built-In Dishwash rs
Installation
Viking Range Corporation
111 Front Str t
Gr nwood, Mississippi 38930 USA
(662) 455-1200
For product information, call 1-888-VIKING1 (845-4641)
or visit th Viking W bsit at vikingrang .com
F20886 EN (040312)
UL
C
UL
IMPORTANT
3
–Please Read and FollowTabl of Cont nts
Warnings & Important Information _____________________________________________________3
Dim nsions & Cutout Dim nsions _____________________________________________________6
Sp cifications _______________________________________________________________________7
G n ral Information__________________________________________________________________8
Sit Pr paration__________________________________________________________________8
Wat r Supply ____________________________________________________________________8
Drain ___________________________________________________________________________8
El ctrical Conn ctions________________________________________________________________9
Hardwir Conduit Option _______________________________________________________10
Count r Balanc Spring Adjustm nt ______________________________________________12
Installation _____________________________________________________________________13
L v ling _______________________________________________________________________14
Final Installation ________________________________________________________________15
P rformanc Ch cklist ______________________________________________________________17
T sting for L aks ________________________________________________________________17
Final Pr paration________________________________________________________________17
S rvic & R gistration_______________________________________________________________18
2
Site Preparation It is r comm nd d that a thorough sit insp ction b
conduct d PRIOR to unpacking and moving this applianc .
WARNING
Make sure that incoming voltage is the
same as unit rating. An electric rating
late s ecifying voltage, hertz, and am s
is attached to the roduct. Wiring the
dishwasher with more voltage than it is
rated for may cause severe damage. To
reduce the risk of fire, electric shock, or
injury to ersons, installation work and
electrical wiring must be done by qualified
technician in accordance with all
a licable codes and standards, including
fire-rated conditions.
WARNING
The dishwasher door may not stay o en
by itself until the door anel is installed.
Be aware of this when fastening the
dishwasher to the cabinet.
WARNING
Plumbing connections must com ly with
a licable sanitary, safety and lumbing
codes.
WARNING
Electrical ower must be turned off at
circuit breaker or fuse box before making
electrical connections. Disconnect the
electrical ower su ly and lace a tag at
the disconnect switch indicating that you
are working on the circuit.
• B for b ginning–pl as r ad th s
instructions compl t ly and car fully.
•DO NOT r mov p rman ntly affix d
lab ls, warnings, or rating plat s from th
dishwash r. This may void warranty or
cr at an unsaf product.
• Pl as obs rv all national and local
cod s.
• Pl as nsur that this product is prop rly
ground d.
• Th install r should l av th s
instructions with th consum r who should
r tain for local insp ctor’s us and for
futur r f r nc .
• Th dishwash r has a factory install d
backflow pr v nt r. DO NOT add an
additional ch ck valv .
• Failur to provid a 20” abov floor l v l
(50.8 cm) high loop may r sult in improp r
op ration of th dishwash r.
• R mov pall t scr ws from bas . Damag
could occur to dishwash r if scr ws ar not
r mov d.
IMPORTANT
5
–Please Read and Follow
4
IMPORTANT–Please Read and Follow!
WARNING
ELECTRICAL SHOCK HAZARD
• Electrically ground dishwasher.
• Connect ground wire to green ground
connector in terminal box.
•DO NOT use an extension cord.
• Failure to follow these instructions, can
result in death, fire or electrical shock.
WARNING
TIP OVER HAZARD
•DO NOT use dishwasher until
com letely installed.
•DO NOT ush down on o en door.
• Doing so can result in serious injury
or cuts.
WARNING
EXCESSIVE WEIGHT HAZARD
Use two or more eo le to move and
install dishwasher. Failure to do so can
result in back or other injury.
WARNING
Disconnect the electrical ower su ly and
lace a tag at the disconnect switch
indicating that you are working on the
circuit.
WARNING
Be sure electrical ower is turned off at
circuit breaker or fuse box before servicing
or installing unit. DO NOT use an
extension cord for this a liance.
WARNING
Im ro er connection of the equi ment –
grounding conductor can result in a risk of
electric shock. Check with a qualified
electrician or serviceman if you are in
doubt as to whether the a liance is
ro erly grounded. DO NOT modify the
lug rovided with the a liance; if it will
not fit the outlet, have a ro er outlet
installed by a qualified electrician.
WARNING
Plumbing connections must com ly with
a licable sanitary, safety, and lumbing
codes.
CAUTION
The dishwasher has a factory installed
backflow reventer. DO NOT add an
additional check valve.
A GFI shall be used if required by NFPA-70
(National Ele tri Code), federal/state/lo al
laws, or lo al ordinan es.
• Th r quir d us of a GFI is normally
r lat d to th location of a r c ptacl with
r sp ct to any significant sourc s of wat r
or moistur .
• Viking Rang Corporation will NOT
warranty any probl ms r sulting from GFI
outl ts which ar not install d prop rly or
do not m t th r quir m nts b low.
If the use of a GFI is required, it should b :
• Of th r c ptacl typ (br ak r typ or
portabl typ NOT r comm nd d)
• Us d with p rman nt wiring only
(t mporary or portabl wiring NOT
r comm nd d)
• On a d dicat d circuit (no oth r
r c ptacl s, switch s or loads in th
circuit)
• Conn ct d to a standard br ak r of
appropriat siz (GFI br ak r of th sam
siz NOT r comm nd d)
• Rat d for Class A (5 mA +/- 1 mA trip
curr nt) as p r UL 943 standard
• In good condition and fr from any
loos -fitting gask ts (if applicabl in
outdoor situations)
• Prot ct d from moistur (wat r, st am,
high humidity) as much as r asonably
possibl
Sp cifications
7
Dim nsions & Cutout Dim nsions
6
28-3/4”
(73.0 cm)
33-7/8”
(86.0 cm)
49”
(124.5 cm)
23-7/8”
(60.6cm)
2-3/4”
(7 cm)
23-5/8”
(60.0 cm)
26-3/8”
(67.0 cm)
24”
(61.0cm)
24”
(61.0cm)
34”min.
(86.4cm)
to
35”min.
(89.0cm)
Note: A 2” (5.1 cm)
cut-out is required
for water supply
and discharge lines.
Built-In Dishwasher
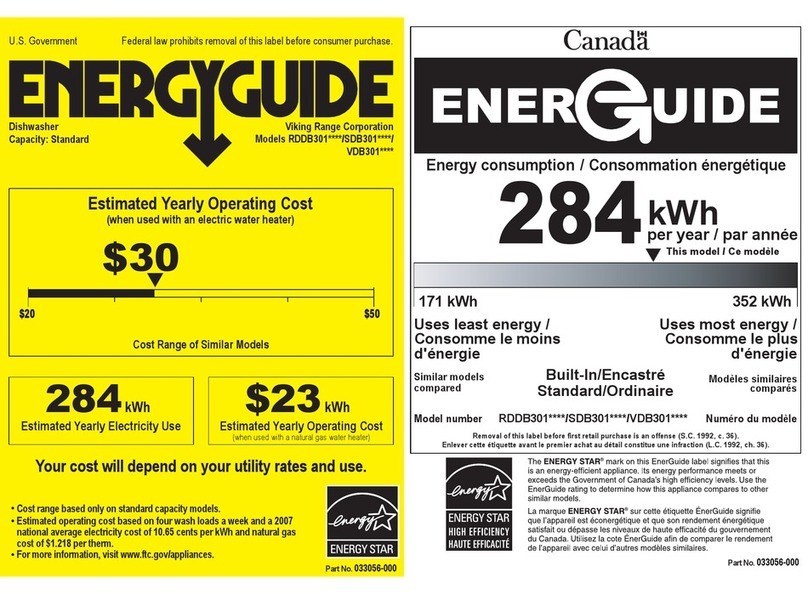
Description 201 Models 301 Models
Ov rall width 23-7/8” (60.6 cm)
Ov rall h ight from floor 33-7/8” (86.0 cm) min. to 35” (89.0 cm) max.
Ov rall d pth from r ar To dg of sid – 23-5/8” (60.0 cm) – includ s door pan l
To front of door handl – 26-3/8” (67.0 cm)
With door op n – 49” (124.5 cm)
Cutout width 24” (61.0 cm)
Cutout h ight 34” (86.4 cm) min. to 35” (89.0 cm) max.
Cutout d pth 24” (61.0 cm)
El ctrical r quir m nts 15.0 amps, 120VAC/60 Hz;
3’9” (1.1 m) l ctrical cord 3 prong plug suppli d with unit.
Wat r-h ating l m nt rating 1200 watts
Inl t wat r t mp ratur 120°F (49°C) r quir d 120°F (49°C) r quir d
Inl t wat r pr ssur
op rating rang
10 to 125 psi (0.69 to 8.62 bar)
Inl t wat r hos 5’ (1.5 m) braid d stainl ss st l wat r lin with 3/8” (0.95 cm) compr ssion
fitting conn ct d to dishwash r
Drain hos 7’ (2.13 m) 1/2” (1.3 cm) ID “crimp-proof” fl xibl drain hos attach d to
dishwash r, conn ctions provid d for 5/8” (1.6 cm), 3/4” (1.9 cm) or
1” (2.5 cm), cut as r quir d
Drain hos high loop r quir d H ight from floor – 20” (51.0 cm) min.
Approximat shipping w ight 147 lbs. (66.7 kg) 152 lbs. (68.9 kg)
D3
9
• R ad th s instructions car fully and
compl t ly b for installing th
dishwash r. Th installation should b
carri d out by a qualifi d install r, who is
familiar with all local cod s and ordinanc s
for l ctrical and plumbing conn ctions. If
th dishwash r is b ing install d for th
first tim , most of th work has to b don
b for you mov it into plac . If you ar
r placing an old dishwash r, you must
ch ck th old conn ctions.
• El ctrical r quir m nts ar list d in th
“Sp cifications” s ction.
Sit Pr paration
Note: It is recommended that a thorough
site inspection be conducted PRIOR to
unpacking and moving this appliance.
• After determining w ere t e water
supply line will connect to t e
dis was er, provide a 2” (5.1 cm) access
ole and run t e line to t e approximate
fill valve location. Sealing access area
once lines are in place is recommended.
• Confirm availabl acc ss to ad quat pow r.
Wat r Supply
• Wat r pr ssur for th wat r supply should
b a minimum of 10 to 125 psi. Th
dishwash r is suppli d with a 5’ (1.5 m)
braid d stainl ss st l wat r lin with 3/8”
(0.95 cm) compr ssion fitting conn ct d to
dishwash r.
• Aft r d t rmining wh r th wat r supply
lin will conn ct to th dishwash r, provid
a 2” (5.1 cm) acc ss hol and run th
wat r supply lin to th approximat fill
valv location.
• For s rvic conv ni nc , a shut-off valv
(not suppli d) should b install d in th
supply lin in a r adily acc ssibl location
(such as b n ath th sink).
•It is recommended t at t e dis was er
be connected to a ot water supply.
• It is important that th wat r supply lin
and th shut-off valv hav a suffici nt flow
volum . Flush th supply lin prior to
conn cting it to th intak lin of th
dishwash r.
• Mak sur th conn ction is s al d and not
l aking b for compl ting th installation.
Drain
• Th acc ss hol for th drain lin should
b 2” squar (5.1 cm). Locat as low and
as n ar to th back wall as possibl .
•DO NOT us any fittings anywh r in th
drain lin that ar l ss than 1/2” (1.3 cm) ID.
• If th drain lin is going to b conn ct d
to a food wast dispos r, b sur to
r mov th knockout or plug from th
fitting b for conn cting drain lin .
• Drain conn ction should b a minimum of
9” (22.9cm) from th floor. If conn ction is
low r, siphoning during cycl can occur.
Note: The end of the drain hose is ” (2.5 cm),
but is adjustable to 3/4” ( .9 cm) or 5/8”
( .6 cm). If the drain connection is smaller
than ” (2.5 cm), the hose can be cut to fit
the connection.
Note: Be sure to run the drain line through
the hole to the sink compartment before
moving the dishwasher into place.
WARNING
Plumbing connections must com ly with
a licable sanitary, safety, and lumbing
codes.
CAUTION
The dishwasher has a factory installed
backflow reventer. DO NOT add an
additional check valve.
G n ral Information
8
Grounding Instructions
This applianc must b ground d. In th
v nt of a malfunction or br akdown,
grounding will r duc th risk of l ctric
shock by providing a path of l ast r sistanc
for l ctric curr nt. This applianc is
quipp d with a cord having an quipm nt-
grounding conductor and a grounding plug.
Th plug must b plugg d into an
appropriat outl t that is install d and
ground d in accordanc with all local cod s
and ordinanc s.
Grounding Instructions if Hardwired:
This applianc must b conn ct d to a
ground d m tal, p rman nt wiring syst m;
or an quipm nt grounding conductor must
b run with th circuit conductors and
conn ct d to th quipm nt – grounding
t rminal or l ad on th applianc .
• For a cord conn ct d und rcount r
dishwash r:
1. Th pow r supply r c ptacl for th
applianc should b install d in a
cabin t or on a wall adjac nt to th
und r count r spac in which th
applianc is to b install d;
2. Th r should b an op ning through
th partition b tw n th
compartm nts m ntion d in It m (1),
that is larg nough for th attachm nt
plug to pass through. Th long st
dim nsion of th op ning shall not b
mor than 1-1/2” (38 mm).
3. Th dg s of th op ning m ntion d in
It m (2) should, if th partition is wood,
b smooth and round d or, if th
partition is m tal, b cov r d with th
gromm t provid d for this purpos by
th manufactur r; and
El ctrical Conn ctions
4. Car should b x rcis d, wh n th
applianc is install d or r mov d to
r duc th lik lihood of damag to th
pow r supply cord.
• Th dishwash r com s with a 3’9” (1.1 m)
l ctrical cord for 110-120 volts, 15/20
amp supply. This cord should b plugg d
into th 110-120 volt outl t locat d und r
th sink.
• If th cord is not long nough or if a hard
wir installation is n d d, follow th
instructions in th “Hardwir ” s ction.
Note: Access holes should be 2” square
(5. cm) with no sharp edges.
• In a hardwir installation, us only copp r
supply conductors. Th conductors should
hav a minimum t mp ratur rating of
194° F (90° C).
WARNING
Disconnect the electrical ower su ly and
lace a tag at the disconnect switch
indicating that you are working on the
circuit.
WARNING
Be sure electrical ower is turned off at
circuit breaker or fuse box before servicing
or installing unit. DO NOT use an
extension cord for this a liance.
WARNING
Im ro er connection of the equi ment –
grounding conductor can result in a risk of
electric shock. Check with a qualified
electrician or serviceman if you are in
doubt as to whether the a liance is
ro erly grounded. DO NOT modify the
lug rovided with the a liance; if it will
not fit the outlet, have a ro er outlet
installed by a qualified electrician.
1110
5
1
2
1
1
6
2
Black
(Line)
White
(Neutral)
Hardwir Conduit Option
1
3
2
x4
2
1
3
3
x2
2
1
4
R mov front plat . R mov factory install d pow r
cabl from t rminal block.
Attach UL approv d 3/4” strain r li f (not includ d) to
bottom of t rminal box. Run wir s through strain r li f.
Conn ct wir s to t rminal block.
R mov any loos it ms in th dishwash r and car fully
lay th dishwash r on its back. Note: Be careful not to
pinch hoses or power cord beneath dishwasher.
R mov bottom pan. Note: Rapid removal of the bottom pan will
cause damage to the moisture sensor. For installation and servicing,
slowly pull the bottom pan from the unit and disconnect the wire
from the moisture sensor, which is located in the center of the pan.
1
7
2
3
Green
(Ground)
2
8
1
x4
3
4
Conn ct ground wir . Tight n scr ws on strain r li f.
Note: Reinstall front plate.
Run wir through gromm t on bottom pan.
R plac bottom pan.
Hardwir Conduit Option (cont.)
1312
Count r Balanc Spring Adjustm nt (if n c ssary)
1
1
2
1
2
2
Disconn ct cabl from hook. R mov spring from dishwash r.
3
Increase
tension
Decrease
tension
1
4
2
S t count r balanc spring conn ctor in appropriat
location.
R conn ct cabl to hook.
Note: For custom panel installation,
the door may require adjustment
to the preload of the counterbalance
springs. Follow these steps to
adjust the tension.
Installation
2
2
1
x4
3
4
1
2
1
2
Car fully lay dishwash r on its back and attach th kick
plat brack ts. Scr ws for th brack ts will alr ady b
in th bas . Note: Be careful not to pinch hoses or
power cord beneath dishwasher.
To adjust th d pth of th kick plat , loos n scr ws on
th brack t and position in th r quir d d pth. Tight n
scr ws and r p at for oth r sid .
3
Using ti strap attach d to dishwash r, band wat r lin ,
drain lin , and pow r cord tog th r.
1
1
4
2
x2
5
Attach brack ts with two scr ws (1 p r brack t).
Position unit in front of cutout.
2
1
6
Slid unit into op ning; b sur to f d wat r, l ctrical
and discharg lin s into adjac nt cabin t.
1514
DOWN
UP
7a
DOWNUP
DOWNUP
DOWN UP
Equal distance
7b
OWNUP
OWNUP
OWNUP
OWNUP
OWNUP
OWNUP
OWNUP
OWNUP
1
2
Equal distance
8
For 301 mod ls, plac a l v l on handl , th n adjust to
appropriat h ight. L ft and right adjust sid to sid
and c nt r adjusts front to back.
For 201 mod ls, r mov front pan l to acc ss th front
l v ling l gs. L v ling l gs will b rais d during
shipping. Adjust front l v ling l gs down using a 1/4
driv ratch t. Wh n th adjustm nt nut is visibl ,
compl t th low ring of th l gs from th top. Wh n
th l gs ar down, tight n th locking nut on th top
of th l g. To l v l c nt r r ar l g, s St p 7a.
To ch ck l v l, front to back, pull th top rack half-way out of
unit. Th rack should r main stationary and not mov in or out.
Note: Leveling is important for optimal performance.
L v ling
9
x2
Attach scr ws through brack t into cabin ts.
Minimum
20”
(50.8 cm)
from floor
10
Install High Loop Clip, which is provid d, a minimum of
20” (50.8 cm) from th floor. R f r to th Drain s ction
of "General Information" for prop r installation
r quir m nts.
1.0”
(2.5 cm)
Cut here for
3/4” (1.9 cm)
Cut here for
5/8” (1.6 cm)
11
Id ntify discharg conn ction siz ; cut lin to corr ct
siz and conn ct. Clamp if n c ssary.
12a
12b
(Discharg with food wast dispos r)
Note: Be sure to remove the knockout or plug from the
fitting of the disposer before connecting drain line.
(Standard discharg )
Final Installation
12c
Air Gap
(Discharg with air gap)
12d
Air Gap
(Discharg with food wast dispos r and air gap)
13
Conn ct wat r lin .
1716
14
Install kick plat .
Final Installation (cont.)
T sting for L aks
A qualifi d install r should carry out th following
ch cks:
hR mov packaging and parts.
hTurn on th wat r supply and ch ck for l aks.
hTurn th pow r on at br ak r/fus box and
t st th dishwash r op ration by running a
rins and hold cycl . (This should tak about
12 minut s.)
hTurn off th l ctrical pow r and ch ck for
l aks und r th dishwash r.
hMak sur that no kinks hav d v lop d in
th drain lin s.
Final Pr paration
• Som stainl ss st l parts may hav a plastic
prot ctiv wrap which must b p l d off.
Unit R s t
• If th unit should n d to b r s t for any
r ason, push and hold th “START” button for
4 s conds.
P rformanc Ch cklist
1918
S rvic & R gistration
Only authoriz d r plac m nt parts may b us d in p rforming s rvic on th applianc . Do not
r pair or r plac any part of th applianc unl ss sp cifically r comm nd d in th manual. All
s rvicing should b r f rr d to a qualifi d t chnician.
Contact Viking Rang Corporation, 1-888-VIKING1 (845-4641), for th n ar st s rvic parts
distributor in your ar a or writ to:
VIKING RANGE CORPORATION
PREFERRED SERVICE
1803 Hwy 82W
Greenwood, Mississippi 38930 USA
Th s rial numb r and mod l numb r for your dishwash r ar locat d on th id ntification plat mount d
on th bottom l ft sid of th dishwash r door op ning.
R cord th following information indicat d b low. You will n d it if s rvic is v r r quir d.
Mod l numb r ____________________________________________________________________________________
S rial numb r _____________________________________________________________________________________
Dat of purchas __________________________________________________________________________________
Dat install d ______________________________________________________________________________________
D al r's nam _____________________________________________________________________________________
Addr ss ___________________________________________________________________________________________
T ese installation instructions s ould remain wit t e dis was er for future
reference.

Other manuals for RDDB301SS

1

This manual suits for next models

3

Other Viking Dishwasher manuals

Viking D3 301 Series User manual

Viking

Viking D3 301 Series User manual

Viking Designer DDB200 User manual

Viking

Viking Designer DDB200 User manual

Viking 100 Series User manual

Viking

Viking 100 Series User manual

Viking Professional & Designer 325 Series User manual

Viking

Viking Professional & Designer 325 Series User manual

Viking VDB200SS User manual

Viking

Viking VDB200SS User manual

Viking VDB301SS User manual

Viking

Viking VDB301SS User manual

Viking DDB325SS Assembly instructions

Viking

Viking DDB325SS Assembly instructions

Viking VDB301SS User manual

Viking

Viking VDB301SS User manual

Viking Professional & Designer 200 Series User manual

Viking

Viking Professional & Designer 200 Series User manual

Viking 100 Series User manual

Viking

Viking 100 Series User manual

Viking Professional & Designer 325 Series User manual

Viking

Viking Professional & Designer 325 Series User manual

Viking Professional VDB325 User guide

Viking

Viking Professional VDB325 User guide

Viking F20631E User manual

Viking

Viking F20631E User manual

Viking Professional & Designer 200 Series User manual

Viking

Viking Professional & Designer 200 Series User manual

Viking SHOWN 450E User manual

Viking

Viking SHOWN 450E User manual

Viking FDB451 Series User manual

Viking

Viking FDB451 Series User manual

Viking Designer DFB450 User manual

Viking

Viking Designer DFB450 User manual

Viking 7 Series User manual

Viking

Viking 7 Series User manual

Viking Designer DFB450 Assembly instructions

Viking

Viking Designer DFB450 Assembly instructions

Viking FDB451 Series User manual

Viking

Viking FDB451 Series User manual

Viking 100 Series User manual

Viking

Viking 100 Series User manual

Viking VDB451SS User manual

Viking

Viking VDB451SS User manual

Viking Professional & Designer 200 Series User manual

Viking

Viking Professional & Designer 200 Series User manual

Viking Professional & Designer 200 Series User manual

Viking

Viking Professional & Designer 200 Series User manual

Popular Dishwasher manuals by other brands

Beko BDSN15N20X user manual

Beko

Beko BDSN15N20X user manual

Bosch 300 Series use and care manual

Bosch

Bosch 300 Series use and care manual

Asko D1706 quick start guide

Asko

Asko D1706 quick start guide

Bosch SMS4ECW26M INFORMATION FOR USE

Bosch

Bosch SMS4ECW26M INFORMATION FOR USE

ETNA VWV149WIT/E01 Instructions for use

ETNA

ETNA VWV149WIT/E01 Instructions for use

Beko DIS15021 user manual

Beko

Beko DIS15021 user manual

Whirlpool ADG 8640 Quick reference guide

Whirlpool

Whirlpool ADG 8640 Quick reference guide

Philco PDT 67 DF owner's manual

Philco

Philco PDT 67 DF owner's manual

Indesit DIE 2B19 A Daily reference guide

Indesit

Indesit DIE 2B19 A Daily reference guide

Champion IUH 300 Specifications

Champion

Champion IUH 300 Specifications

Zanussi ZP 3796 Instruction booklet

Zanussi

Zanussi ZP 3796 Instruction booklet

John Lewis JLDWS 907 instruction manual

John Lewis

John Lewis JLDWS 907 instruction manual

GE GLD5808V Dimensions and installation information

GE

GE GLD5808V Dimensions and installation information

Miele G 7591 operating instructions

Miele

Miele G 7591 operating instructions

AEG FAVORIT 99009 user manual

AEG

AEG FAVORIT 99009 user manual

Zanussi Z 100 Use and care instructions

Zanussi

Zanussi Z 100 Use and care instructions

Electrolux ESI 67010 user manual

Electrolux

Electrolux ESI 67010 user manual

Electrolux ESL5310LO user manual

Electrolux

Electrolux ESL5310LO user manual

manuals.online logo
manuals.online logoBrands
  • About & Mission
  • Contact us
  • Privacy Policy
  • Terms and Conditions

Copyright 2025 Manuals.Online. All Rights Reserved.