manuals.online logo
Brands
  1. Home
  2. •
  3. Brands
  4. •
  5. Viking
  6. •
  7. Dishwasher
  8. •
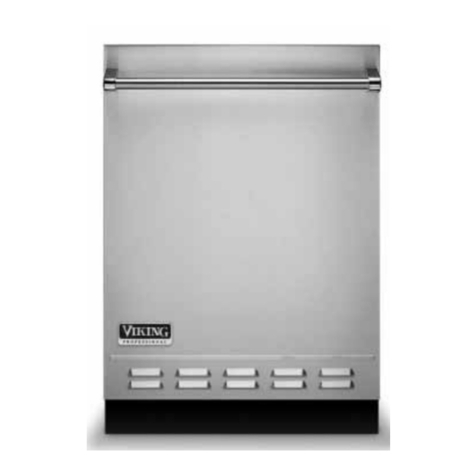
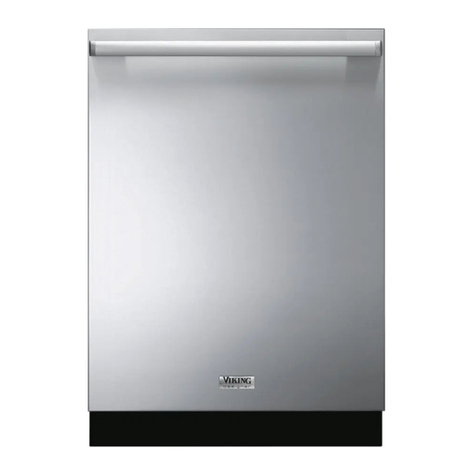
  9. Viking VDB451SS User manual

Viking VDB451SS User manual

Stainless steel
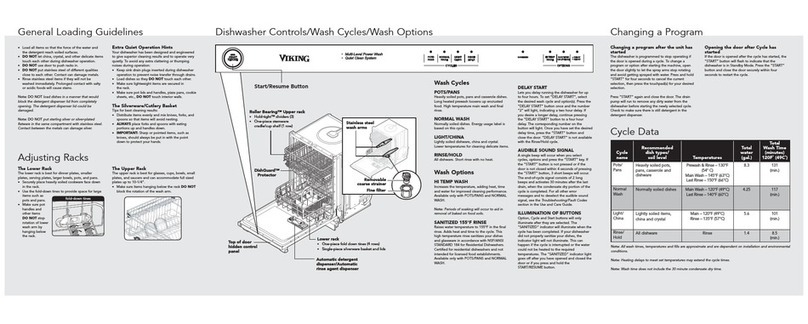
wash arms
Stainless steel
wash arms
Removable
coarse strainer
Removable
coarse strainer
Fine filterFine filter
Automatic detergent
dispenser/Automatic
rinse agent dispenser
Automatic detergent
dispenser/Automatic
rinse agent dispenser
Top of door
hidden control
panel
Top of door
hidden control
panel
Roller Bearing™ Upper rack
•Hold-tight™ dividers (3)
•One-piece stemware
cradle/cup shelf (2)
Roller Bearing™ Upper rack
•Hold-tight™ dividers (3)
•One-piece stemware
cradle/cup shelf (2)
Lower rack
•One-piece fold down tines (4 rows)
•Two-piece silverware basket with lids
Lower rack
•One-piece fold down tines (4 rows)
•Two-piece silverware basket with lids
DishGuard™
Protector
DishGuard™
Protector
Sliding Side
Utensil Basket
Sliding Side
Utensil Basket
Start/Resume Button
Wash Cycles
POTS/PANS
Heavily soiled pots, pans and casserole dishes.
Intense pressure, added wash time and high
temperatures.
NORMAL WASH
Normally soiled plates, glasses, bowls, and
lightly soiled pots and pans. Energy usage
label is based on this cycle.
LIGHT/CHINA
Lightly soiled items, china and crystal. Lower
temperatures and pressure levels for cleaning
delicate items.
FAST WASH
To remove light films and residue on dishes
and glassware. Short wash times and varying
pressures.
RINSE/HOLD
All dishware. Short rinse with no heat.
Wash Options
TOP WASH
Washes dishes on top rack only. Available on
Normal Cycle.
HI TEMP WASH
Increases the temperature, adding heat, time
and water for improved cleaning performance.
Available only with POTS/PANS and NORMAL
WASH.
Note: Periods of soaking will occur to aid in
removal of baked on food soils.
SANITIZED 155 F RINSE
Raises water temperature to 155 F in the final
rinse. Adds heat and time to the cycle. This
high temperature rinse sanitizes your dishes
and glassware in accordance with NSF/ANSI
STANDARD 184 for Residential Dishwashers.
Certified for residential dishwashers and not
intended for licensed food establishments.
Available only with POTS/PANS and NORMAL
WASH.
DELAY START
Lets you delay running the dishwasher. To set
“Delay Start”, select the desired wash cycle and
option(s). Press the “Delay Start” key once and
the number “2” will light, indicating a two hour
delay. If you desire a longer delay, continue
pressing the “Delay Start” key to the desired
delay time. The corresponding number on the
key will light. Once you have set the desired
delay time, press the “START” button and close
the door. “Delay Start” is not available with the
Rinse/Hold cycle.
AUDIBLE SOUND SIGNAL
A single beep will occur when you select
cycles, options and press the “START” key. If
the “START” button is not pressed or if the
door is not closed within 4 seconds of pressing
the “START” button, 3 short beeps will occur.
The end-of-cycle signal consists of 2 long
beeps and activates 30 minutes after the last
drain, when the condensate dry portion of the
cycle is completed. For all other error
messages and to deselect the audible sound
signal, see the Troubleshooting/Fault Codes
section in the Use and Care Guide.
ILLUMINATION OF BUTTONS
Option, Cycle and Start buttons will only
illuminate after they are selected. The
"SANITIZED" indicator will illuminate when the
cycle has been completed. If your dishwasher
did not properly sanitize your dishes, the
indicator light will not illuminate. This can
happen if the cycle is interrupted or the water
could not be heated to the required
temperatures. The "SANITIZED" indicator light
goes off after you have opened and closed the
door or if you press and hold the
START/RESUME button.
Cycle Data
Changing a program after the unit
has starte
The dishwasher is programmed to stop operating if
the door is opened during a cycle. To change a
program or option after starting the machine, open
the door slightly to let the spray arms stop rotating
and avoid getting sprayed with water. Press and hold
“START” for four seconds to cancel the current
selection. Then press the touchpad(s) for your
desired selection.
Press “START” again and close the door. The drain
pump will run to remove any dirty water from the
dishwasher before starting the newly selected cycle.
Check to make sure there is still detergent in the
detergent dispenser.
Opening the oor after Cycle
has starte
If the door is opened for longer than five seconds,
after the cycle has started, the ”START” button will
flash to indicate that the dishwasher is in Standby
Mode. Press the “START” button before closing the
door and the cycle will resume.
Power On Light
Ablue light will illuminate from the bottom middle of
the dishwasher kickplate when a cycle is running.
•Load all items so that the force of the water and
the detergent reach soiled surfaces.
•DO NOT let china, crystal, and other delicate items
touch each other during dishwasher operation.
• DO NOT use door to push racks in.
• DO NOT put stainless steel of different qualities
close to each other. Contact can damage metals.
•Rinse stainless steel items if they will not be
washed immediately. Prolonged contact with salty
or acidic foods will cause stains.
Note: DO NOT load dishes in a manner that would
block the detergent dispenser lid from completely
opening. The detergent dispenser could be
damaged.
Note: DO NOT put sterling silver or silver-plated
flatware in the same compartment with stainless steel.
Contact between the metals can damage silver.
Extra Quiet Operation Hints
Your dishwasher has been designed and engineered
to give superior cleaning results and to operate very
quietly. To avoid any extra clattering or thumping
noises during operation:
• Keep sink drain plugs inserted during dishwasher
operation to prevent noise transfer through drains.
•Load dishes so they do not touch each other.
•Make sure lightweight items are secured in
the rack.
• Make sure pot lids and handles, pizza pans, cookie
sheets, etc., DO NOT touch interior walls.
The Silverware/Cutlery Basket
Tips for Best Cleaning Results:
• Distribute items evenly and mix knives, forks, and
spoons so that items will avoid nesting.
•ALWAYS place forks and spoons with eating
portions up and handles down.
• Each compartment has a lid which will separate the
silverware for the best cleaning and drying results.
The lids also hold small, lightweight items in place.
•IMPORTANT: Sharp or pointed items, such as
knives, should always be put in with the point
down to protect your hands.
• Basket can be moved to upper rack or lower rack.
Adjusting Racks
The Lower Rack
The lower rack is best for dinner plates, smaller plates,
serving plates, larger bowls, pots, and pans.
• Securely place heavily soiled cookware face down in
the rack.
• Use the fold-down tines to provide space for large
items such as
pots and pans.
• Make sure pot
handles and
other items
DO NOT stop
rotation of lower
wash arm by
hanging below
the rack.
The Upper Rack
The upper rack is best for glasses, cups, bowls, small
plates, and saucers and can accommodate full-sized
plates up to 10-1/4”.
• Make sure small plastic items are held firmly in
place with Hold Tight™ dividers.
• Arrange
stemware
between prongs
of stemware
cradle so that
the stemware
cannot move
easily.
• Make sure items
hanging below
the rack DO NOT block the rotation of
the wash arm.
Changing a Program
General Loading Guidelines Dishwasher Controls/Wash Cycles/Wash Options
fold-down tines
fold-down tines
Note: Will perform properly if connected to cold” water - 50˚F (10˚C). Cycle times will be extended.
Note: All cycle times, temperatures and fills are approximate and are dependent on installation and
environmental conditions.
Note: Heating delays to meet set temperatures may extend cycle times.
Note: AirFlo™Gentle Drying will add approximately one hour to the total cycle time.
Cycle
name
Recommen e
ish types/
soil level Temperatures
Total
water
(gal.)
Total
Wash Time
(minutes)
120F˚ (49C˚)
Pots/
Pans
Heavily soiled pots,
pans and casserole
dishes
Main–145 F (63 C)
Rinse–150 F (66 C)
8.4 138
(min.)
Normal
Wash
Normally soiled plates,
glasses, bowls, and
lightly soiled pots and
pans
Main–120 F (49 C)
Rinse–140 F (60 C)
4.25 110
(min.)
Light/
China
Lightly soiled china
and crystal
Main–125 F (51.7 C)
Rinse–130 F (54 C)
5.4 112
(min.)
Fast
Wash
Lightly soiled dishware
and glassware
Main–130 F (54 C)
Rinse–135 F (57 C)
5.8 60
(min.)
Rinse/
Hold
All dishware Rinse 1.4 10
(min.)
F20892 EN (031312)
®
VIKING RANGE CORPORATION
111 Front Street • Greenwood, Mississippi
38930 USA • (662) 455-1200
Warning an Important Safety Instructions appearing
in this gui e are not meant to cover all possible
con itions an situations that may occur. Common
sense, caution, an care must be exercise when
installing, maintaining, or operating the appliance.
ALWAYS contact the manufacturer about problems or
conditions you do not understand.
Recognize Safety Symbols, Wor s, Labels
Rea all instructions before using the
ishwasher.
• This dishwasher must be properly connected to an
appropriate electrical supply, water supply, and
drain.
• The dishwasher must be securely mounted to the
cabinet.
• Use the dishwasher only for its intended function.
• Use only detergents and rinse agents
recommended for use in household dishwashers,
and store them in a safe and dry environment away
from the access of children.
• When loading items to be washed, place sharp
items so that they are not likely to damage the
door seal and load sharp knives with the handles
up to avoid the risk of personal injury.
•DO NOT wash plastic items unless marked
“dishwasher safe” or the equivalent.
•DO NOT operate your dishwasher unless all
enclosure panels are properly in place.
•DO NOT abuse, sit on or stand on the door or dish
rack of the dishwasher.
•DO NOT tamper with controls.
• To reduce the risk of injury, DO NOT allow children
to play in or on a dishwasher.
•If hot water has not been used recently (usually two
weeks or longer), hydrogen gases may buildup in
the water heater and the hot water pipes.
HYDROGEN GAS IS EXPLOSIVE. To prevent
injury or damage, before using your dishwasher,
turn on all hot water faucets and allow water to run
for several minutes before using your dishwasher.
This will allow gases to escape. DO NOT smoke or
use any open flames near the faucet while it is
open.
• When discarding an old dishwasher, ALWAYS
remove the door to prevent accidental entrapment.
• To prevent electrical shock, disconnect
electrical power supply to dishwasher before
attempting to service.
• For Grounding Instructions, please refer to
Installation Instructions or Installation Summary.
•DO NOT use door to push racks in.
It is your responsibility to be sure your dishwasher
• has been installed by a qualified installer
• has been properly grounded
• has been properly connected to electricity, water
and drain lines
• is properly maintained
• has had all shipping materials, packaging and
temporary labels removed.
Viking Quick Reference Guide
D A N G E R
Hazar s or unsafe practices which WILL result in
severe personal injury or eath
W A R N I N G
Hazar s or unsafe practices which COULD result
in eath severe personal injury or eath
CAUTION
Hazards or unsafe practices hich COULD
result in minor personal injury.
All safety messages will identify the hazard, tell you
how to reduce the chance of injury, and tell you what
can ha en if the instructions are not followed.
WARNING
To avoid the risk of fire, electrical shock, or injury
when using your dishwasher, follow basic recautions
including the following.
WARNING
De ending on cycles/o tions selected, the dishwasher
o erates at very high water tem eratures 155°F
(68°C). Use extreme caution when o ening unit or
handling dishes.
WARNING
DO NOT re air or re lace any art of the a liance
unless s ecifically recommended in the manual. All
other servicing should be referred to a qualified
authorized technician.
WARNING
NEVER o erate the dishwasher without the filters
in lace.
WARNING
To avoid the risk of ersonal injury due to steam
burns, o en door slowly to allow steam to esca e
before o ening com letely
Washing Recommendations
Materials Dishwasher safe? Comments
Aluminum Yes
Exceptions: anodized and
disposable aluminum
Anodized aluminum may fade or darken. Disposable
aluminum may contact other dishes and cause dark spots.
Cast iron Not recommended Seasoning will be removed and the cast iron will rust.
China/stoneware Yes
Exceptions: antique,
hand-painted, or gold leaf
China without decoration or with glaze covered patterns is
usually dishwasher safe. Antique, hand-painted and gold-leaf
china may discolor or fade.
Crystal Yes
Exceptions: antique, some
lead crystal
Position crystal so that it will not fall over or knock against
other dishes. Some types of lead crystal may etch
in dishwasher.
Flatware with
glued handles
Not recommended Certain adhesives may loosen and cause the handles to
come off.
Glass Yes
Exceptions: milk glass
(not recommended)
Milk glass may discolor with repeated washing.
Gold-plated
flatware
Not recommended Gold-plated flatware may discolor.
Knives Yes Position knives in large items tray so that blades are not
touching. Knives may become dull if the blades contact
other items.
Non-stick
coatings
Not recommended Coating may wear off with repeated washing.
Pewter/brass/
bronze
Not recommended Pewter, brass, and bronze may tarnish or pit.
Plastic Yes Disposable plastic cannot withstand high water temperature
or dishwasher detergent.
Stainless steel Yes Rinse stainless steel items if they will not be washed
immediately. Prolonged contact with salty or acidic foods
will stain. Position stainless steel pieces so they do not
contact dissimilar metals.
Silver/
silverplate
Yes Rinse silver/silverplate items if they will not be washed
immediately. Prolonged contact with salty or acidic foods
and foods containing sulfur will stain. Position stainless steel
pieces so they do not contact dissimilar metals.
Tin Not recommended Tin may rust.
Wood Not recommended Wash wood items by hand. Wood may warp, crack, or lose
its shape or finish in the dishwasher.
Most household plates, saucepans, and flatware are dishwasher safe. If you are unsure, check the manufacturer’s
recommendations before washing. You are responsible for what is washed in the dishwasher.
Important Safety Instructions
(Please Read and Save these Instructions)
A GFI shall be used if required by NFPA- 0 (National
Electric Code), federal/state/local laws, or local
ordinances.
• The required use of a GFI is normally related to the
location of a receptacle with respect to any
significant sources of water or moisture.
• Viking Range Corporation will NOT warranty any
problems resulting from GFI outlets which are not
installed properly or do not meet the requirements
below.
If the use of a GFI is required, it should be:
• Of the receptacle type (breaker type or portable
type NOT recommended)
• Used with permanent wiring only (temporary or
portable wiring NOT recommended)
• On a dedicated circuit (no other receptacles,
switches or loads in the circuit)
• Connected to a standard breaker of appropriate size
(GFI breaker of the same size NOT recommended)
• Rated for Class A (5 mA +/- 1 mA trip current) as per
UL 943 standard)
• In good condition and free from any loose-fitting
gaskets (if applicable in outdoor situations)
• Protected from moisture (water, steam, high
humidity) as much as reasonably possible
451 Series Built-In Dishwashers
Other manuals for VDB451SS

2

This manual suits for next models

1

Other Viking Dishwasher manuals

Viking Professional DFUD042P User manual

Viking

Viking Professional DFUD042P User manual

Viking RDDB201SS User manual

Viking

Viking RDDB201SS User manual

Viking Professional & Designer 200 Series User manual

Viking

Viking Professional & Designer 200 Series User manual

Viking 201 Series User manual

Viking

Viking 201 Series User manual

Viking DDB325SS User manual

Viking

Viking DDB325SS User manual

Viking Professional & Designer 200 Series User manual

Viking

Viking Professional & Designer 200 Series User manual

Viking Professional & Designer 450 Series User manual

Viking

Viking Professional & Designer 450 Series User manual

Viking DDB200SS Quick start guide

Viking

Viking DDB200SS Quick start guide

Viking RVDP324SS User manual

Viking

Viking RVDP324SS User manual

Viking VDB451SS User manual

Viking

Viking VDB451SS User manual

Viking Designer DDB200 User manual

Viking

Viking Designer DDB200 User manual

Viking 3 Series User manual

Viking

Viking 3 Series User manual

Viking VDB301SS User manual

Viking

Viking VDB301SS User manual

Viking 100 Series User manual

Viking

Viking 100 Series User manual

Viking Professional & Designer 200 Series User manual

Viking

Viking Professional & Designer 200 Series User manual

Viking Designer DFB450 User manual

Viking

Viking Designer DFB450 User manual

Viking SHOWN 450E User manual

Viking

Viking SHOWN 450E User manual

Viking Custom Front DFUD042 User manual

Viking

Viking Custom Front DFUD042 User manual

Viking RDDB301SS Assembly instructions

Viking

Viking RDDB301SS Assembly instructions

Viking VDW302WS User manual

Viking

Viking VDW302WS User manual

Viking Custom Front DFUD042 Assembly instructions

Viking

Viking Custom Front DFUD042 Assembly instructions

Viking Professional & Designer 200 Series User manual

Viking

Viking Professional & Designer 200 Series User manual

Viking FDB451 Series User manual

Viking

Viking FDB451 Series User manual

Viking DDB325SS Assembly instructions

Viking

Viking DDB325SS Assembly instructions

Popular Dishwasher manuals by other brands

Electrolux EI24ID50Q Use and care guide

Electrolux

Electrolux EI24ID50Q Use and care guide

Sharp QW-NA24F42DI-DE user manual

Sharp

Sharp QW-NA24F42DI-DE user manual

Zanussi Z 70 VS Use and care instructions

Zanussi

Zanussi Z 70 VS Use and care instructions

Whirlpool ADP 4740 Quick reference guide

Whirlpool

Whirlpool ADP 4740 Quick reference guide

Beko DFS04C10W user manual

Beko

Beko DFS04C10W user manual

Tricity Bendix DH040 Instruction booklet

Tricity Bendix

Tricity Bendix DH040 Instruction booklet

Miele G 7310 operating instructions

Miele

Miele G 7310 operating instructions

Moyerdiebel 383HT M2 Installation, Operation, Cleaning and Maintenance Manual

Moyerdiebel

Moyerdiebel 383HT M2 Installation, Operation, Cleaning and Maintenance Manual

IKEA RENODLAD manual

IKEA

IKEA RENODLAD manual

Ariston LFF 81 operating instructions

Ariston

Ariston LFF 81 operating instructions

AEG OKO FAVORIT 60850 i User instructions

AEG

AEG OKO FAVORIT 60850 i User instructions

Maytag MDB4709PAB0 User instructions

Maytag

Maytag MDB4709PAB0 User instructions

Asko DOD651PHXXLS.U operating instructions

Asko

Asko DOD651PHXXLS.U operating instructions

Candy 32900048 CDI45 Service manual

Candy

Candy 32900048 CDI45 Service manual

Bosch SKS40E02 operating instructions

Bosch

Bosch SKS40E02 operating instructions

Kenmore 587.14131, 587.14132, 587.14134, 587.14139 Use & care guide

Kenmore

Kenmore 587.14131, 587.14132, 587.14134, 587.14139 Use & care guide

Zanussi DWS 949 Instruction booklet

Zanussi

Zanussi DWS 949 Instruction booklet

arcelik 6566 I user manual

arcelik

arcelik 6566 I user manual

manuals.online logo
manuals.online logoBrands
  • About & Mission
  • Contact us
  • Privacy Policy
  • Terms and Conditions

Copyright 2025 Manuals.Online. All Rights Reserved.