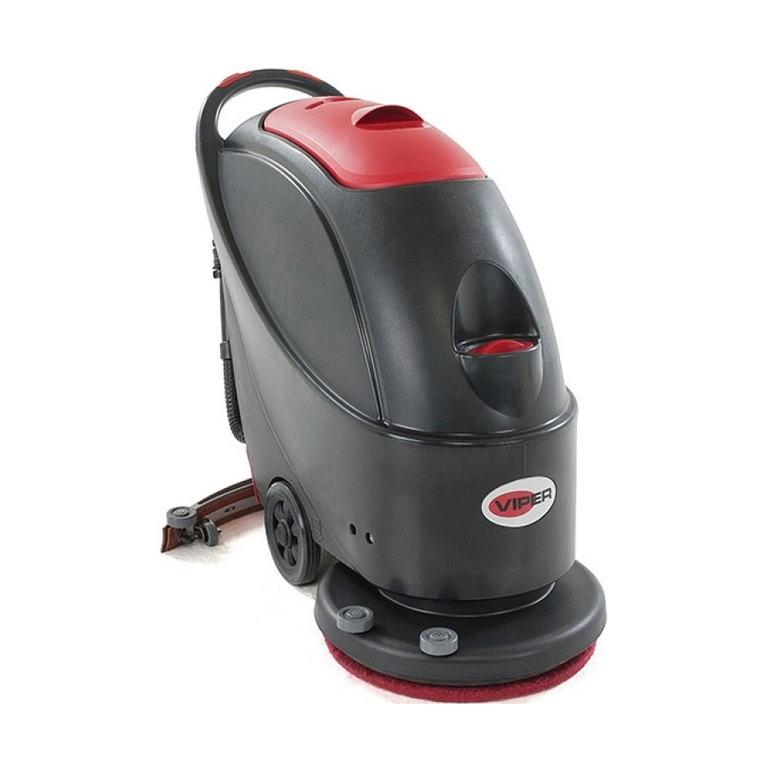
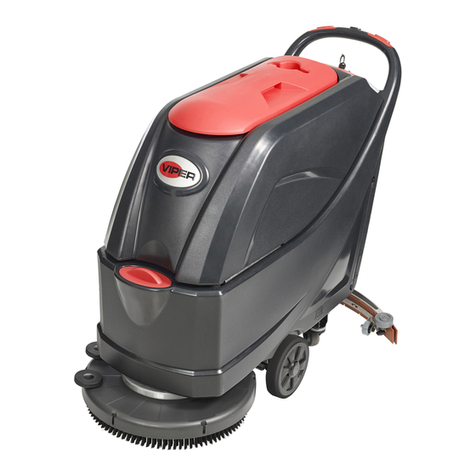
Viper AS380/15B-AU User manual

VF89865 REV:01 (2015.7.13)
AS380/15B-AU
User Manual
Original instructions
Company information:
www.vipercleaning.eu
info-eu@vipercleaning.com


INTRODUCTION
NOTE
The numbers in brackets refer to the components shown in Machine Description chapter.
MANUAL PURPOSE AND CONTENTS
The purpose of this Manual is to provide the operator with all necessary information to use the machine properly, in a safe and
autonomous way. It contains information about technical data, safety, operation, storage, maintenance, spare parts and disposal.
%HIRUHSHUIRUPLQJDQ\SURFHGXUHRQWKHPDFKLQHWKHRSHUDWRUVDQGTXDOL¿HGWHFKQLFLDQVPXVWUHDGWKLV0DQXDOFDUHIXOO\&RQWDFW
1LO¿VNLQFDVHRIGRXEWVFRQFHUQLQJWKHLQWHUSUHWDWLRQRIWKHLQVWUXFWLRQVDQGIRUDQ\IXUWKHULQIRUPDWLRQ
TARGET
7KLV0DQXDOLVLQWHQGHGIRURSHUDWRUVDQGWHFKQLFLDQVTXDOL¿HGWRSHUIRUPWKHPDFKLQHPDLQWHQDQFH
7KHRSHUDWRUVPXVWQRWSHUIRUPSURFHGXUHVUHVHUYHGIRUTXDOL¿HGWHFKQLFLDQV1LO¿VNZLOOQRWEHDQVZHUDEOHIRUGDPDJHVFRPLQJ
from the non-observance of this prohibition.
HOW TO KEEP THIS MANUAL
The Instructions for use Manual must be kept near the machine, inside an adequate case, away from liquids and other substances
that can cause damage to it.
DECLARATION OF CONFORMITY
7KH'HFODUDWLRQRI&RQIRUPLW\VXSSOLHGZLWKWKHPDFKLQHFHUWL¿HVWKHPDFKLQHFRQIRUPLW\ZLWKWKHODZLQIRUFH
NOTE
Two copies of the original declaration of conformity are provided together with the machine documentation.
IDENTIFICATION DATA
The machine serial number and model name are marked on the plate (4).
Product number and year of production are marked on the same plate.
7KLVLQIRUPDWLRQLVXVHIXOZKHQUHTXLULQJPDFKLQHVSDUHSDUWV8VHWKHIROORZLQJWDEOHWRZULWHGRZQWKHPDFKLQHLGHQWL¿FDWLRQGDWD
MACHINE model
PRODUCT code
MACHINE serial number
OTHER REFERENCE MANUALS
– Electronic battery charger Manual, to be considered as integral part of this Manual
– Spare Parts List (supplied with the machine)
– 6HUYLFH0DQXDOWKDWFDQEHFRQVXOWHGDW1LO¿VN6HUYLFH&HQWHUV
SPARE PARTS AND MAINTENANCE
$OOQHFHVVDU\RSHUDWLQJPDLQWHQDQFHDQGUHSDLUSURFHGXUHVPXVWEHSHUIRUPHGE\TXDOL¿HGSHUVRQQHORUE\1LO¿VN6HUYLFH
Centers. Only original spare parts and accessories must be used.
&RQWDFW1LO¿VNIRUVHUYLFHRUWRRUGHUVSDUHSDUWVDQGDFFHVVRULHVVSHFLI\LQJWKHPDFKLQHPRGHOSURGXFWFRGHDQGVHULDOQXPEHU
CHANGES AND IMPROVEMENTS
1LO¿VNFRQVWDQWO\LPSURYHVLWVSURGXFWVDQGUHVHUYHVWKHULJKWWRPDNHFKDQJHVDQGLPSURYHPHQWVDWLWVGLVFUHWLRQZLWKRXWEHLQJ
REOLJHGWRDSSO\VXFKEHQH¿WVWRWKHPDFKLQHVWKDWZHUHSUHYLRXVO\VROG
$Q\FKDQJHDQGRUDGGLWLRQRIDFFHVVRU\PXVWEHDSSURYHGDQGSHUIRUPHGE\1LO¿VN
1
USER MANUAL

2
OPERATION CAPABILITIES
7KH6&VFUXEEHUGU\HULVXVHGWRFOHDQVFUXEELQJDQGGU\LQJVPRRWKDQGVROLGÀRRUVLQFLYLORULQGXVWULDOHQYLURQPHQWXQGHU
VDIHRSHUDWLRQFRQGLWLRQVE\DTXDOL¿HGRSHUDWRU
7KHVFUXEEHUGU\HUFDQQRWEHXVHGIRU¿WWHGFDUSHWDQGFDUSHWFOHDQLQJ
CONVENTIONS
Forward, backward, front, rear, left or right are intended with reference to the operator’s position, that is to say in driving position
with the hands on the handlebar (1).
UNPACKING/DELIVERY
To unpack the machine, carefully follow the instructions on the packing.
When the machine is delivered, check that the packing and the machine were not damaged during transportation.
,QFDVHRIYLVLEOHGDPDJHVNHHSWKHSDFNLQJDQGKDYHLWFKHFNHGE\WKHFDUULHUWKDWGHOLYHUHGLW&DOOWKHFDUULHULPPHGLDWHO\WR¿OO
in a damage claim.
Please check that the following items have been supplied with the machine:
– Technical documents:
Scrubber-dryer Instructions for use Manual
Electronic battery charger manual (if installed)
Scrubber-dryer Spare Parts List
SAFETY
The following symbols indicate potentially dangerous situations. Always read this information carefully and take all necessary
precautions to safeguard people and property.
The operator’s cooperation is essential in order to prevent injury. No accident prevention program is effective without the total
cooperation of the person responsible for the machine operation. Most of the accidents that may occur in a factory, while working
or moving around, are caused by failure to comply with the simplest rules for exercising prudence. A careful and prudent operator is
the best guarantee against accidents and is essential for successful completion of any prevention program.
VISIBLE SYMBOLS ON THE MACHINE
WARNING!
Carefully read all the instructions before performing any operation on the machine.
WARNING!
Do not wash the machine with direct or pressurized water jets.
max.2%
WARNING!
'RQRWXVHWKHPDFKLQHRQVORSHVZLWKDJUDGLHQWH[FHHGLQJWKHVSHFL¿FDWLRQV
USER MANUAL

3
SYMBOLS THAT APPEAR ON THIS MANUAL
DANGER!
It indicates a dangerous situation with risk of death for the operator.
WARNING!
It indicates a potential risk of injury for people.
CAUTION!
It indicates a caution or a remark related to important or useful functions.
Pay careful attention to the paragraphs marked by this symbol.
NOTE
It indicates a remark related to important or useful functions.
CONSULTATION
It indicates the necessity to refer to the Instructions for use Manual before performing any procedure.
GENERAL INSTRUCTIONS
6SHFL¿FZDUQLQJVDQGFDXWLRQVWRLQIRUPDERXWSRWHQWLDOGDPDJHVWRSHRSOHDQGPDFKLQHDUHVKRZQEHORZ
DANGER!
–Before performing any maintenance, repair, cleaning or replacement procedure, remove the ignition key and
disconnect the battery connector.
–This machine must be used by properly trained operators only.
–Do not wear jewels when working near electrical components.
–Do not work under the lifted machine without supporting it with safety stands.
–'RQRWRSHUDWHWKHPDFKLQHQHDUWR[LFGDQJHURXVÀDPPDEOHDQGRUH[SORVLYHSRZGHUVOLTXLGVRUYDSRXUV
This machine is not suitable for collecting dangerous powders.
–:KHQXVLQJOHDG:(7EDWWHULHVNHHSVSDUNVÀDPHVDQGVPRNLQJPDWHULDOVDZD\IURPWKHEDWWHULHV'XULQJ
the normal operation explosive gases are released.
–When using lead (WET) batteries, battery charging produces highly explosive hydrogen gas. During battery
charging, lift the recovery tank and perform this procedure in well-ventilated areas and away from naked
ÀDPHV
WARNING!
–Carefully read all the instructions before performing any maintenance/repair procedure.
–The machine ignition key has a built-in magnet. Do not place objects having magnetic bands (such as credit
cards, electronic keys, phone cards) near the key. The built-in magnet can damage or erase the data stored
on the magnetic bands.
–Before using the battery charger, ensure that frequency and voltage values, indicated on the machine serial
number plate, match the electrical mains voltage.
–Do not pull or carry the machine by the battery charger cable and never use the battery charger cable as
a handle. Do not close a door on the battery charger cable, or pull the battery charger cable around sharp
edges or corners. Do not run the machine on the battery charger cable.
–Keep the battery charger cable away from heated surfaces.
–Do not charge the batteries if the battery charger cable or the plug are damaged.
–7RUHGXFHWKHULVNRI¿UHHOHFWULFVKRFNRULQMXU\GRQRWOHDYHWKHPDFKLQHXQDWWHQGHGZKHQLWLVSOXJJHG
in. Before performing any maintenance procedure, disconnect the battery charger cable from the electrical
mains.
–Do not smoke while charging the batteries.
–To avoid any unauthorized use of the machine, remove the ignition key.
–Do not leave the machine unattended without being sure that it cannot move independently.
USER MANUAL

4
WARNING!
–Always protect the machine against the sun, rain and bad weather, both under operation and inactivity
FRQGLWLRQ6WRUHWKHPDFKLQHLQGRRUVLQDGU\SODFH7KLVPDFKLQHPXVWEHXVHGLQGU\FRQGLWLRQVLWPXVW
not be used or kept outdoors in wet conditions.
–Before using the machine, close all doors and/or covers as shown in the Instructions for use Manual.
–This machine is not intended for use by persons (including children) with reduced physical, sensory or
mental capabilities, or lack of experience and knowledge, unless they have been given supervision or
instruction concerning use of the machine by a person responsible for they safety.
Children should be supervised to ensure that they do not play with the machine.
–&ORVHDWWHQWLRQLVQHFHVVDU\ZKHQXVHGQHDUFKLOGUHQ8VHRQO\DVVKRZQLQWKLV0DQXDO8VHRQO\1LO¿VN¶V
recommended accessories.
–Check the machine carefully before each use, always check that all the components have been properly
assembled before use. If the machine is not perfectly assembled it can cause damages to people and
properties.
–Take all necessary precautions to prevent hair, jewels and loose clothes from being caught by the machine
moving parts.
–Do not use the machine on incline.
–Do not tilt the machine more than the angle indicated on the machine itself, in order to prevent instability.
–Do not use the machine in particularly dusty areas.
–Use the machine only where a proper lighting is provided.
–While using this machine, take care not to cause damage to people or objects.
–Do not bump into shelves or scaffoldings, especially where there is a risk of falling objects.
–Do not lean liquid containers on the machine, use the relevant can holder.
–The machine working temperature must be between 0 °C and +40 °C.
–The machine storage temperature must be between 0 °C and +40 °C.
–The humidity must be between 30 % and 95 %.
–:KHQXVLQJÀRRUFOHDQLQJGHWHUJHQWVIROORZWKHLQVWUXFWLRQVRQWKHODEHOVRIWKHGHWHUJHQWERWWOHV
–7RKDQGOHÀRRUFOHDQLQJGHWHUJHQWVZHDUVXLWDEOHJORYHVDQGSURWHFWLRQV
–Do not use the machine as a means of transport.
–'RQRWDOORZWKHEUXVKSDGWRRSHUDWHZKLOHWKHPDFKLQHLVVWDWLRQDU\WRDYRLGGDPDJLQJWKHÀRRU
–,QFDVHRI¿UHXVHDSRZGHU¿UHH[WLQJXLVKHUQRWDZDWHURQH
–Do not tamper with the machine safety guards and follow the ordinary maintenance instructions
scrupulously.
–Do not allow any object to enter into the openings. Do not use the machine if the openings are clogged.
Always keep the openings free from dust, hairs and any other foreign material which could reduce the air
ÀRZ
–'RQRWUHPRYHRUPRGLI\WKHSODWHVDI¿[HGWRWKHPDFKLQH
–When the machine is to be pushed for service reasons (missing or discharged batteries, etc.), the speed
must not exceed 4 km/h.
–This machine cannot be used on roads or public streets.
–Pay attention during machine transportation when temperature is below freezing point. The water in the
recovery tank or in the hoses could freeze and seriously damage the machine.
–8VHEUXVKHVDQGSDGVVXSSOLHGZLWKWKHPDFKLQHRUWKRVHVSHFL¿HGLQWKH,QVWUXFWLRQVIRUXVH0DQXDO8VLQJ
other brushes or pads could reduce safety.
–In case of machine malfunctions, ensure that these are not due to lack of maintenance. If necessary, request
assistance from the authorised personnel or from an authorised Service Center.
–If parts must be replaced, require ORIGINAL spare parts from an Authorised Dealer or Retailer.
–To ensure machine proper and safe operation, the scheduled maintenance shown in the relevant chapter of
this Manual, must be performed by the authorised personnel or by an authorised Service Center.
–Do not wash the machine with direct or pressurised water jets, or with corrosive substances.
–The machine must be disposed of properly, because of the presence of toxic-harmful materials (batteries,
etc.), which are subject to standards that require disposal in special centres (see Scrapping chapter).
USER MANUAL
5
+
MACHINE SET UP&INSTALLATION
UNCRATING MACHINE
e sure and check packing carton for any damage. Immediately report any damage to carrier.
Check contents of package to ensure that the following items are included:
1. Machine
2. atteries(x2)
3. Squeegee assembly
4. Scrubber-dryer User Manual
5. Electric attery Charger Manual
(
if equipped
)
6. connecting wire for battery and charger (if equipped)
7. brush or pad driver
(
if equipped
)
BATTERY DISASSMBLY AND INSTALLATION
1. Switch off the main switch (47).
2. Remove the recovery tank (2) as shown in the relevant paragraph.
3. Unscrew the bolt from batteries (16), then remove or change.
4. Install the batteries on the machine according to the diagram below.
5. Install the recovery tank.
WARNING
Do not connect to+, or - to-, when disassembly or install the batteries. It is very dangerous.
Battery charging
Charge the batteries (see the procedure in Maintenance chapter).
MACHINE SET UP
Pre-operation checks
1. Sweep or dust mop the surface to be cleaned.
2. Check that squeegee is properly installed.
3. Lower the squeegee (33) with the lever (26).
4. Check battery are fully charged.(see ATTERY CHARGIN)
5. Check that brush/pad is properly installed.
Brush/Pad driver installation and disassembly
Figure 1
USER MANUAL

6
NOTE
Only install manually. If auto-installation, it will wear brush hub.
Make sure that the tanks are empty before disassembling the brush.
1. Turn off the machine.
2. Lay down the machine in this position as indicated in the figure2, Pull up the lift lever (26) to raise
the squeegee up (33).
3. Mount the brush or pad driver onto the drive wheel hub and then rotate counterclockwise until it
locks, as indicated in the figure 3.
4. To remove the brush/pad, rotate the brush/pad clockwise until it is released from drive wheel hub.
WARNING
Do not turn on the machine in this position as below. he brush/pad could disengage and cause injury.
Squeegee installation
1. Turn off the machine (47).
2. Pull down the squeegee lift lever (26) to put down the squeegee on the “working” position.
3. Lay down the machine in this position as indicated in the figure2.
4. Loosen the two knobs (55) on the squeegee and slide the squeegee into the slots of squeegee
brackets
Tighten the knobs securely (unscrew the knobs, if disassembly).
5. To replace the front/rear squeegee (56/57), unscrew the thumb nut (37).
Figure 2
Figure 3
USER MANUAL

7
Solution tank filling
NOTE
he machine can be filled with a with pipe or bucket. Do not remove the Solution filter (21) while
filling.
1. Fill water into solution tank (3) from the inlet (20) through pipe or bucket
2. Do not fill the solution tank completely, leave a few centimeters from the edge.
3. The water temperature must not exceed 40
℃
.
CAUTION!
Use only low-foam and non-flammable detergents, intended for automatic scrubber applications
Solution tank draining
NOTE
Solution tank should be drained and cleaned after each scrubber operation is
completed.
1
.
Unscrew the drain cap (22) on the bottom of solution tank. The solution/water will flow
freely into a bucket or floor drain.
2
.
Rinse the solution tank with clean water after every use. This will help prevent chemical
build up and clogging of the solution lines
3
.
Screw up the drain cap (22).
Recovery tank draining
NOTE
Recovery tank should be drained and cleaned after each scrubber operation is
completed.
1
.
Turn the latch (17) off the recovery tank, take off the recovery tank from machine by
grasping two grooves of tank. Open the lid (1) and overturn the recovery tank to
drain the dirty water into a container, or unscrew the drain cap (22) to let water pipe
out to a bucket.
2
.
Clean and Rinse the recovery tank with clean water after every use.
3
.
Re-place the recovery tank on the machine and turn the latch (17) to lock the tank..
MACHINE OPERATION
1
.
Set the handle to a comfortable height by pressing level (25).
2
.
Lower the squeegee (33) onto the floor by pulling down the lift mechanism (26).
USER MANUAL
8
3
.
Turn on the main switch (47).
4
.
Turn on the brush motor switch (48) and the solution switch (50), the indicate light will be on.
5
.
Turn on the vacuum motor switch (49), the indicate light will be on.
6
.
If necessary, adjust the water flow by turn the ball valve (31) manually
7
.
Pull one or both operating triggers (24), and then brush will start to spin, solution will begin to flow.
Move the machine and start cleaning,
NOTE
If the battery indicator light (51 is green, the machine can be used. If it is yellow or red, the
batteries must be charged.
CAUTION!
Before lifting the brush, turn it off by pressing the switch (47).
CAUTION!
When cleaning excessively aggressive floors or others this could cause the machine do not work, brush
motor and vacuum indicators on the Control panel(46) flashing simultaneously. It means the machine
being overloaded.
Please turn off all the switches on the Control panel (46).
CAUTION!
Do not use the machine with discharged batteries to avoid damaging the batteries and reducing the
battery life.
AFTER USING THE MACHINE
After scrubbing, please proceed with below actions before leaving the machine:
1
.
Remove the brush/pad-holder.
2
.
Empty the tanks as shown in the previous parsagraph.
3
.
Perform the daily maintenance procedures (see the maintenance chapter)
4
.
Store the machine in a clean and dry place, with the brush/pad-holder and the squeegee
5
.
If storing in an area which may reach freezing temperatures, be sure to drain all fluids from the
machine prior to storage. any damage caused by freezing temperatures will not be covered by the
warranty.
MACHINE NOT BEING USED FOR LONG PERIODS
If the machine is not going to be used for more than 30days, please proceed with below actions:
1. Perform the procedures shown in ‘After Using the Machine paragraph’.
2. Disconnect the battery connector.
MAINTENANCE
The lifespan of the machine and its maximum operating safety are ensured by correct and regular
maintenance. The following chart provides the scheduled maintenance. The intervals shown may vary
according to particular working conditions, which will be defined by the person in charge of the
maintenance.
WARNING
Maintenance procedures must be performed with the machine switched off and the batteries/battery
charger cable disconnected. Moreover, carefully read the instruction in the Safety chapter.
All scheduled or extraordinary maintenance procedures must be performed by qualified personnel, or by
USER MANUAL

9
an authorized Service Center.
This Manual describes only the easier and most common maintenance procedures.
For other maintenance procedures shown in the Scheduled Maintenance Table, refer to the Service
Manual that can be consulted at any Service Center.
SCHEDULED MAINTENANCE TABLE
Procedure Daily, after
using the
machine
Weekly Every six
mouths
yearly
attery charging
Squeegee cleaning
rush cleaning
Tank and vacuum grid with float cleaning, the
cover gasket check
Squeegee blade check and replacement
Solution filter cleaning
Out-water pipe filter cleaning
Screw and nut tightening check (1)
rotary parts getting lubricant (1)
rush/Pad-holder motor carbon brush check or
replacement
(2)
Vacuum system motor carbon brush check or
replacement
(2)
(1) And after the first 8 working hours.
(2) This maintenance procedure must be performed by an authorized viper Service Center.
BATTERY CHARGING
NOTE
Charge the batteries when the yellow or red indicator (51),or at the end of every working cycle
.
CAUTION!
Keeping the batteries charged make their life last longer.
CAUTION!
If the machine is not equipped with on-board battery charger, choose an external battery charger suitable
for the type of batteries installed.
WARNING!
Please use viper approved charger to charge the battery
WARNING
!
Pay careful attention when charging WE batteries as there may be battery fluid leakages. he battery
fluid is corrosive. If it comes in contact with skin or eyes, rinse thoroughly with water and consult a
physician.
USER MANUAL

10
1. Place charger and machine in a well ventilated area.
2. Turn machine off (47).
3. Take away the recovery tank (2), Exposing battery compartment.
4. Plug the charging cable to the grounded wall outlet (100v~240v)..
Connect the charging cable to the machine socket.
5. The charging indicator light (30) turn on means It is in charging, green light means battery charging
is completed.
6. Upon the completion of charging, first unplug the charging cable from the wall outlet and then
disconnect from machine.
7. Replace the recovery tank.
NOTE
For further information about the operation of the battery charger (29), see the relevant paragraph.
SQUEEGEE CLEANING
NOTE
The squeegee must be clean and its blades must be in good condition in order to
getting a good drying performance.
CAUTION!
It is advisable to wear protective gloves when cleaning the squeegee because there may be sharp debris.
SQUEEGEE BLADE CHECK AND REPLACEMENT
1. Take off the squeegee as shown in the previous paragraph.
2. Check to see if the edge of the front/rear blades are cracked or split, if necessary replace them with
new.
3. Unscrew six the thumb nut (37) to get off the blades.
4. Check the front/rear blades for integrity, cut and tears. If they are not adequate, overturn or replace
them.
5. Install the squeegee in the reverse order of removal.
BRUSH /PAD DRIVER CLEANING
CAUTION!
It is advisable to wear protective gloves when cleaning the brush/pad because there may be sharp debris.
1. Remove the brush/pad as shown in the previous paragraph.
2. Clean and wash the brush/pad with water and detergent.
3. Check the brush bristles for integrity and wearing status; if necessary, replace the brush.
4. Check the pad for wearing status; if necessary, replace the pad driver.
TANK/VACUUM GRID WITH FLOAT CLEANING AND COVER
GASKET CHECK
CAUTION!
It is advisable to wear protective gloves when cleaning the tank and vacuum/suction assembly because
there may be sharp debris.
USER MANUAL
11
1. Move the machine to the appointed disposal area.
2. Turn off the main switch (47).
3. Take off the recovery tank (2), clean and rinse both solution/recovery tank, and drain out.
4. Take off all vacuum kits, gasket, filter, clean and re-install.
5. Check the recovery tank lids gasket ring and the vacuum rubber connector (18) between two tanks
are integrity or not..
NOTE
The gasket ring of recovery tank and the rubber connector between two tanks create
vacuum in the tank. If necessary, replace them.
MACHINE STRUCTURE
1. Recovery tank lid
2. Recovery tank
3. Solution tank
4. rush cover
5. Protective rollers
6. rush
7. Front handle shell
8. Control panel
9. Rear handle shell
10. Handle rubber
11. Handle iron pipe
12. Squeegee vacuum assembly
13. Squeegee suction assembly
14. Left positioning
15. Right positioning
16. atteries
17. Latch
18. Rubber sealing
19. Limit hose joint
20. Inlet
21. Solution filter
22. Solution tank drain
23. Wheels on fixed axle
24. Handle left and right
25. Handle rotate lever
26. Squeegee lift lever
27. Squeegee string
28. ox circuit
29. Charger
30. attery charge indicator
31. Solution flow control lever
32. Electromagnetic valve data
33. Squeegee
USER MANUAL

12
34. Squeegee hose
35. Squeegee wheels
36. Axle
37. Thumb nut
38. Vacuum system motor
39. rush motor
40. Drive belt
41. elt
42. Squeegee rotation plate
43. Squeegee lift plate
44. Squeegee fixing plate
45. Motor fixing plate
USER MANUAL

13
USER MANUAL

14
Control panel
46. Control panel
51. Electric quantity indicator
47. Main switch
52. rush motor indicator
48. rush motor switch
53. Vacuum motor indicator
49. Vacuum motor switch
54. Suction Electromagnetic valve data indicator
50. Suction Electromagnetic valve data switch
TECHINICAL DATA
Machine length*width*height 770x500x550MM
Solution tank capacity 15L
Recovery tank capacity 15L
Wheel diameter 254MM
rush motor data 24V 250W
Vacuum motor data 24V 300W
Electromagnetic valve data 24V
Maximum gradient 2%
Sound lever 68 d A
atteries data (2X12V) 24V 35Ah/20h
Power cable length /
atteries spec 196 x 130 x 175mm
Working capacity, up to 1000mm H
2
O
Cleaning productivity 750m
2
/hour
Squeegee width 490mm
rush diameter 380mm
rush rpm 150rpm
Charger
Input 100-240
Vac, 50-60HZ
Output 24Vdc, 5A
Operating Weight 60kg
Gross Weight 65kg
Carton spec 780x145x590MM
USER MANUAL

15
TROUBLESHOOTING
Trouble Possible Cause Remedy
The machine does not work,
indicator light (51) do not turns on
The battery connector is disconnected Connect
The batteries are completely discharged Charge the batteries
The power line disconnected from the
power
Connect
The machine does not work,
indicator light(51) display red
The batteries are discharged Charge the batteries
rush motor does not work, brush
indicator light (52) do not turns on
The PC or key board is faulty Change the PC or key board
rush motor does not work, brush
indicator lights (52) flash
The deck motor is overloaded Use less aggressive brushes
suitable for the floor to be cleaned
There are foreign materials(tangled
threads,etc)preventing the brush from
rotating
Clean the brush hub
Vacuum system motor does not
work, vacuum motor indicator light
(53) do not turns on
The PC or key board is faulty Change the PC or key board
Vacuum system motor does not
work, brush indicator lights (53)
flash
The vacuum system motor is overloaded Check the vacuum system motor
The suction power is insufficient The recovery tank is full. Empty the recovery tank.
The hose is disconnected from the
squeegee
connect
Vacuum assembly is clogged Clean or check
The squeegee is dirty, or the squeegee
blades are worn or damaged
Clean and check the squeegee
The recovery tank do not limited Lock the latch(17)
The tank cover is not properly closed, or
the gasket is damaged
Close the cover properly or
replace the gasket
Squeegee adjustment piece (58) not set at
an appropriate position
Adjust the screw nut (59) to the
appropriate position
The solution flow is insufficient.
The solution is empty Fill the tank
Solution flow control valve(31) is block
up
Clean the valve
The solution is dirty Empty the solution, clean the tank
and refill with clean solution
The squeegee leaves marks on the
floor.
There is debris under the squeegee blades Remove the debris
The squeegee blades are worn, chipped
or torn
Replace the blades
USER MANUAL

AUSTRALIA:
Nilfisk Pty Ltd
Unit 1/13 Bessemer Street
Blacktown NSW 2148
Phone: 1300 556 710
E-mail: [email protected]
NEW ZEALAND:
Nilfisk Limited
Suite F, Building E
42 Tawa Drive
Albany
Auckland 0632
Phone +64 9414 1996

Company information:
www.vipercleaning.eu
info-eu@vipercleaning.com
Table of contents
Other Viper Scrubber manuals

Viper
Viper AS1050R User manual

Viper
Viper AS380/15C-EU User manual

Viper
Viper AS710R User manual

Viper
Viper AS5160 User manual

Viper
Viper FANG 18 C User manual

Viper
Viper AS530R User manual

Viper
Viper FANG 18 C User manual

Viper
Viper AS510B User manual

Viper
Viper AS430C-US User manual

Viper
Viper AS430C User manual

Viper
Viper FANG 20 User manual

Viper
Viper FANG 32T-EU User manual

Viper
Viper AS510B User manual

Viper
Viper FANG 20T User manual

Viper
Viper AS430C User manual

Viper
Viper AS5160 User manual

Viper
Viper AS5160-US User manual

Viper
Viper FANG 20HD-EU User manual

Viper
Viper AS380/15B-EU User manual

Viper
Viper AS5160 User manual