VIPowER Hi-Speed External Drive USB 2.0 User manual

USER MANUAL
www.vipower.com
ViPowER
External Drive

CONTENTS
1. INTRODUCTION …………....…………………………………….……1
2. SYSTEM REQUIREMENTS ………….....………………………….…...1
3. HARDWARE INSTALLATION …...................................................................1
4. DRIVERS INSTALLATION …...................................………………..……2
4.1 DRIVERS INSTALLATION (AT2).............................................................3
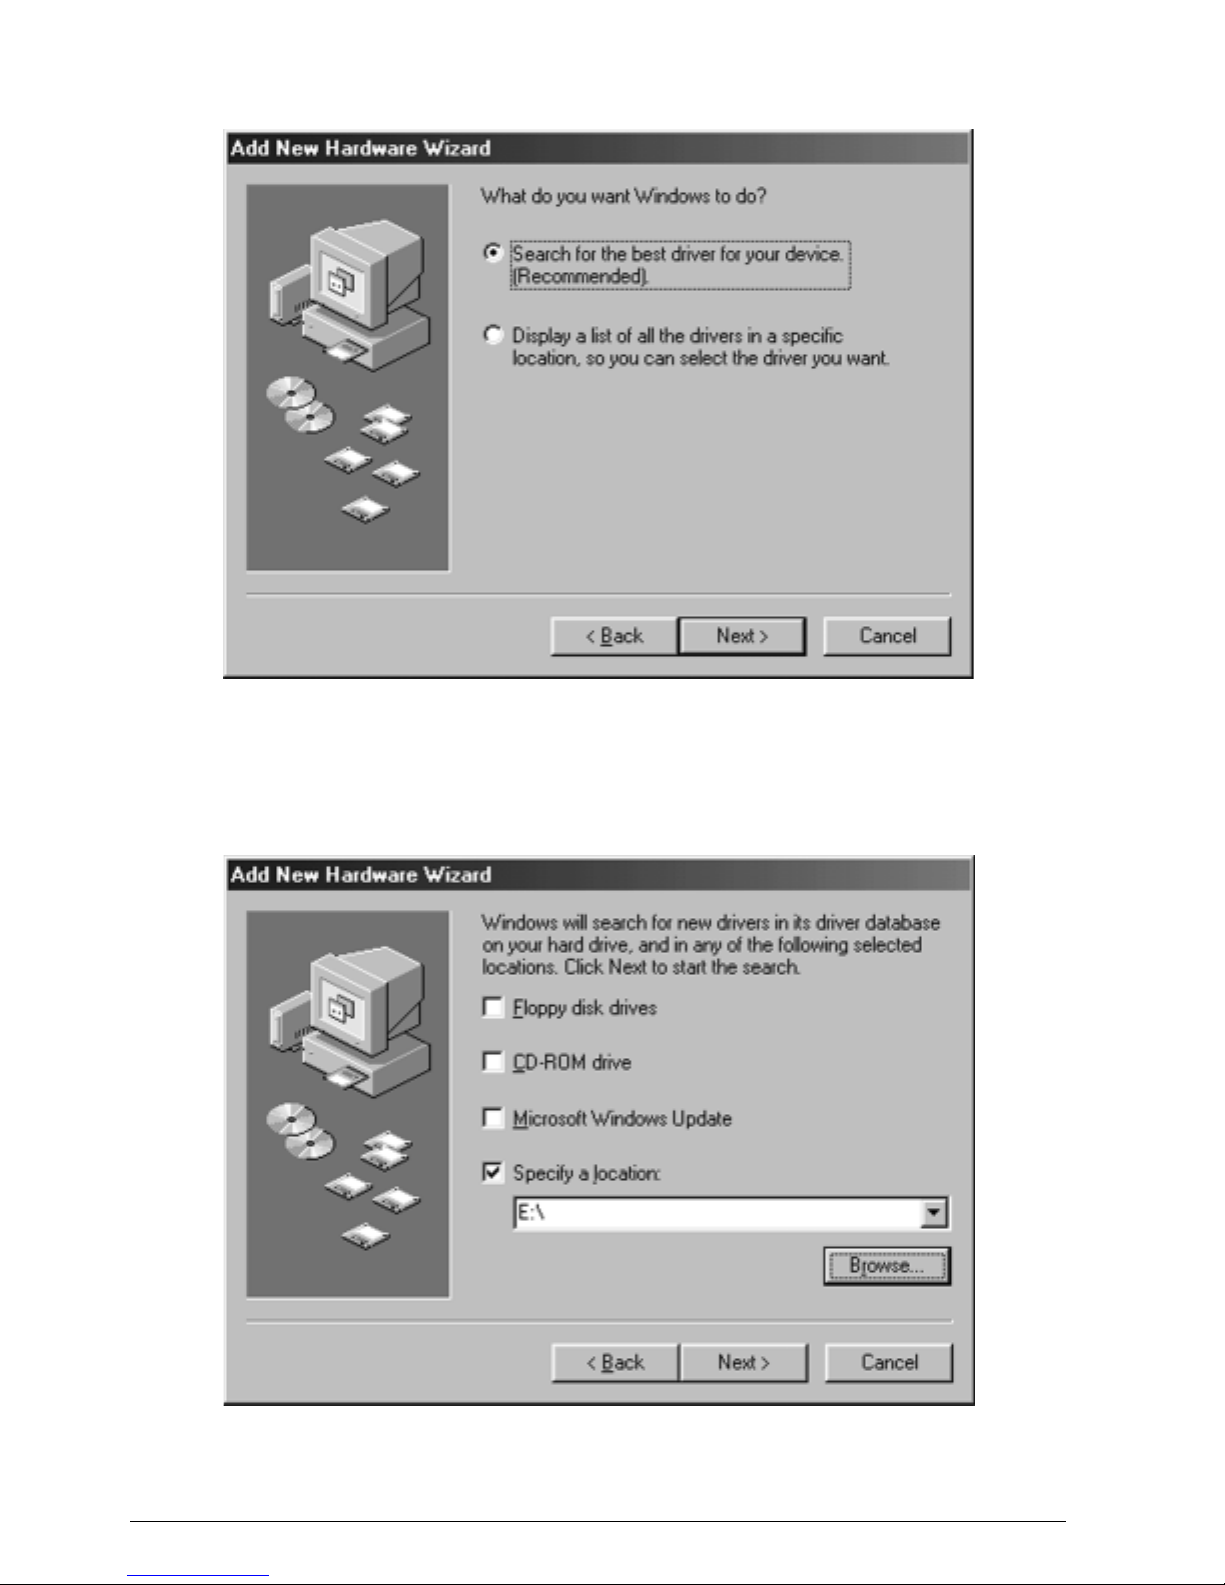
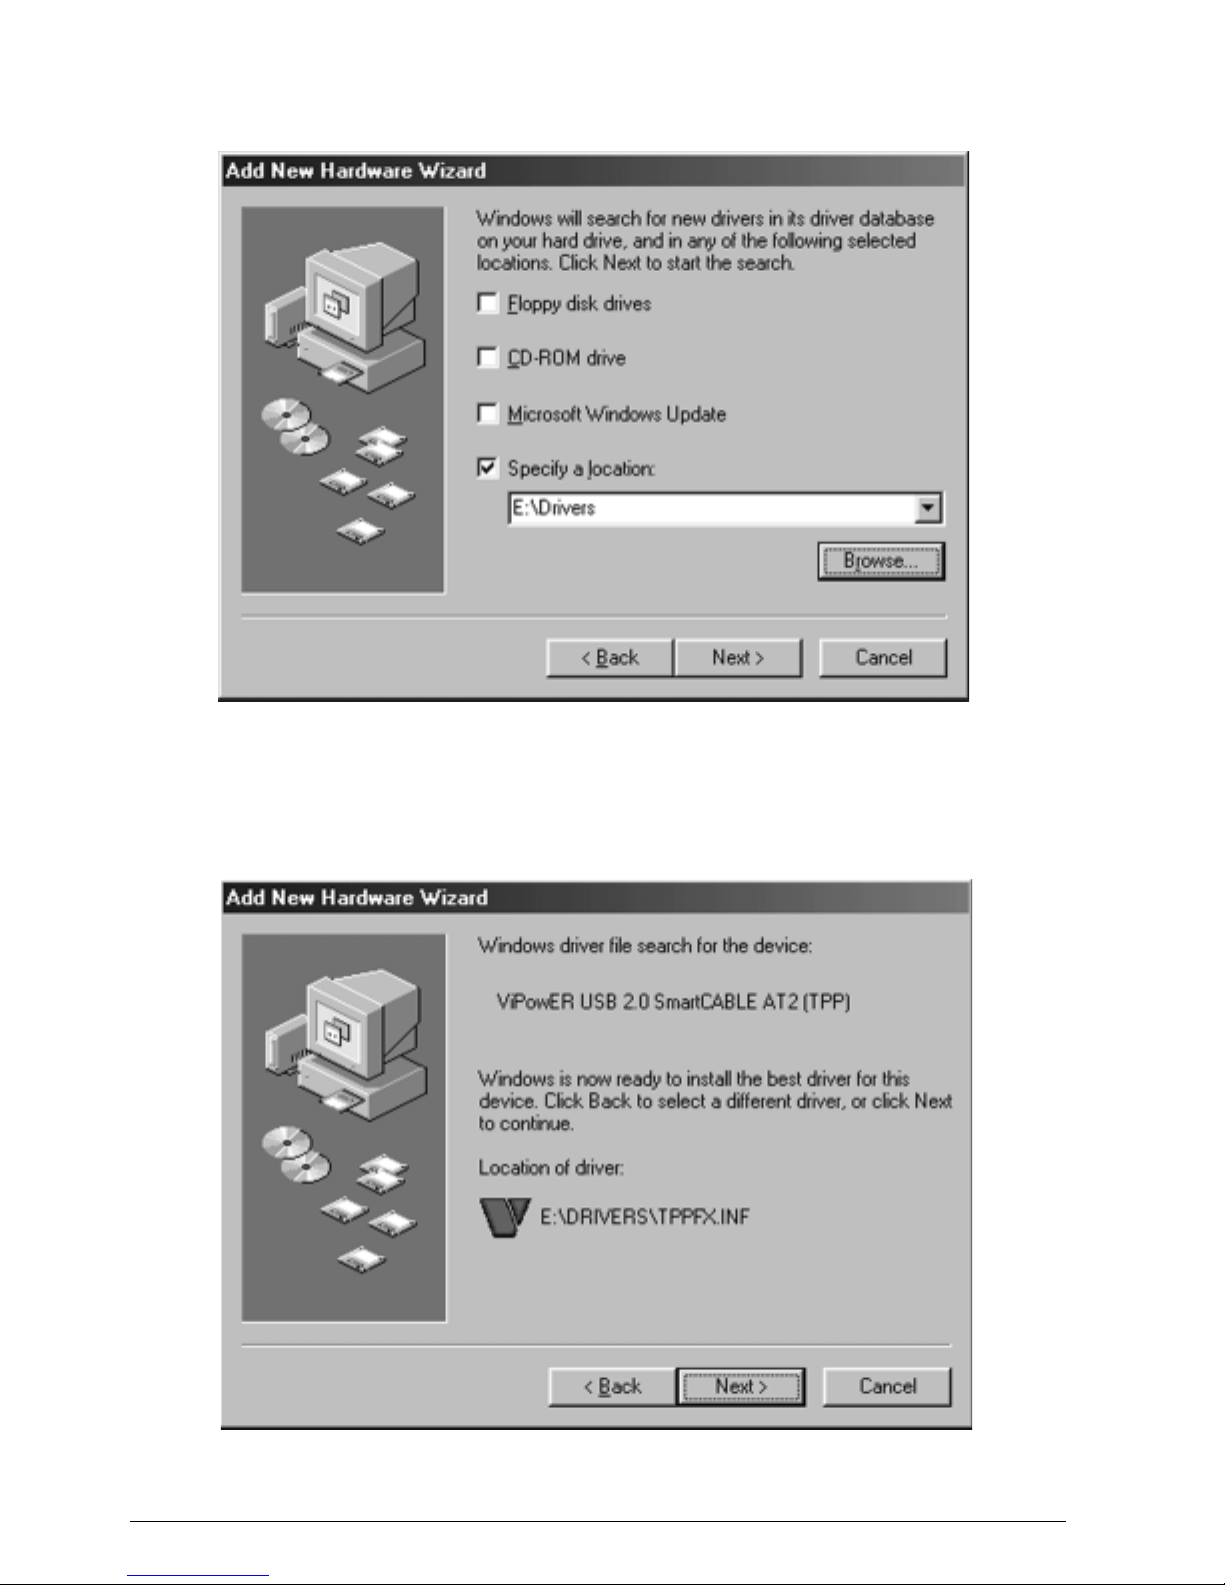
4.1.1 WINDOWS 98SE………......……....…….....…..…………..……..3
4.1.2 WINDOWS ME/2000/XP ……………..…..…………….…..…….9
4.1.3 Mac OS …………………....…………...…………………...….10
4.2 DRIVERS INSTALLATION (Genesys)....................................................11
4.2.1 WINDOWS 98SE…………..……....…….....…..…………..…....11
4.2.2 WINDOWS ME/2000/XP …………….............………….….……17
4.2.3 Mac OS ………………….……………….......……………....…18
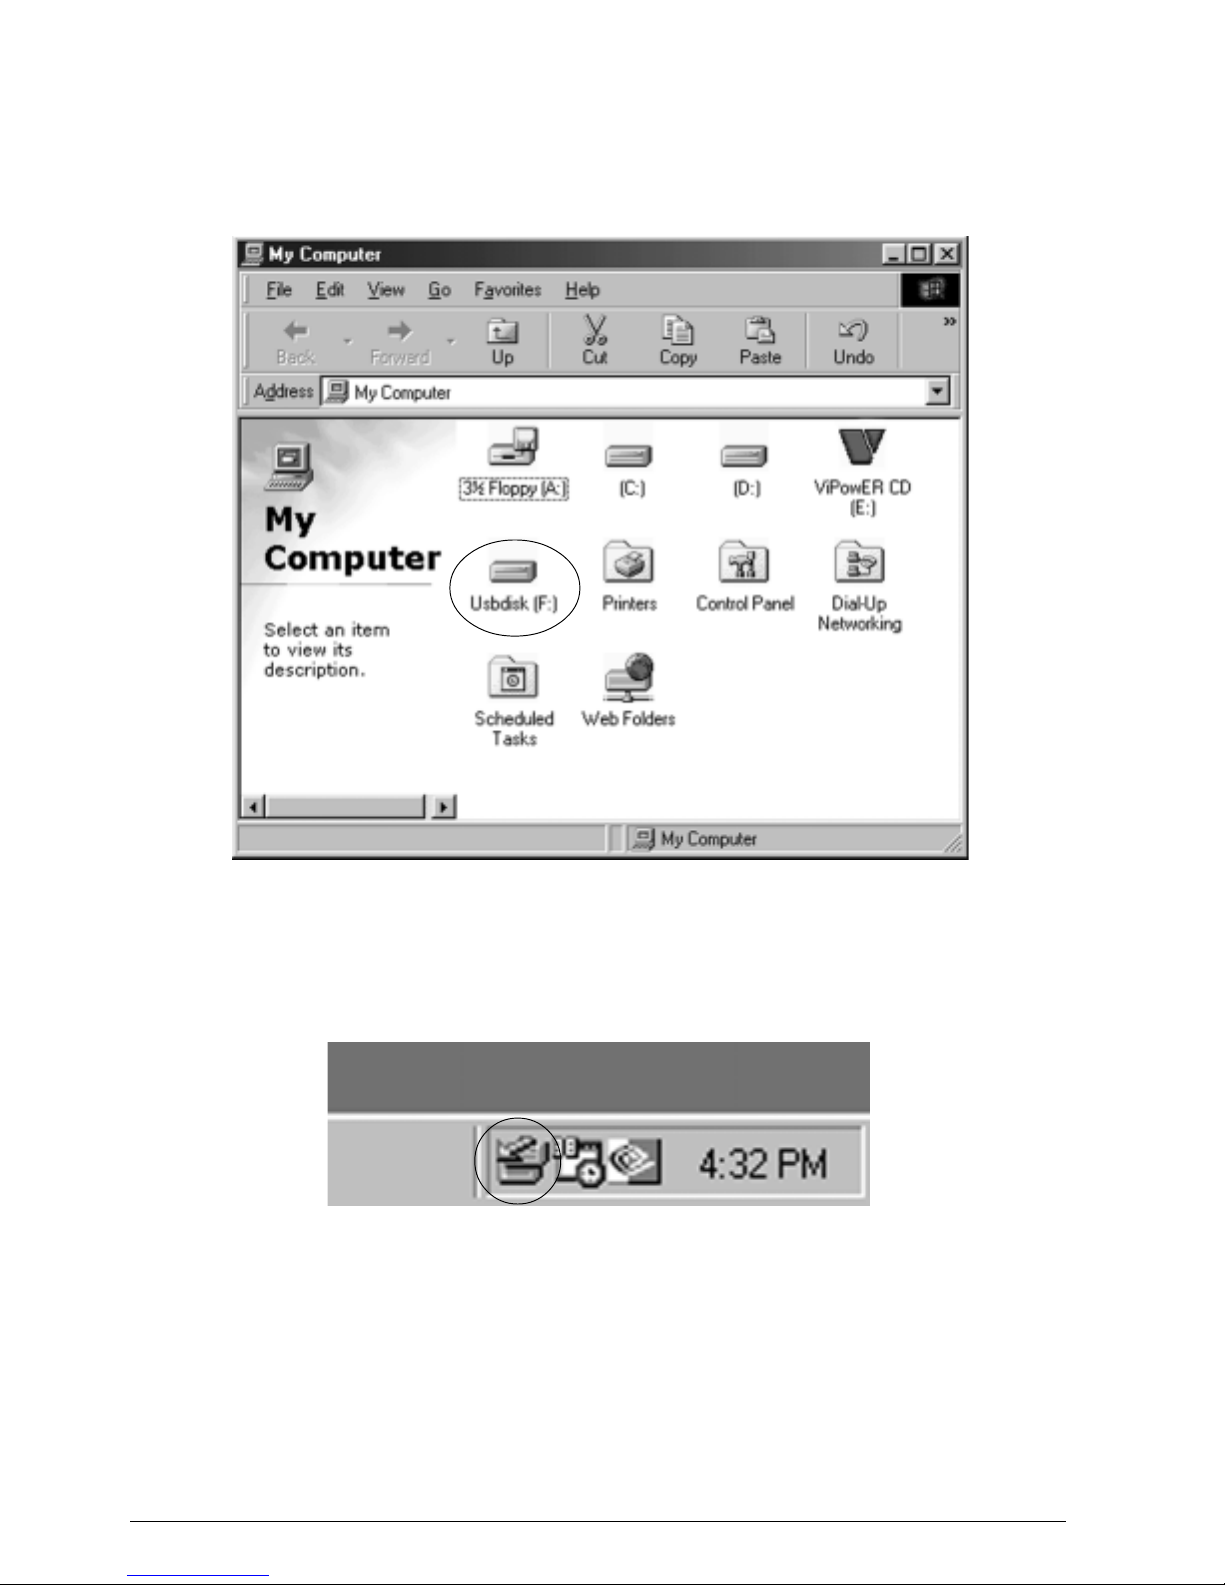
5. USING THE USB 2.0 EXTERNAL DRIVE ………...............……………19
5.1 Connect the USB 2.0 External Drive to computer ………….......………19
5.2 Disconnect the USB 2.0 External Drive from computer ……...…….…..19
6. PARTITIONING THE USB 2.0 EXTERNAL HARD DISK DRIVE ..........21
6.1 PARTITION UNDER WINDOWS 98/ME ………….........................…..21
6.2 PARTITION UNDER WINDOWS 2000/XP ………………......……...23

1. INTRODUCTION
The USB 2.0 External Drive is a portable compact storage drive that incorporates
the USB 2.0 (Universal Serial Bus 2.0) high speed interface. The USB 2.0 External
Drive provides a fast and easy way to add more storage space to your computer. The
Plug & Play feature gives you a great convenience on the road, the USB 2.0 External
Drive can re-connected while the computer is running.
The USB 2.0 External Drive is compatible with Apple Macintosh and Windows
Computers.
Note:
In order to reach USB 2.0 speed, you must have a computer or host adapter
card that has USB 2.0 support. This device will auto sense the speed of your USB
port and adjust between USB 1.0 and USB 2.0 speed.
2. SYSTEM REQUITEMENTS
Hardware:
Notebook and desktop computer with USB or USB 2.0 port supported.
Operation system:
Windows 98SE / Me / 2000 / XP, and Mac OS 8.6 or above.
3. HARDWARE INSTALLATION
Step 1 Boot-up your computer make sure the USB / USB 2.0 Port device driver
has installed and is available in operation system.
Step 2 Plug the port connector of the USB cable into the USB Port of your USB
2.0 External Drive.
Step 3 Plug the power cord to the inlet of your USB 2.0 External Drive and
power on the drive. Your USB 2.0 External Drive will be ready to use.
USB 2.0 External Drive 1

Step 4 Plug the port connector of the USB cable into USB port of computer.
Step 5 Follow the Software Installation for the next.
Note:
In order to reach USB 2.0 speed, you must have a computer or host adapter
card that support USB 2.0 . This device will automatically sense the speed of
your USB port and adjust between USB 1.0 and USB 2.0 speed.
4. Drivers INSTALLATION
Please try to find a round sticker on your ViPowER USB device to choose the
right driver and installation procedure accordingly.
There are two different versions of USB controllers, each reguires
different software driver.
AT2 = AT2 Genesys = G
2 USB 2.0 External Drive

4.1 Drivers INSTALLATION (AT2)
4.1.1 Windows 98SE
If this is the first time you use USB 2.0 External Drive, you have to run the
[STEPUP.EXE] from USB 2.0 install CD before you connect your USB 2.0
External Drive to computer.
1. Connect your USB 2.0 external drive to your computer.
2. A “Add New Hardware Wizard” will pop-out. Click on [Next].
USB 2.0 External Drive 3

3. Select “Display a list of all drivers” then click on [Next].
4. Click on [Browse].
4 USB 2.0 External Drive

5. Double click on the ViPowER CD icon.
6. Click to choose “Driver” directory, then click [OK].
USB 2.0 External Drive 5

7. Click on [Next].
8. Click on [Next].
6 USB 2.0 External Drive

9. The system will request you to restart your computer now. Click on
[FINISH].
10. After the system restart, the installation is complete. You can connect your
USB 2.0 External Drive to computer now.
USB 2.0 External Drive 7

11. After you connect your USB 2.0 External Drive to your computer. Double
click on [My Computer], a new drive Disk is added, it is the USB 2.0 External
Drive which just installed.
A green Unplug or Eject hardware icon will appear in system tray too.
If the new drive doesn’t appear in My Computer, it means this USB 2.0 External
Drive is a whole new hard disk drive which doesn’t contain any partition. Please refer
to chapter 6 to prepare your USB 2.0 Hard Disk.
8 USB 2.0 External Drive

4.1.2 Windows Me / 2000 / XP
Step1 If you are plugging the USB External Drive into your computer for the
first time, system will detect USB 2.0 Storage Device and install the
driver of [USB Mass Storage Device] from system files automatically.
Step2 After the system installed the driver of USB mass storage device. Double
click on My Computer, a new drive Disk is added in a few seconds, it is the
USB 2.0 External Drive which just installed.
This USB 2.0 External Drive is supported by Mass Storage Device in win Me/ 2000/
XPsystem directly. You don’t need to install any drivers. If the USB 2.0 External Hard
Disk is a whole new disk drive which doesn’t contain any partition, please refer to
the Partition the USB 2.0 External Hard Disk chapter to prepare your USB 2.0
External Disk.
USB 2.0 External Drive 9

4.1.3 Mac OS
1. This USB2.0 External Drive is supported by Mass Storage Support 1.3.5 in
Mac OS. You don’t need to install any drivers.
2. Mac OS 8.6
If you are using Mac OS 8.6, the software of Mass Storage Support 1.3.5 is
required to install. You can download The USB Mass Storage Support 1.3.5
from the Apple Software Updates web site Http://www.apple.com/support.
Mac OS 9.0 or latter
You don’t need to install this software if you have installed Mac OS 9.0 or
above.
3. When you plug this USB Hard Disk into the USB port of your Mac computer,
the mass storage volume should appear on the desktop in a few seconds
automatically.
10 USB 2.0 External Drive

4.2 Drivers INSTALLATION (Genesys)
4.2.1 Windows 98SE
If this is the first time you use USB 2.0 External Drive, you have to run the
[STEPUP.EXE] from USB 2.0 install CD before you connect your USB 2.0
External Drive to computer.
1. Connect your USB 2.0 external drive to your computer.
2. A “Add New Hardware Wizard” will pop-out. Click on [Next].
USB 2.0 External Drive 11

3. Select “Display a list of all drivers” then click on [Next].
4. Click on [Browse].
12 USB 2.0 External Drive

5. Double click on the ViPowER CD icon.
6. Click to choose “Driver” directory, then click [OK].
USB 2.0 External Drive 13

7. Click on [Next].
8. Click on [Next].
14 USB 2.0 External Drive

9. The system will request you to restart your computer now. Click on
[FINISH].
10. After the system restart, the installation is complete. You can connect your
USB 2.0 External Drive to computer now.
USB 2.0 External Drive 15

11. After you connect your USB 2.0 External Drive to your computer. Double
click on [My Computer], a new drive Disk is added, it is the USB 2.0 External
Drive which just installed.
A green Unplug or Eject hardware icon will appear in system tray too.
If the new drive doesn’t appear in My Computer, it means this USB 2.0 External
Drive is a whole new hard disk drive which doesn’t contain any partition. Please refer
to chapter 6 to prepare your USB 2.0 Hard Disk.
16 USB 2.0 External Drive

4.2.2 Windows Me / 2000 / XP
Step1 If you are plugging the USB External Drive into your computer for the
first time, system will detect USB 2.0 Storage Device and install the
driver of [USB Mass Storage Device] from system files automatically.
Step2 After the system installed the driver of USB mass storage device. Double
click on My Computer, a new drive Disk is added in a few seconds, it is the
USB 2.0 External Drive which just installed.
This USB 2.0 External Drive is supported by Mass Storage Device in win Me/ 2000/
XPsystem directly. You don’t need to install any drivers. If the USB 2.0 External Hard
Disk is a whole new disk drive which doesn’t contain any partition, please refer to
the Partition the USB 2.0 External Hard Disk chapter to prepare your USB 2.0
External Disk.
USB 2.0 External Drive 17

4.2.3 Mac OS
1. This USB2.0 External Drive is supported by Mass Storage Support 1.3.5 in
Mac OS. You don’t need to install any drivers.
2. Mac OS 8.6
If you are using Mac OS 8.6, the software of Mass Storage Support 1.3.5 is
required to install. You can download The USB Mass Storage Support 1.3.5
from the Apple Software Updates web site Http://www.apple.com/support.
Mac OS 9.0 or latter
You don’t need to install this software if you have installed Mac OS 9.0 or
above.
3. When you plug this USB Hard Disk into the USB port of your Mac computer,
the mass storage volume should appear on the desktop in a few seconds
automatically.
18 USB 2.0 External Drive
This manual suits for next models
1
Table of contents
Other VIPowER Storage manuals
Popular Storage manuals by other brands

Shire
Shire 147518 manual

Seagate
Seagate ST31500341AS - Barracuda 1.5 TB Hard Drive datasheet

IBM
IBM Storwize V7000 Introduction and implementation guide

Samsung
Samsung STORY Station HX-DU050DB user manual

HP
HP StorageWorks P4000 Series Hardware installation instructions

Dell
Dell PowerVault MD3200 Series owner's manual