Visonic PowerLink User manual


Table of Contents
2
Table of Contents
Table of Contents ...................................................................................................................... 2
Chapter 1: Getting Started ................................................................................................... 5
Introduction................................................................................................................5
Specifications.............................................................................................................6
Software.................................................................................................................6
Installation ...............................................................................................................12
Package Contents.................................................................................................12
System Requirements ..........................................................................................13
Installation Procedure..........................................................................................13
Chapter 2: Installing the Visonic PowerLink....................................................................... 14
Hardware Installation...............................................................................................14
For PowerMax PRO: ...........................................................................................14
For PowerMax+:..................................................................................................16
Step 1: Connecting the Visonic external PowerLink to the Home Router..........16
Step 2: Connecting the Visonic PowerLink to the PowerMax+..........................16
Router Configuration...............................................................................................17
Step 1: Determining the IP Addresses of Home Router and Visonic PowerLink17
Step 2: Logging In to the Router .........................................................................18
Step 3: Port Forwarding Configuration ...............................................................18
Step 4: Wi-Fi (Wireless Network) Configuration ...............................................18
Step 6: Wi-Fi Encryption Configuration .............................................................19
Visonic PowerLink Configuration...........................................................................19
Step 1: Logging-in to the Visonic PowerLink.....................................................19
Step 2: Connection Setup.....................................................................................19
Step 3: Home Devices Customization.................................................................19
Step 4: Adding Cameras......................................................................................19
Step 5: Adding Users...........................................................................................19
Chapter 3: Logging Into The Visonic PowerLink................................................................ 19
Visonic PowerLink Window ...................................................................................19
Quick View..............................................................................................................19
Home Devices Pane.............................................................................................19
Cameras Pane.......................................................................................................19

Table of Contents
3
Security System Pane ..........................................................................................19
Chapter 4: Managing Alerts and Alarms ............................................................................ 19
System Alerts...........................................................................................................19
System Alarms.........................................................................................................19
Viewing Cameras during an Alarm.....................................................................19
Closing the Alarm Mode Screen..........................................................................19
Chapter 5: Managing Home Devices ................................................................................. 19
Viewing Device Information...................................................................................19
Filter by Device Status.........................................................................................19
Filter by Device Type..........................................................................................19
Filter by Location ................................................................................................19
Editing Device Setup...............................................................................................19
Searching for a Specific Device by Name...............................................................19
Chapter 6: Managing Video Cameras................................................................................ 19
Camera Configuration..............................................................................................19
Adding / Removing Cameras...............................................................................19
Chapter 7: Managing the Security System......................................................................... 19
Arming the PowerMax+ / PowerMax PRO Security System..................................19
Security Information................................................................................................19
Detectors..............................................................................................................19
Accessories..........................................................................................................19
Chapter 8: Managing Users ............................................................................................... 19
Adding / Removing Users........................................................................................19
Editing User Profiles................................................................................................19
Chapter 9: Managing System Configuration...................................................................... 19
System Configuration..............................................................................................19
Editing System Configuration .................................................................................19
Management ........................................................................................................19
Network ...............................................................................................................19
Users ........................................................................................................................19
Home Devices......................................................................................................19
Cameras ...............................................................................................................19
Security....................................................................................................................19
Resetting to Factory Settings...................................................................................19
Chapter 10: Cellular Web Interface...................................................................................... 19
Logging into PowerLink......................................................................................19
Viewing the security status..................................................................................19
Table of Contents
4
Setting the security mode.....................................................................................19
Controlling Home Devices..................................................................................19
Filtering / Searching Home Devices list..............................................................19
Controlling Your Cameras...................................................................................19
Glossary...................................................................................................................19
Alarm...................................................................................................................19
Alert.....................................................................................................................19
Arming.................................................................................................................19
Central Station.....................................................................................................19
Control Panel .......................................................................................................19
Latchkey ..............................................................................................................19
Port Forwarding...................................................................................................19
Home Router........................................................................................................19
Wi-Fi (Wireless LAN).........................................................................................19
Product Limitations .............................................................................................19
Appendix A..............................................................................................................19

Getting Started
5
Chapter 1:Getting Started
Introduction
The Visonic PowerLink enables you to view and control the Visonic PowerMax+ /
PowerMax PRO Security System over the Internet.
It provides the following advanced features:
•Event notifications to Email and mobile phones.
•Display of the status of the PowerMax+ / PowerMax PRO Security system
including system mode, detector status and troubled accessories.
•Display of the current status of the home automation devices controlled by the
PowerMax+ / PowerMax PRO Security system.
•In-House video viewing via Wired or Wireless cameras around the house.
•Recorded alarm time video of all cameras from the latest alarm.
•Local storage of video camera images on your computer.
•Remote arming and disarming of the PowerMax+ / PowerMax PRO Security
system.
All control and view options are enabled via a secured Web Interface, accessible from
anywhere around the globe whether connected by a PC or a cellular phone.
The Visonic PowerLink has a built-in Secured Web Server, which ensures that all
private information is fully secured. The web interface does not require any software
to be downloaded into the remote computer, allowing users to operate the browser at
maximum-security level.

Getting Started
6
Specifications
Software
Security System
•Commands
oArm Away
oArm Home
oDisarm
•Status
oPowerMax+ / PowerMax PRO LCD Status
oArming Mode
oZone Information: Zone Number, Zone Type, Zone Status,
Location.
oAccessories Status: Keypads, Keyfobs, Sirens, Commanders.
oAlarm Indication: Burglar, Fire, Flood, Gas, Emergency, Panic,
Tamper.
oTrouble Indication: Inactivity, Low Battery, Tamper Open,
Line Failure, AC Failure, RF Jamming.
oPowerMax+ / PowerMax PRO Log
Home Devices
•X10 Control
oLamp: On, Off, Dim, Bright
oHeater: On, Off, Warmer, Cooler
oAir conditioner: On, Off, Warmer, Cooler
oSunshade: Open, Shut, Up, Down
•X10 Attributes
oLocation
oType
oDescription
•X10 Filtering
oBy Active / Inactive
oBy Location
oBy Device Type
oBy Device Description
Cameras
•Up to 14 cameras can be enrolled (12 Ethernet & WiFi + 2 RS-485)

Getting Started
7
•Camera Types:
oVisonic CAM1000 - RS-485
oVisonic CAM2000 - Ethernet
oVisonic CAM2000WL - WiFi / Ethernet
oVisonic CAM3100 - WiFi / Ethernet / IR / 60 degrees FOV
oVisonic CAM3200 - WiFi / Ethernet / Pan Tilt / IR / 60 degrees
FOV
oVivotek IP7135 - Network Camera
oVivotek IP7137 - WLAN Network Camera
oVivotek PT7135 – Pan / Tilt Network Camera
oVivotek PT7137 – Pan / Tilt WLAN Network Camera
oVivotek FD7131 – Indoor Dome with While LED
oVivotek FD6112V / FD6122V – Fixed Dome Network Camera
oVivotek VS2101 – MJPG Video Server
•Auto enrollment of LAN and WiFi cameras to the home network
•Auto Capture Of 10 Post Alarm Images Per Camera
•Auto Capture Of 5 Pre Alarm Images Per Camera
•Turn On / Off for web view according to the alarm modes
•Flip & Mirror camera images for floor and ceiling installations
•Camera Actions:
oPan / Tilt
oSave Image to Local HD
oTurn ON, OFF
oCurrent View / Alarm View
Users
•1 Master User
•7 Standard Users
Management
•IP Address: Auto configuration or Manual Configuration
•Reset to Factory Defaults Option
•Remote Firmware Upgrade
Web Server
•Ports: 443 (SSL), 80 (HTTP)
•Ports can be changed by user
•Automatic port forwarding with UPNP support

Getting Started
8
•XHTL & WAP support for mobile phone access
Data Security
•128Bit SSL encryption on all data transmissions to and from the
Internet
•Authentication required by Username and Password
•Login brute force attack protection
•WEP, WPA and no Encryption for WiFi camera in-house image
transfer
Hardware
CPU
•Intel Xscale PXA255 @ 200MHz
OS
•Montavista Linux
Memory
•64MB Flash
•64MB SDRAM
PowerMax+ /PowerMax PRO Connection
•RS-232
Power Supply
•Powered From PowerMax+ / PowerMax PRO via RS-232 connection
Size
•PowerLink (For PowerMax+): 200x115x55mm (7-7/8x4-1/2x3-3/16
in.)
•Internal PowerLink (For PowerMax PRO): 96X96X23mm (3-3/4 x 3-
3/4 x 7/8 in.)
Weight
•PowerLink (For PowerMax+): 365g (13 oz.)
•Internal PowerLink (For PowerMax PRO): 122g (4.3 oz.)
Color
•PowerLink (For PowerMax+): Gray,
•Internal PowerLink (For PowerMax PRO): Silver
Operating Temperature
•0ºC to 49ºC (32ºF to 120ºF)
Storage Temperature
•-20ºC to 60ºC (-4ºF to 140ºF)
Compliance with Standards
•EN 60950, EN 55022, EN 55024

Getting Started
9
Cameras
CAM3100
•Image Resolution: up to 640x480
•Effective Image Resolution: 320x240
•Image Frame Rate: QCIF@30fps,CIF@30fps, VGA@30fps
•Sensor Type: 1/4” Low Lux. CMOS sensor
•Lens: f: 4.2mm; F: 2.0, 60 degree field of view
•6 IR LEDS
•Auto Gain Control
•Auto Exposure
•Auto White Balance
•Communication Format: LAN, 10/100Mbps, Wireless LAN 802.11g
•Power Supply: 5 VDC, 2500mA
•Picture Format: Compressed JPEG
•Color: Two tone, White and Silver
•Operating Temperature: 0˚C to 45˚C
•Storage Temperature: -15˚C to 60˚C
•Humidity: 0% to 90% non-condensing
•Compliance with Standards: FCC/CE class B
CAM3200
•Image Resolution: up to 640x480
•Effective Image Resolution: 320x240
•Image Frame Rate: QCIF@30fps,CIF@30fps, VGA@30fps
•Sensor Type: 1/4” Low Lux. CMOS sensor
•Lens: f: 4.2mm; F: 2.0, 60 degree field of view
•7 IR LEDS
•PAN / TILT
•Auto Gain Control
•Auto Exposure
•Auto White Balance
•Communication Format: LAN, 10/100Mbps, Wireless LAN 802.11g
•Power Supply: 12 VDC, 1500mA
•Picture Format: Compressed JPEG
•Color: Two tone, White and Silver

Getting Started
10
•Operating Temperature: 0˚C to 45˚C
•Storage Temperature: -15˚C to 60˚C
•Humidity: 0% to 90% non-condensing
•Compliance with Standards: FCC/CE class B
CAM2000
•Image Resolution: up to 640x480
•Effective Image Resolution: 320x240
•Image Frame Rate: QCIF@30fps,CIF@25fps, VGA@10fps
•Sensor Type: Color CMOS
•Lens: f: 6.0mm; F: 1.8, 45 degree field of view
•Auto Gain Control
•Auto Exposure
•Auto White Balance
•Communication Format: LAN, 10/100Mbps
•Power Supply: 5 VDC, 700mA
•Picture Format: Compressed JPEG
•Color: Two tone, Silver and Bronze
•Operating Temperature: 5˚C to 40˚C
•Storage Temperature: -25˚C to 50˚C
•Humidity: 5% to 95% non-condensing
•Compliance with Standards: FCC, CE, VCCI Class B
CAM2000WL
•Image Resolution: up to 640x480
•Effective Image Resolution: 320x240
•Image Frame Rate: QCIF@30fps,CIF@25fps, VGA@10fps
•Sensor Type: Color CMOS
•Lens: f: 6.0mm; F: 1.8, 45 degree field of view
•Auto Gain Control
•Auto Exposure
•Auto White Balance
•Communication Format: LAN, 10/100Mbps, Wireless LAN 802.11g
•Power Supply: 5 VDC, 1000mA
•Picture Format: Compressed JPEG
•Color: Two tone, Silver and Bronze

Getting Started
11
•Operating Temperature: 5˚C to 40˚C
•Storage Temperature: -25˚C to 50˚C
•Humidity: 5% to 95% non-condensing
•Compliance with Standards: FCC, CE, VCCI Class B

Getting Started
12
Installation
Package Contents
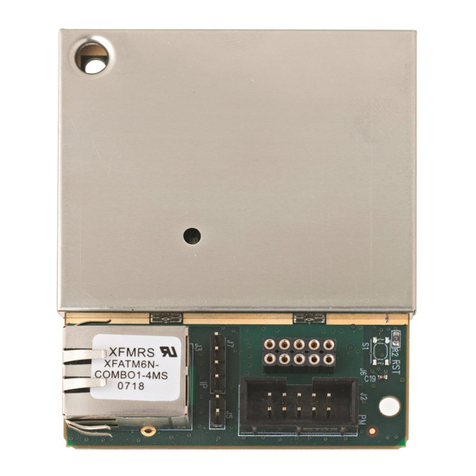
1 x Visonic PowerLink
External PowerLink
(For PowerMax+)
Internal PowerLink
(For PowerMax PRO)
1 x PowerLink RS-232 Interface
Module For PowerMax+
Dual RS-232
(For PowerMax Pro)
1 x 2m (6.5 feet) Cat-5 Cable
1 x RS-232 Cable
1 x Mounting Kit (for PowerMax+
only)
1 x Resources CD

Getting Started
13
System Requirements
•PowerMax+ / PowerMax PRO Security System.
•High-Speed Internet connection (Cable or DSL) enabled via a Home Router
(Ethernet Based).
•One free Ethernet port on the home router for the PowerLink connection.
•One free Ethernet port on the home router for IP based camera enrollment (will
be freed if camera is WiFi).
•One free Ethernet port on the home router for every added Ethernet camera.
•One of the supported browsers:
oInternet Explorer version 6.0 or up
oFirefox version 1.0 or up
oSafari 4
oOpera 9
•PC running Windows® 2000, XP or Vista connected to the home router.
•Optional: WiFi 802.11b or 802.11g Access Point
Installation Procedure
The Visonic PowerLink installation procedure involves three stages:
•Hardware Installation
•Router Configuration
•Visonic PowerLink Configuration

Installing the Visonic PowerLink
14
Chapter 2:Installing the Visonic PowerLink
The Visonic PowerLink installation procedure involves the following stages:
· Hardware Installation
· Router Configuration
· Visonic PowerLink Configuration
Hardware Installation
For PowerMax PRO:
Step 1. Open the PowerMax Pro:
1
2
Release
screws
Step 2. Install the dual RS-232 module and connect its flat cable:
Front
unit
Back
unit

Installing the Visonic PowerLink
15
Step 3. Plug in the Internal
PowerLink and fasten it with 2
screws:
Step 4. Connect the PowerMax
PRO to the home router:
Cat-5 Cable
to home router
Step 5. Connect internal
PowerLink to the dual RS-232
module:
Step 6. Close the panel and
secure with 2 screws:

Installing the Visonic PowerLink
16
For PowerMax+:
Step 1: Connecting the Visonic external PowerLink to the Home
Router
Use the supplied Cat-5 cable to attach the Visonic PowerLink's LAN port to one of
the free LAN ports of the Home Router.
If an Ethernet infrastructure exists in your house, you can connect the Visonic
PowerLink to the Home Router through a network wall outlet. Use the supplied Cat-5
cable to connect the LAN port of the Visonic PowerLink to the Network wall outlet.
Step 2: Connecting the Visonic PowerLink to the PowerMax+
Remove
plastic cap
PowerMax+
PowerLink
Connect
PowerLink
module
Connect the supplied
RS-232 cable
21
3
Note
Make sure the distance between the Visonic PowerLink and the PowerMax+ Control
Panel does not exceed the length of the cable.

Installing the Visonic PowerLink
17
Step 3: Wall Mounting the Visonic PowerLink
Fasten bracket
to the
PowerLink
3
Mark and drill 3 holes in mounting
surface. Fasten the bracket to the
mounting surface with the screws.
1
2
Locate PowerLink
on the bracket and
push downward as shown
until a click is heard.
Router Configuration
After installing the hardware you need to configure the Home Router. Different Home
Router models have different login interfaces and configuration. The following
section includes a general description of the procedure and an example of a specific
Home Router model. Router specific instructions and guides for port forwarding can
be found at http://www.portforward.com.
Step 1: Determining the IP Addresses of Home Router and Visonic
PowerLink
1. Make sure you have in front of you the Visonic PowerLink Installation Form -
see appendix A.
2. On your PC click Start > Run.
3. In the Open text box type cmd and click OK.
4. at the Command Prompt type ipconfig and press Enter
Default Gateway
IP
A
ddress

Installing the Visonic PowerLink
18
5. Copy the Default Gateway IP Address as the Home Router IP Address Value
in the Visonic PowerLink Installation Form (See appendix A).
6. Copy the first three blocks of the IP Address to the Visonic PowerLink IP
Address Value in the Visonic PowerLink Installation Form (the last block of
the IP Address is 200, see Appendix A).
Example: The Default Gateway value is 192.168.0.1:
The Home Router IP Address is 192.168.0.1.
The IP Address value is 192.168.0.3:
The Visonic PowerLink IP Address is 192.168.0.200.
Step 2: Logging In to the Router
You are required to login to your Router configuration interface.
1. Open your Internet Browser and in the Address line type
HTTP://<Home Router IP Address>. Replace <Home Router
IP Address> with the value of "Home Router IP Address" from the
Installation form (see appendix A).
2. Once the Login page appears, type a username and a password to login.
Different Routers have different login interfaces. Refer to your Router's manual for
instructions.
If you are unable to login, call your home router installer or Internet service provider
for assistance.
Step 3: Port Forwarding Configuration
Router port forwarding guides for your router can be found at
http://www.portforward.com.
1. In your Router's window, locate the Port Forwarding configuration screen.
2. Set the Port Forwarding IP Address to the value of Visonic PowerLink IP
Address from the Installation Form (see appendix A).
3. Set Protocol to TCP.
4. Set all port related fields to 443
5. If requested, set the Port Forwarding rule name to PowerLink.
6. Save the information.
7. If requested, restart the router and wait for the router to restart
Step 4: Wi-Fi (Wireless Network) Configuration
Perform this step if you intend to connect wireless cameras to the Visonic PowerLink.
1. In your Router Configuration window, locate the Wireless Network
configuration screen.
2. Set a value for the SSID. Changing the default SSID value is recommended to
ensure a secured wireless network.

Installing the Visonic PowerLink
19
3. In the Visonic PowerLink Installation Form (see appendix A), write down the
value of SSID for future reference.
4. Select a Channel. (You can pick any channel. The default channel is usually 6).
5. Mark the selected channel in the Visonic PowerLink Installation Form
(Appendix A).
Step 6: Wi-Fi Encryption Configuration
PowerLink supports three encryption methods:
1. No encryption
2. WEP 64bit / 128bit
3. WPA
Enabling encryption on your Wi-Fi network is highly recommended and ensures that
any information transferred on the Wi-Fi network such as camera images is secured
against unauthorized viewers.
Refer to your router user's manual in order to set up encryption.
Some routers need restart in order to apply the settings. Please make sure to restart the
router if restart is needed.

Installing the Visonic PowerLink
20
Visonic PowerLink Configuration
Step 1: Logging-in to the Visonic PowerLink
1. Before logging-in, the PowerLink has to be enrolled to the PowerMax+ /
PowerMax PRO. In order to enroll the PowerLink:
•On the PowerMax+ / PowerMax PRO, enter the "USER SETTING"
menu.
•Choose "DEFINE PWRLNK" -> "Install".
•Press "Show/OK". Wait for the confirmation sound.
•Press "Away". Press "Show/OK".
2. Open your Internet Browser and in the Address line type
HTTP://< Visonic PowerLink IP Address>. Replace
<Visonic PowerLink IP Address> with the value of "PowerLink IP
Address" from the Installation form (see appendix A).
3. In Visonic PowerLink's Login screen: enter the Username and Password.
Default Username and Password values (if not changed by owner or installer):
Username: Admin
Password: Admin123
Note
Username and Password are case-sensitive.
4. Click Login >>.
If you are unable to login, call your Visonic PowerLink service provider for
assistance.
Table of contents
Other Visonic Software manuals
Popular Software manuals by other brands

Novell
Novell SUSE LINUX ENTERPRISE DESKTOP 11 SP1 - 8-18-2010 VIRTUALIZATION WITH... manual

AVG
AVG ANTI-VIRUS 2011 - REV 2011.03 user manual

Allied Telesis
Allied Telesis AR441S Release notes

Partec
Partec PARASTATION5 V5 Administrator's guide

Autodesk
Autodesk NAVISWORKS brochure

Novell
Novell PLATESPIN ORCHESTRATE 2.0.2 - ADMINISTRATOR REFERENCE... Getting started

Novell
Novell GROUPWISE 7 - CROSS-PLATFORM manual

Nortel
Nortel Host Tools New features

Creo
Creo DocuColor 2045 user guide

EUTECH INSTRUMENTS
EUTECH INSTRUMENTS CYBERCOMM PRO FOR CYBERSCAN CON 1500 Installation and user guide

UNIBLUE
UNIBLUE DRIVERSCANNER quick start guide

Adaptec
Adaptec CDP-00278-01-A user guide