Visual Productions Cuety User manual
© VISUAL PRODUCTIONS BV WWW.VISUALPRODUCTIONS.NL
CUETY
MANUAL

Revision History
Revision Date Author(s) Description
1 31.03.2015 ME Initial version.
8 07.01.2019 BZ Added revision history. Updated web-
site addresses. Updated showfile and
personality file location. Clarified sub-
fixtures not being supported in Per-
sonalities chapter. Clarified wheel lim-
itation. Added Minimal requirements
chapter. Added Kiosc section to ap-
pendices. Updated API appendix.
9 22.07.2020 BZ Updated various images. Corrected
and Changed API messages to be
easier to understand. Added vMan-
ager Tablet version. Added Protocols
chapter.
2


©2020 Visual Productions BV. All rights reserved.
No parts of this work may be reproduced in any form or by any means - graphic,
electronic, or mechanical, including photocopying, recording, taping, or infor-
mation storage and retrieval systems - without the written permission of the
publisher.
While every precaution has been taken in the preparation of this document,
the publisher and the author assume no responsibility for errors or omissions,
or for damages resulting from the use of information contained in this docu-
ment or from the use of programs and source code that may accompany it. In
no event shall the publisher and the author be liable for any loss of profit or
any other commercial damage caused or alleged to have been caused directly or
indirectly by this document.
Due to the dynamic nature of product design, the information contained in
this document is subject to change without notice. Revisions of this informa-
tion or new editions may be issued to incorporate such changes.
Products that are referred to in this document may be either trademarks and/or
registered trademarks of the respective owners. The publisher and the author
make no claim to these trademarks.
4

VISUAL PRODUCTIONS BV
ROLLANDSTRAAT 55ZW
NL-2013 SM HAARLEM
THE NETHERLANDS
TEL +31 (0)23 551 20 30
WWW.VISUALPRODUCTIONS.NL
ABN-AMRO BANK 53.22.22.261
BIC ABNANL2A
IBAN NL18ABNA0532222261
VAT NL851328477B01
COC 54497795
Declaration of Conformity
We, manufacturer Visual Productions BV, herby declare under sole responsibility,
that the following devices:
LPU-1
LPU-2
Is in conformity with the following EC Directives, including all amendments:
EMC Directive 2004/108/EG
And the following harmonized standards have been applied:
NEN-EN-IEC 61000-6-1:2007
NEN-EN-IEC 61000-6-3:2007
Full name and identication of the person responsible for product quality and
accordance with standards on behalf of the manufacturer
Date: Place:
December 12th, 2014 Haarlem, The Netherlands
ing. Maarten Engels
Managing Director
Visual Productions BV
Chapter 1
Introduction
Thank you for choosing the Cuety lighting controller. This manual will discuss
setting up the hardware and software as well as programming your light show.
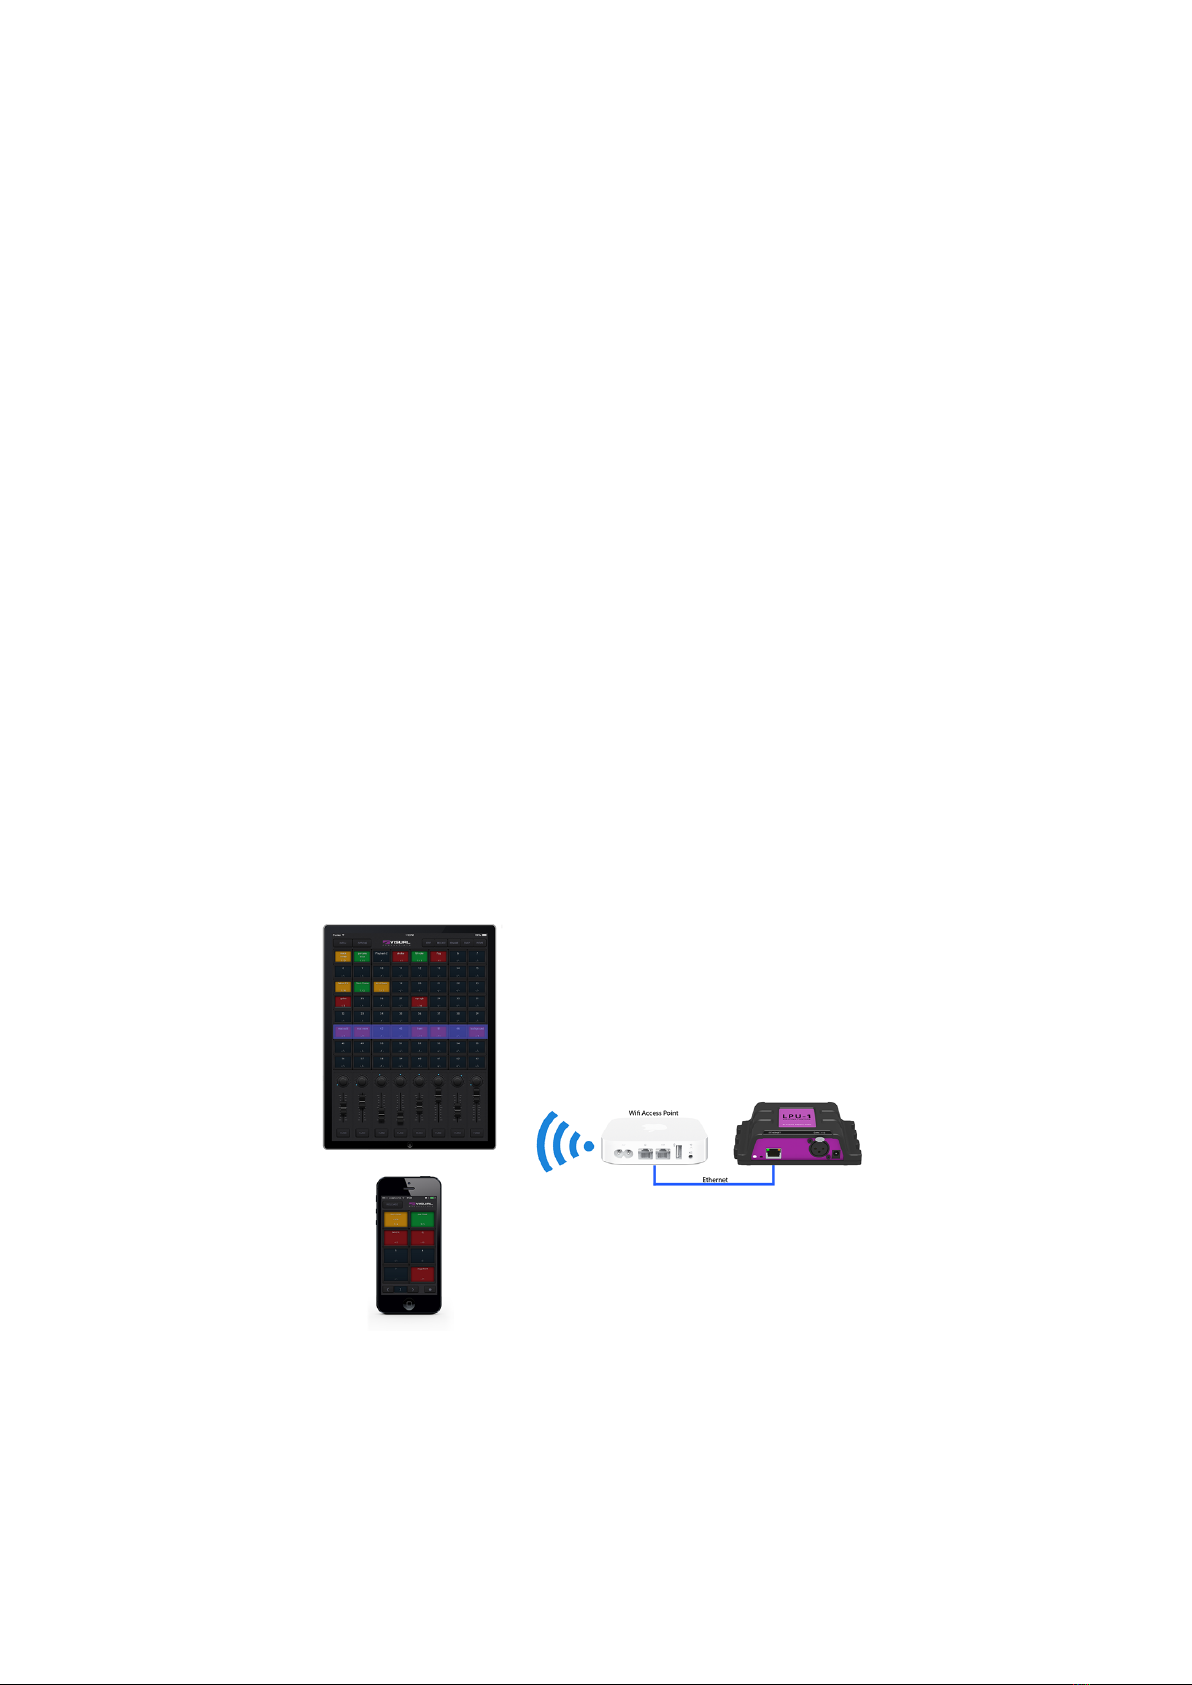
1.1 System
The Cuety system consists of the LPU hardware and the Cuety App. This
App is available on iOS and Android, as well as Windows, macOS and Ubuntu
Linux. In order for the LPU and the App to communicate you need to provide
a Wi-Fi access point yourself. You can expand the system by also running the
Remote App on your phone. See figure 1.1.
Figure 1.1: System
6

1.2 Hardware
The LPU hardware device is the brain of your Cuety system. This box takes
care of all the calculation of DMX levels, cue timing and FX engine. Therefore,
all the information about the patch and cues are stored in this device. In a
way, the Apps are just ’user interface’. This means that when the communica-
tion between the LPU and the App is interrupted, perhaps because of a Wi-Fi
problem, then your show will continue to run.
This also means that when you use the LPU for lighting in a permanent in-
stallation then you only need to connect the (Remote) App when you want to
change to a different cue. When not connected to an App, the LPU will just
continue to run the currently active cues.
1.3 Saving data to memory
This manual will describe how to configure the LPU and program playbacks,
cues, etc. The Cuety App is used for editing these kinds of elements. When
changes are made, these changes are directly stored in the RAM memory of
the LPU and the programming will directly influence the behaviour of the unit.
RAM memory is, however, volatile and its content will be lost through a power
cycle. For this reason the LPU will copy any changes in the RAM memory to its
onboard flash memory. Flash memory retains its data even when not powered.
The LPU will load all its data back from the flash memory upon startup.
This memory copy process is conducted automatically by the LPU and should
not be of any concern of the user. One point of consideration is, however, that
after making a change the unit should be given time to perform the copy to
flash. As a rule of thumb, do not disconnect the power from the device within
30 seconds from making a programming change.
1.4 LPU-1 vs LPU-2
The LPU is available in two versions, the LPU-1 and the LPU-2. The difference
between the two units is that the LPU-2 has additional options to connect
to external systems. Only the LPU-2 has support for OSC, TCP, UDP and
HTTP protocols, making it very suitable to be integrated in permanent systems.
Appendix A discusses the LPU-2’s connectivity in detail.
7
LPU-1 LPU-2
Market Entertainment Installation
DMX Channels 512 512
Fixtures 64 64
Sub-fixtures - -
Playbacks 64 64
Cues per Playback 48 48
FX Generator yes yes
Personality Files 3500+ 3500+
Art-Net yes yes
sACN yes yes
OSC - yes
UDP - yes
TCP - yes
HTTP - yes
Web-interface - yes
The LPU-2 web-interface is read-only. It is useful for checking the device’s status
and monitoring incoming and outgoing network messages. The web-interface
does not allow for modifying the LPU-2.
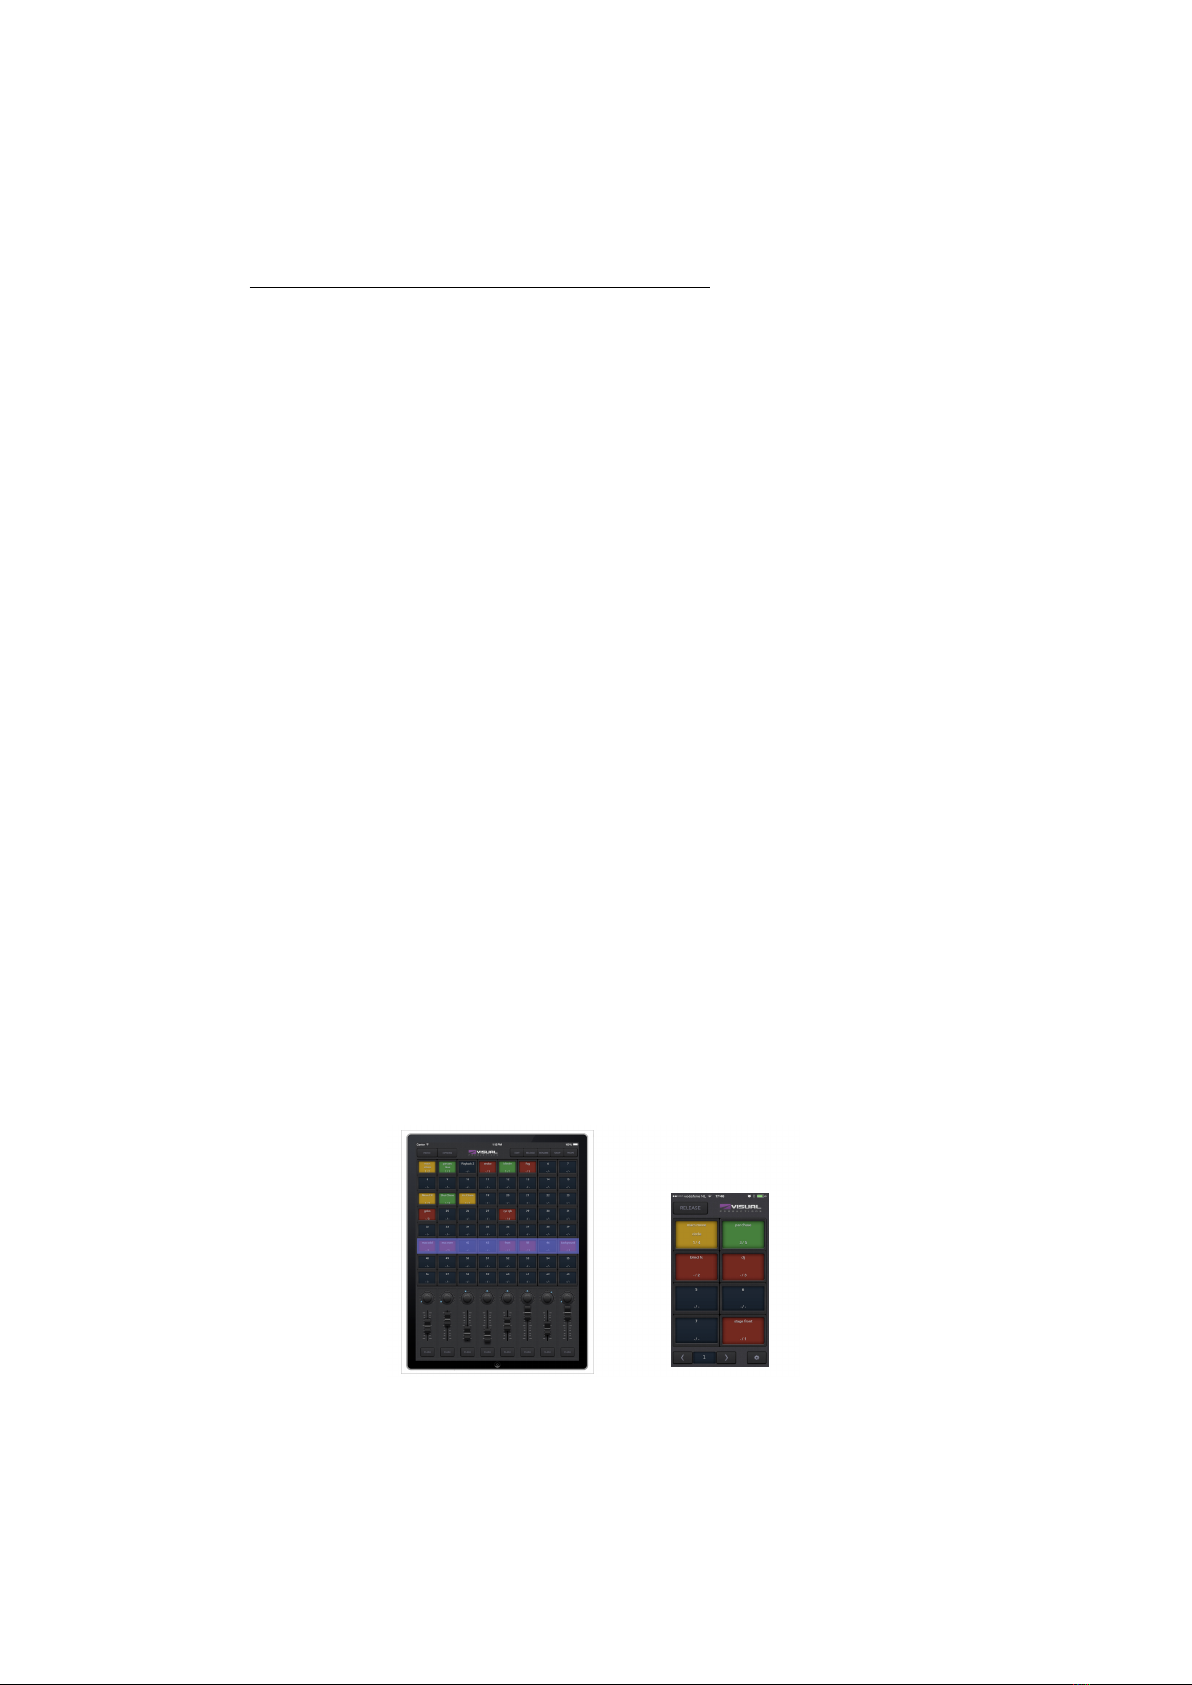
1.5 Apps
The main App is the Cuety App, designed for tablets. This App allows you to
create a patch (the list of fixtures you are controlling), program cues and FX
and operate the playbacks like a live lighting console.
Figure 1.2: Cuety and Cuety Remote Apps
8
In some situations you might not need the ability to modify all the details of
your light show; sometimes you just want a simple way of choosing between the
pre-programmed cues. In this case you can use the Remote App, designed for
phones.
The Remote App is also useful to give to other users of your lighting that have
less privileges; the Remote App does not enable the user to make any changes
to the patch or cues.
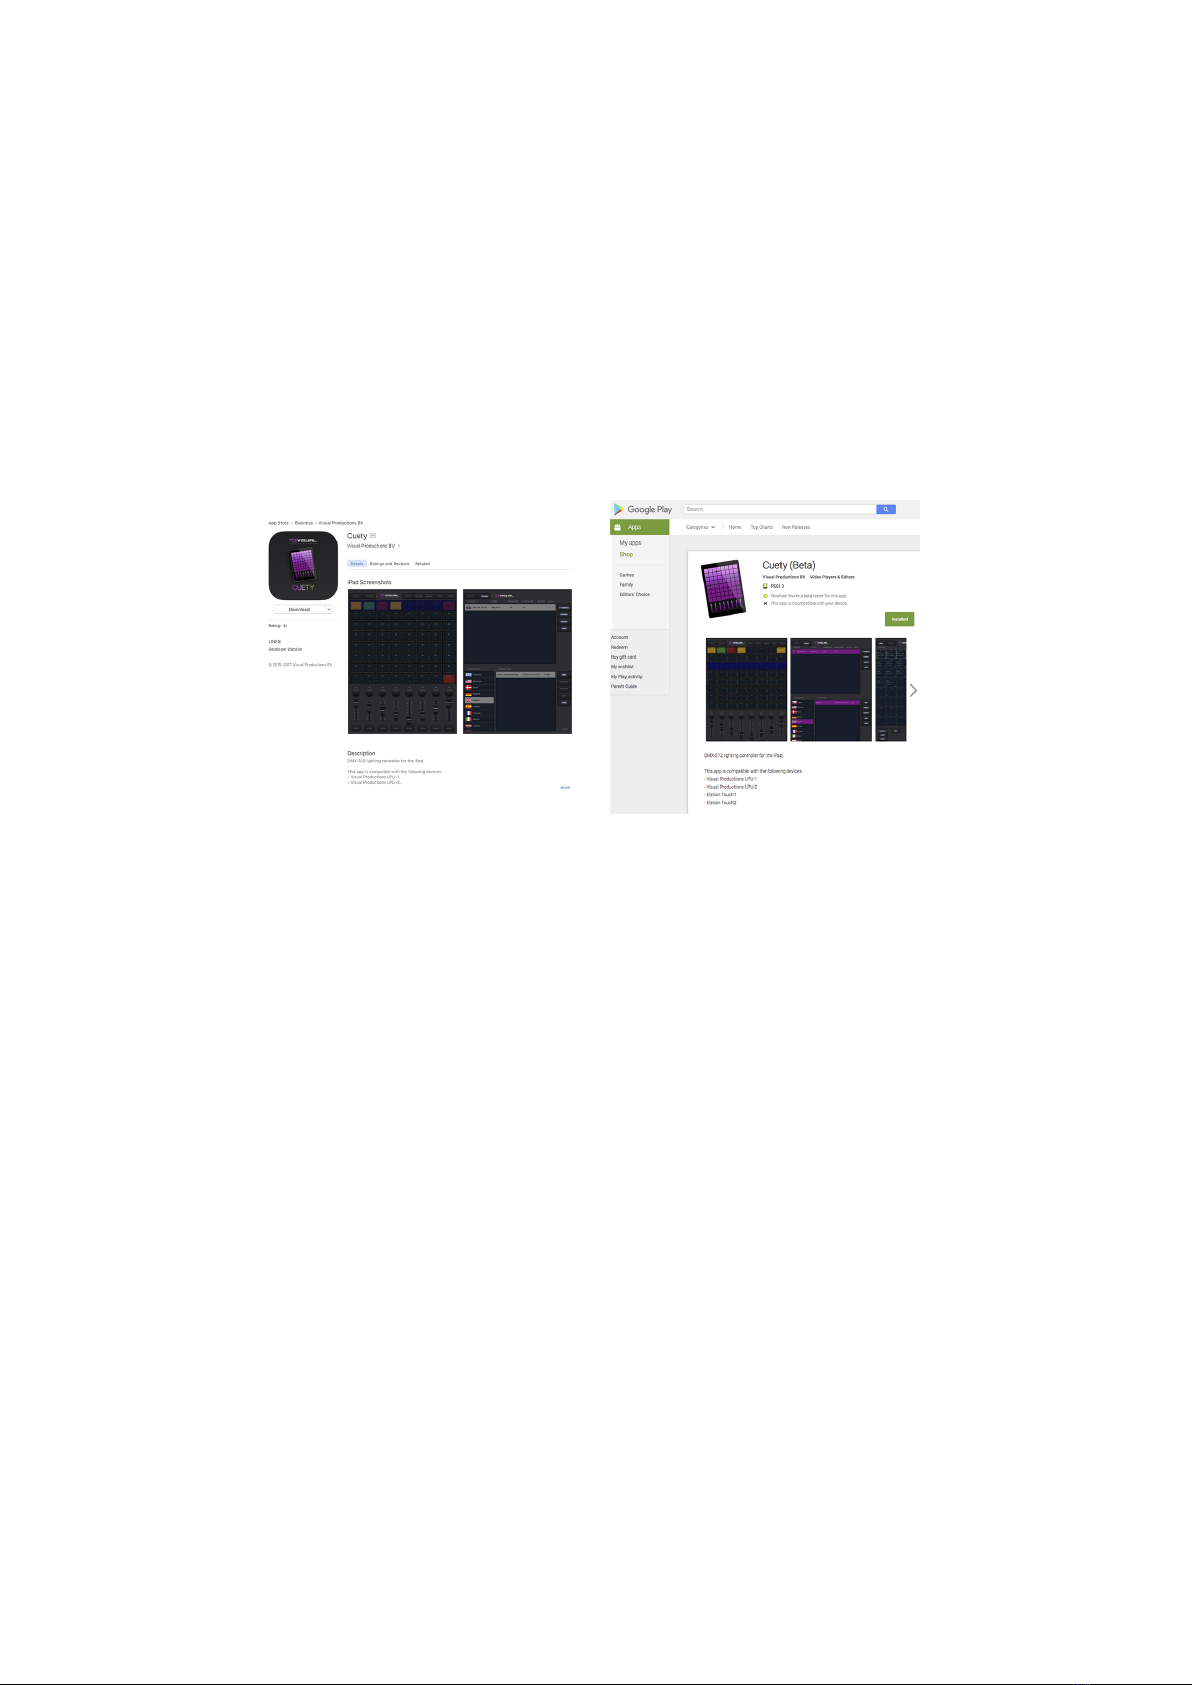
(a) iOS (b) Android
Figure 1.3: App stores
Both Apps are available for iOS and Android and can be obtained via the Apple
App Store and Google Play store. See figure 1.3.
9

Figure 1.4: Download page
The Cuety and Cuety Remote software is also available on desktop operating
systems Windows, macOS and Ubuntu Linux. These releases can be downloaded
from http://www.visualproductions.nl/downloads/ (figure 1.4). Please bear
in mind that the Cuety app is designed for a tablet; the portrait view requires
a screen with a minimum of 1080 pixels in height.
1.6 What’s in the box?
The LPU packaging contains the following items (see figure 1.5):
•LPU
•Ethernet cable
•Power supply
•4x international plug
•Info card
10

Figure 1.5: LPU box contents
1.7 Versions
At the time of writing this manual the Cuety App was at version 1.14, the Cuety
Remote App was at version 1.09 and the LPU firmware at version 1.25.
1.8 Further Help
We have prepared you several instruction videos on our YouTube channel (fig-
ure 1.6) at http://youtube.com/c/visualproductionsbvhaarlem. These tu-
torials address network-setup, programming cues, importing personality files,
upgrading firmware, etc.
11

Figure 1.7: Forum
13

Chapter 2
Protocols
The LPU-1 and LPU-2 support the output of DMX via the 3-pole XLR connec-
tor on the device. Art-Net and sACN output can also be enabled to transmit
the DMX data over the network. The following chapter will explain what these
three protocols are. The LPU-1 and LPU-2 support 1 universe, that can be
output simultaneously via DMX, ArtNet and sACN. It is important to note
that only output is supported.
2.1 DMX-512
DMX-512 is the standard communication protocol for stage lighting. One DMX
network contains 512 channels which is called a ’universe’. Each lighting fixture
connected to this universe will use one or more of these channels. On the lighting
fixture itself the DMX address can be set. This address corresponds to the first
channel that this fixture will listen.
As shown in figure 2.1 a simple RGB light might use 3 channels. Setting this
light to DMX address 1 will mean that the first three channels of the universe
control the red, green, and blue values of this light. When adding a second
RGB light, it would commonly be set to the next free address. In this case, that
would be address 4. It will then listen to channels 4, 5 and 6 for red, green and
blue.
14
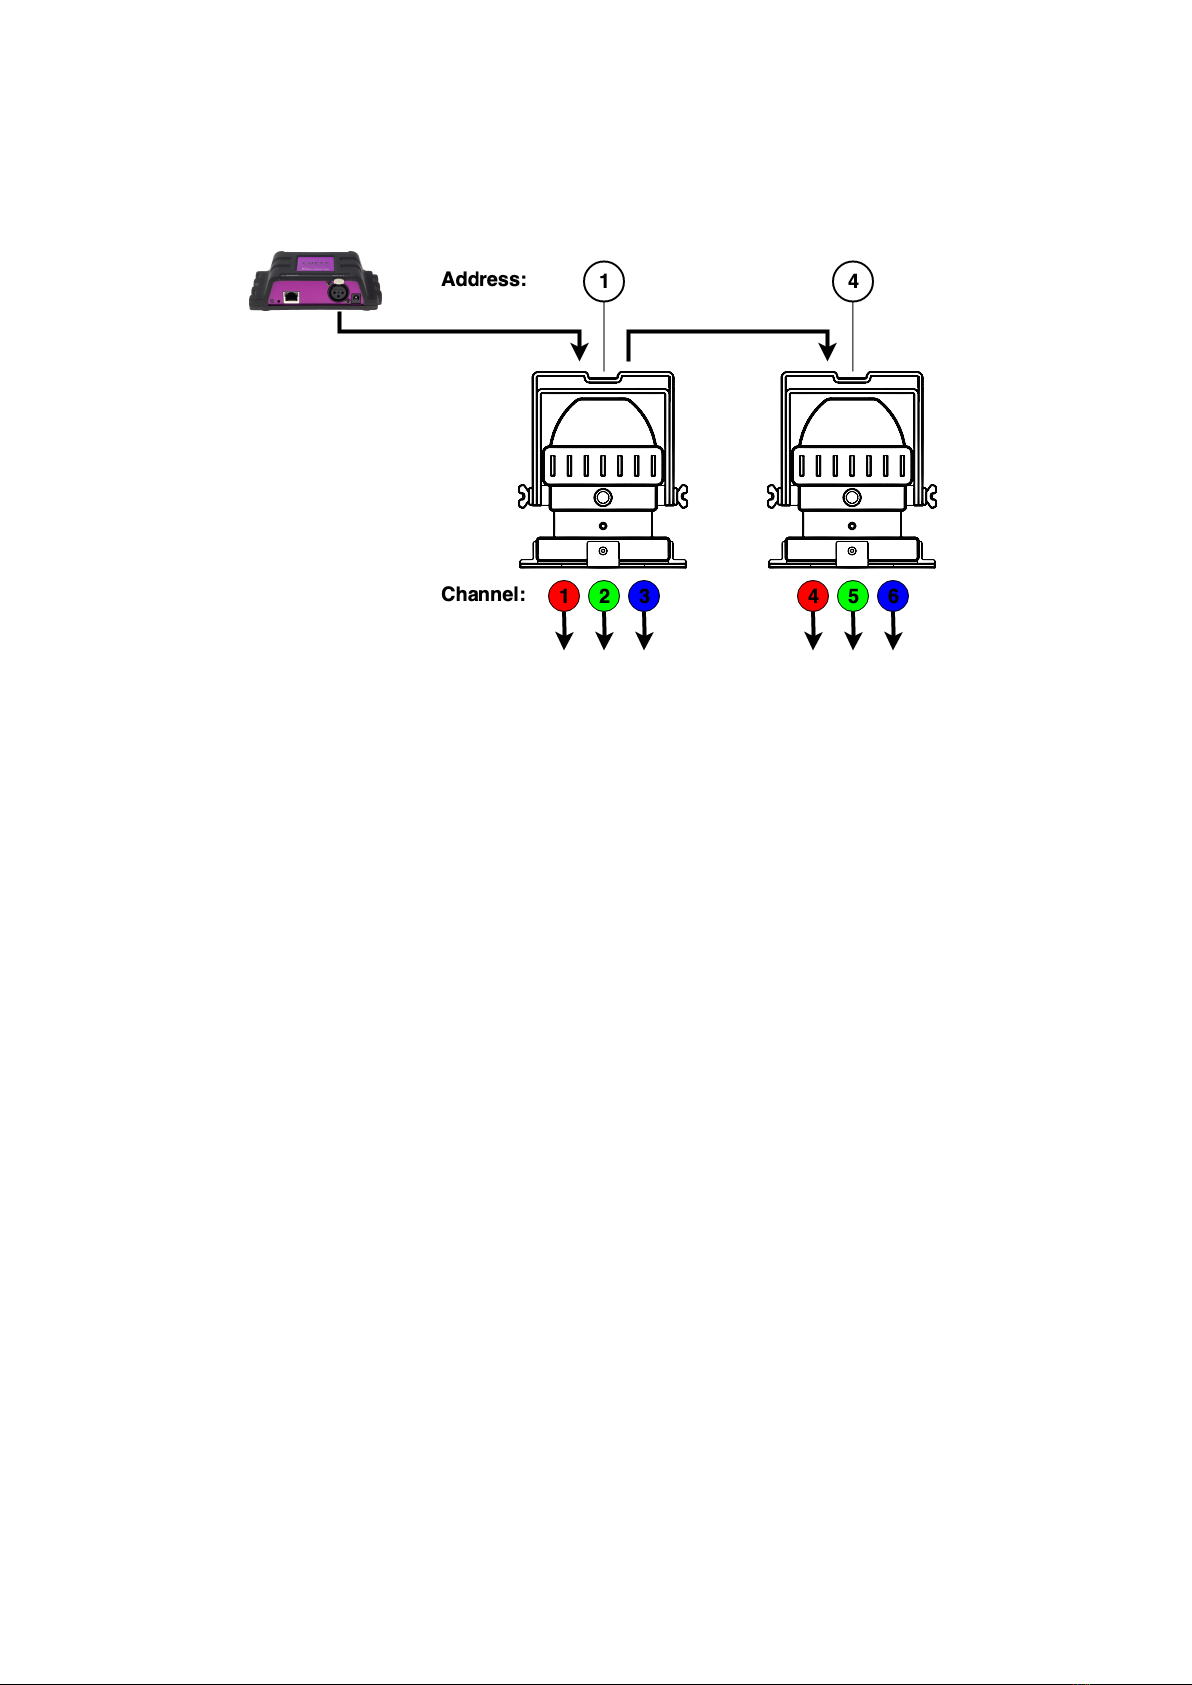
Figure 2.1: DMX example
How many channels a lighting fixture uses will always depend on the manufac-
turer/model. Often a light can have different operating modes. For example, a
simple RGB light can have a 3-channel mode where it uses 3 channels for red,
green and blue. But it might have a 4 channel mode for red, green, blue and
intensity. Maybe it even has a 5-channel mode, adding a channel for strobe. In-
formation about DMX and operating modes can usually be found in the manual
of the lighting fixture.
It is advised to use a shielded twisted pair cable for DMX cabling. The cable
should be terminated with an 120 Ohm resistor.
DMX-512 is a very successful protocol with, however, a few limitations. The
maximum number of attached devices is limited to 32 and they all have to be
connected in bus-topology having one cable running via each device. Further-
more, a DMX-512 cable should not be longer than 300 meters.
2.2 Art-Net
The Art-Net protocol primarily transfers DMX-512 data over Ethernet. The
high bandwidth of an Ethernet connection allows Art-Net to transfer up to 256
universes.
The data sent out for Art-Net does put a certain load on the network, therefore
it is recommended to disable Art-Net when not in use.
Art-Net output can be enabled or disabled in the Options menu, see section 5.1.
15

2.3 sACN
The streaming Architecture of Control Networks (sACN) protocol uses a method
of transporting DMX-512 information over TCP/IP networks. The protocol is
specified in the ANSI E1.31-2009 standard.
The sACN protocol supports multi-cast in order to take efficient use of the
network’s bandwidth.
sACN output can be enabled or disabled in the Options menu, see section 5.1.
16
Chapter 3
Quickstart
This chapter offers you a brief step-by-step instructions on how to get your
Cuety system up and running. All steps are explained in further detail in the
subsequent chapters. In this Quick Start example we are using a simple 3-
channel RGB fixture that is set to start-address 1.
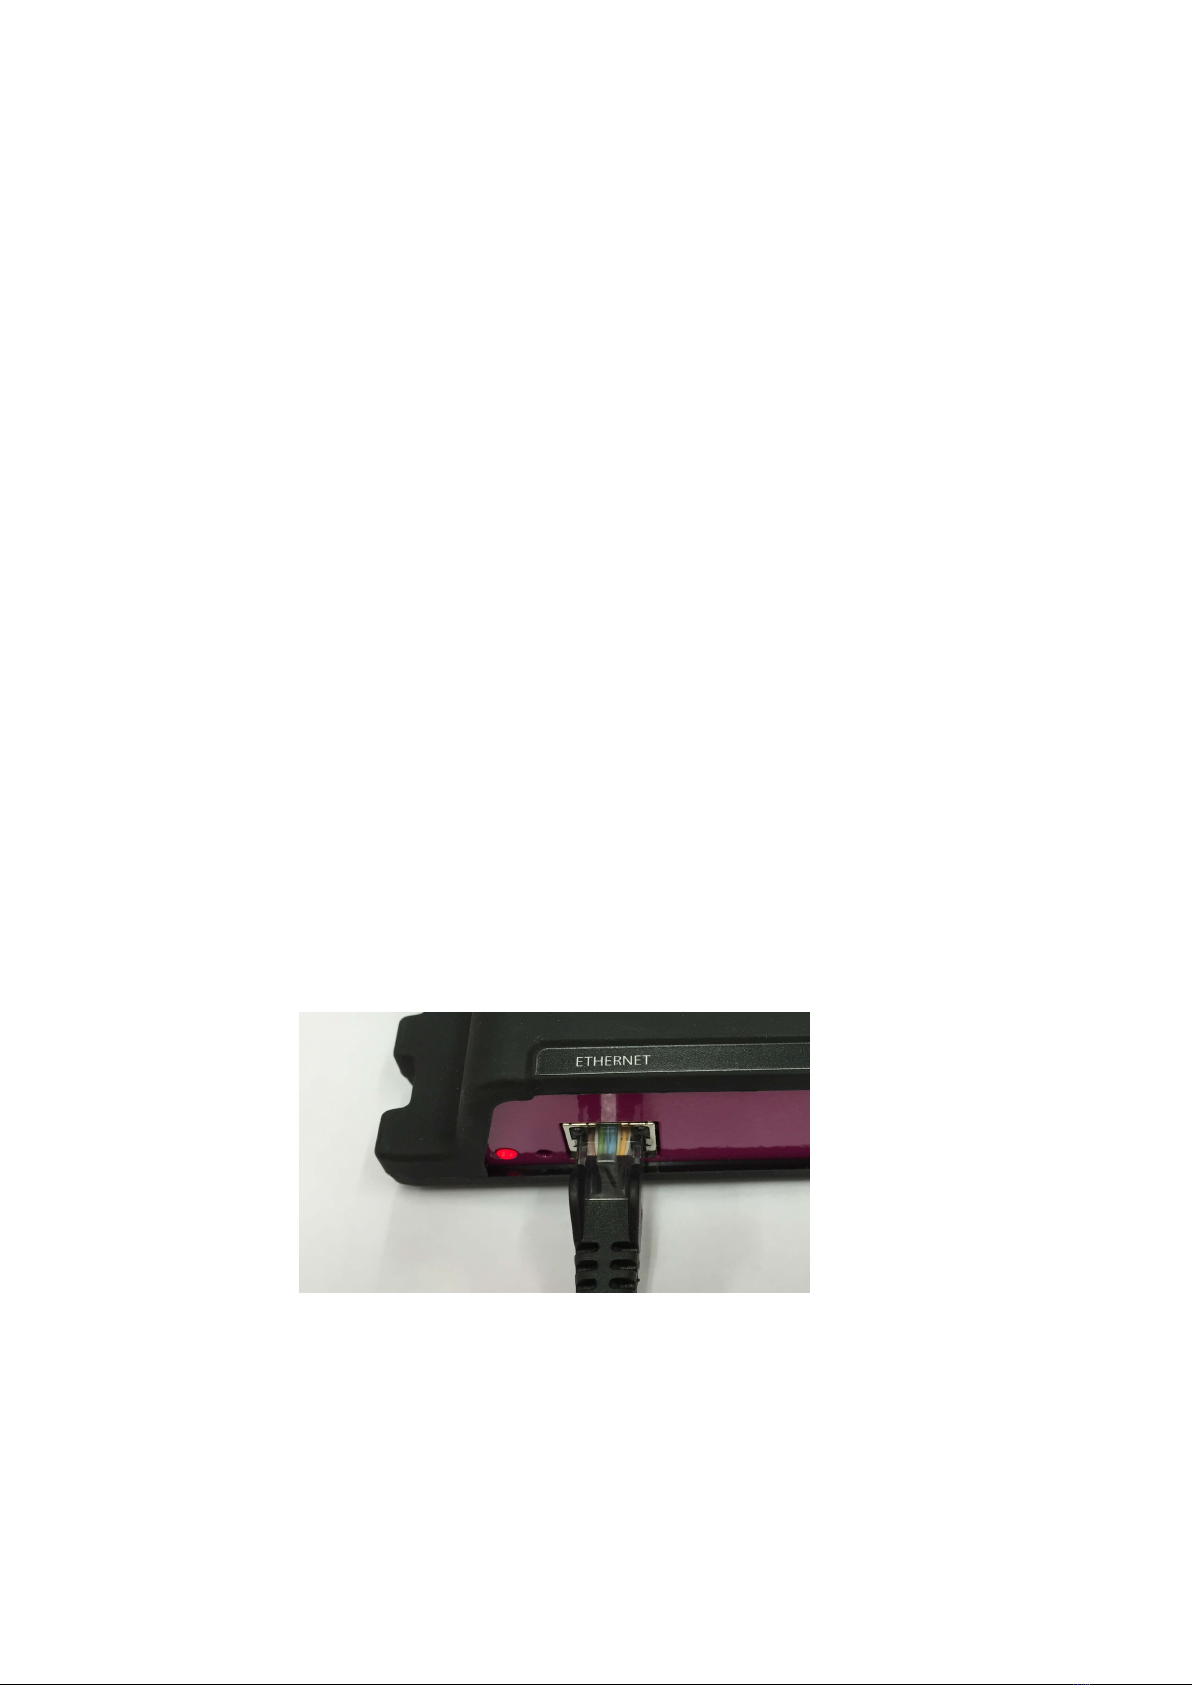
1. Connect
Power up your LPU device with the accompanied PSU. Use the network
cable to connect the LPU to your router.
2. DHCP
We assume here that you have a router that acts as a DHCP server.
Make sure your LPU device is also set to DHCP. The LED should be
blinking in red. If it’s blinking in white (static IP) then please use a
pencil to shortly push the reset button.
17

3. Cuety
We assume you have an iPad that is already connected to your network.
Start your Cuety app on your iPad and go to the OPTIONS screen.
Select the LPU from the list. There now should be a green LED in the
Cuety GUI (right next to the OPTIONS button).
4. Patch
Go to the PATCH screen and select the first fixture cell (top left). Press
the PERSONALITY button and go to the ’Generic’ manufacturer, where
you choose a ’RGB 01x’ model.
18

5. Edit
Exit the PATCH screen, you are now back in the main playback screen.
Press the EDIT button and then select a playback cell. This opens
the EDIT screen. Select the fixture and set some RGB values in the
’programmer’ below. Press ADD for >1 second to add a cue to the list
and record it immediately. Now set some other RGB values and press
ADD again for >1 second to create the second cue.
6. Playback
Press the BACK button to return to the main playback screen. Now you
can activate your edited playback by clicking on it. The playback status
should indicate a yellow colour and the attached fixture should show our
first RGB levels. By clicking the playback button again it will go to the
next cue.
You could go back into the EDIT screen to set fade times and change the
cues’ conditions to make it traverse automatically.
19

Chapter 4
Setting up
This chapter discusses how to set up the LPU.
4.1 Mounting
The device can be placed desktop or it can be DIN Rail mounted. The device
is prepared for DIN Rail mounting by using the ’DIN rail holder TSH 35’ from
Bopla (Product no. 22035000).
Figure 4.1: Bopla DIN rail adapter
This adapter is - amongst others - available from:
•Farnell / Newark (order code 4189991)
•Conrad (order code 539775 - 89)
•Distrelec (order code 300060)
4.2 Kensington Lock
The device can be secured by using a Kensington style laptop lock.
20
Other manuals for Cuety
1
This manual suits for next models
2
Table of contents
Other Visual Productions Dj Equipment manuals


