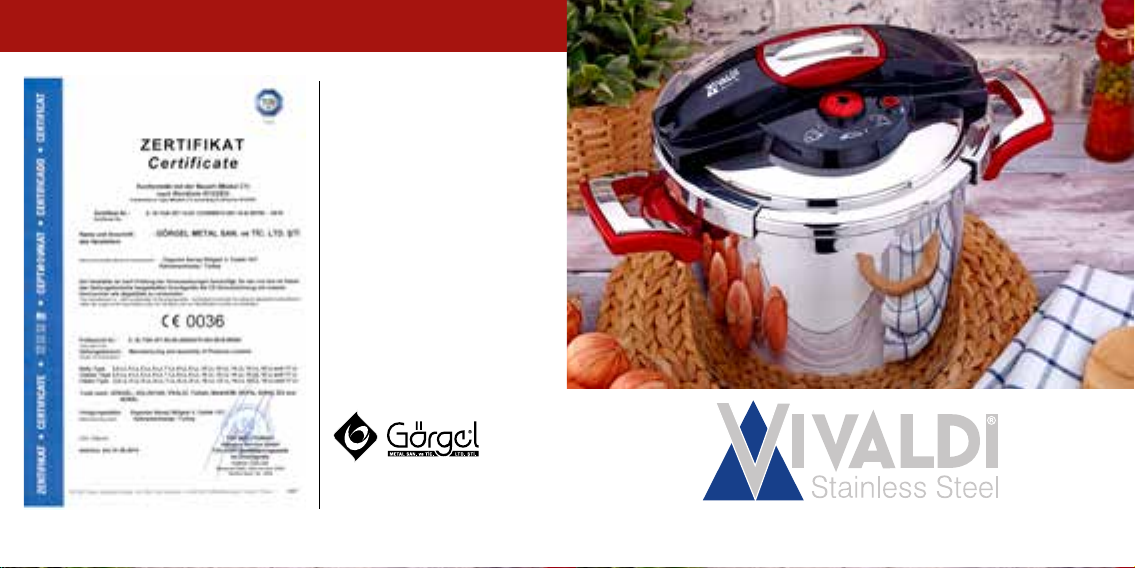
Vivaldi Clipso User manual

Düdüklü Tencere Kullanım Kılavuzu & Garanti Belgesi

2 3
Bu düdüklü tencere en son uluslararası güvenlik kurallarına uygun olarak imal edilmiş-
tir. Lütfen düdüklü tencerenizi kullanırken bu kurallara uyun.
1. Düdüklü tencerenizi hiçbir zaman gözetimsiz bırakmayın, özellikle de yakınların-
da çocukların olmamasına dikkat edin.
2. Düdüklü tencereniz ile fırında pişirme yapmayın.
3. Basınçlı düdüklü tencereyi çok dikkatli şekilde taşıyın. Sıcak yüzeylere dokun-
mayın. Taşımak için sadece saplarından kaldırın.
4. Eğer gerekirse fırın eldiveni kullanın.
5. Tasarımı dışındaki amaçlar için düdüklü tencerenizi kullanmayın.
6. Bu cihaz basınç altında pişirir. Düdüklü tencerenin uygunsuz kullanımı, haşlan-
ma ile sonuçlanabilir. Isı kaynağının üzerine koymadan önce düdüklü tencere-
nin düzgünce kapatıldığından emin olun.
7. Hiçbir zaman düdüklü tencereyi zorlayarak açmayın. İçerisindeki basıncın tama-
men dışarı çıktığından emin olduktan sonra tencerenizi açın.
8. Düdüklü tencerenizi hiçbir zaman susuz olarak kullanmayın. Düdüklü tencere-
nizde en az 1/3 seviyesine kadar su olmalıdır. Aksi halde düdüklü tencereye
ciddi olarak zarar verebilirsiniz.
9. Tencereyi, kapasitesinin 2/3’ünden fazla doldurmayın. Pirinç ya da kurutulmuş
sebzeler gibi pişirme sırasında hacmi artan yiyecekleri pişirirken düdüklü ten-
cerenizi yarıdan fazla doldurmayın.
10. Kullanım talimatlarına göre uygun ısı kaynağı kullanın.
11. Tencerenizde, basınç altında pişirildiğinde şişen (ciğer, sosis gibi) derili eti pişirdik-
ten sonra deriyi delmeyin, haşlanabilirsiniz. Bu durumda sivri bir bıçak ucu ile derili
yiyeceklerde önceden birkaç delik açın.
12. Hamur işi ve mercimek gibi gıdaları pişirirken yemeğin fışkırmasını önlemek
için kapağı açmadan önce yavaşça tencereyi sallayın.
13. Her kullanımdan önce valflerin düzgün ve kolayca çalıştığından emin olun.
14. Düdüklü tencereyi hiçbir zaman bol yağda kızarmış yiyecekler için basınçlı
konumda kullanmayın.
15. Hiçbir şekilde düdüklü tencerenin güvenlik sisteminde değişiklik yapmayın.
16. Sadece üreticinin önerdiği uygun yedek parçaları kullanın. Özellikle, aynı üreti-
cinin uygun olarak nitelendirdiği gövde ve kapağı kullanın.
17. Bu talimatlara uyun.
Dikkat Edilmesi Gereken Noktalar

4 5
Düdüklü Tencerenin Ek Özellikleri
• Üç farklı pişirme konumuna sahip pişirme ventili
• Çabuk basınç boşaltımı için özel olarak geliştirilmiş düzenek
• Isıyı iletmeyen yan saplar
• En uygun ısı dağıtımı için küçültülmüş termo-sandviç taban
• Güvenlik kilidi ile donatılmış kolay açma kapatma sistemi
• 18/10 Cr./Ni. paslanmaz çelikten yapılmış tencere gövdesi ve kapağı
• Bütün ocaklar için uygun taban
1. Güvenlik Sistemi
• Özel emniyet kilidi, tencere içinde basınç oluşmaya başladığında kelepçeleri
kilitleyerek kapağın açılmasını önler.
• Tek düğmeyle kilitleme mekanizması düdüklü tencereyi kapatmayı kolaylaştırır.
• Kapak üzerindeki pişirme ventili “pişirme” yönünde iken tencerede oluşan fazla
basıncı içindeki mekanizma sayesinde dışarı atar.
• Düdüklü tencereniz 1. kademede 0,5 bar, 2.’de 0,6 bar, 3.’te 0,7 bar basınçla
pişirme yapar, oluşan fazla basınç pişirme ventilinden dışarı atılır. Herhangi bir
nedenle pişirme ventili tıkanırsa tencere içindeki basınç 1,4 bar’a ulaştığında
emniyet ventili devreye girerek fazla basıncı boşaltır. Şayet hem pişirme ventili,
hem de emniyet ventili tıkanırsa 2,0 bar’da tencere ile kapak arasından basıncın
tamamı boşalır.
• Hava Valfi (Emniyet Kilidi): Kapak tencereye kapatılırken, tencere içinde sıkı-
şacak olan basıncı dışarı atarak kapağın tencereye uygun şekilde oturmasını
sağlar. Kelepçeler açık olduğu sürece hava valfi açık durumdadır. Kapama
düğmesine basıldığında, hava valfi serbest kalır ve yay yardımıyla hava çıkışını
kapatır. Aynı zamanda açma düğmesinin önüne gelerek emniyet kilidi görevi
yapar. Tencere içinde basınç olduğu sürece kapağı açamazsınız.
2. Özellikler
Nitelik
Bu düdüklü tencere 18/10 Cr./Ni. paslanmaz çelikten yapılmıştır. Düdüklü tence-
renin yan sapları ısıya dayanıklı bakalit malzemedendir. Tam otomatik mekanizma
düdüklü tencerenin kolay ve rahat kullanımını sağlar.
Etkinlik
Gereken basınca erişildiğinde ocağın altı kısılarak ısı girişinin azaltılması ile enerji
tasarrufu sağlanır.
Çok Yönlülük
Düdüklü tencereniz çorba, sebze, et ve türlülerin yapımında kullanılabilir.
Pilav ve pirinç yemeklerinin, reçellerin, marmelatların ya da sebzelerin pişirilmesi
sadece birkaç dakikanızı alır.
Düdüklü tencereniz bütün ocak tiplerine uygundur.
Gazlı ocak: Ateş seviyesi düdüklü tencerenin tabanını geçmemelidir.
Elekrikli ocak: Ocağın ısıtma plakası düdüklü tencerenin tabanından daha büyük
olmamalıdır.
Cam (seramik) + indüksiyon kızgın levha: Düdüklü tencerenin tabanı temiz ve
kuru olmalıdır.
Düdüklü tencerenin plastik bölümleri sadece aşırı ısıdan dolayı zarar görebilir; bu
sebepten dolayı bu durum üreticinin garantisi altına girmez.
Güvenlik Sistemi

6 7
Ürün Açıklaması
2.1 Ürün Açıklaması
Düdüklü tencerenin dış görünümü
A. Düdüklü tencere kapağı
B. Düdüklü tencere kapak açma / kapama
C. Kapak tutamacı
D. Buhar çıkışı
E. Kademeli pişirme ventili
F. Kapak kelepçesi
G. Yan kulplar
H. Paslanmaz çelik tencere gövdesi
I. Termo Kapsül taban
B
H
I
C
D
EF
G
A

89
Kullanım Talimatları
3. Kullanım Talimatları
3.1 Düdüklü tencerenin kapağının açılması
• Pişirme ventil düğmesi “buhar boşaltma” konumunda iken, kapak tutma kulbunun
altındaki açma düğmesine başparmağınızla basarak, kelepçelerin her iki yana
açılmasını sağlayın. Kapağı tencere üzerinden kaldırın.
• İlk kullanımdan önce: Silikon contayı kapaktan sökün ve kaynayan suda durulayın,
kurutun ve doğru pozisyonda yerine yerleştirin.
Not: Silikon contanın yerine düzgünce yerleştirildiğinden emin olmak için
özel özen gösterin. Aksi takdirde basınç düzgünce sağlanamaz. Silikon
conta çevrilmemeli ve kapaktaki kanala (conta ve paslanmaz çelik kapak
arasında hiç boşluk kalmadan) sıkıca oturtulmalıdır.
• Genel kural olarak düdüklü tencereyi kullanmadan önce silikon contanın pozisyonu
kontrol edilmelidir.
3.2 Yemek melzemelerinin tencereye koyulması
• Her pişirmede tencereye en az bir bardak su/sıvı ilave edin. Tencereyi en fazla
yarısına kadar doldurun. Bu seviyeye sıvı ve yemek malzemeleri dahildir.
Dikkat: Kolayca köpüren ya da kabaran yiyecekleri pişirirken (nohut, bezelye,
pirinç vb.) düdüklü tencere sadece yarısına kadar doldurulabilir. Pişirmeden
önce köpürmeyi azaltmak için diğer malzemelere bir tatlı kaşığı tereyağ ya da
sıvı yağ ekleyin.
• Maksimum dolum seviyesi (2/3) tencerenin iç kısmında işaretlenmiştir. Hiçbir koşul-
da düdüklü tencereyi bu seviyenin üzerinde aşırı doldurmayın. Aksi takdirde, valfler
yemek malzemeleriyle temas edecek ve tıkanmalarına sebep olarak fonksiyonları
bozulacaktır.
3.3 Düdüklü tencere kapağının kapatılması
• Pişirme ventil düğmesi buhar boşaltma konumunda olmalıdır. Kelepçeler açık du-
rumda iken kapağı tencerenin üzerine yerleştirin. Kapağı üstten bir elinizle bastırır-
ken, diğer elinizin başparmağını kullanarak kapama düğmesine basın. Kelepçelerin
tencereye kilitlendiğini ve tencere gövdesine tamamen temas ettiğini kontrol edin.
3.4 Yemek hazırlanışı
• Düdüklü tencereyi ocağın üzerine yerleştirin ve ocağınızı en yüksek seviyeye açın.
Ocağın düdüklü tencerenin tabanından daha büyük olmamasına, ocak alevinin ten-
cere kenarından taşmamasına dikkat edin.
• Pişirme ventil düğmesi buhar boşaltma konumunda yani tam açık olmalıdır. Bir süre
sonra pişirme ventil düğmesinden fıslama ile kuvvetli buhar çıkmaya başlayınca,
önce ısı kaynağını en düşük seviyeye getirin.
• Pişirme ventil düğmesini yemeğinizin cinsine göre 1, 2 veya 3’e çevirin. Bu andan
itibaren pişirme süresi başlamıştır, zaman tutun.
• Pişirme süresince pişirme ventiline müdahalede bulunmayın. Ventil içindeki sübap
oluşan fazla basıncı dışarı atar.
Not: Gereken pişirme derecesine pişirme ventilinden buhar çıktığında ulaşıl-
mıştır. Örnek Pişirme Süreleri tablosunda gösterilen pişirme zamanları pişirme
ventilinden ilk buhar çıktığı zamandan itibaren gerekli süreyi ifade eder.
• Düdüklü tencerede yemek hazırlama zamanları ile ilgili basit yöntem şudur: Herhan-
gi bir yemek düdüklüde normal tencerenin 1/3’ü süresinde pişer. Örnek: 30 dakika
yerine 10 dakika.

10 11
3.5 Yemek pişmesi bittiğinde/düdüklü tencere nasıl açılır?
Pişirme periyodu sonunda ısı kaynağını kapatın. Bu bekleme süresinde tencere
içindeki basınç en aza inecektir. 3 dakika kadar bekleyin. Pişirme ventilini yavaşça
buhar boşaltma yönüne doğru çevirin ve buharın komple boşalmasını bekleyin.
Kapağı açarken düdüklü tencere ile aranızda güvenli bir mesafe bırakın. Kapağı zorla
açmaya çalışmayın!
• Tencerenizi ateşten aldıktan sonra, 3-4 dakika beklemeden hemen açmanız gere-
kirse, tencerenizi musluk suyu altında 1 dakika soğutun. Pişirme ventil düğmesini
buhar boşaltma yönüne çevirerek kalan basıncın tamamını boşaltın.
DİKKAT: Büyük miktarda buhar pişirme ventilinden boşalabilir ve yüzünzü veya
vücudunuzun diğer bölümlerini haşlayabilir. Hızlı basınç düşmesi, “çabuk açıl-
ma” sırasında ortaya çıkan yüksek bir tıslama sesi duyabilirsiniz. Bu tamamen
normaldir. Sadece bütün buhar dışarı çıktığında kapak açılabilir. Çabuk basınç
düşüşü sebzeler, hububatlar ya da köpüren gıda maddeleri için seçilmemelidir.
4. Temizlik ve Bakım
4.1 Tencere gövdesinin temizlenmesi
Düdüklü tencerenin gövdesi diğer paslanmaz çelik tencereler gibi elle ya da bulaşık
makinesinde temizlenebilir. Lütfen metal fırçalar, aşındırıcı temizleme malzemeleri
ya da ağartıcı maddeleri yüzeye zarar vereceğinden dolayı kullanmayın. İnatçı kirleri
ve solmaları çıkartmak için düdüklü tencereyi limon suyuyla (yarım limonu 2 bardak
su ile karıştırarak) doldurun. Karışımın 5 dakika boyunca basınçla kaynamasına izin
verin. Düdüklü tencereyi ocaktan alın ve soğumaya bırakın. Şimdi düdüklü tencere-
nizi sıcak su ile durulayabilirsiniz. Kapak sadece sıcak suyla ve bulaşık deterjanıyla
temizlenmelidir. KAPAĞI BULAŞIK MAKİNESİNE KOYMAYIN. Temizlemek için sert
ve aşındırıcı malzemeler kullanmayın.
Dikkat: Kapak ve silikon contayı bulaşık makinesinde yıkamayın. Dolapta sakla-
mak için, düdüklü tencerenin üzerindeki kapağı ters çevirin ve tencere gövdesi
üzerine koyun; bu silikon contayı korur. Düdüklü tencere sadece içinde yemek
olmadan saklanabilir; saklamak için dolaba kaldırdığınızda temiz ve tamamen
kuru olmalıdır.
4.2 Pişirme ventil düğmesinin temizlenmesi
• Pişirme ventilinin her kullanımdan sonra temizlenmesi gerekmektedir. Kapağı elini-
ze alarak kapağın altında bulunan pişirme ventil somununu elinizle çevirerek açın.
• Somunun altında bulunan o-ring’i yakalayıp, tekrar yerine takmak zorunda olduğu-
nuzdan kaybolmamasına dikkat ederek açın.
• Ventil plastiğini çevirerek açıp yıkayın ve aynı şekilde çevirerek takın. Ventil yönüne
dikkat ederek ventilinizi kapağa yerleştirin.
• Yıkamış olduğunuz o-ring’i somunun içerisine yerleştirip tekrar sıkın.
4.3 Silikon kapak contası temizlenmesi
Düdüklü tencerenin her kullanımından sonra silikon contayı kapaktan çıkartarak elde
sabunlu sünger ve sıcak su ile derinlemesine yıkayın, kurutun. Düdüklü tencerenizin
kullanım sıklığına bağlı olarak (şayet her gün kullanılıyor ise) kapak contası her 2 yılda
bir orjinal yeni bir conta ile değiştirilmelidir.

12 13
5. Sorun giderme
5.1 Düdüklü tencere kapatılamıyor.
• Contayı kapak içine uygun şekilde yerleştirin.
• Kelepçelerin her iki yana tam açılmasını sağlayın.
• Tencere içinde kaynar vaziyette yemek varsa, kapağı tencere üzerine koyduğunuz-
da içinde oluşan basınç, kapağı yukarı kaldıracak ve kilitleme zorlaşacaktır.
• Pişirme ventilini “buhar boşaltma” konumuna getirip, kapağı elle bastırarak kilitle-
meyi deneyin.
• Kapak mekanizması arızalanmış olabilir, tencereyi aldığınız yere veya imalatçı
firmaya başvurun.
5.2 Pişirme ventilinden pişirme konumunda fazla buhar geliyor.
• Isı kaynağı çok açıktır. Ocak ateşini mümkün olduğu kadar azaltın.
• Pişirme ventili kirlenmiştir. Tencere basıncını boşalttıktan sonra sökerek temizleyin.
• Pişirme ventili arızalanmış olabilir. İmalatçı firmadan yenisi ile değiştirin.
5.3 Düdüklü tencere kapağı altından ve kenarları boyunca buhar kontrolsüz bir
şekilde kaçıyor. Su damlıyor.
• Pişirme ventili tıkanmış veya kirlenmiş olabilir. Tencereyi tamamen soğutun ve
talimatlara uygun oyarak pişirme ventilini sökerek temizleyin.
• Tencereye sıvı konmamış olabilir, en az bir bardak sıvı ilave edin.
• Conta hasarlı olabilir kontrol edin.
• Ventil somununun altındaki o-ring’in yerine takılmış olduğundan emin olun.
5.4 Lekelerin çıkarılması zor.
Lekeler için çeşitli nedenler vardır. Tencere içerisinde yanarak yapışmış yemekler
bulaşık deterjanı ve daha sonra metal olmayan bulaşık teliyle suda ısıtılarak temizlen-
melidir. Aşırı kahverengi, mavi, sarımsı ya da yeşilimsi solmaların nedeni paslanmaz
çeliğin yüksek derecede ısıtılmasından kaynaklanır. Solmalar düdüklü tencereyi yük-
sek derecede kullandığınız zaman ortaya çıkarlar. Böylece solmalar düdüklü tencere
normal kullanıldığında kaybolurlar. Şayet kaybolmaz ise, limon suyu ile çıkarılabilirler.
Solmanın yoğunluğuna göre sirkeyle temizleme süreci tekrarlanmalıdır. Yuvarlak, kah-
verengi ve transparan lekeler çoğunlukla kullanma ve yıkama suyundan kaynaklanır.
Düdüklünün kendisi paslanmazdır çünkü 18/10 Cr./Ni. paslanmaz çelikten yapılmıştır.
Yuvarlak, beyaz lekelere tuz ve/veya kalsiyum karbonat çökeltileri (kireç birikintisi)
neden olur. Bulaşık makinesi kullanmayın ya da özellikle temizleme malzemelerinin
miktarını ve tuz kullanımını azaltın. Örneğin, su kaynamaya başladığında tuz lekelerini
önlemek için yemeğe sadece tuz ya da su ekleyin. Sert suya sahip bir bölgede yaşı-
yor olabilirsiniz. Böylece solmalar ayrıca asidik asit (konsantre sirke) ya da limon suyu
ile çıkarılabilirler. Solmanın yoğunluğuna göre sirkeyle ya da sitrik asitle temizleme
süreci tekrarlanmalıdır.
5.5 Düdüklü tencerenin kapağı açılamıyor.
• Tencerenin içinde basınç bitmemiş ise emniyet kilidi devrededir. Biraz bekleyip tekrar
deneyin.
• Soğuma yavaş olursa tencere içinde vakum oluşabilir, pişirme ventilini buhar bo-
şaltmaya tam çevirip kapağı açmayı deneyin. Açmak için kapağı asla zorlamayın.
• Pişirme ventili tıkanmış olabilir. Tencerenin tamamen soğumasını bekleyin.

14 15
6. Pişirme zamanları tablosu
Bu kullanım kılavuzu Vivaldi düdüklü tencere için detaylı yemek tariflerini içermez. Kendi
yemek tariflerinize göre yemeklerinizi ve yiyeceklerinizi pişirebilirsiniz. Yemek pişirme
zaman tablosu yemek pişirme zamanlarınızı ayarlamanıza yardımcı olur. Yemek pişirme
zaman tablosu listelenen ürünler ve malzemeleri açısından sadece fikir vermek amacı ile
hazırlanmıştır. Doğru pişirme zamanına karar vermek için normal yemek pişirme yöntem-
lerinde kullandığımız pişirme sürelerini azaltabilir ve belirtilen malzemelere benzeyenleri
kullanabilirsiniz. Vivaldi düdüklü tencere ile ne kadar sürede pişireceğinizi kısa zamanda
öğreneceksiniz. Eğlenceli yemek pişirme deneyimleri edineceğinizden eminiz.
Gıda Maddeleri Pişirme Zamanı (dk.) Açılma Şekli Bekleme Süresi (dk.)
Sebzeler: Düdüklü tencereye, 1,5 bardak su koyun
Enginar 6 Hızlı
Taze fasulye 4Hızlı
Brokoli 4Hızlı
Lahana (1/2) 10 Karışık 4
Havuç (bütün) 5Hızlı
Havuç (dilim) 3Hızlı
Karnabahar 3Hızlı
Mısır (tatlı) 6 Hızlı
Patates (küp) 6 Karışık 4
Patates (1/2) 8 Karışık 5
Gıda Maddeleri Pişirme
Zamanı (dk.) Açılma Şekli Bekleme Süresi
(dk.)
Et çeşitleri, kümes hayvanları ve balıklar: Bir yemek tarifi kullanıyorsanız tarifte
söylenenin sadece yarısı kadar su koyun.
Ağır ateşte pişmiş kuzu eti 15-20 Normal 5-10
Kemikli kuzu eti 25-30 Normal 5-10
Bütün tavuk 15-25 Normal 5-10
Tavuk göğüs 12-18 Hızlı
Tavuk parçaları 10-12 Hızlı
Ağır ateşte pişmiş dana eti 25-35 Normal 15-20
Dana (kemiksiz) 10-15 Hızlı 15-20
Kabuklular/midye 4-8 Hızlı
Karides 4-8 Hızlı
Balık fileto 5-8 Hızlı
Örnek Pişirme Süreleri

16 17
Gıda Maddeleri Pişirme
Zamanı (dk.) Açılma Şekli Bekleme Süresi
(dk.)
Pilav: Köpürmeyi azaltmak için bir kaşık dolusu tereyağı ya da yağ ekleyin. Beyaz pirinç
için, tarifte söylenenden 1/3 oranında, kırık pirinç için 1/4 oranında az su kullanın.
Beyaz pirinç 6 Karışık 7
Pirinçle tavuk 10 Hızlı
Kurutulmuş bakliyatlar: Önceden ıslatılmalarına gerek yoktur. Düdüklü tencereye bir ye-
mek kaşığı tereyağı ya da sıvı yağ ile 1/4 bakliyat ve 3/4 su ekleyiniz. Pişme süresinden
sonra düdüklü tencerenin soğuk su altında soğumasını bekleyin.
Nohut 14-18 Hızlı
Kuru fasulye (beyaz) 14-18 Hızlı 3
Barbunya fasulye (kırmızı) 18-20 Karışık 5
Bakla (tava) 18-20 Karışık
Markası Vivaldi
Modeli Klipso
Ürün Cinsi Düdüklü Tencere
Basınç 0,70 - 1,40 bar
Sıcaklık 1200
Kapasitesi Tüm ölçüler
Teknik Bilgiler
18
Çevrenin korunmasına yardım
edebilirsiniz! Lütfen yerel yönet-
meliklere uymayı hatırlayın: Çalış-
mayan ve kullanılmayan mutfak
gereçlerinizi uygun çöp dönüşüm
kutularına atın.
GARANTİ VE TAMİR SÜRESİ
Ürün satıldığı tarihten itibaren 2 (iki)
yıl garantilidir. Arızalı ürünün yetkili
tamir ve bakım servisinde tamir
süresi 30 (otuz) iş günüdür.
ÜRETİCİ FİRMA:
GÖRGEL METAL
SANAYİ VE TİC. LTD. ŞTİ.
GÖRGEL METAL SAN. VE TİC. LTD. ŞTİ.
Organize Sanayi Böl. 3. Cd. No: 13/1
Onikişubat-Kahramanmaraş / Türkiye
Tel: 0344.257 90 90 Fax: 236 30 90
Pressure Cooker Instructions & Certicate of Warranty

20 21
This pressure cooker was manufactured according the latest international safety rules.
Please follow these rules when using this pressure cooker.
1. Never leave your pressure cooker unattended; special attention must be paid to
keep it away from the children.
2. Never cook with your pressure cooker in the oven.
3. Move the pressure cooker very carefully. Do not touch hot surfaces. Lift only from
the handles while moving it.
4. If required, use oven gloves.
5. Do not use your pressure cooker other than the purposes of its design.
6. This device cooks under pressure. Improper use of the pressure cooker may result
in scalding. Make sure that the pressure cooker is properly closed before placing
it on the heat source.
7. Never force the pressure cooker to open. Do not open it before making sure that the
internal pressure is fully released.
8. Never use your pressure cooker with no water in it. Your pressure cooker must
contain water at a level of at least 1/3. Otherwise, you may seriously damage your
pressure cooker.
9. Do not fill your pressure cooker more than 2/3 of its capacity.
While cooking food whose volume increases during cooking such as rice or dried
vegetables, do not fill the pressure cooker more than half of its capacity.
10. Use suitable heat source as per the operating instructions.
11. While cooking under pressure in your pressure cooker, and after cooking meat
with skin such as liver or sausage, do not pierce the skin as you may get scalded.
In such a case, make a few holes in food with skin with a sharp knife previously.
12. While cooking food such as pastry and lentil, shake your cooker gently before you
open the lid in order to avoid spouting of the food.
13. Before each use, make sure that the valves function properly and easily.
14. Never use the pressure cooker in a pressurized position for food fried in plenty
of oil.
15. Never make any changes in the safety system of the pressure cooker.
16. Always use suitable spare parts recommended by the manufacturer. Specifically,
use the body and lid qualified to be suitable by the same manufacturer.
17. Follow these instructions.
Issues to be Taken Into Consideration

22 23
1. Safety System
• The special safety lock, avoids the opening of the lid when the pressure began
to form in the cooker by locking the clamps.
• One-button locking mechanism makes it easy to close the pressure cooker.
• When the cooking valve is in the cooking position, it releases the extra pressu-
re formed in the cooker by its mechanism.
• Your pressure cooker, cooks with pressure in 1. level at 0.50 bar, in 2. level at
0.60 bar and in 3. level at 0.70 bar. The extra pressure released through the
valve. For any reason, if the cooking valve clogged and the internal pressure
reaches 1.40 bar, the safety valve activates and releases the extra pressure.If
both the cooking valve and the safety valve clogs, at 2.0 bar, the pressure will
be completely released through the body and the lid.
• Air Valve (Safety Lock) : When the lid is closing, the pressure which is stuck
in the cooker, will be released, providing the lid close properly. As long as the
clamps are open, the air valve will be open. When the close button is pressed,
the air valve get loose and with the help of the spring, closes the air output. At
the same time, it came in front of the open button acting as a safety lock. As
long as there is pressure in the cooker, you cannot open the lid.
2. Properties
Quality
This pressure cooker is made of 18/10 Cr/Ni stainless steel. Side handles of
the pressure cooker are made of heat-resistant bakelite material. Full-automatic
mechanism ensures easy and comfortable use of the pressure cooker.
Additional Properties of the Pressure Cooker:
• Cooking valve with three different cooking positions
• Assembly developed specifically for quick pressure release
• Heat proof side handles
• Thermo sandwich base reduced for optimum heat distribution
• Easy open close system equipped with a safety lock
• Cooker body and lid made of 18/10 Cr/Ni stainless steel
• Base suitable for all stoves
Efficiency
When the required pressure is reached, energy saving is ensured by reducing
the heat on the stove and decreasing the heat input.
Versatility
Your pressure cooker can be used for cooking soup, vegetables, meat and mixed
vegetables. It takes only a few minutes to cook rice and other food with rice,
jams, marmalades or vegetables. Your pressure cooker is suitable for any type
of stoves.
Gas stove: Its fire level should not exceed the cooker base.
Electric stove: Heating plate of the stove should not be larger than the pressure
cooker base.
Glass (ceramic) + induction hot plate: The pressure cooker base should be
clean and dry. Plastic parts of the pressure cooker can be damaged only due
to excessive heat; therefore, these parts are not covered by the warranty of the
manufacturer.

24 25
2.1 Product Description
Outer appearance of the pressure cooker.
A. Pressure cooker lid
B. Pressure cooker lid open / close
C. Lid handle
D. Steam release
E. Staged cooking valve
F. Lid clamp
G. Side handles
H. Stainless steel cooker body
I. Thermo-capsule base
B
H
I
C
D
EF
G
A

26 27
3.1 Opening the pressure cooker lid
• When the cooking valve is in “pressure release” position, press the open button underne-
ath the lid handle with your thumb, to release the lock both sides. Lift the lid to open the
cooker.
• Before The First Use: Remove the silicon gasket from the lid, rinse with boiling water, and
then dry and place it back in the correct position.
Note: Use special caution to ensure that the silicon gasket is properly fitted in its
place. Otherwise, pressure cannot be properly achieved. Silicon gasket should not be
turned and should be securely fitted (with no space between the gasket and stainless
steel lid) into the groove lid.
• As a general rule, the position of the silicon gasket should be checked before using the
pressure cooker.
3.2 Setting of cooking degree:
• In each cooking, fill at least one and a half glass of water into the cooker. Fill, maximum
the half of the cooker. This includes, the cooking materials and the liquid.
Caution: While cooking food that will either produce foam or expand in size (such
as chickpeas, peas, rice), the pressure cooker can only be filled half. Add a dessert
spoon of butter or oil to other materials to reduce foaming before cooking.
• Maximum filling level (2/3) is marked inside the cooker. Never fill the pressure cooker
excessively above this level. Otherwise, the valves will contact the food materials; this will
cause them to clog and disrupt their functions.
3.3 Closing the pressure cooker lid
The cooking valve must be in “pressure release” position. When the clamps are released,
put the lid on the cooker. While pressing the lid with one hand from the top, use your other
hands thumb to press the close button. Make sure the clamps are locked and properly
contact the body of the cooker.
3.4 Preparing food
• Place the pressure cooker on the stove, and turn on the stove to the highest level.Make
sure that the stove is not larger than the pressure cooker base. The fire level should not
exceed the cooker base.
• The cooking valve must be in “pressure release” position, so it must be fully open. After
a while, you will hear a hissing sound and see the pressure release. At his point, turn the
stove to the lowest level.
• Set the cooking valve to 1, 2 or 3 depending on the food you are cooking. Now the coo-
king time has started, set your clock.
• During the cooking, do not intervene the cooking valve. The valve will release the extra
pressure.
NOTE: When the steam is released from the cooking valve, the required cooking degree
is reached. The cooking time shown in the cooking timetable states the required period
as of the time the initial steam is released from the cooking valve.
• The simple method about the food preparation time in the pressure cooker is as follows:
In a pressure cooker, any food is cooked at 1/3 of time of a normal cooker. Example: 10
minutes instead of 30 minutes.
3.5 How to open the pressure cooker after cooking is completed When the cooking time
is over, close the heat source. Wait for about 3 minutes. During the waiting period, the
pressure inside the cooker will be minimized. Gently turn the cooking valve to release posi-
tion and wait for the steam to be fully released. While opening the lid, leave a safe distance
between your body and the pressure cooker. Do not force the pressure cooker to open!
• After the heat source closed, if you need to open your pressure cooker without waiting 2
or 3 minutes, keep the pressure cooker under running water for 1 minute to cool it down.
To release the remaining pressure, turn the cooking valve to release pressure position.
Operating Instructions

28 29
CAUTION: High amount of steam may be released from the cooking valve and scald
your face or other parts of your body. During quick pressure drop, you may hear a
high hissing sound that occurs only during “quick opening”. This is perfectly normal.
The lid can be opened only when the steam is fully released. Quick pressure drop
should not be chosen for vegetables, grains or foodstuff that produces foam.
4. Cleaning and Maintenance
4.1 Cleaning the Cooker Body
The body of the pressure cooker can be hand-washed or cleaned in the dishwasher like the
other stainless steel cookers. Please do not use metal brushes, abrasive cleaning materials
or bleaching agents, as they damage the surface. In order to remove the heavy dirt and
discoloration, fill the pressure cooker with lemon juice (by mixing half a lemon with 2 glasses
of water). Leave the mixture to boil with pressure for 5 minutes. Lift the pressure cooker from
the stove and leave it to cool down. You can now rinse your pressure cooker with hot water.
The lid should be cleaned only with hot water and dish detergent.
DO NOT PUT THE LID INTO THE DISHWASHER. Do not use hard and abrasive materials
for cleaning.
Caution: Do not wash the lid and silicon gasket in the dishwasher. To store it in the
cupboard, invert the lid on the pressure cooker and place it on the cooker body; this
protects the silicon gasket. The pressure cooker can be stored only without food in
it; it should be clean and completely dry when you put it in the cupboard to store.
4.2 Cleaning the cooking valve
• After each use, the cooking valve must be cleaned. Take the lid in your hands and unscrew
the cooking valve nut, which is under the lid, with your hand.
• You should replace the o-ring under the nut. To avoid losing the o-ring, unscrew carefully.
• Unscrew the valve plastic, clean and replace the same way. Screw the valve by paying
attention to the direction.
• Replace the cleaned o-ring under the nut and screw.
4.3 Cleaning the silicon lid gaske
After each use of the pressure cooker, remove the silicon gasket from the lid, hand-wash
the gasket with hot water and soapy sponge thoroughly, and then dry it. Based on the use
frequency of your pressure cooker (if used daily), the lid gasket should be replaced with an
original gasket every two years.
5. Trouble shooting
5.1 The pressure cooker cannot be closed
• Place the gasket properly into the lid.
• Provide the full opening of the clamps on either side
• If there is boiling food in the cooker, when you put the lid on, the pressure inside will raise
the lid and locking the lid will be harder.
• Turn the cooking valve to “pressure release” position and try to close the lid by pushing.
• The lid mechanism could be out of order. Take the cooker to the place you bought or
consult the manufacturer.
5.2 Too much steam release from the cooking valve during cooking.
• Heat source is too high. Decrease the heat as much as possible.
• Cooking valve could be dirty. After releasing the cooker pressure, unscrew and clean the
valve.
• Cooking valve could be out of order. Take a new one from the manufacturer and replace.
5.3 Steam leaks uncontrollably from the bottom and along the sides of the pressu-
re cooker lid. Water drops.
• The cooking valve could be dirty or clogged. Cool the cooker completely and in accordan-
ce with the instructions, remove the cooking valve and clean.
• There could be no water in the cooker. Add at least one glass of water
• The gasket could be damaged. Check it.
• Make sure that the o-ring under the valve nut is in place

30 31
5.4 Stains are hard to remove
There are various causes for stains. Food, which is burnt and stuck inside the
cooker, should be cleaned with dish detergent and then, by heating in water with a
scourer that is not made of metal. The cause of excessive brown, blue, yellowish or
greenish discoloration is heating of the stainless steel at a high degree. Discoloration
occurs when you use the pressure cooker at a high degree. Thus, such discolo-
ration is eliminated when the pressure cooker is used under normal condition. If
it is not eliminated, it can be removed with lemon juice. Based on the intensity of
discoloration, cleaning process with vinegar should be repeated. Round, brown and
transparent stains often result from utility and washing water. The pressure cooker
itself is stainless as it is made of 18/10 stainless steel. Salt or calcium carbonate
sediments (lime deposit) cause round and white stains. Do not use dishwasher or
specifically decrease the amount of cleaning materials and use of salt. For instance,
when water starts boiling, add only salt or water into food to prevent salt stains. You
might be living in a region where the water is of hard nature. Thus, discoloration can
be removed also with acidic acid (concentrated vinegar) or lemon juice. Based on
the intensity of discoloration, cleaning process with vinegar or citric acid should be
repeated.
5.5 The pressure cooker cannot be opened.
• If the pressure in the cooker is not fully released, the safety lock is active. Wait a
moment and try again
• If the cooling is slow, vacuum can occur inside the cooker. Turn the cooking valve
to release pressure position and try again. Never force the lid to open.
• Cooking valve may be clogged. Allow the cooker to cool completely.
6. Cooking time table
These instructions do not include detailed recipes for VIVALDI pressure cooker. You
may cook your meals and food according to your own recipes. Cooking time table
helps you to adjust your cooking time. The cooking time table was prepared only to
give an opinion on the listed products and materials. In order to decide the correct
cooking time, you may decrease the cooking time used in regular cooking methods
and use the materials that resemble the specified ones. You will find out the cooking
time with VIVALDI pressure cooker after a short time. We are confident that you will
experience enjoyable cooking.
Food Cooking Time (min.) Opening Method Waiting Time (min.)
Vegetables: Add 1.5 glasses of water into the pressure cooker.
Artichoke 6 Fast
Fresh beans 4Fast
Broccoli 4Fast
Cabbage (1/2) 10 Mixed 4
Carrot (whole) 5Fast
Carrot (sliced) 3Fast
Cauliflower 3Fast
Sweet corn 6 Fast
Potato (cubed) 6 Mixed 4
Potato (1/2) 8 Mixed 5
Cooking Time for Reference

32 33
Food Cooking Time
(min.)
Opening
Method
Waiting Time
(min.)
Meat, poultry and fish: If using a recipe, use half the amount of water indicated in
the recipe.
Braised lamb 15-20 Normal 5-10
Lamb with bones 25-30 Normal 5-10
Chicken (whole) 15-25 Normal 5-10
Chicken breast 12-18 Fast
Chopped chicken 10-12 Fast
Braised veal 25-35 Normal 15-20
Veal fillet 10-15 Fast 15-20
Shellfish/mussel 4-8 Fast
Shrimp 4-8 Fast
Fish fillet 5-8 Fast
Food Cooking Time
(min.)
Opening
Method
Waiting Time
(min.)
Rice: Add a spoonful of butter or oil to reduce foaming. For white rice, use less than 1/3
and for chipped rice, use less than ¼ of the amount of water indicated in the recipe.
White rice 6 Mixed 7 6 Karışık 7
Chicken with rice 10 Fast 10 Hızlı
Dry legumes: Pre-heating is not required. Add a spoonful of butter of vegetable oil
into the pressure cooker, along with ¼ scale of legumes and ¾ scale of water. Cool
pressure cooker under cold water after cooking.
Peas 14-18 Fast
Dried beans (white) 14-18 Fast 3
Kidney beans (red) 18-20 Mixed 5
Horse beans (mashed) 18-20 Mixed
34 35
Brand Vivaldi
Model Clipso
Product Type PRESSURE COOKER
Pressure 0,70 - 1,40 bar
Temperature 120°
Capacity ALL SIZES
Technical Information
You may help to protect the environ-
ment! Please remind to follow the
local regulations: Please discard
your non-operating or unused kitc-
henware into suitable recycle bins.
PERIOD OF WARRANTY AND
REPAIR
The product is guaranteed for 2
(years) as of the date of sale. The
period of repair for the defective
product at authorized repair &
maintenance service is 30 (thirty)
working days.
MANUFACTURING COMPANY
GÖRGEL METAL
SAN. VE TİC. LTD. ŞTİ.
GÖRGEL METAL SAN. VE TİC. LTD. ŞTİ.
Organize Sanayi Böl. 3. Cd. No: 13/1
Onikişubat-Kahramanmaraş / Türkiye
Tel: 0344.257 90 90 Fax: 236 30 90

37
1. Garanti süresi, malın teslim tarihinden itibaren başlar ve 2 yıldır.
2. Malın bütün parçaları dahil olmak üzere tamamı firmamızın garantisi kapsamındadır.
3. Malın garanti süresi içerisinde arızalanması durumunda, tamirde geçen süre garanti süresine
eklenir. Malın tamir süresi en fazla 30 (otuz) iş günüdür. Bu süre, mala ilişkin arızanın servis
istasyonuna, servis istasyonunun olmaması durumunda, malın satıcısı, bayii, acentası, tem-
silciliği, ithalatçısı veya imalatçısı-üreticisinden birisine bildirim tarihinden itibaren başlar. Malın
arızasının 15 gün içerisinde giderilememesi halinde imalatçı-üretici veya ithalatçı malın tamiri
tamamlanıncaya kadar, benzer özelliklere sahip başka bir malı tüketicinin kullanımına tahsis
etmek zorundadır.
4. Malın garanti süresi içerisinde gerek malzeme ve işçilik, gerekse montaj hatalarından dolayı
arızalanması halinde, işçilik masrafı, değiştirilen parça bedeli ya da başka herhangi bir ad altında
hiçbir ücret talep etmeksizin tamiri yapılacaktır.
5. Tüketicinin onarım hakkını kullanmasına rağmen malın;
• Tüketiciye teslim edildiği tarihten itibaren, belirlenen garanti süresi içinde kalmak kaydıyla, bir yıl
içerisinde; aynı arızanın ikiden fazla tekrarlanması veya farklı arızaların dörtten fazla meydana
gelmesi veya belirlenen garanti süresi içerisinde farklı arızaların toplamının altıdan fazla olması
unsurlarının yanı sıra, bu arızaların maldan yararlanamamayı sürekli kılması,
• Tamiri için gereken azami sürenin aşılması,
• Firmanın servis istasyonunun, servis istasyonunun mevcut olmaması halinde sırasıyla satıcısı,
bayii, acentesi, temsilciliği, ithalatçısı veya imalatçısı-üreticisinden birisinin düzenleyeceği raporla
arızanın tamirinin mümkün bulunmadığının belirlenmesi durumlarında, tüketici malın ücretsiz
değiştirilmesini, bedel iadesini veya ayıp oranında bedel indirimi talep edebilir.
6. Malın kullanma kılavuzunda yer alan hususlara aykırı kullanılmasından kaynaklanan arızalar
garanti kapsamı dışındadır.
7. Garanti Belgesi ile ilgili olarak çıkabilecek sorunlar için Sanayi ve Ticaret Bakanlığı Tüketicinin ve
Rekabetin Korunması Genel Müdürlüğü’ne başvurulabilir.
Merkez Servis Adresi: GÖRGEL METAL SAN. VE TİC. LTD. ŞTİ.
O.S.B. 3. Cd. No: 13/1 Onikişubat/K.Maraş Tel: 0344.257 90 90 Fax: 236 30 90
Garanti Şartları
Garanti Şartları
Warranty Conditions

38 39
1. Warranty period is 2 (two) years and commences on the delivery date of the product
2. The entire product including all the parts is warranted by our company.
3. If the product becomes defective within the warranty period, the time elapsed during repair is added to
the warranty period. The repair period of the product is maximum 30 (thirty) working days. This period
starts as of the date the defect of the product is notified to the service station, or if a service station
is not available, to any one of the product’s seller, dealer, agency, representation office, importer or
manufacturer. If defect of the factory product is not remedied within 15 working days, the manufacturer
and importer must allocate another factory product with similar properties to the use of the consumer
until repair of product is completed.
4. If the product becomes defective within its warranty period due to faults of material and work-
manship or assembly, its repair shall be performed without demanding any charges as a cost of
workmanship or replaced part, or by any other means.
5. Even though the consumer uses its right of repair, if;
• As of the delivery date of the product to the consumer, within one year, provided that the determined
warranty period is valid; the same failure recurs more than twice, or different failures occur more than
four times, or total of different failures within the determined warranty period is more than six, and also if
these failures cause to benefit from the product continuously;
• The required maximum repair period is exceeded,
• If it is determined that the defect cannot be remedied with a report to be prepared by the service
station of the company, and if a service stations is not available, by any one of the product’s seller,
dealer, agency, representation office, importer or manufacturer, respectively; the consumer may
request the replacement of the product free of charge, or return of the cost or a discount in the
cost at the rate of defect.
6. The defects resulting from the product use contrary to the issues stated in the instructions shall not be
covered by the warranty.
7. For the problems that may arise concerning the certificate of warranty, you may refer to the General
Directorate for the Protection of Consumers and Competition of the Ministry of Industry and Trade.
Warranty Conditions
Company Title: GÖRGEL METAL SAN. VE TİC. LTD. ŞTİ.
O.S.B. 3. Cd. No: 13/1 Onikişubat/K.Maraş Tel: 0344.257 90 90 Fax: 236 30 90
Table of contents
Languages:
Popular Electric Pressure Cooker manuals by other brands

Living Well Products
Living Well Products MWPC01 instruction manual

Cuckoo
Cuckoo CRP-GH10 Fuzzy Series operating instructions

Sheffield
Sheffield PLA1424 instruction manual

Pacific Northwest
Pacific Northwest PNW 421 Use and care guide

Cuckoo
Cuckoo CMC-Q5 Series operating instructions

TEFAL
TEFAL P4110764 user manual


