Nesco PC6-13 User manual
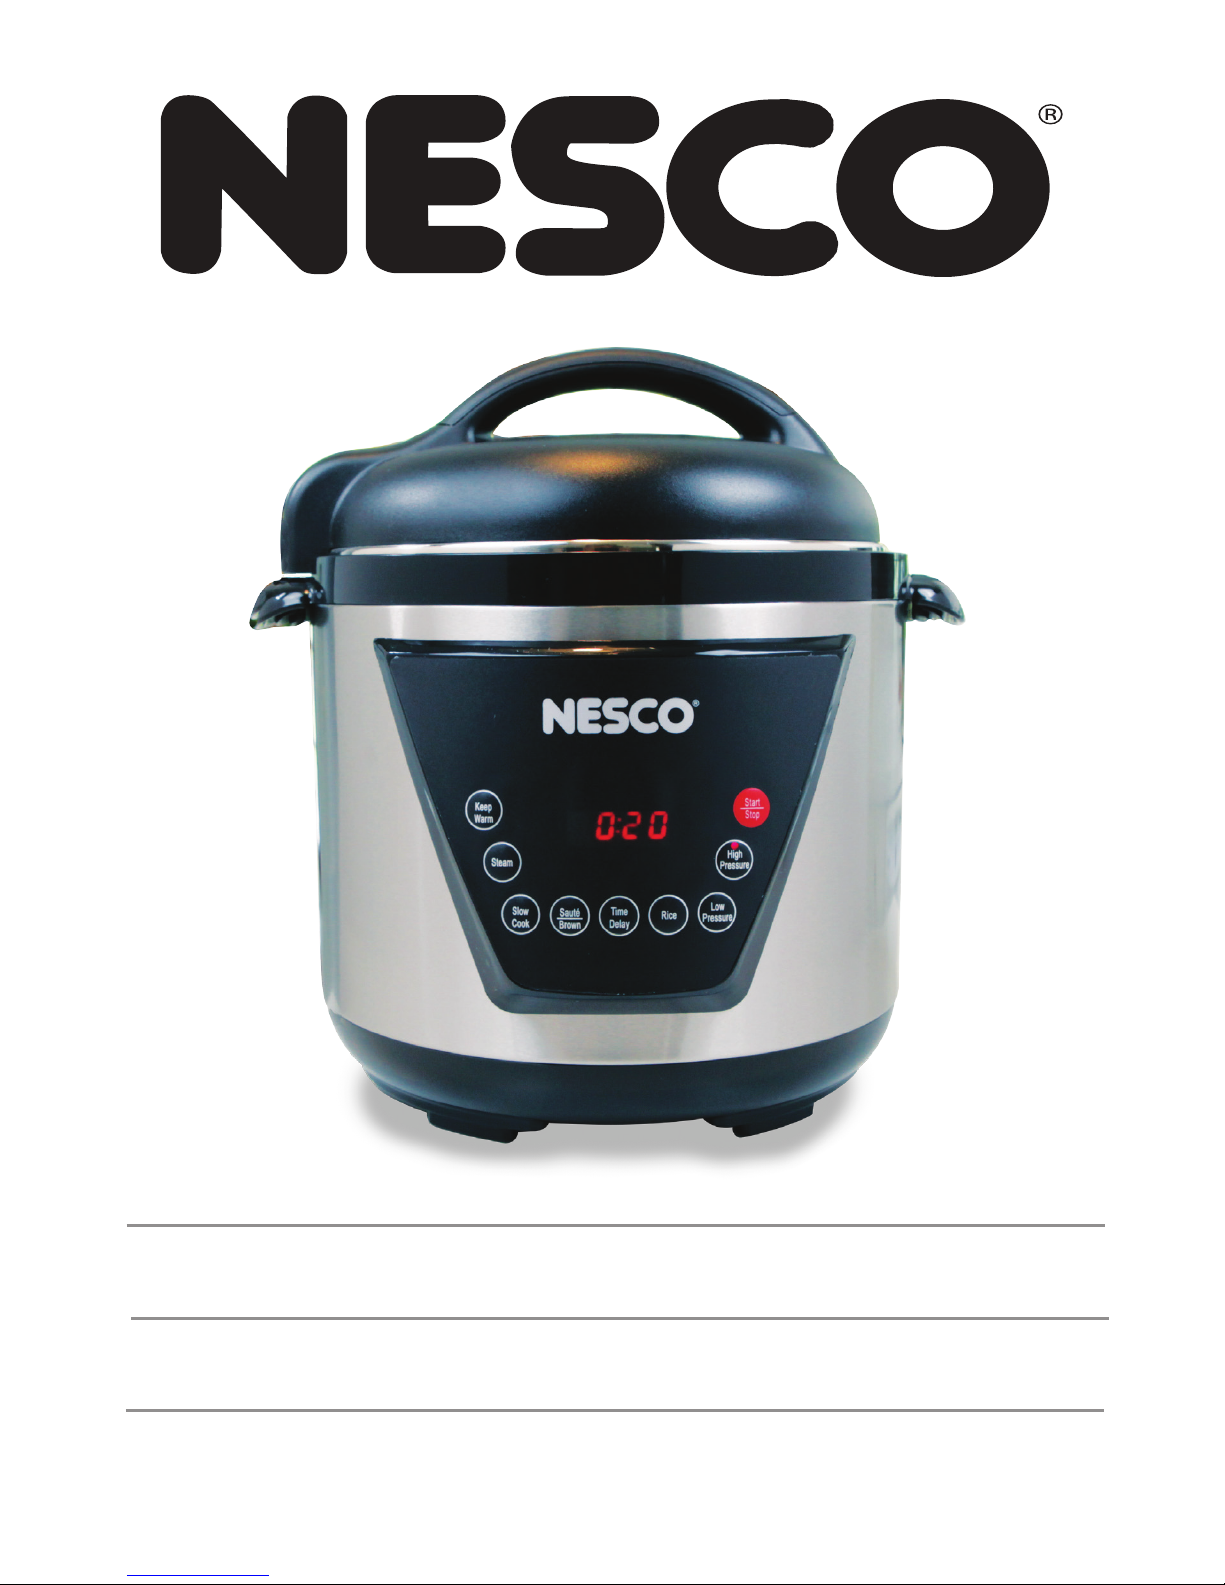
6L Digital Pressure Cooker (Model PC6-13)
Instruction Manual
6L Autocuiseur Numérique (Modèle PC6-13)
Manuel d’utilisateur
6L Olla de Presión Digital
(Modelo PC6-13)
Manual de Instrucción

Table of Contents
Important Safeguards ................................................................................1-3
Parts............................................................................................................4
Functions .....................................................................................................5
Operation..................................................................................................6-8
Care and Cleaning.........................................................................................9
Tips and Hints, Troubleshooting ...................................................................10
Recipes ................................................................................................. 11-14
One Year Limited Warranty..........................................................................15
Table des Matières
Mesures de Précaution Importantes ....................................................... 16-18
Pièces ........................................................................................................19
Functions ...................................................................................................20
Fonctionnement..................................................................................... 21-24
Entretien et de Nettoyage............................................................................25
Consiels et Astuces, Dépannage.............................................................. 26-27
Garantie Limitée d’un an..............................................................................28
Tabla de Contenido
Salvaguardas Importantes ...................................................................... 29-31
Partes ........................................................................................................32
Funcciones .................................................................................................33
Funcionmiento....................................................................................... 34-37
Cuidado y Limpieza .....................................................................................38
Consejos Prácticos, Problemos .....................................................................39
Garantía limitada de un Año.........................................................................40
Technical Specications
Specication / Caractéristiques / Especicaciones: 1000 W., 120 VAC, 60Hz
For accessories and additional products, go to
www.nesco.com

1
English
Caution Marks and Symbols
This is the safety alert symbol. This symbol is placed in the manual to
alert you to the potential for bodily injury or death.
UNDERSTANDING SIGNAL WORDS:
Signal words are used to identify safety information within the text of this
manual.
DANGER
Indicates an imminently hazardous situation which, if not voided,
will result in death or serious personal injury.
WARNING
Indicates a potential hazard or unsafe situation which, if not
avoided, could result in death or serious personal injury or product
damage.
CAUTION
Indicates a potential hazard or unsafe practice, which if not
avoided may result in minor personal injury or product damage.
NOTICE
This display is used to address practices not related to physical
injury.

2
English
- This product is designed for household use only -
When using electrical appliances, basic safety precautions should always be followed,
including the following:
IMPORTANT SAFEGUARDS
1. READ ALL INSTRUCTIONS BEFORE USE.
2. Do not touch hot surfaces. Use handles or knobs.
3. To protect against electrical shock and personal injury, do not immerse this
appliance, including cord and plug, in water or other liquid.
4. This appliance is not intended for use by persons (including children) with
reduced physical, sensory or mental capabilities, or lack of experience and
knowledge, unless they have been given supervision or instruction concerning
use of the appliance by a person responsible for their safety.
5. Close supervision is necessary when any appliance is used by or near children.
6. Unplug from outlet when not in use and before cleaning. Allow to cool completely
before putting on or taking off parts, and before cleaning.
7. Do not operate any appliance with a damaged cord or plug or after the appliance
malfunctions or has been damaged in any manner. To avoid hazards, return appliance
to NESCO®Factory Service Department for examination, repair or adjustment.
8. The use of accessory attachments not recommended by the manufacturer may
result in re, electric shock or injury to persons.
9. Do not use outdoors.
10. Do not let cord hang over edge of table or counter, or touch hot surfaces.
11. Do not place on or near a hot gas or electrical burner or in a heated oven.
12. Intended for counter top use only,
do not use for other than its intended use
.
13. Operate appliance only when all parts are fully engaged and secured.
14. It is recommended that appliance not be moved when it contains hot oil or other
hot liquid. If it must be moved, use extreme caution.
15. Use extreme caution when releasing pressure or while removing the lid. Serious
burns can result from escaping steam.
16. While the unit is in operation, never attempt to remove the lid or bypass safety
features.
17. To reduce the risk of electrical shock, cook only in the removable cooking pot.
18. Do not ll the cooking pot more than 50% full with food or 60% full with liquid.
When cooking foods that expand during cooking do not ll the unit over 50% full.
19. Foods such as applesauce, cranberries, pearl barley, oatmeal or other cereals,
split peas, noodles and pasta, or rhubarb should not be cooked under pressure in
the pressure cooker. These foods tend to foam, froth and sputter, and may block
the oating valve.
20. Caution should be used when moving appliances containing hot food or liquid.
21. WARNING: Never deep fry or pressure fry in the pressure cooker. It is dangerous
and may cause a re, serious damage or injury.
22. WARNING: Spilled foods can cause serious burns. Keep appliance and cord away
from children. Never drape cord over edge of counter top, never use outlet below
counter top and never use with an extension cord.
23. Do not cover the appliance or have it near ammable material including curtains,
draperies or walls while in use.
24. Never cover the regulator knob while in use. Severe injury or damage may result.
25. When cooking food under pressure, a minimum 2 cups (0,5 L) of liquid must be used.
26. Do not lift the appliance by the cover handle, always use side handles.
SAVE THESE INSTRUCTIONS

3
English
Grounded 3 prong plug: This appliance has a 3-prong (grounding) plug for use
in a 3-prong (grounding) outlet to minimize the possibility of electric shock. This
applance should only be used with a 120V, 60 Hz grounded outlet. Failure to follow
these instructions could result in re, electrical shock, serious injury or death.
If the plug does not fully t into the outlet, contact a qualied electrician to inspect
and repair the problem. Do NOT attempt to modify the plug in any way. Do NOT use
an adapter. Failure to follow these instructions could result in re, electrical shock,
serious injury or death.
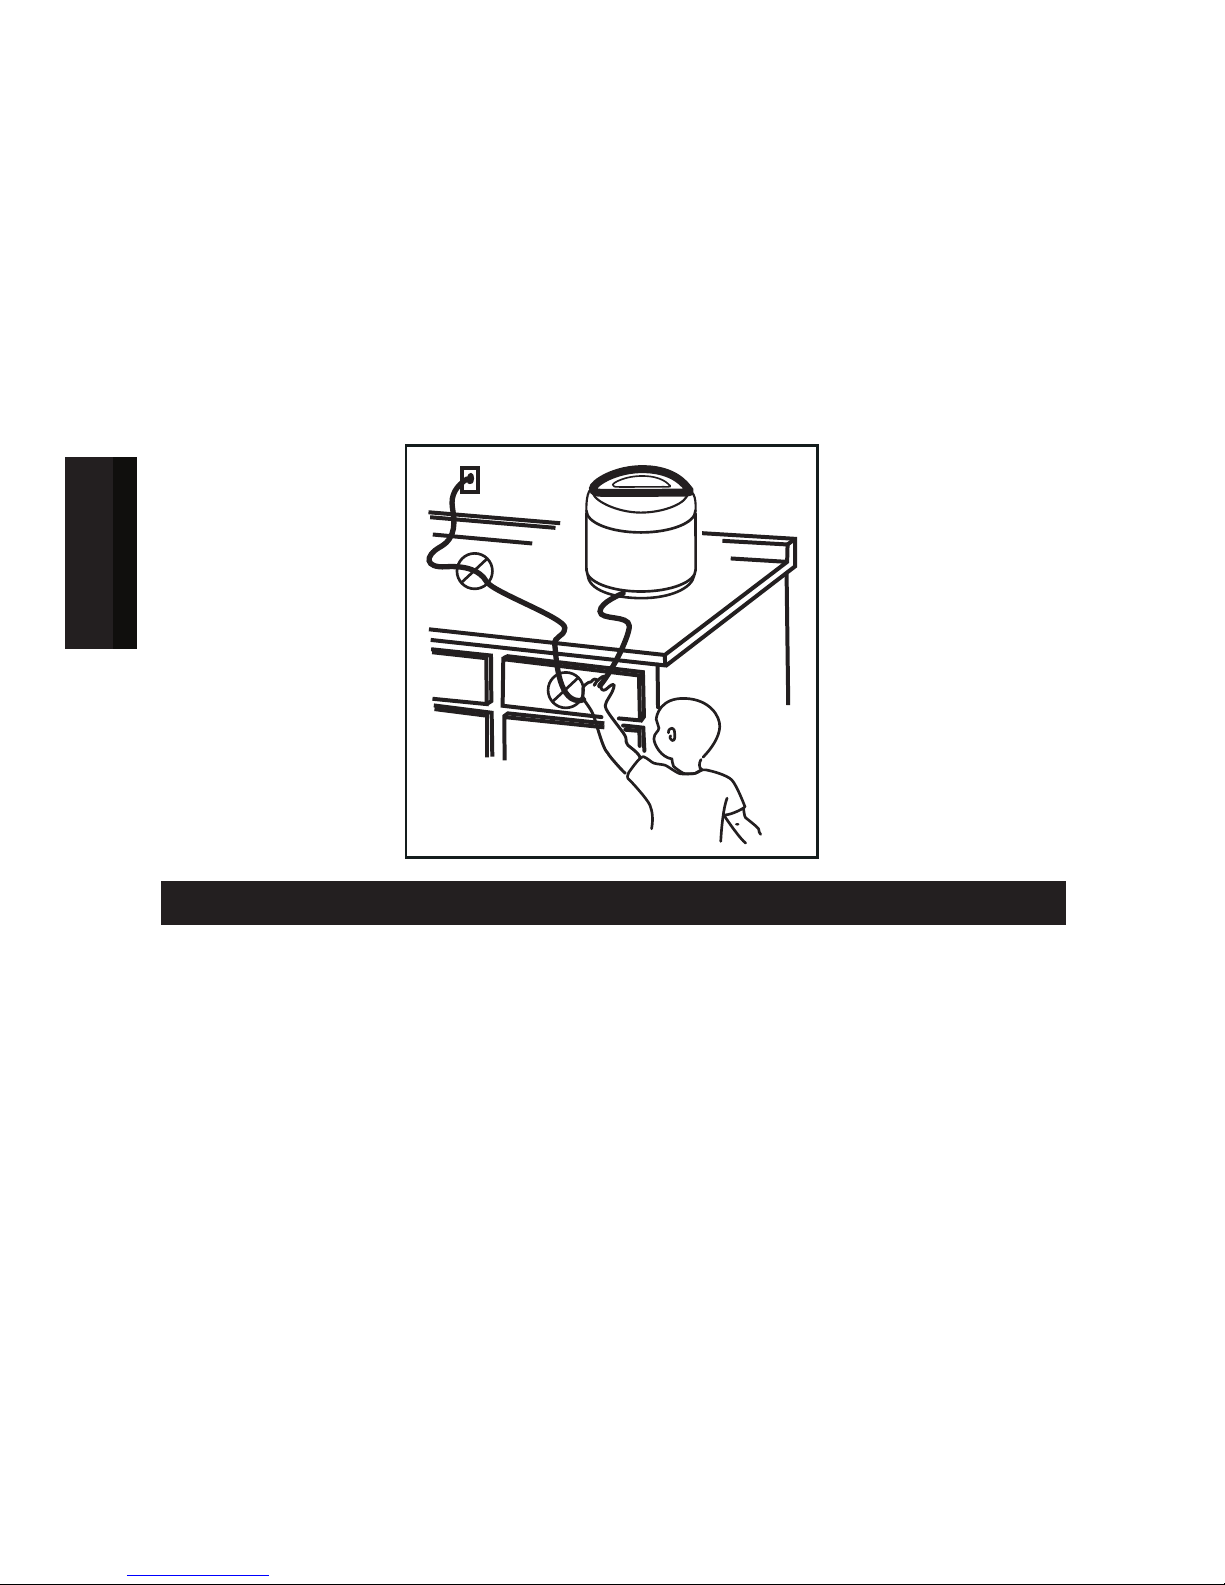
Short Cord Instructions: A short power supply cord is provided to reduce the risk
resulting from becoming entangled in or tripping over a longer cord.
BEFORE FIRST USE
1. Read and follow all instructions and save for reference. Remove all packaging and labels.
2. Clean all parts following instructions in the ‘Care and Cleaning’ section.
3. Wipe the base with a damp cloth and dry completely. Never use abrasive cleaners
or scouring pads to clean parts of this appliance.
4. TO REDUCE RISK OF ELECTRICAL SHOCK HAZARD NEVER IMMERSE
THE BASE OR CORD IN WATER OR ANY OTHER LIQUID.
4
English
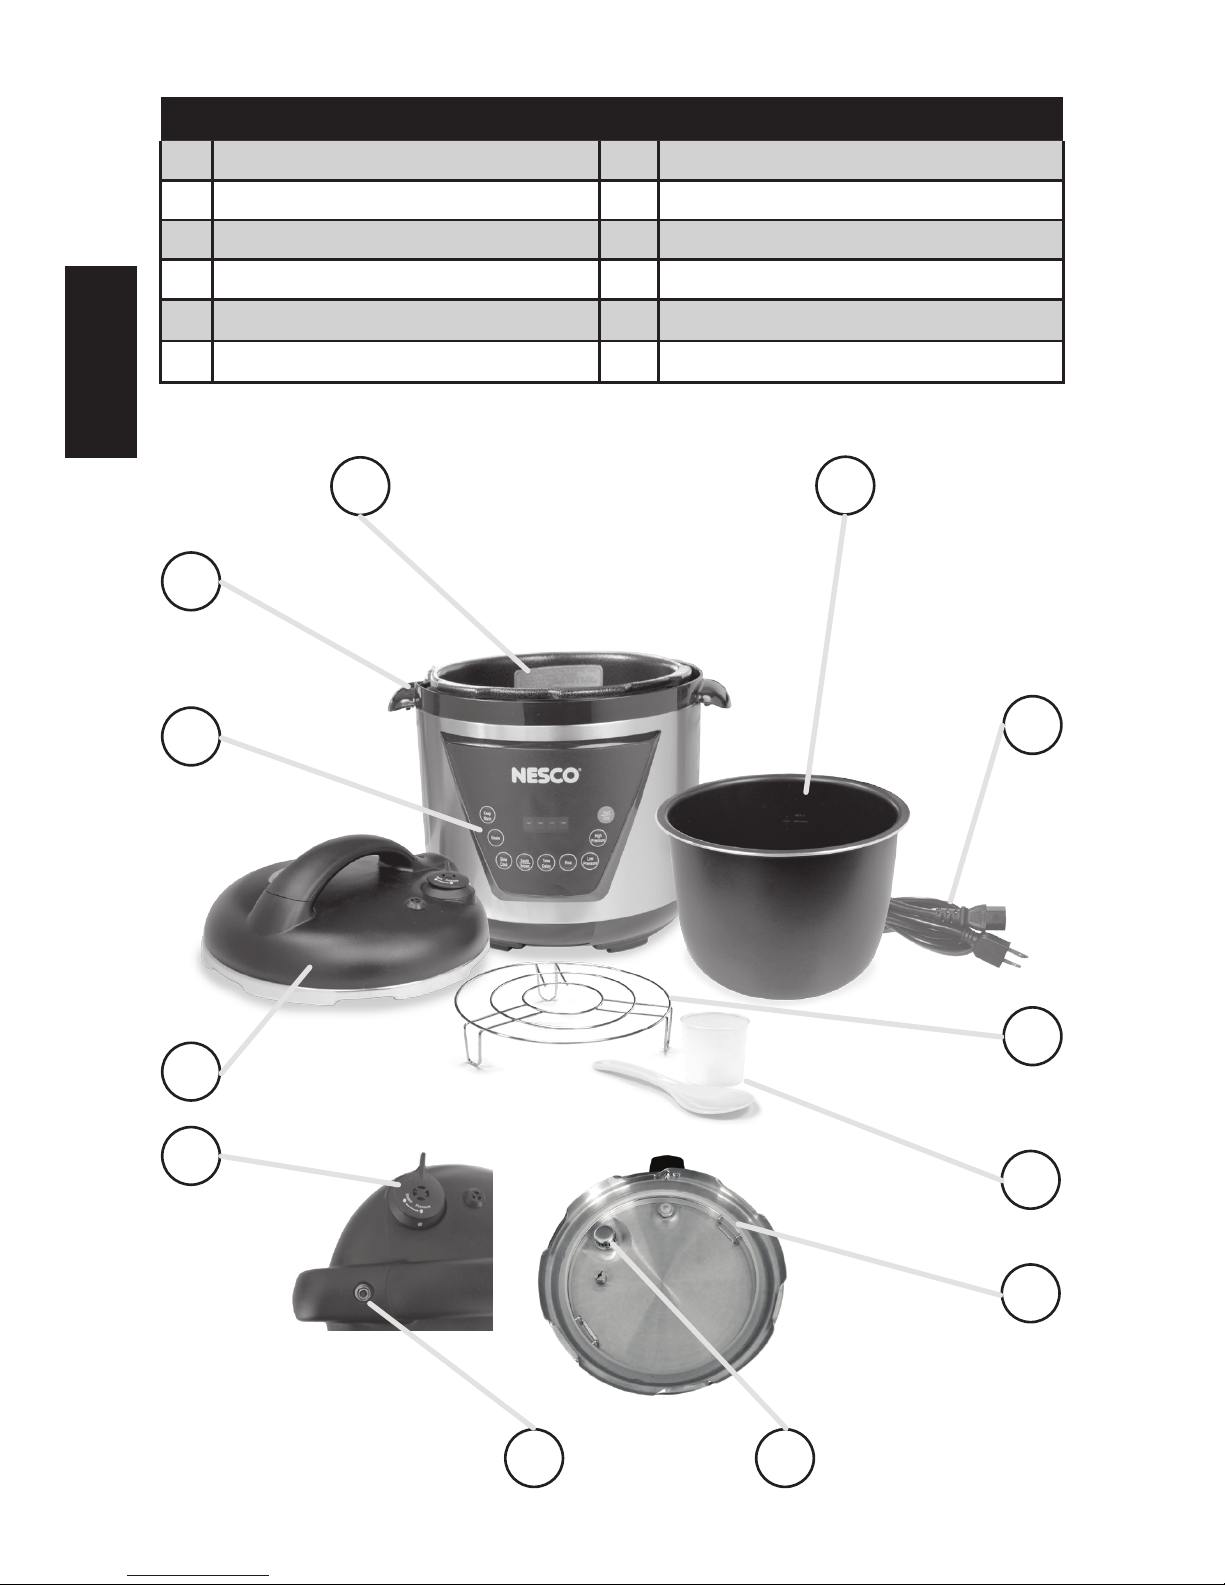
Parts
1Pressure Regulator Knob 7 Power Cord
2 Locking Lid 8 Cooking Rack
3 Control Panel 9 Serving Spoon and Measuring Cup
4 Condenstion Cup (not shown) 10 Sealing Gasket
5 Base 11 Regulator Filter
6 Cooking Pot 12 Floating Valve
8
5
12
2
3
4
1
11
9
10
6
7

5
English
FUNCTIONS
1. Pressure Regulator Knob - Align marks on knob. Position to “PRESSURE”
for pressurized cooking and position to “STEAM” to release pressure or cooking
without pressure.
2. Locking Lid - A mechanical safety feature that locks the lid until pressure in the
cooker is reduced to safe levels.
3. Control Panel - Buttons that control the functions of the unit.
• KEEP WARM - Reheats food or keeps food warm for serving.
• STEAM - Quickly boils water to steam foods like vegetables or rice.
• SLOW COOK - Cooks recipes slowly (12 hour timer) and at a low heat (180°F)
to retain the natural avors and tenderness.
• SAUTÉ/BROWN - To brown/sauté meat before pressure cooking for better results.
• TIME DELAY - Allows you to delay the cooking process by up to 8 hours.
• RICE - One touch setting for cooking rice.
• LOW PRESSURE - Controls cooking pressure at 5 pounds above atmospheric pressure.
• HIGH PRESSURE - Controls cooking pressure at 10 pounds above atmospheric pressure.
• START /STOP - Controls power to the control board.
4. Condensation Cup - Collects excess condensation during cooking process. Pull
down to remove and push up to lock.
5. Base - Do not immerse in water! Contains the electronic controls and heater.
6. Cooking Pot - Features 6 liters capacity, removable with non-stick coating for
easy cleanup and durable aluminum alloy for even heating.
7. Power Cord - Removable for easy storage. Be sure plug is attached to the base
securely.
8. Cooking Rack - Use when cooking multiple food items or steaming.
9. Serving Spoon / Measuring Cup - Use to stir or serve. Protects the surface of
the cooking pot. 6 oz. cup to measure ingredients or to remove excess liquid.
10. Sealing Gasket - Creates air tight seal necessary for pressure cooking and is
removable for easy cleaning.
11. Regulator Filter - Protects regulator valve from larger pieces of food that could
cause blocking. Check that it is clean and in place.
12. Floating Valve - Safety valve engages when pressure is built in the cooker and
will not allow lid to be removed.
FUNCTION TIME SETTINGS
FUNCTION SETTING DEFAULT TIME TOTAL TIME
HIGH AND LOW PRESSURE 1 MINUTE 1 MIN. TO 2 HRS
RICE 10 MINS. 5 TO 30 MINS.
TIME DELAY 30 MINS. 8 HRS.
SAUTÉ/BROWN
N 30 MINS. 1 TO 30 MINS.
SLOW COOK 4 HRS. 30 MINS. TO 12 HRS.
STEAM 15 MINS. 1 MIN. TO 2 HRS.
KEEP WARM NONE NONE
6
English
OPERATION
1. Place the appliance on a at, heat resistant and stable surface.
2. Before using your appliance, always check the lid to be sure the sealing gasket
and regulator lter are clean and positioned correctly. (see Care and Cleaning
section). Ensure gasket is not damaged or broken. If damaged, do not use the
pressure cooker and contact customer service 1-800-288-4545 for replacement.
3. To open the lid, grasp handle and turn until it stops, then lift to remove.
4. Place desired foods into cooking pot.
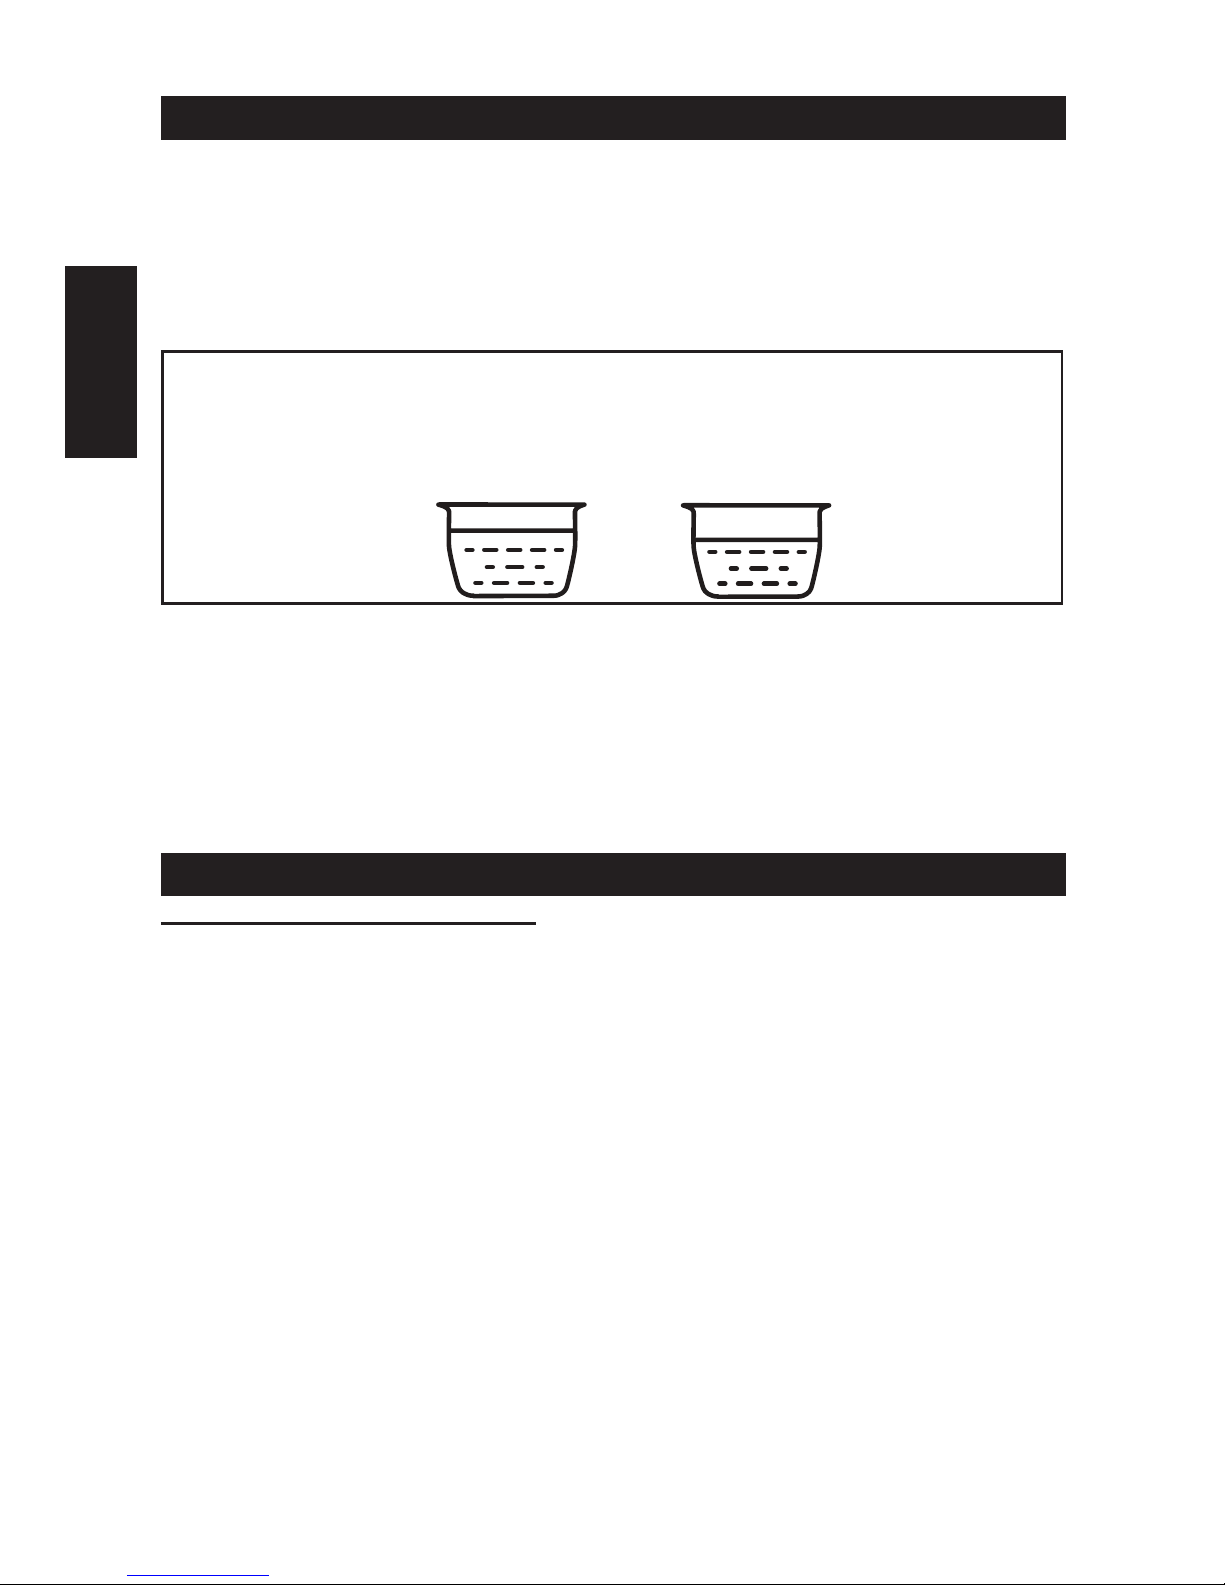
NOTE: The total volume of food and liquid must not exceed 60% of the
capacity of the cooking pot. For foods such as dried vegetables and beans, or rice
and grains, the total volume must not exceed 50% capacity. Overlling may clog
the pressure limit valve, which can cause excess pressure to develop. Always use
at least 2 cups liquid when pressure cooking.
5. Check inside the cooker base where the heating plate and sensor are located to
be sure this area is clean and dry before inserting cooking pot.
6. Replace lid and turn until it locks into position.
7. Insert plug into 120 volt electrical outlet.
8. Set desired cooking function and time setting, then press START to begin.
NOTE: Cooker will begin countdown when the desired pressure is reached. Cooker
will automatically switch to KEEP WARM function after cooking times out, except
when using BROWN/SAUTE function which will automatically turn off.
FUNCTIONS
PRESSURE COOKING SETTING:
Before using, check to be sure that the sealing gasket and the pressure regulator
knob are clean and positioned properly (see Care and Cleaning section).
1. Plug the cord into an electrical wall outlet.
2. Position the cooking pot into the cooker base.
3. Place food in the cooking pot according to the recipe. NOTE: When cooking most
foods under pressure, unless stated otherwise add (16 oz.) of liquid to pot.
4. Place the lid on the cooker base and turn until it locks into place. (The locking pin
will click into place.)
5. Set regulator knob to PRESSURE.
6. Choose the desired cooking mode by pressing either the HIGH or LOW pressure
button on the control panel. The light on the button will ash and the digital
display will show 0:01 (This equals 1 minute cooking time.)
7. Set the desired time by pressing the button once for each additional minute or by
continuously holding the button down. The longest cooking time is 2 hours.
8. Press the START button to begin cooking. The indicator light will stop ashing.
9. The unit will begin to count down in minutes, after the pressure has been
reached. (The oating valve will rise when pressure is building up.) This ensures
the lid is locked and cannot be removed.
10. When nished cooking, allow pressure to release by using the ‘natural method’ or
‘quick release method’.
(continued on next page)
60% 50%

7
English
Natural Method:
CAUTION
KEEP HANDS AND FACE AWAY FROM ESCAPING
STEAM AS IT IS HOT AND CAN CAUSE INJURY.
After cooking, press the ‘STOP’ button and unplug cord. Let appliance stand and
allow pressure to drop naturally which takes from 10 to 20 minutes. After 20
minutes, using oven mitts or tongs, set the pressure regulator knob to ‘STEAM’ and
allow pressure to be released.
Quick Release Method:
CAUTION
KEEP HANDS AND FACE AWAY FROM
ESCAPING STEAM AS IT IS HOT AND CAN CAUSE INJURY.
After cooking, press the ‘STOP’ button and unplug cord. Using oven mitts or tongs,
move the pressure regulator knob to ‘STEAM’ and allow the pressure to be released.
WARNING:
• Do not touch the pressure regulator knob while in use to avoid burn injury from
steam.
• Keep hands and face away at all times. Use oven mitts when removing the
cooking pot or making adjustments to the regulator knob.
• Lid cannot be removed under pressure. Remove pressure by the NATURAL or
QUICK RELEASE methods. Remove the lid by turning to unlock and lifting it
away from you to avoid being burned by the steam.
NOTE:
• When full pressure is reached, cooking will begin and the timer will start to
count down. The raised oat indicates you are cooking under pressure. The lid
is double-locked and cannot be opened while under pressure.
KEEP WARM SETTING:
This function can be used to keep recently cooked foods warm or to reheat.
1. Turn the pressure regulator knob to STEAM.
2. Press the KEEP WARM button.
Press the START button to begin the program.
3. The cooker will automatically switch to the KEEP WARM function after cooking
when using any program setting, except
SAUTÉ/
BROWN.
SAUTÉ/
BROWN SETTING:
This program allows you to sauté/brown your food before cooking it under pressure.
Brown meat or poultry for the best avor and texture, unless otherwise indicated in
the recipe.
For best results, food should be patted dry with a paper towel before browning and
make sure the oil is hot before adding your meat or poultry.
1. Position the cook pot into the pressure cooker base.
2. Add small amount of oil as per recipe to the cooking pot. Do not use the lid.
3. Press the SAUTÉ/BROWN button. The light on the button will ash and the
display will read “0:30”.
4. Press the START button to begin heating.
5. After about one minute of preheating, add food and begin cooking.
6. NOTE: Do not leave pressure cooker unattended while cooking foods.
(continued on next page)

8
English
STEAM SETTING:
This program quickly brings liquid to a boil for steaming food or cooking rice.
1. Position the cook pot into the pressure cooker base.
2. Place the rack in the bottom of the removable cooking pot.
3. Add at least 16 oz. of water so that the bottom of the rack is above the liquid.
4. Add the food. Do not ll the pot more than two-thirds full. Note: If steaming rice,
put the rice in a smaller bowl and place on the rack. See “OPERATION” section.
5. Place lid onto the pressure cooker and turn to lock. Set the pressure regulator
knob to STEAM.
6. Press the STEAM button. The light on the button will ash and the digital display
will read ”0:15”.
7. Set the desired time by pressing the button once for each additional minute or
press and hold for rapid increase. The longest steaming time is 2 hours.
8. Press the START button to begin cooking.
CAUTION:
• The lid can be opened while cooking to check the food during the STEAM
cooking mode. Use caution and never place face over the pressure cooker when
removing the lid. Tilt lid away when lifting. Steam escapes as soon as the lid is
opened and can cause serious burns.
RICE SETTING:
1. Place ingredients into the cook pot. Do not ll cook pot more than 50% full.
When cooking rice, the maximum amount of rice is 1-1/2 cups uncooked white
rice plus 3 cups liquid.
2. Place lid on pressure cooker and turn it to lock. Then press RICE button. Default
time is 10 minutes, press button to adjust time.
3. When time is nished, allow the pressure to release by the “Natural” method,
which means to let it sit for about 15 minutes or until the oating valve releases
and the lid can be opened and removed.
SLOW COOK SETTING:
1. Place the cooking pot into the pressure cooker.
2. Place the food to be slow cooked in the cooking pot.
3. Place lid onto the pressure cooker and turn it to lock. Set the pressure regulator
knob to STEAM.
4. Press the SLOW COOK button. The light on the button will ash and the digital
display will read “4:00” (This equals 4 hours of cooking time).
5. Set the desired time by pressing the button once for each additional half hour or
by continuously holding the button down. The longest cooking time is 12 hours
with a temperature of 180°F.
6. Press the START button to begin cooking. The indicator light will stop ashing.
7. The unit will begin to count down in one minute increments, when the cooking
pot temperature reaches about 180°F.
(continued on next page)

9
English
TIME DELAY SETTING:
This function allows you to begin cooking food up to 8 hours later in half hour
increments. You can use the delayed time setting with slow cook, steam, high and
low pressure. CAUTION: Perishable foods such as meat and poultry products, sh,
cheese and dairy products cannot be left at room temperature for more than 2 hours.
(No longer than 1 hour when the room temperature is above 90°F).
1. Select the desired cooking mode and time.
2. Press the DELAY TIME button for the delayed time setting. Press button to adjust
the time to delay. Default time :30 minutes, maximum time 8 hours.
3. Press the START button. Cooking will begin after delayed time has elapsed.
CARE AND CLEANING
Do not wash any parts of the pressure cooker in the dishwasher. Always
clean the pressure cooker after every use or if it has not been used for an extended
period of time.
1. Press STOP button and remove power cord from electrical outlet. Let cool before
cleaning.
2. Lid - Remove and wash in warm soapy water. Rinse and dry.
3. Gasket - Removed for cleaning and inspection (see instructions below).
How to remove and assemble sealing gasket.
1. Always check gasket for cracks or damage when cleaning.
2. Turn lid upside down and grasp gasket with thumb and index nger and pull
gently to remove from metal ring. Continue until gasket is fully removed
from metal ring.
3. Clean and inspect gasket for any cracks, scratches or is broken.
4. Install gasket by starting in one section and feed the gasket edge around the
metal ring located to the underside of the lid. Repeat this until the gasket is
fully wrapped around the metal ring with edges being even.
WARNING: Do not use gasket if damaged. Contact our customer support
representative. www.NESCO.com or toll free 1-800-288-4545
3. Cooking Pot - Wash the cooking pot with warm soapy water and dry. Do not put
into dishwasher as detergents may ruin the nonstick surface.
4. Base - Wipe the outer housing of base with a clean damp cloth. Do not
immerse base in water or any other liquid!
5. Condensation Cup - Remove the condensation cup by pulling down away from
base. Clean with warm, soapy water. Rinse and dry. Replace by pushing up until
it locks.
6. Power Cord - Wipe clean and inspect cord and plug for damage. Do not use if
damaged and contact us for replacement.
NOTE: Store the pressure cooker with the lid resting upside down on cooking
pot. This allows the gasket to keep shape and
keep stale odors from forming.
LIFT TO
REMOVE PRESS TO
INSERT
(continued on next page)

10
English
Cleaning the Pressure Regulator Knob and Floating Valve:
Check that the regulator knob and oating valve are in good working order before
each use. Regulator knob will turn freely and the oating valve will slide easy with a
push of your nger. Be sure the small seal is in place around the oating valve.
Wash oating valve by following these directions.
1. After the unit has cooled, remove the lid.
2. Lift up the regulator knob to remove. Wipe knob with a cloth, rinse and dry.
3. Turn the lid over and use a brush to clean around the valve and lter. Make sure
the small rubber gasket is in-tact on bottom of oating valve. Do not cover small
holes with gasket.
4. Replace the regulator knob by aligning the knob in the hole and push to lock.
HINTS AND TIPS
• To ensure the best cooking performance when cooking under pressure, always
use at least 16 oz. of water or liquid in your recipes to enable enough steam to
be created to produce pressure.
• When using HIGH or LOW pressure settings the timer will not begin counting
down until full pressure is reached. It takes about 10 mins. to reach pressure.
• Pressure cooking is quicker than oven cooking, if you are unsure of the cooking
time, it is better to under cook and use the quick release method to check for
doneness. If not ready, continue cooking until nished.
• Perishable foods, such as meat, poultry and sh cannot be left out at room
temperature for no more than 2 hours. Therefore, when cooking perishable foods
do not set delay timer for longer than 2 hours (1 hr. if above 90°F/32C).
• Tougher, less expensive cuts of meat are better suited for the pressure cooker
because cooking under pressure breaks down the bers for tender results.
• Fresh fruit should be cooked on low pressure.
• Add a tablespoon of oil to the water when cooking beans to reduce foaming.
TROUBLESHOOTING
• If the oating valve has not risen, but the timer is counting down,
perform the following steps:
1. Stop the pressure cooker by pressing the STOP button.
2. Turn the pressure regulator knob to STEAM, using oven mitts or tongs, release
in short bursts, until the pressure is fully released. Also referred to as the “quick
release method”.
3. Remove the lid and add liquid to have approximately 16 oz. of liquid in cooking
pot. Stir food to disperse liquid. Replace the lid and lock into position.
4. Press desired cooking function button and set desired cooking time.
5. Press the START button to resume cooking.
• If steam is leaking from under the cover, follow these steps:
1. Stop the pressure cooker by pressing the STOP button.
2. Turn the pressure regulator knob to STEAM, using short bursts, until the
pressure is fully released, also known as the quick release method.
3. Remove the cover and gasket. Check for tears or cracks. Do not use cooker if
any parts are damaged.
4. Check to be sure the gasket is positioned properly.
5. Check the contents of the cooking pot do not exceed 60% full.
6. If the cover still will not seal, call customer service at 1-800-288-4545.

11
English
Recipes
BBQ RIBS
1 Rack of Ribs, cut into pieces
1 (28 oz.) bottle of Barbeque sauce
2 C. Ginger ale
Pour ginger ale in cooking pot. Add: Cut rack of rib and your favorite rub or just salt
and pepper. Set regulator knob to PRESSURE. Place lid on cooker and lock it. Set
regulator knob to PRESSURE. Press the HIGH pressure button for 45 minutes. Press
start, the oating valve will rise when cooking pressure is reached and timer will
begin to countdown When nished, press STOP button and use the quick release
method to release the pressure by turning the regulator knob to STEAM in short
bursts. Pour out the ginger ale. Add the barbeque sauce and serve.
BEEF POT ROAST
3 lb. Beef pot roast 2 Tbsp Vegetable oil
1 medium Onion, chopped 3 C Beef broth
1 C Water
Salt and Pepper to taste
1 Bay leaf
Heat oil in cooker, using the BROWN setting to brown roast on both sides. Place meat
on wire rack and add remaining ingredients. Cover and lock lid in place. Set regulator
knob on SEAL. Program for HIGH pressure and cook for 45 minutes. Release pressure
by using the natural release method. Cooker will beep and switch automatically to the
warm setting when cooking time is completed.
BUFFALO CHICKEN SLIDERS
2 lbs. boneless chicken breasts 3 C. hot or mild wing sauce
1 C. Water 3 pkgs. dinner rolls
1 (18 oz.) bottle Blue Cheese dressing Celery and Carrot sticks
Put chicken in cooking pot with 2 cups Hot sauce and water. Place lid on cooker and
lock it and set regulator knob to PRESSURE. Press the HIGH pressure button for 15
minutes. When nished, press STOP button and use the quick release method to
release the pressure by turning the regulator knob to STEAM in short bursts. Drain
excess juice and toss with remaining hot sauce.
To serve, shred chicken to each roll and top with dressing. Add side of celery and
carrot sticks.

12
English
Recipes
CHICKEN STOCK
1 Tbsp. vegetable oil 2 lbs. chicken thighs
1/2 celery stalk, chunked (set aside leaves) 1 lb. carrots, cut 1”to 3” lengths
1 lbs. onions, quartered 1/2 bundle Parsley,
1/2 tsp. black peppercorn 1/2 Bay leaf
1 Tbsp. chicken avored soup base 10 C. water or 2/3 full
Add oil, chicken thighs and celery leaves into the cooking pot. Select BROWN button
and press the START button, brown until meat is lightly golden brown. Add the rest of
the ingredients. Place lid on cooker and lock it and set regulator knob to PRESSURE.
Press the HIGH pressure button for 30 minutes. Use the natural release method to
release the pressure. Strain the stock using a seive or cheesecloth.
CHOCOLATE CHEESECAKE
Crust:
1 C. Chocolate wafer cookie crumbs 2 Tbsp butter, melted
Mix crumbs and butter together. Press into bottom of 7” spring form pan and set aside.
Filling:
2 C. water 2 eggs, large
2 (8 oz.) pkg. cream cheese, softened 2/3 C. packed brown sugar
3/4 C. chocolate wafer cookie crumbs
Topping:
1 C. heavy whipping cream 3/4 C. maple sryup
1/2 C. chopped pecans, toasted
(Variation: Add 1 tsp. instant coffee to melted chocolate chips for a mocha
cheesecake.)
Blend cream cheese in bowl with mixer until smooth. Gradually add sugar. Mix
thoroughly. Adding one egg at a time, mix until cheese is smooth.
Fold in melted chocolate until thoroughly blended. Add remaining 3/4 cup of cookie
crumbs into mixture. Pour into spring form pan over crust.
Add water and rack to cook pot. Tear off a 6” piece of aluminum foil and fold in half,
lengthwise. This helps to remove pan after cooking cycle is complete. Place spring
form pan on foil and lower onto cooking rack. Cover and lock lid in place.
Turn regulator knob to SEAL. Program for high pressure and cook for 20 minutes.
Release pressure by using the quick release method. Unlock and remove lid.
Remove cheesecake from cooker by lifting up the ends of foil swing. Let cool to room
temperature before refrigerating. For best results, refrigerate overnight.

13
English
Recipes
COUNTRY BOIL
1-1/2 lbs. Kielbasa, cut into pieces 1-1/2 lbs. extra large shrimp, peel/devein
1 lbs. baby red potatoes 2 corn on the cob, cut in half
3 C. water 1/2 C. Old Bay seasoning
1 Bay leaves
Place all ingredients into cooking pot and place lid on cooker and lock it. Set regulator
knob to PRESSURE. Press the HIGH pressure function for 15 minutes. Press start,
the oating valve will rise when cooking pressure is reached and timer will begin to
countdown.
When nished, press STOP button and use the quick release method to release the
pressure by turning the regulator knob to STEAM in short bursts.
PINTO BEANS
2 lbs. Pinto beans, washed 9 C. water
1/2 Tbsp. Canola oil 1/3 C. garlic powder, to taste
Place all ingredients into cooking pot and place lid on cooker and lock it. Set regulator
knob to PRESSURE. Press the HIGH pressure function for 35 minutes. Press start,
the oating valve will rise when cooking pressure is reached and timer will begin to
countdown.
When nished, press STOP button and use the quick release method to release the
pressure by turning the regulator knob to STEAM in short bursts.
PORCINI RISOTTO
1 Tbsp. olive oil 1 small yellow onion, peeled and chopped
1-1/2 cups Arborio rice 1/2 C. white wine
4 C. chicken stock 1 oz. dried porcini mushrooms, crushed
1 C. frozen peas 1/2 C. grated Parmesan cheese
Add oil and SAUTE onions for 2 to 3 minutes or just until soft. Add the rice and cook,
stirring for 1 to 2 minutes. Add the wine and continue to stir until all the wine has
been absorbed. Stir in the chicken stock and mushrooms. Add cover and lock into
position. Press RICE setting for 7 minutes with the regulator knob in STEAM position.
When nished, press STOP button and use the quick release method to release
the pressure by turning the regulator knob to STEAM in short bursts! Check the
tenderness of rice and stir until it has thickened.
Fold in the peas and cheese, and stir until well blended.

14
English
Recipes
ROOT BEER PULLED PORK SANDWICHES
2-1/2 lbs. boneless country ribs 1-1/2 C. root beer
3/4 C. water 1 (18 oz.) bottles of barbeque sauce
4 hamburger buns
Add pork, root beer and water into cooking pot and place lid on cooker and lock it.
Set regulator knob to PRESSURE. Press the HIGH pressure function for 30 minutes.
When nished, press STOP button and use the quick release method to release the
pressure by turning the regulator knob to STEAM in short bursts.
Remove lid and check meat for tenderness, If meat does not shred with a fork, add
ve more minutes on HIGH. Drain excess liquid, shred and mix in barbeque sauce.
Serve on a bun with side of coleslaw or salad.
TURKEY CHILI
3 Tbsp. vegetable oil 1/2 lb. turkey sausage, chunked
2 lbs. ground turkey 1-1/2 C. onions, chopped
1 large green peppers, diced 2 large red bell peppers, diced
2 (16 oz.) cans stewed tomatoes 1/2 Tbsp. cinnamon
1/8 C. whole cumin seeds 5 C. chicken or turkey stock
1/4 C. chili powder 3 cloves garlic, pressed
1/4 C. cornmeal (optional) Salt and Pepper to taste
Add oil, turkey sausage and ground turkey into the cooking pot. Select BROWN
button and press the START button, brown meat is brown. Add the onions and cumin
seeds, continue to brown for 1 minute, stirring frequently. Add remaining ingredients,
except garlic and stir to mix. Place lid on cooker and lock it. Set regulator knob to
PRESSURE. Press the HIGH pressure function for 5 minutes.
When nished, press STOP button and use the quick release method to release the
pressure by turning the regulator knob to STEAM in short bursts. Stir in garlic and more
seasonings if desired. If chili is too thin stir in small amounts of cornmeal to thicken.
VIDALIA ONION & POTATO SOUP
3 large Russet potatoes, peeled, cubed 3 C. Vidalia onions, chopped, sliced
2 celery stalks, chopped 3 Tbsp. butter
4 C. chicken broth 1-1/2 tsp. kosher salt
Pepper to taste 2-1/2 Tbsp. parsley, chopped
Preheat cooker on WARM. Heat butter and saute onions and celery for 3 minutes.
Add remaining ingredients and stir to mix. Place lid on cooker and lock it. Set
regulator knob to PRESSURE. Press the HIGH pressure function for 6 minutes.
When nished, press STOP button and use the quick release method to release the
pressure by turning the regulator knob to STEAM in short bursts.
Purée about 1-1/2 cups of the soup and return to cooking pot. Press WARM button to
reheat and serve.

15
English
ONE YEAR LIMITED WARRANTY
This appliance is warranted for one year from date of original purchase against
defects in material and workmanship. This warranty does not cover transportation
damage, misuse, accident or similar incident. This warranty gives you specic legal
rights and you may have other rights, which vary from state to state. This product
is intended for household use only, not for commercial use. Warranty does not
cover commercial use.
Your new NESCO® appliance comes equipped with numerous safety features.
Any attempt to interfere with the operation of these safety features makes this
warranty null and void. In the event we receive an appliance for service that has
been tampered with, we reserve the right to restore it to its original state and
charge for the repair.
For service in warranty - Defective products may be returned, postage prepaid, with
a description of the defect to: The Metal Ware Corporation, 1700 Monroe Street,
Two Rivers, Wisconsin 54241, for no-charge repair or replacement at our option.
Must include proof of purchase or copy of original bill of sale when
returning product for warranty service.
Please call Customer Satisfaction at 1-800-288-4545 to obtain a Return Authorization
before shipping.
• For service in warranty, follow instructions set forth in warranty. When ordering
new parts, make sure that you always mention the model number of the
product.
• Call us on our toll free number, 1-800-288-4545 and tell us about your
problem.
• If we instruct you to send all or part of your appliance to us for repair or
replacement, our Customer Satisfaction representative will provide a Return
Authorization number (this number noties our receiving department to
expedite your repair). Pack your unit carefully in a sturdy carton with sufcient
padding to prevent damage because any damage caused in shipping is not
covered by the warranty.
• Print your name, address and Return Authorization number on the carton.
• Write a letter explaining the problem. Include the following: your name,
address and telephone number and a copy of the original bill of sale.
• Attach the sealed envelope containing the letter inside the carton. Insure the
package for the value of the NESCO® appliance and ship prepaid to:
Attn: Factory Service Dept.
The Metal Ware Corporation
1700 Monroe Street
Two Rivers, WI 54241

16
Français
Pictogrammes et Symboles de Danger
Ceci est un symbole de danger. Il est placé dans le manuel pour vous
alerter des dangers de dommages corporels ou de mort potentiels.
COMPRENDRE LES MOTS-INDICATEURS:
Les mots indicateurs identifient les informations relatives à la sécurité dans
ce manuel.
DANGER
Indique un danger imminent qui, s’il n’est pas circonscrit,
entraînera la mort ou de graves blessures corporelles.
AVERTISSEMENT
Indique un danger potentiel ou une situation dangereuse qui, s’ils
ne sont pas circonscrits, pourraient entraîner la mort, de graves
blessures corporelles ou un grave endommagement du produit.
ATTENTION
Indique un danger potentiel ou une pratique dangereuse, qui, s’ils
ne sont pas circonscrits, sont susceptibles d’entraîner de légères
blessures corporelles ou l’endommagement du produit.
AVIS
Attire l’attention sur des pratiques sans lien avec les blessures
corporelles.

17
Français
- Ce produit est conçu exclusivement pour une utilisation domestique -
Lorsque vous utilisez des appareils électriques, il est essentiel de toujours respecter les mesures
de sécurité suivantes:
MESURES DE PRÉCAUTION IMPORTANTES
1. LIRE TOUTES LES INSTRUCTIONS UTILISATION AVANT.
2. Ne touchez pas les surfaces chaudes. Utilisez la poignée.
3. Pour vous protéger contre les décharges électriques et les blessures, ne pas immerger cet
appareil, le cordon, ou la prise dans l’eau ou dans un autre liquide.
4. Cet appareil n’a pas destiné à être utilisé par des personnes (y compris les enfants) ayant
un handicap physique réduite, sensorielles ou mentales, ou le manque d’expérience et de
connaissance, sauf si elles ont été encadrées pour l’utilisation de l’appareil donnée par une
personne responsable de leur sécurité.
5. Ne laissez jamais des enfants utiliser cet appareil sans surveillance.
6. Débranchez l’appareil lorsque vous ne l’utilisez pas et avant de le nettoyer. Laissez-le
refroidir complètement avant d’ajouter ou de retirer des pièces et avant le nettoyage.
7. N’utilisez jamais un appareil dont le cordon ou la prise de courant sont endommagés, ou si
l’appareil a mal fonctionné ou qu’il a été endommagé de quelque façon que ce soit. Pour
éviter tout danger, retournez l’appareil à NESCO®au département de service d’entretient
pour vérication, réparation ou ajustement.
8. L’utilisation des attachements accessoires non recommandés par le fabricant peut avoir
comme conséquence le feu, la décharge électrique ou les dommages aux personnes.
9. Ne pas utiliser à l’extérieur.
10. Ne pas laisser le cordon pendre sur le bord d’une table ou d’un comptoir ou entrer en
contact avec des surfaces chaudes.
11. Ne pas placer sur ou près d’une source de gaz chaud, d’un brûleur électrique ou dans un four chaud.
12. Ne pas utiliser cet appareil pour un autre emploi que celui qui est décrit dans le présent manuel.
13. Utilisez l’appareil uniquement lorsque toutes les pièces sont bien enclenchées et xées.
14. Il est recommandé de ne pas déplacer l’appareil lorsqu’il contient de l’huile ou tout autre
liquide chaud. S’il doit absolument être déplacé, faites preuve d’une extrême prudence.
15. Soyez extrêmement prudent Lorsque vous relâchez la pression ou tout en enlevant le
couvercle. Brûlures graves peuvent résulter d’échapper à la vapeur.
16. Lorsque l’appareil est en fonctionnement, ne jamais essayer d’enlever les dispositifs de
sécurité couvercle ou dérivation.
17. Pour réduire le risque de choc électrique, faire cuire seulement dans le pot de cuisson amovible.
18. Ne remplissez pas la cuve de cuisson au-delà de 50% capacité avec des aliments ou des
60% avec du liquide. Pour la cuisson d’aliments dont le volume augmente avec la cuisson,
ne dépassez pas la moitié de la capacité de la cuve.
19. Les aliments tels que la compote de pommes, les canneberges, l’orge perlé, les ocons
d’avoine ou autres céréales, les pois cassés, les nouilles et les pâtes ou la rhubarbe ne
doivent pas être cuits sous pression dans l’autocuiseur. Ces aliments ont tendance à
générer de la mousse et à crachoter et peuvent bloquer la soupape à otteur.
20. Une extrême prudence doit-il être utilisé appareil Lors du déplacement de récipient
contenant des aliments chauds ou liquide.
21. AVERTISSEMENT: N’utilisez jamais l’autocuiseur pour la friture. Il est dangereux et peut
provoquer un incendie, des dommages ou des blessures graves.
22. AVERTISSEMENT: Versé aliments peuvent causer des brûlures graves. Gardez l’appareil
et le cordon loin des enfants. Jamais draperie cordon sur le bord du comptoir, ne jamais
utiliser la sortie et ne jamais utiliser en dessous de comptoir Avec une rallonge.
23. Ne couvrez pas l’appareil ou le faire à proximité de matières inammables, y compris
rideaux, tentures, murs en cours d’utilisation.
24. Ne jamais couvrir la vanne de régulation en cours d’utilisation. Blessures ou des dommages
graves peuvent entraîner.
25. Lors de la cuisson d’aliments sous pression, un minimum de 2 tasses (0,5 L) de liquide doit être utilisé.
26. Ne pas soulever l’appareil par le couvercle de la poignée, utilisez les poignées latérales.
CONSERVER CES DIRECTIVES
18
Français
Grounded che à 3 broches: Cet appareil a une broche 3 (terre) pour une
utilisation dans une prise à 3 broches (mise à la terre) pour minimiser le risque de
choc électrique. Cette applance ne doit être utilisé avec un 120V, 60 Hz prise de
terre. Le non-respect des instructions Ces pourrait provoquer un incendie, un choc
électrique, des blessures graves ou la mort.
Si la che ne rentre pas complètement dans la prise, contactez un électricien qualié
pour inspecter et réparer le problème. Ne tentez pas de modier la che en aucune
façon. Ne pas utiliser un adaptateur. Le non-respect des instructions Ces pourrait
provoquer un incendie, un choc électrique, des blessures graves ou la mort.
Directives relatives au cordon court: Un cordon d’alimentation court est fourni dans le but
de réduire le risque de s’y empêtrer ou de trébucher. Des rallonges ne doit pas être utilisé.
AVANT LA PREMIÈRE UTILISATION
1. Lisez et suivez toutes les instructions et conservez-les pour vous y reporter
ultérieurement. Ôtez tous les emballages et étiquettes.
2. Nettoyez toutes les pièces en vous reportant aux instructions de la section
«Entretien et nettoyage».
3. Essuyez la base à l’aide d’un chiffon humide et séchez soigneusement. N’utilisez jamais
de détergents abrasifs ou de tampons à récurer pour nettoyer les pièces de cet appareil.
4. POUR RÉDUIRE LE RISQUE DE CHOC ÉLECTRIQUE, NE PLONGEZ JAMAIS
LA BASE OU LE CORDON DANS L’EAU OU AUCUN AUTRE LIQUIDE.
Table of contents
Languages:
Other Nesco Electric Pressure Cooker manuals


Popular Electric Pressure Cooker manuals by other brands


Ninja
Ninja Foodi OL701 Series owner's guide

Emeril Lagasse
Emeril Lagasse Pressure AirFryer Plus Startup guide

Electrolux Professional
Electrolux Professional Thermaline Pro Thermetic PUET Operating and installation instructions

Avalla
Avalla K-45 instructions

Aurora
Aurora AU 251 manual

TEFAL
TEFAL Secure 5 Neo user guide